This site is supported by our readers. We may earn a commission, at no cost to you, if you purchase through links.
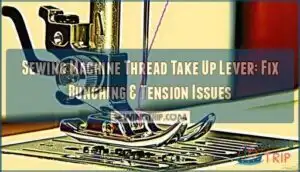 Your sewing machine thread take up lever is the unsung hero that prevents thread chaos.
This small component above your presser foot moves in sync with your needle, pulling approximately 59 inches of thread to create just one inch of stitching.
It regulates thread tension and prevents those frustrating loops that bunch underneath your fabric—what sewers call "bird’s nesting."
When properly threaded and positioned at its highest point, the lever coordinates with your machine’s tension discs and feed mechanism to create smooth, even stitches.
However, improper threading or tension issues can quickly turn your project into a tangled mess, requiring specific troubleshooting techniques to restore perfect stitch formation, and this can be due to issues with the tension discs or the feed mechanism.
Table Of Contents
Key Takeaways
- Position your thread take-up lever at its highest point before threading, placing fabric, or removing projects – this prevents tangles and ensures smooth operation throughout your sewing process.
- Thread the lever correctly to prevent bird’s nesting – missing this crucial threading step causes frustrating thread bunching underneath your fabric that’ll ruin your project.
- Clean and maintain your lever regularly – remove lint buildup weekly with a small brush and apply one drop of sewing machine oil to pivot points every 8-10 hours of use.
- Troubleshoot systematically when problems persist – rethread completely, check for debris, and inspect tension settings before seeking professional repair for mechanical issues.
What is The Thread Take-Up Lever?
The thread take-up lever sits above your presser foot and acts as the conductor of your sewing machine’s thread orchestra.
You’ll spot this small but mighty component moving up and down as you sew, pulling thread from the spool and managing the precise amount needed for each stitch.
Location and Appearance in Sewing Machines
You’ll spot the take up lever perched directly above your presser foot, acting as the thread path’s essential checkpoint.
This small but mighty component features either an eyelet or slot design, depending on your machine’s vintage.
In modern sewing mechanics, the lever design seamlessly integrates into the machine layout, sometimes tucked behind covers but always orchestrating fabric interaction.
The thread take up lever’s positioning makes it the highest threading point, while the take up spring mechanism guarantees smooth thread uptake lever operation throughout your sewing process.
Role in Stitch Formation
Your sewing machine’s thread take up lever orchestrates perfect stitch formation by managing thread flow during each stitch cycle.
When the needle penetrates fabric, the lever drops to release thread. As it rises, it pulls excess thread through the fabric, creating proper stitch quality and maintaining fabric tension.
This rhythmic lever movement guarantees consistent sewing precision, pulling approximately 59 inches of thread to sew just one inch of fabric.
Proper thread tension settings are vital for achieving flawless stitch formation and preventing common issues like bunching and uneven tension.
How It Works With Other Machine Parts
Machine interplay creates the magic of perfect stitches.
Your thread takeup lever coordinates with the needle bar, feed mechanism, and tension discs like a conductor orchestrating a symphony.
As the needle bar moves down, lever movement synchronizes to pull thread through fabric.
When it rises, thread synchronization tightens loops for secure stitches.
This sewing machine parts teamwork guarantees fabric flow remains smooth while thread tension stays balanced throughout stitch regulation.
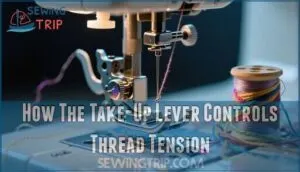
How The Take-Up Lever Controls Thread Tension
Your sewing machine’s take-up lever works like a conductor orchestrating thread movement, pulling exactly the right amount of thread through each stitch while preventing annoying slack that causes bunching.
When it’s out of sync with your needle and tension discs, you’ll see loops, knots, and that dreaded bird’s nest mess underneath your fabric.
Regulating Thread Uptake and Slack
When your thread takeup lever moves upward, it pulls excess thread up from below the needle plate, cinching the stitch knot into fabric layers.
The take-up lever orchestrates thread flow like a conductor, pulling exactly what each stitch needs while preventing frustrating tangles
This prevents large loops and slack on the underside. The lever collects and releases sewing machine thread consistently, matching each stitch’s requirements for proper tension adjustment and slack control, preventing thread jams.
Proper thread tension control is essential for achieving smooth and consistent stitches, and it requires careful management to prevent issues.
Synchronization With Needle and Tension Discs
Perfectly synchronized thread takeup lever coordinates with needle movement and tension discs to create flawless stitches.
The lever timing guarantees thread synchronization as your needle penetrates fabric, while tension control systems work together like a well-orchestrated dance.
This precise thread uptake lever coordination prevents bunching by maintaining ideal needle tension throughout each stitch cycle for consistent sewing machine thread synchronization, ensuring a smooth process through perfectly synchronized mechanisms.
Impact on Stitch Consistency and Quality
When your thread takeup lever operates smoothly with proper tension settings, you’ll notice dramatically improved stitch quality and sewing precision.
The lever’s coordinated movement guarantees consistent thread control, preventing loose stitches that compromise fabric handling.
Poor thread tension adjustment creates uneven stitches, while a properly functioning thread uptake lever delivers professional results every time you sew.
To achieve peak performance, understanding take up lever adjustments is vital for maintaining consistent thread tension and preventing common sewing issues, ensuring consistent thread tension and a smooth sewing experience with proper tension settings.
Proper Threading and Positioning Techniques
Threading your take-up lever correctly prevents the frustrating thread nests that can turn a simple sewing project into a tangled mess.
Proper lever positioning also protects your needle and guarantees smooth fabric handling throughout your work.
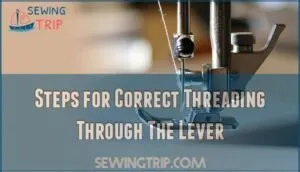
Steps for Correct Threading Through The Lever
Before threading through the take-up lever, you’ll need proper lever alignment to avoid frustrating thread nests.
Follow this threading order for smooth thread routing:
- Raise presser foot to release tension discs
- Turn handwheel to position thread takeup lever at highest point
- Guide thread through upper guides before reaching lever
- Thread through lever’s eyelet, ensuring proper thread routing
- Check lever calibration by gently tugging thread
This threading sequence guarantees correct tension adjustment and prevents the thread uptake lever from missing engagement during operation.
Understanding proper thread tension settings is vital for achieving the desired stitch quality and preventing common threading issues, as explained in the thread tension settings guide.
Positioning The Lever for Safe Fabric Handling
Before you start sewing, always position your thread takeup lever at its highest point by turning the handwheel toward you.
This lever positioning guarantees the needle reaches maximum height, preventing fabric snags and bent needles during fabric placement.
With proper lever safety and thread management, you’ll achieve better sewing accuracy and machine efficiency throughout your project.
Threading Differences in Older Vs. Newer Machines
Older machines feature exposed thread takeup lever with visible threading paths requiring manual precision through thread guides. You’ll thread directly through lever slots using your fingers.
Vintage sewing models demand careful attention since missing the lever eye causes immediate problems. Newer machine models hide the lever inside covers with automated threading tools and numbered paths.
Modern upper threading systems include spring-loaded mechanisms that guide thread naturally into position, reducing threading errors substantially. Understanding older sewing machines requires knowledge of their unique sewing machine parts, including exposed thread takeup lever and automated threading tools, which are crucial for manual precision and threading errors, and also involve older sewing machines.
Preventing Threading Errors and Jams
Smart threading prevents most sewing machine thread take up problems before they start.
You’ll avoid headaches by mastering these essential prevention techniques that keep your machine running smoothly.
- Position lever at highest point – Turn handwheel toward you until lever reaches top
- Raise presser foot first – This releases tension discs for proper threading
- Double-check lever engagement – Make certain thread sits in eyelet, not beside it
- Test thread path gently – Light tug should show slight resistance without thread breakage
These steps prevent thread tangling, needle damage, and fabric snagging while guaranteeing proper thread tension throughout your sewing machine thread take up system.
Common Thread Take-Up Problems and Solutions
Even experienced sewers encounter threading hiccups that can turn a simple project into a frustrating puzzle.
When your take-up lever isn’t working properly, you’ll quickly notice thread bunching, skipped stitches, or those dreaded bird’s nests that seem to appear out of nowhere.
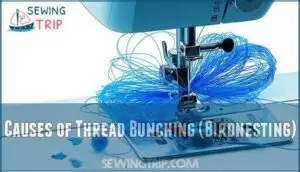
Causes of Thread Bunching (Birdnesting)
Thread bunching wreaks havoc when your machine’s systems fall out of sync.
Incorrect Threading through the thread take up lever creates immediate birdnesting, while loose Thread Tension lets upper thread form loops underneath fabric.
Bobbin Issues like wrong placement disrupt thread flow, and Needle Problems cause snagging.
Even Fabric Friction can lift your presser foot, triggering thread tangling disasters.
Proper presser foot engagement is vital to prevent tension related issues and guarantee smooth sewing operations.
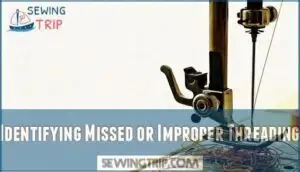
Identifying Missed or Improper Threading
Missing thread routing through the take-up lever creates the most frustrating threading errors.
You’ll spot this culprit when your machine refuses to form stitches or produces nasty thread nests underneath fabric.
Check if thread bypassed the lever entirely—it’s surprisingly easy to miss during threading.
Thread breakage and poor stitch quality often signal improper thread routing through guides leading to the lever, which can cause nasty thread nests and result in poor stitch quality.
Adjusting Thread Tension and Needle Selection
After confirming your take-up lever is properly threaded, fine-tune your tension settings and needle selection for superior stitch quality.
Start with your machine’s default thread tension, then adjust incrementally based on fabric choice. Heavy fabrics need stronger tension, while delicate materials require lighter settings.
Match your needle selection to both thread quality and fabric weight—universal needles work for most projects, but specialized needles prevent thread breakage and improve performance.
Understanding proper thread selection methods is essential for achieving the desired stitch quality and preventing common issues.
Clearing Jams and Cleaning The Lever
When jammed fabric meets your thread take up lever, don’t panic.
First, turn off your machine and raise the presser foot. Gently remove any visible thread clearance issues around the lever mechanism.
For thorough lever cleaning, use a small brush to sweep away lint and debris removal from tight spots. Check for twisted threads caught in the lever adjustment area.
If rethreading doesn’t solve persistent jams, professional lever maintenance may be needed.
Troubleshooting Persistent Take-Up Lever Issues
When your take-up lever won’t cooperate despite basic fixes, it’s time for systematic troubleshooting to identify deeper mechanical or electronic issues.
You’ll need a methodical approach to pinpoint whether the problem stems from worn parts, misalignment, or computer glitches that require professional attention.
Step-by-Step Troubleshooting Checklist
When thread issues persist despite basic fixes, you’ll need a systematic approach to restore your sewing machine’s performance.
Follow this troubleshooting checklist to identify the root cause and achieve smooth stitch quality.
- Rethread completely – Start with the thread take up lever at its highest position, ensuring proper thread tension through every guide point
- Check error codes – Note any display messages on computerized machines and cross-reference them with your manual for specific solutions
- Inspect for debris – Clean the lever mechanism thoroughly, removing lint buildup that affects thread uptake and causes maintenance issues
Addressing Mechanical or Electronic Malfunctions
When basic troubleshooting fails, deeper mechanical or electronic problems may plague your thread take up lever.
Modern machines display error codes indicating faulty sensors or circuit issues, while motor failure creates grinding sounds during operation.
Electronic glitches cause erratic lever movement, disrupting thread uptake timing, and check for loose connections, reset your machine’s electronics, or inspect gear alignment if thread slippage persists despite proper threading, to address issues such as thread slippage.
When to Seek Professional Repair
Sometimes even the best troubleshooting hits a wall. When your take-up lever won’t budge despite your efforts, Expert Diagnosis becomes necessary.
Persistent thread breakage, unusual noises, or complete Machine Failure signal it’s time to call in the pros.
Professional sewing machine repair shops can assess Warranty Claims and offer multiple Repair Options. While Repair Costs vary, attempting complex mechanical fixes yourself risks further damage to delicate thread uptake mechanisms.
Regular maintenance and understanding of common sewing issues can help prevent such problems from arising in the first place.
Maintenance Tips for Smooth Operation
Regular inspection catches lever problems before they snowball into expensive repairs.
Clean the thread take up area weekly, removing lint with a small brush. Apply one drop of machine oil to lever pivot points after every 8-10 hours of sewing.
Check threading paths during routine sewing machine maintenance, ensuring proper thread management through all guides. Replace worn needles immediately—they stress the lever and create thread tension issues.
Proper sewing machine oil application is essential for maintaining the device’s machine oil levels, which is crucial for the sewing machine’s longevity.
Frequently Asked Questions (FAQs)
How Do I Know if the Take-up Lever is Missing?
Spotting a missing lever isn’t rocket science—you’ll see an empty slot or gap above your presser foot where it should sit.
Without it, threads won’t feed properly, causing immediate bunching and failed stitches during operation.
What is the Best Way to Clean a Stuck Take-up Lever?
Turn off your machine and unplug it first.
Remove the needle and presser foot for better access.
Use compressed air to blow out lint buildup, then apply a small drop of sewing machine oil to the lever’s pivot point and work it gently.
How Can I Prevent Thread From Coming Out of the Lever?
Approximately 59 inches of thread move through your needle per inch sewn—that’s a lot of motion.
Position your take-up lever at its highest point, verify proper threading through the eyelet, and use the correct needle size for your thread weight to prevent slippage.
What Should I Do if the Take-up Lever and Needle Are Not Moving?
Check if your machine’s handwheel moves freely by turning it manually. If it’s stuck, power down and inspect for thread jams, debris, or mechanical obstructions that need clearing.
How Do I Know if I Need to Replace the Take-up Lever?
When your take-up lever‘s completely seized, cracked, or won’t budge despite thorough cleaning, it’s replacement time. You’ll need professional help since this repair requires disassembling machine components and precise reassembly.
What is thread take up in a sewing machine?
Thread take-up is your machine’s thread management system that pulls thread from the spool, regulates tension, and draws it through fabric to form stitches.
It’s the lever above your presser foot that moves up and down, orchestrating smooth sewing.
Should the take up lever be up or down?
Like a conductor raising a baton before the symphony begins, you’ll want your take-up lever positioned at its highest point.
Always raise the lever to the top before threading, placing fabric, or removing your project for smooth, tangle-free sewing.
What is a thread take up lever?
Your sewing machine’s take-up lever sits above the presser foot, orchestrating smooth stitches by pulling thread through fabric and managing tension. It’s the unsung hero preventing those frustrating thread tangles.
Can take-up lever timing affect stitch quality?
Timing acts like a conductor’s baton—when your lever’s rhythm falls out of sync with the needle’s dance, you’ll get loose stitches, thread bunching, and skipped stitches that’ll drive you crazy.
How often should take-up lever be lubricated?
Lubricate your take-up lever every 8-10 hours of sewing time or monthly with regular use.
Apply one small drop of sewing machine oil to the lever’s pivot point for smooth operation.
Conclusion
Practice makes perfect, and mastering your sewing machine thread take up lever transforms frustrating projects into smooth successes.
You’ve learned to identify threading errors, adjust tension properly, and troubleshoot common bunching problems.
Remember to position the lever at its highest point before threading and maintain regular cleaning schedules.
When threading issues persist despite following these techniques, don’t hesitate to consult your machine manual or seek professional service.
Your sewing machine thread take up lever coordination with other components guarantees consistently beautiful stitches every time.
- https://sewingmachineman.substack.com/p/take-up-stroke-an-important-aspect
- https://sewingmachineshop.com/sewing-machine-take-up-lever/
- https://www.youtube.com/watch?v=ddhk-qHIAE4
- https://madamsew.com/blogs/sewing-blog/how-to-deal-with-thread-tension
- https://sabrinawhartonbrown.wordpress.com/2011/05/23/how-to-get-your-sewing-machine-thread-tension-and-stitch-quality-right/

