This site is supported by our readers. We may earn a commission, at no cost to you, if you purchase through links.
High tension can cause puckered seams, thread breaks, or uneven stitches.
Start by checking your thread path—sometimes a thread’s caught on something sneaky, like the spool cap.
Next, adjust the top tension dial down a notch; small tweaks can make a big difference.
Don’t forget the bobbin! A poorly wound bobbin or incorrect bobbin case tension can wreak havoc.
Use quality thread and a needle suited for your fabric.
With some patience, you’ll have smooth stitches in no time.
Curious about fabric-specific tips? Keep reading!
Table Of Contents
- Key Takeaways
- Sewing Machine Tension Basics
- Causes of Excessive Tension
- Tension Issues and Troubleshooting
- Adjusting Tension Settings
- Maintaining Optimal Tension
- Fabric-Specific Tension Settings
- Identifying Too Much Tension
- Preventing Excessive Tension
- Troubleshooting High Tension
- Achieving Perfect Tension
- Frequently Asked Questions (FAQs)
- Conclusion
Key Takeaways
- Check your thread path and rethread carefully to avoid sneaky snags or misalignment.
- Adjust the top tension dial in small increments, testing on similar fabric to your project.
- Inspect the bobbin case for proper winding, placement, and tension problems for smooth stitching.
- Clean tension disks, use quality thread, and match needle size to fabric type to prevent tension problems.
Sewing Machine Tension Basics
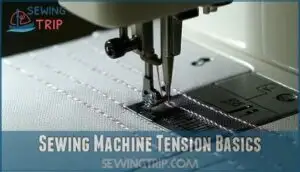
Understanding sewing machine tension is key to getting clean, even stitches. It’s all about balancing how the threads pull together to create the perfect seam.
Mastering sewing machine tension unlocks flawless stitches, ensuring balanced threads for professional-quality seams every time.
Thread Tension Definition
Thread tension is all about how tight or loose the threads are as they flow through your sewing machine to form stitches.
It controls the pull on both the upper and lower threads, ensuring balanced stitches. When tension is set right, the threads meet neatly in the fabric’s middle, creating even stitching.
If the thread pressure (upper or bobbin tension) is off, you’ll see uneven stitching or loose loops. Think of tension balance as a dance between the threads—too much pull ruins the rhythm, leaving you with imperfect stitch formation, which affects the overall stitch formation and can lead to imperfect stitches.
Balanced Tension Importance
Getting the right tension balance is vital for smooth sewing results.
Balanced tension keeps your stitches even, prevents puckering, and helps maintain seam integrity.
Without it, fabric wear increases, and stitch quality suffers.
A well-balanced machine gives you professional results every time.
Tension gauges provide precise measurements for accurate adjustments.
- Improves Stitch Quality: Balanced tension guarantees clean, even stitches with no loops or gaps.
- Enhances Machine Performance: Proper tension avoids unnecessary strain on your sewing machine.
- Protects Fabric Wear: Prevents pulling, tearing, or other damage caused by uneven thread tension.
When tension’s just right, your sewing shines!
Causes of Excessive Tension
When your sewing machine’s tension is too tight, it’s often caused by incorrect settings or threading issues. Understanding these triggers helps you fix the problem and avoid uneven stitches.
Impact Of Technology Advancement
Modern sewing machine tension systems, like Smart Sewing Machines, make life easier but come with quirks.
Automated Adjustments and Digital Tension Control adapt quickly, yet too much tension can arise. Predictive Maintenance helps spot sewing problems early.
Here’s a quick breakdown:
| Issue | Cause | Fix |
|---|---|---|
| Thread Breaks | Adaptive Tension Systems fail | Adjust manually |
| Uneven Stitches | Misread fabric type | Check tension settings |
| Frequent Snapping | Over-tightened thread | Reset digital controls |
The issues that arise from these systems include Thread Breaks, Uneven Stitches, and Frequent Snapping, which can be addressed by following the provided fixes.
Future Trends And Innovations
Smart sewing is changing the game with innovations like AI integration, automated adjustment, and adaptive tension settings. These features improve sewing machine performance and make tension control a breeze.
Consider the following:
- Sensors fine-tune tension for flawless stitches.
- Machines predict maintenance needs to save time.
- IoT connectivity boosts sewing machine troubleshooting.
It’s all about tension optimization with smarter, simpler solutions, utilizing AI integration and adaptive tension settings to enhance the sewing experience.
Ethical Implications Of Progress
When sewing technology advances, ethical concerns emerge.
Bias amplification in designs can unintentionally impact patterns, while algorithmic accountability guarantees reliable tension troubleshooting.
However, job displacement worries some as machines simplify tasks.
Data privacy from interconnected systems raises eyebrows, too.
And let’s not forget the environmental impact—producing smarter machines may increase waste.
Adjusting tension includes balancing progress and responsibility, considering the potential for job displacement.
Tension Issues and Troubleshooting
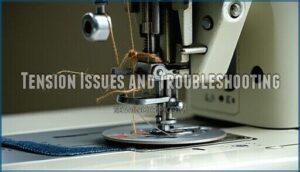
When your sewing machine’s tension is off, it can lead to frustrating issues like looping thread, puckered seams, or snapping threads.
Understanding these problems and knowing how to fix them will help you keep your projects running smoothly.
Looping Thread and Bird Nesting
Looping threads or bird nesting can mess up your work and test your patience.
These tension issues often show up when something’s off with your machine.
Keep an eye out for:
- Bobbin case issues: Correct placement minimizes loops under fabric.
- Thread quality matters: Cheap thread causes skipped stitches.
- Tension disc cleaning: Dust here disrupts thread flow.
Seam Puckering and Breaking
Troubles with seam puckering or breaking? It’s likely your sewing machine tension is too tight for the fabric weight.
Check your stitch length—light fabrics prefer shorter stitches, while heavy fabrics need longer ones.
Match your thread type and needle size too.
Adjust the presser foot pressure and test on scraps to stop uneven tension from ruining your seams.
Thread Breaking and Uneven Tension
Thread breaking and uneven tension can frustrate even seasoned sewists.
It often boils down to simple fixes:
- Check thread quality; avoid old or cheap threads.
- Verify the needle size matches the fabric type.
- Rethread properly, making certain thread flows smoothly through tension disks.
- Adjust upper thread tension incrementally before touching bobbin tension.
- Prioritize regular machine maintenance to prevent recurring tension issues.
Addressing thread guide tension issues is also vital for smooth stitching.
Adjusting Tension Settings
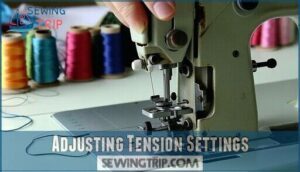
You’ll need to make small, precise adjustments to your tension dial until your stitches look even on both sides of the fabric.
Turn the dial up in small increments if your bottom thread shows on top, or down if your top thread shows underneath.
Incremental Tension Dial Adjustments
Now that you understand those common tension issues, let’s focus on how to adjust your settings properly.
When adjusting the tension dial on your machine, always make small tweaks rather than dramatic changes. Turn the dial just half a number at a time, then test your stitches on scrap fabric that matches your project.
Watch how the thread behavior changes with each adjustment. Most tension dials range from 0-9, with 4-5 being the standard starting point.
Remember that dial sensitivity varies between machines, so tension increments that work on one might differ on another. Patience during tension fine-tuning saves time and frustration later, as it allows for precise adjustments.
Bobbin Tension Adjustment Methods
With proper tools in hand, adjusting your bobbins tension can be less intimidating than you might think.
For frontloading bobbin cases, locate the small screw on the side and turn it clockwise to tighten or counterclockwise to loosen lower thread tension. Make tiny 1/8 to 1/4 turn adjustments, testing between each change.
Different bobbin case types require specific approaches, and thread weight impacts your settings substantially. Mark your starting point before making changes to pre-wound bobbins.
A tension gauge usage can provide precision, but most sewists rely on the simple weight test—if thread pulls out slowly with slight resistance, your bobbin thread tension is just right.
Maintaining Optimal Tension
You’ll keep your machine running smoothly by maintaining ideal tension through regular cleaning and proper thread selection.
Small maintenance steps, like correct bobbin winding and removing lint buildup, prevent major tension headaches later.
Regular Machine Cleaning and Servicing
Now that you’ve tweaked your tension settings, let’s talk about keeping your machine in tip-top shape. A clean machine is your best defense against tension problems.
- Lint building up between tension discs creates uneven thread pull
- Dust particles jamming feed dogs cause fabric to feed improperly
- Oil residue on needle plates creates sticky spots that catch thread
- Dirt in bobbin case prevents smooth rotation
- Clogged thread paths force thread to find alternative routes
Regular cleaning with a Sew Clean Brush Set prevents these issues. Professional maintenance every 12 months guarantees component inspection and prevents damage. Don’t wait until problems arise—make machine cleaning part of your sewing routine.
High-Quality Thread and Needle Selection
Many tension problems disappear when you prioritize thread quality and needle selection.
Choose threads that match your fabric—polyester for stretch, cotton for natural fibers.
The right needle types prevent breakage and skipped stitches; use ballpoint for knits and sharp needles for wovens.
When threads keep breaking or your machine sounds strained, it’s often a sign you need better thread or a fresh needle.
Investing in superior thread options can resolve many common sewing issues.
This approach helps to ensure that you are using the right needle and high-quality threads, which can make a significant difference in your sewing experience.
Correct Bobbin Winding and Insertion
Getting your bobbin right is half the battle in tension management.
Wind bobbins at medium speed for even tension, and make sure the thread flows smoothly.
Clean your bobbin case regularly to remove lint that affects bobbin thread tension.
A bobbin winding machine can automate this process.
When inserting, listen for that satisfying "click" and test by gently pulling – it should offer slight resistance.
Improper insertion technique errors can wreak havoc on your stitches due to poor insertion technique.
Fabric-Specific Tension Settings
You’ll need to adjust your tension settings based on what you’re sewing, as different fabrics require different tension levels.
Your lightweight fabrics like cotton voile need lower settings (2-3), while thick materials such as denim work best with higher tension (3.5-4.5).
Lightweight Fabric Tension Settings
Now that you’ve mastered basic tension maintenance, let’s focus on those delicate fabrics.
When sewing lightweight materials like lawn, voile, or cotton voile, your tension settings need to be lower than standard.
Adjust your dial to between 2-3 instead of the usual 4.
For these airy fabrics, smaller stitch lengths (1.5-2.4mm) and thinner needles (70/10) will help prevent puckering and damage while ensuring smooth fabric tension.
Thick Fabric Tension Settings
While lightweight fabrics need a gentle touch, thick fabrics like denim demand more muscle from your machine.
For heavy-weight fabrics such as denim, canvas, and thick wools, set your tension around 5. Use a universal needle size 90/14 for these sturdy materials.
You’ll also want to lengthen your stitch for better fabric handling. These upholstery settings prevent thick fabrics from puckering or breaking your thread, ensuring a smooth process with heavy-weight fabrics.
Stretchy Fabric Tension Settings
While heavy fabrics need stronger tension, stretchy fabrics require a gentler touch.
For stretch knit fabrics like Lycra, set your tension between 2-3.
Use ballpoint needles to prevent snagging and damage.
Your fabric type determines your approach—sharper needles work with 3-5 tension settings.
If you’re using a serger, adjust the differential feed to prevent wavy seams.
Stretch stitch patterns further accommodate the fabric’s natural movement, allowing for a natural movement.
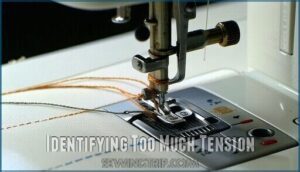
Identifying Too Much Tension
You’ll notice your machine has too much tension when your stitches look tight, your fabric puckers, or your thread keeps breaking.
Identifying these signs early will save you hours of frustration and help you make quick adjustments for perfect stitches every time.
Visible Signs of Excessive Tension
After setting your fabric-specific tension, you’ll need to spot when tension is still too high.
Your sewing machine will show clear warning signs when thread tension is excessive.
Look for these red flags:
- Fabric puckering along seams
- Broken threads that snap frequently
- Needle breaks during normal sewing
- Tight stitching that causes fabric to bunch
- Skipped stitches creating inconsistent seams
These visible signs indicate your machine needs tension adjustment before continuing.
Audio and Tactile Cues
While you’re sewing, your machine communicates tension problems through distinct audio and tactile cues.
Listen and feel for these warning signs to catch issues early.
| Sound Indicators | Vibration Feedback |
|---|---|
| Clicking or popping | Machine jerking |
| Rhythmic patterns change | Uneven fabric feed |
| Motor resistance sounds | Stiff handwheel |
| Grinding or straining | Excessive vibration |
These tension sounds often signal sewing machine troubleshooting is needed before thread breaks or damage occurs.
Incorrect threading can be a cause, so re-threading the machine may resolve the issue, which involves checking for tension problems and addressing them promptly to prevent thread breaks or further damage, and considering re-threading as a potential solution.
Performance Issues
When struggling with sewing machine tension issues, you’ll notice clear performance problems beyond visual cues.
Your stitch quality deteriorates noticeably while fabric feed becomes inconsistent or jerky.
Machine noise often increases, and you’ll experience less precise speed control.
The motor function may strain, causing your machine to work harder than necessary, which can lead to the need for tension adjustment or sewing machine repair.
If these troubleshooting indicators appear together, it’s time for adjustment or repair.
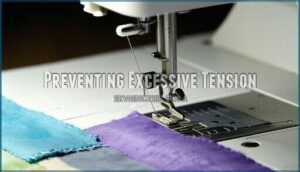
Preventing Excessive Tension
You’ll save yourself hours of frustration by taking simple steps to prevent tension problems before they start.
Regular cleaning of your machine and using quality threads matched to your fabric will keep your stitches looking professional every time.
Proper Thread Path and Tension Balance
Your thread path is the foundation of balanced tension.
Follow these simple steps to prevent excessive tension in your sewing machine:
- Double-check threading diagrams for your specific machine model
- Clear all path obstructions like lint or dust
- Use quality thread that matches your project needs
- Thread both top and bobbin consistently for balanced stitching
Addressing these tension discrepancies early saves you from frustrating sewing machine troubleshooting later.
Regular Tension Checks and Adjustments
Check tension settings regularly to avoid tension issues that mess up your stitches.
Use your adjustment tools for fine-tuning and test stitching on scrap fabric before projects.
Seasonal adjustments, like for thick winter fabrics, help maintain balance.
Stick to frequency guidelines and pair this routine with professional servicing for long-term sewing machine maintenance.
Perfect tension requires practice and care!
Machine Maintenance and Upkeep
How often do you think about your sewing machine’s upkeep? Good maintenance prevents excessive tension issues.
Here’s a quick checklist:
- Remove lint from the bobbin case regularly.
- Clean tension disks with a soft brush.
- Stick to a servicing frequency of at least once a year.
- Use high-quality thread and check needle condition.
- Verify proper bobbin care and winding.
Troubleshooting High Tension
When your sewing machine’s tension is too high, it can cause tight seams, thread snapping, or uneven stitches.
Troubleshooting high tension starts with simple steps like rethreading and adjusting the tension dial to restore smooth stitching.
Common Causes of High Tension
High tension problems often pop up due to incorrect threading or lint buildup clogging the machine.
Damaged parts, like the tension discs, can also mess with the balance. Using the wrong needle or low-quality thread is another culprit.
Even uneven bobbin tension impacts stitching. Keep a close eye on these factors to prevent pesky sewing machine tension woes.
Step-by-Step Troubleshooting Guide
To start sewing machine troubleshooting, identify the issue. Look for looping, thread breaks, or uneven stitches.
Begin with a tension reset, setting the dial to the default. Test stitches on scrap fabric and note results.
Adjust incrementally, giving small tweaks until stitches balance. If problems persist, consider products for troubleshooting.
For stubborn tension issues, seek professional help. Master tension adjustment, and sewing machine tension woes won’t bother you again!
Advanced Troubleshooting Techniques
When tension diagnostics point to persistent tension problems, focus on fine-tuning.
Complex fabrics might need special adjustments—watch for needle deflection or skipped stitches.
Lower the bobbin tension slightly or loosen the top thread incrementally.
Also, verify the feed dog and presser foot settings suit your fabric.
For stubborn tension issues, a tiny bobbins screw adjustment can help, and it is crucial to make these adjustments carefully to resolve the tension problems.
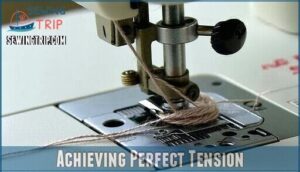
Achieving Perfect Tension
Getting perfect tension on your sewing machine is all about balancing the top and bobbin threads.
With small adjustments and proper settings, you’ll achieve smooth, even stitches on every project.
Balancing Top and Bobbin Tension
Balanced tension means the top and bobbin threads meet perfectly in the middle of your fabric.
Balanced tension creates flawless stitches by harmonizing the top and bobbin threads at the fabric’s center, ensuring professional and smooth results.
Check the upper thread tension if you see loops or puckering—adjust it slightly. Still struggling? Gently tweak bobbin tension, making tiny turns.
Balanced tension improves stitch appearance, prevents thread breakage, and keeps seams strong. Smooth stitching isn’t luck; it’s smart tension troubleshooting!
Fine-Tuning Tension Settings
Dial in precision by tweaking the tension dial slowly—small moves make a big difference.
If adjustments to the top thread don’t cut it, explore bobbins adjustments carefully.
Test stitching on scrap fabric helps pinpoint issues caused by fabric variations or thread types.
Fine-tuning your sewing machine tension guarantees better tension settings, smoother stitches, and easier sewing machine troubleshooting, leading to overall better sewing experiences.
Optimizing Sewing Machine Performance
Fine-tuning tension isn’t the finish line—it’s the start of sewing smoothly.
Optimize performance by:
- Ensuring consistent stitching with balanced tension settings.
- Checking needle alignment to avoid skipped stitches.
- Keeping the feed even for smooth fabric movement.
- Minimizing vibrations through regular sewing machine maintenance.
- Improving motor efficiency with cleaning and lubrication.
To maintain consistent performance, clean tension devices regularly.
Small tweaks keep your machine humming like a well-oiled engine!
Frequently Asked Questions (FAQs)
How to prevent sewing machine tension issues?
Think of your machine as an orchestra—every thread needs harmony.
Use quality thread, clean lint often, match top and bobbin threads, adjust small increments, and test on scrap fabric.
Maintenance keeps tension issues away, by ensuring harmony is maintained through regular checks and adjustments.
What is a sewing machine tension?
Sewing machine tension controls how tightly threads are pulled during stitching.
It balances the top and bobbin threads to create neat, even stitches without puckering or gaps.
Proper tension guarantees your projects look professional.
What causes loose tension on a sewing machine?
Loose tension often happens when the top thread isn’t threaded right, the tension dial is set too low, or lint clogs the tension discs.
Always rethread, clean, and adjust settings slowly to fix it, ensuring that you address the complete concepts related to the issue.
What happens if thread tension is off on a sewing machine?
When thread tension is off, you’ll notice uneven stitches, loops on fabric, thread snapping, or puckering seams.
Balanced tension is key—it keeps stitching neat and secure, with no knots or gaps appearing.
How do I know if my sewing machine tension is too high?
If your stitches pucker, seams ripple, or break while sewing, your tension’s too high.
The top thread pulls excessively tight, causing knots to sit on the fabric’s surface instead of inside it.
Adjust gradually.
How do I get a better tension in a sewing machine?
Think of tension like Goldilocks searching for “just right.”
Start with the top tension dial, adjust in small steps, and test stitches.
Use quality thread, clean lint, and balance top and bobbin threads patiently.
What number should tension be on a sewing machine?
Your sewing machine tension typically starts at 4 or 5 for most medium-weight fabrics.
However, adjust it based on your project.
Test on scrap fabric first and tweak until stitches are even and balanced.
How does fabric type impact tension settings?
Did you know lightweight fabrics like cotton voile need low tension settings (around 2-3)?
Fabric thickness and stretchiness affect tension. Thicker fabrics require higher tension, while stretchier ones benefit from lower settings to avoid puckering, which is influenced by stretchiness.
Can thread type affect stitch tension quality?
Different threads, like cotton, polyester, or metallic, affect tension because of their thickness, stretch, and texture.
Mismatched threads can cause uneven stitching, so always pair your thread with fabric and needle for best results to achieve best results.
Why does my fabric keep gathering unexpectedly?
Your fabric gathers when the thread tension is too tight, pulling the material unevenly.
Loosen the top tension slightly, test on scrap fabric, and adjust until the stitches lie flat without bunching.
Conclusion
So, what’s the secret to fixing a sewing machine with too much tension?
Start small—check your thread path, adjust the top tension dial, and inspect your bobbin.
A little patience goes a long way!
Keep your machine clean, use quality thread, and match your needle to your fabric.
Whether it’s puckered seams or broken threads, these simple steps can save the day.
With proper care, your machine will sew smoothly every time, and that’s the key to happy stitching!

