This site is supported by our readers. We may earn a commission, at no cost to you, if you purchase through links.
Your first quilt doesn’t need to be perfect—it needs to be finished. That’s the hard-won wisdom every quilter eventually learns, but most of us discover it only after frogging out stitches for the third time or abandoning a half-completed project in the closet.
Machine quilting transforms this craft from a months-long marathon into something you can actually complete, but your sewing machine won’t come with a quilting manual in the box.
The good news? You don’t need years of practice to create something beautiful. With the right techniques and a solid understanding of your machine’s capabilities, you’ll move from nervously guiding fabric under the presser foot to confidently stitching patterns that make your quilt come alive.
Table Of Contents
Key Takeaways
- Machine quilting lets you finish projects in 6–7 hours instead of the 22 hours hand quilting requires, making it the practical choice for beginners who want to actually complete their first quilt.
- Your workspace setup matters as much as your skills—position your machine at elbow height with 500–1,000 lux lighting, and keep essential tools within arm’s reach to avoid fatigue during long sessions.
- A walking foot prevents the puckering and shifting that ruins quilt sandwiches by feeding all three layers at the same rate, while quarter-inch seam allowances and proper basting every 3–4 inches create the foundation for professional results.
- Start with simple patchwork patterns using squares or rectangles, practice straight-line quilting before attempting free-motion work, and remember that finishing an imperfect quilt builds more skill than abandoning a perfect one halfway through.
Getting Started With Machine Quilting
Starting your machine quilting journey doesn’t have to feel intimidating, even if you’ve never touched a sewing machine before. You’ll need to make a few important decisions upfront, from selecting your first pattern to setting up a workspace that actually works for you.
Let’s walk through the key steps that will set you up for success and help you feel confident as you begin.
Choosing a Beginner-Friendly Quilt Pattern
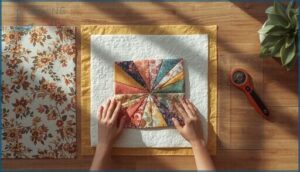
Your first quilt pattern should center on simple patchwork with squares or rectangles—these shapes let you build confidence before tackling stars or log cabins. Look for beginner-friendly designs with low block counts, like a crib quilt using 42 six-inch blocks, and consider precut fabrics such as charm packs to simplify cutting.
When planning your quilt, consider the standard quilt dimensions for the type you’re making. Start with straightforward patterns that skip complex point matching, and you’ll see real progress quickly.
Setting Up Your Quilting Space
Once you’ve picked your pattern, it’s time to set up a workspace that won’t leave you sore. Position your sewing machine at seated elbow height—about 90-degree arm angles—to keep your shoulders relaxed. Aim for 500–1,000 lux of daylight-range lighting so you can match fabric colors without squinting.
Keep your rotary cutter, quilting tools, and sewing notions within arm’s reach for an ergonomic layout that facilitates hours of stitching. Prioritize your comfort by considering sewing machine ergonomics to avoid long-term discomfort.
Understanding Machine Quilting Vs. Hand Quilting
Now that your space is ready, let’s talk method. Machine quilting stitches at 750–1,100 stitches per minute—far faster than hand quilting’s 20 to 30. That speed cuts a twin quilt from 22 hours down to 6 or 7.
You’ll get consistent stitch uniformity, perfect for everyday quilts, while hand quilting offers softer, heirloom aesthetics.
Time investment, ergonomic impact, and cost analysis all tilt toward the sewing machine for beginner quilting.
Planning Your Quilt Design With Software
Before you cut a single piece of fabric, quilt design software like Electric Quilt 8 lets you test layouts, audition fabrics at scale, and generate accurate yardage charts. Software capabilities include planning accuracy for seam allowances and cost control through precise material estimates.
Hardware integration even exports stitching files to some machines. Emerging technologies now blend AI color suggestions with traditional quilt layout programs—planning smarter means sewing confidently.
Essential Tools and Materials for Quilting
You can’t build a quilt without the right tools, and having the essentials on hand will save you time and frustration. The good news is that you don’t need a ton of specialized equipment to get started with machine quilting.
Let’s walk through the key tools and materials that will set you up for success, from your sewing machine itself to the small accessories that make a big difference.
Sewing Machine Features for Quilting
Your quilting machine’s throat space—the gap between the needle and the machine body—determines how easily you’ll maneuver larger projects. Domestic machines offer 7 to 9 inches, while models like the Janome Horizon Memory Craft 9450QCP provide 11 inches.
Look for adjustable stitch speed, reliable thread tension settings, and helpful features like knee lifters and generous bobbin options to improve your quilting experience.
Quilting Foot, Walking Foot, and Guide Bar Uses
Your walking foot adds an extra set of feed dogs on top, moving all three quilt layers at the same rate to prevent puckering and shifting—essential for straight-line machine quilting.
A quilting foot with a center blade guides stitch-in-the-ditch work along seams, while the guide bar maintains consistent spacing between parallel lines.
For piecing, a quarter-inch foot ensures accurate seam allowances every time.
Rotary Cutter, Ruler, and Fabric Scissors
For precise fabric cutting, your rotary cutter paired with an acrylic ruler delivers clean edges through multiple layers—something ordinary scissors can’t match. A 45 mm cutter and 6×24 inch ruler form your go-to duo, usually costing $40–$80 together.
Choose ergonomic scissors for detail work, and always respect cutter safety: that razor-sharp blade demands careful handling and frequent replacement to prevent slips.
High-Quality Quilting Thread Options
You’ll find that fiber properties matter—cotton thread offers heat resistance and a traditional feel, while polyester brings excellent durability testing results and tensile strength.
Thread weight affects your quilt’s appearance: 40 or 50 wt balances visibility with strength, while heavier weights create bold lines.
Brand comparison reveals options like Aurifil’s 50 wt cotton with 270 colors.
Consider environmental impact, thread tension compatibility with your bobbin and needle, and choose high-quality thread for lasting results.
Selecting Needles for Machine Quilting
Your needle choice can make or break your quilting success. Match needle size to both fabric layers and thread weight—lightweight cottons work well with 70/10 needles, while thicker quilt sandwiches need 90/14 or larger.
Quilting needles labeled “H-Q” handle multiple layers best, and you’ll want to change your sewing machine needle every 8 to 10 hours to maintain proper thread tension and prevent skipped stitches.
Top 7 Must-Have Quilting Products
You’ve got the basics down, and now it’s time to stock your quilting toolkit with products that actually make a difference. These seven items aren’t just nice to have—they’re the tools that’ll keep your quilt sandwich secure, your stitches even, and your sanity intact.
Let’s look at what belongs in every beginner’s quilting supply list.
1. Dritz Quilting Curved Safety Pins Bonus
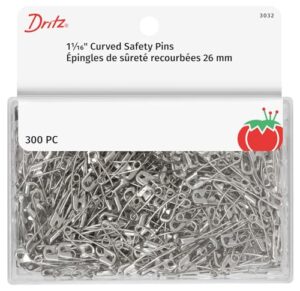
You’ll quickly learn that basting your quilt sandwich is where safety pins become your best friend. The Dritz Quilting 3032 Curved Safety Pins Bonus Pack gives you 300 nickel-plated pins designed specifically for beginners working on large projects.
Their curved design makes penetrating all three layers easier than straight pins, and you’ll want to space them about four inches apart across your quilt.
These pins are completely reusable, making them cost-efficient over dozens of projects. Size 1 works perfectly for low-loft batting, keeping your layers stable under your sewing machine.
Best For: Quilters working on large projects who want a reusable, economical way to baste quilt layers together without spray adhesive.
- Curved design makes it easier to push through three quilt layers with less shifting than straight pins
- 300-count pack gives you enough pins for multiple large quilts at a lower per-pin cost than smaller packs
- Completely reusable across dozens of projects, making them a one-time investment that pays for itself over time
- Some users report the pins aren’t sharp enough out of the package and may need sharpening before first use
- Size 1 pins work best for low-loft batting only, so you’ll need larger pins if you work with thicker materials
- Can be tricky to handle if you have limited hand dexterity, especially when closing several hundred pins during basting
2. Brother Open Toe Walking Quilting Foot
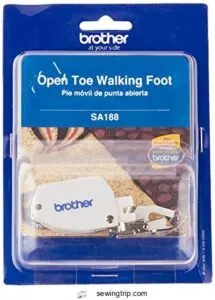
Once your pins hold your sandwich secure, a Brother open toe walking foot transforms how smoothly those layers move through your sewing machine. This accessory integrates a fabric feeding system that advances the top, batting, and backing at the same pace, preventing puckers during straight-line quilting techniques.
The open-toe design gives you clear visibility of your needle position, essential for precise stitch-in-the-ditch work. You’ll want to adjust your machine quilting stitch length to about 3.0–4.0 mm for best results. Confirm model compatibility with your Brother’s maximum stitch width before purchasing.
Best For: Quilters working with thick batting or slippery fabrics who need even feeding across all three quilt layers and clear visibility for precise line work.
- Moves top, batting, and backing at the same speed to eliminate puckers and shifting during straight-line quilting
- Open-toe design provides unobstructed view of the needle path for accurate stitch-in-the-ditch and decorative work
- Compatible with quilt bar attachments for consistent spacing between parallel lines in grid or crosshatch patterns
- Only works with low-shank Brother machines that have 7 mm maximum stitch width, limiting compatibility across brands
- Priced higher than generic walking feet, and counterfeit versions are common from less reputable sellers
- Requires careful installation and adjustment, with some users needing online tutorials beyond the basic included instructions
3. Aurifil White Cotton Quilting Thread Spool
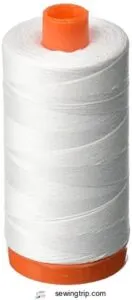
With your walking foot prepped and ready, the right high-quality thread makes every stitch count. Aurifil’s 50wt white cotton quilting thread on a 1,422-yard spool delivers reliability for machine quilting and piecing.
This long-staple Egyptian cotton thread runs smoothly through your sewing machine with minimal lint, so you’ll spend less time troubleshooting and more time stitching. Pair it with an 80/12 universal or quilting needle for best performance.
Beginner quilters appreciate how this thread fiber balances strength with fineness, creating flat seams that won’t add bulk to your quilt sandwich. It’s adaptable across sewing applications, from straight-line quilting to machine appliqué.
Best For: Quilters who want a versatile, low-lint thread for machine piecing and subtle quilting lines without constant bobbin changes.
- Long-staple Egyptian cotton creates flat, strong seams with minimal bulk at intersections
- 1,422-yard spool means fewer interruptions during large quilting projects
- Low lint production keeps your machine cleaner and reduces maintenance between projects
- Large spool size may not fit on some traditional sewing machine spindles
- Thinner 50wt construction can tangle or break if tension isn’t dialed in correctly
- Higher price point compared to budget cotton thread options
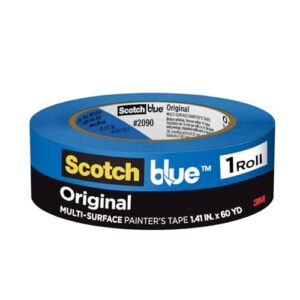
4. ScotchBlue Original Multi Surface Painter’s Tape
Once your thread is loaded, tape becomes surprisingly useful for machine quilting basics. ScotchBlue Original Multi Surface Painter’s Tape, at 1.41 inches wide, simplifies securing the quilt layers during basting. Its medium adhesion strength holds fabric edges flat on your work surface without leaving residue—ideal for quilting for beginners worried about damage.
The crepe paper backing tears easily by hand, and its surface compatibility works on floors or tables. You’ll remove it cleanly within 14 days, making this tape a smart choice with minimal environmental impact.
Best For: Quilters who need a reliable way to hold fabric layers in place during basting without worrying about sticky residue or surface damage.
- Removes cleanly for up to 14 days without leaving adhesive behind, so you can work at your own pace without stress.
- Hand-tearable crepe paper backing makes it quick to apply and adjust without needing scissors or tools.
- Medium adhesion works well on multiple surfaces like tables and floors, keeping fabric secure but not too aggressive.
- Not designed for rough or highly textured surfaces, so it won’t work on every workspace.
- May cause damage if used on delicate fabrics or left on longer than the recommended timeframe.
- Won’t deliver perfectly sharp lines if you’re using it for precision marking or graphic design tasks.
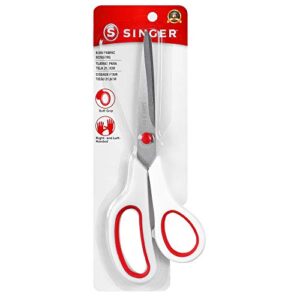
5. SINGER Comfort Grip Fabric Scissors
After taping your quilt sandwich, you’ll need to trim fabric edges and cut binding strips with precision. SINGER Comfort Grip Fabric Scissors feature 8.5-inch stainless steel blades built for cutting performance through multiple layers of cotton—essential for quilting applications.
The rubberized grips offer an ergonomic design that reduces hand fatigue during long sewing sessions. Keep these exclusively for fabric; blade material dulls quickly on paper.
Always cut away from your body on a flat surface—safety practices matter. These ambidextrous shears complement your sewing machine work beautifully.
Best For: Quilters and sewers who need reliable fabric shears for trimming edges, cutting binding strips, and handling multiple layers of cotton during extended sewing sessions.
- 8.5-inch stainless steel blades cut cleanly through multiple fabric layers, making them ideal for quilting and general sewing tasks
- Rubberized comfort grip handles reduce hand fatigue and wrist strain during long cutting sessions
- Ambidextrous design works equally well for right- and left-handed users
- Some users report the blades aren’t sharp enough out of the box for heavy-duty cutting
- Lightweight construction may not hold up well to thick fabrics like denim or leather over time
- Blades dull quickly if used on paper or non-fabric materials, requiring dedicated fabric-only use
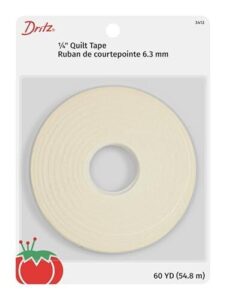
6. Dritz Quilters Tape Quarter Inch Guide
Quarter-inch seams form the backbone of precision piecing, and Dritz Quilter’s Tape acts as your visual roadmap. This adhesive fabric guide—60 yards of quarter-inch tape—sticks gently to your sewing machine bed or quilt top, creating a physical barrier that keeps fabric edges aligned during straight-line quilting and seam work.
Seam allowance accuracy improves dramatically when you follow this beginner quilting aid. After stitching, peel it away carefully; tape residue removal requires only mild soap if needed. Its fabric compatibility makes machine quilting less guesswork, more success.
Best For: Quilters and sewists who need consistent quarter-inch seam allowances and straight quilting lines, especially beginners learning precision piecing.
- Creates a physical guide on your machine bed that keeps fabric edges aligned for accurate seams throughout long piecing sessions
- Removes cleanly from most surfaces without leaving permanent marks on fabric, making it reusable across different project areas
- Works as a budget-friendly alternative to specialty presser feet or magnetic guides, with 60 yards providing plenty of material for multiple projects
- Adhesive strength can fade after a few applications, requiring frequent repositioning during extended sewing sessions
- Should not be sewn through, ironed over, or left on fabric longer than 24 hours to avoid residue buildup
- Some users report it’s not sticky enough for their needs or find the price point high compared to painter’s tape alternatives
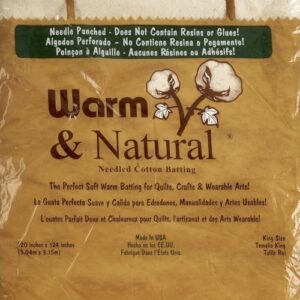
7. Warm Natural Cotton Quilt Batting King
A quilt sandwich needs reliable cotton batting, and Warm & Natural king size delivers. This 120″ × 124″ batting features 87.5% cotton with a needle-punched scrim that prevents separation during sewing machine work.
You can stitch lines up to 10 inches apart—perfect for straightforward quilting techniques on large projects. Expect about 3% shrinkage in cold water or 5% in warm, creating that charming puckered look.
Made from American cotton, it works with both hand and machine quilting without bearding. Material sourcing and quilting performance make this batting a solid foundation for king size application.
Best For: Quilters working on king size projects who want reliable American-grown cotton batting that handles well in both hand and machine quilting without constant pinning.
- Needle-punched scrim prevents fiber separation and bearding, so you won’t see cotton poking through your quilt top even after washing
- Allows quilting lines up to 10 inches apart, cutting down on stitching time for large king size quilts
- No pre-washing needed—quilt straight from the package and get intentional shrinkage for that vintage puckered texture
- Adds noticeable weight to finished quilts compared to polyester alternatives
- Higher price point than synthetic batting options
- Can pucker or slip during sewing if you don’t pin it properly before stitching
Preparing and Layering The Quilt Sandwich
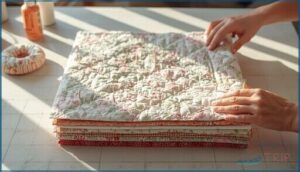
Preparing your quilt sandwich is where all your careful piecing comes together into something ready to quilt. This step involves choosing the right materials, layering them correctly, and securing everything so it won’t shift under your machine.
Let’s walk through each part of the process so you can build a stable, smooth foundation for your quilting.
Choosing Batting and Backing Fabrics
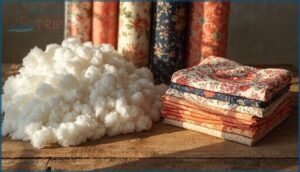
Your batting and backing fabric work like the foundation of a house—they support everything else. Cotton batting offers a soft, low-loft finish and generally shrinks 3% to 5%, creating that classic crinkled look, while polyester adds puffiness with minimal shrinkage.
Choose batting sizes that match your project—crib, twin, queen, or king—and select backing fabric with enough yardage to extend beyond your quilt top, ensuring smooth quilt layers in your sandwich.
Cutting and Arranging Quilt Layers
Start by cutting your backing fabric 6 to 8 inches larger than your quilt top—this backing allowance protects against shifting and shrinkage. Tape the backing wrong-side-up to your work surface, smoothing from the center outward.
Layer batting dimensions about 4 inches larger than the top, then place your quilt top right-side-up, centering carefully. Check grain alignment to keep everything square when layering quilt fabrics into your quilt sandwich.
Methods for Basting: Pins Vs. Spray Adhesive
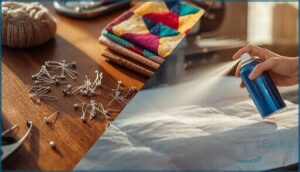
You’ll choose between pin basting and spray adhesive when you baste your layers—each has trade-offs. Safety pins cost about $10 per 100-pin pack but offer infinite reusability, while a $16 spray can covers 5–8 quilts with excellent layer stability.
Basting time favors spray (minutes versus an hour), but spray ventilation matters—open windows and consider a mask. Cost analysis? Pins win long-term; spray saves effort now.
Stabilizing and Securing Quilt Layers
Once you baste your layers, proper stabilization prevents those frustrating tucks and puckers. Pin basting every 3–4 inches secures your quilt sandwich far better than batting guidelines suggest—if your hand rests without touching a pin, add more.
Spray adhesive works quickly, but pair it with safety pins for extra insurance. Thread basting with 4–5 mm stitches offers another reliable option. Your walking foot will thank you later.
Mastering Basic Machine Quilting Techniques
Now that your quilt sandwich is ready, it’s time to bring your project to life with actual stitching.
Machine quilting doesn’t have to feel intimidating when you break it down into manageable techniques. In this section, you’ll learn the fundamental methods that form the foundation of all machine quilting, plus how to handle the bumps you might hit along the way.
Straight-Line Quilting Step-by-Step
Once your quilt sandwich is basted, straight-line quilting delivers beautiful results. Attach your walking foot, set stitch length to 2.5–3.0 mm, and begin at the center, following a seam for guidance.
Work outward in one direction, spacing lines evenly using marking methods like painter’s tape or your presser foot edge. Support the quilt gently, letting the machine advance the fabric smoothly for consistent quilting direction.
Stitch-in-the-Ditch for Seamless Designs
Stitch-in-the-ditch quilting places your needle directly in the seam line, making stitches practically invisible while adding seam stability. This machine quilting technique follows existing patchwork seams, so you won’t need extra marking.
Use your walking foot with a 2.5–4.0 mm stitch length for best results. Start at the quilt center and work outward, letting the seam naturally guide your straightline quilting for unified design integration.
Free Motion Quilting Basics for Beginners
Unlike stitch-in-the-ditch, freemotion quilting gives you creative freedom to draw with your needle. Lower your feed dogs and switch to a darning or free-motion foot for this sewing machine technique.
Start with simple meandering loops on practice sandwiches—most beginners spend around 6 hours weekly building these skills.
Your machine setup matters: pair 40–50 weight thread with an 80/12 needle on cotton fabric for balanced stitch visibility.
Troubleshooting Common Quilting Issues
Even experienced quilters face hiccups—your sewing machine will speak up when tension issues, skipped stitches, or thread breakage occur. Here’s what commonly goes wrong:
- Tension imbalances create loose loops or tight puckers along seams—adjust your dial by 0.5 increments and test on scrap sandwiches.
- Dull needles cause skipped stitches—swap yours every 8–10 quilting hours.
- Fabric puckering signals uneven feed—switch to a walking foot and support your quilt’s weight.
Regular machine maintenance prevents most frustrations.
Finishing Your Quilt With Professional Results
You’ve completed your quilting, and now it’s time to transform your work into a polished, finished piece.
These final steps make the difference between a practice project and a quilt you’ll treasure for years.
Let’s walk through trimming, binding, and those finishing touches that give your quilt a truly professional look.
Trimming and Squaring Up The Quilt
After all that stitching, your quilt edges need attention to look truly professional. Using trimming tools like a sharp rotary cutter and 16.5-inch square ruler, you’ll square up each corner to 90 degrees.
Ruler techniques help you avoid measurement errors—leave a 0.25-inch seam allowance beyond your design points.
These accuracy methods and quilt preparation techniques guarantee clean quilt edges before binding.
Attaching and Mitering Quilt Binding
With your quilt edges trimmed, binding your quilt edges brings everything together. Cut binding strips 2.5 inches wide—the most common binding strip width—and join them for continuous bias binding if needed.
A seam allowance guide of 0.25 to 0.375 inches helps attach binding to your quilt. Machine vs hand methods both work, but mitered corner tips create those crisp 45-degree folds that define professional quilt binding.
Adding Labels and Final Touches
Beyond binding strips, your quilt deserves a personal signature. Label materials like muslin with archival pens to preserve the maker’s name, date, and pattern details—place yours in a lower corner on the back for lasting provenance.
Hanging sleeves about 4 inches wide transform finished quilts into wall art, while decorative edges like narrow piping or beaded embellishments add that final creative spark to your quilt finishing methods.
Care Tips for Your Finished Quilt
Your handmade quilt will last decades with gentle care. Wash your finished quilt no more than once per season using mild detergent on a gentle cycle—overwashing weakens fabric and binding.
Air-dry flat away from direct sunlight to preserve color, never hang wet.
Store between 62°F and 72°F in breathable muslin, refolding every few months to prevent creasing and help your quilt edges stay strong.
Frequently Asked Questions (FAQs)
Can You quilt on a home sewing machine?
Yes, you can absolutely quilt on a home sewing machine. With the right foot attachments and techniques, your machine accommodates project sizes from lap quilts to queen-sized beauties, though time investment increases with scale.
How does quilting work on a sewing machine?
Machine quilting stitches three layers—top, batting, and backing—using techniques like straight-line or free-motion styles. Tension control and proper machine settings prevent puckering, ensuring smooth results as you guide fabric through the sewing machine.
How do you quilt a quilt for a beginner?
Start small and you’ll be sewing success in no time. Begin with pattern choice, fabric selection, and machine setup.
Layer your quilt sandwich, secure with basting methods, then practice quilting straight lines using basic quilting techniques for beginners.
How do you use a sewing machine for quilting?
To use your sewing machine for quilting, adjust tension and stitch length settings, and attach a walking foot for smooth fabric feeding.
Maintain a steady quilting speed while guiding layers through machine quilting techniques.
What is the best sewing machine setting for quilting?
For general quilting, set your stitch length to 5–0 mm and use a walking foot with balanced thread tension. Free-motion work requires lowering feed dogs and installing a darning foot instead.
Can you do quilting on a regular sewing machine?
Absolutely—you can quilt on a regular sewing machine. Most domestic models handle twin-sized quilts comfortably, and with the right walking foot and workspace setup, even queen-sized projects become achievable for dedicated quilters.
What stitch length should I use for machine quilting?
For most machine quilting with a walking foot, aim for 0–0 mm stitch length. This longer setting helps the sewing machine feed three layers smoothly while balancing durability vs. drape across varied batting thickness and fabric type.
Where to start when machine quilting?
Start with small projects like baby quilts to build confidence.
Set up an ergonomic workspace and prepare your machine setup with the right foot.
Then, practice on samples before tackling your full quilt.
How to avoid puckering in machine quilting?
Puckering in machine quilting is like a tiny wrinkle in fabric—often avoidable with proper tension adjustment, a walking foot, dense basting, fabric prep, and appropriate stitch length to keep seams smooth throughout every quilting pass.
What are essential quilting safety tips?
You’ll protect yourself best by keeping rotary cutter blades sharp and covered, replacing needles regularly, arranging your workspace at waist height, taking movement breaks every thirty minutes, and wearing closed-toe shoes.
Conclusion
Studies show that 68% of quilters abandon their first project before completion, but finishing that inaugural quilt builds confidence like nothing else.
You’ve now explored sewing machine tutorials for quilting that cover everything from choosing patterns to binding edges. Your machine is ready, your workspace is set, and you understand the techniques that transform fabric layers into heirlooms.
Start with straight lines, trust the process, and remember—your next quilt will always surpass your last.
- https://craftindustryalliance.org/the-size-of-the-quilting-market-quilting-trends-survey-results-2025/
- https://www.marketgrowthreports.com/market-reports/home-sewing-machines-market-112738
- https://growthmarketreports.com/report/quilting-machine-market
- https://marketintelo.com/report/quilting-machine-market
- https://videos.feedspot.com/quilting_youtube_channels/

