This site is supported by our readers. We may earn a commission, at no cost to you, if you purchase through links.
Start by checking if your needle’s installed correctly with the flat side facing back. Re-thread your machine completely, ensuring the upper thread sits properly in all tension discs.
Remove lint buildup from under the needle plate and around the bobbin case.
Verify your bobbin’s wound evenly and inserted correctly. Check that you’re using the right needle size for your fabric and thread weight.
Sometimes it’s simply a bent needle throwing everything off balance. These systematic checks solve most thread pickup problems without requiring professional repair.
Table Of Contents
- Key Takeaways
- Initial Troubleshooting Steps
- Needle Inspection and Installation
- Bobbin Area Inspection and Troubleshooting
- Fabric and Thread Compatibility Issues
- Advanced Troubleshooting and Maintenance
- Adjusting Needle Bar Height if Other Solutions Fail
- Checking Timing by Turning The Handwheel and Tugging The Needle Thread
- Rethreading Both Upper and Bobbin Threads According to The Machine’s Instructions
- Ensuring Thread is Correctly Seated in Tension Discs and Pulled Through All Channels
- Considering Professional Assistance for Complex Issues
- Frequently Asked Questions (FAQs)
- Conclusion
Key Takeaways
- Check your needle first – You’ll solve most thread pickup problems by ensuring your needle isn’t bent, dull, or installed backwards with the flat side facing back.
- Rethread everything completely – Don’t just adjust tension; remove all thread and start fresh, making sure you follow the proper path through tension discs and guides with the take-up lever raised.
- Clean out lint buildup – Remove your needle plate and bobbin case to clear accumulated debris that blocks proper thread flow and prevents the bobbin thread from catching.
- Match your materials correctly – You need the right combination of needle size, thread weight, and fabric thickness working together, or your machine can’t form proper stitches.
Initial Troubleshooting Steps
Before you check complex parts or call for repairs, start with basic steps that solve most thread pickup problems.
Turn off your machine and check the upper thread tension setting, then verify the thread path follows the correct route from spool to needle, using these steps as a guide for troubleshooting.
Turning Off The Machine
Before diving into sewing machine troubleshooting, power down your machine completely.
This simple restart procedure prevents power surges from causing memory loss in computerized models and allows components to cool properly.
Safety First steps include:
- Unplug the power cord from the wall outlet
- Wait 30 seconds for complete component cooling
- Check for any visible thread not catching issues before restarting
Checking Upper Thread Tension
Check your tension dial settings first – the standard setting is 4 for most sewing machine problems.
Look for thread path obstructions between the spool and needle that cause thread tension issues. Clean your tension discs gently with a soft brush to remove lint buildup.
Remember that incorrect threading impacts tension and can lead to several problems, including tension issues and threading problems.
Test your adjustments on a fabric scrap using a consistent threading method before continuing your project.
Verifying Proper Upper Thread Threading
Improper upper thread paths cause most pickup problems.
Follow your machine’s threading order exactly—from spool placement through each thread guide to the take-up lever.
The thread must sit properly in tension discs and pass through every designated thread guide.
Missing even one step in the thread path disrupts the entire system, preventing successful bobbin thread pickup.
The correct threading is crucial for the overall performance of the machine, and any mistake can lead to problems, including those related to successful pickup.
Re-threading The Machine if Necessary
Sometimes faulty threading creates a domino effect that blocks proper thread pickup. You’ll need to start fresh with complete rethreading when initial adjustments don’t work.
Follow your machine’s threading sequence exactly:
- Thread Path – Guide thread through every designated point from Thread Spool to needle
- Tension Discs – Verify that thread sits properly between metal plates when Take-up Lever is raised
- Thread Guide positions – Check each Guides Alignment point for proper thread placement
- Threading direction – Confirm correct front-to-back needle thread rethreading to prevent thread breaks
Dusting Lint From Under The Needle Plate and Bobbin Case
Lint buildup effects your sewing machine’s thread pickup like dust in a clock.
Remove the needle plate and bobbin case to access hidden lint using cleaning tool options like brushes or compressed air.
Clean both areas thoroughly, as accumulated debris blocks proper thread flow.
Regular sewing machine cleaning prevents future issues, this preventative measure beats expensive professional lint removal services, and ensures proper thread flow is maintained, which is crucial for the machine’s overall performance, including the need to avoid expensive repairs.
Needle Inspection and Installation
A damaged or incorrectly installed needle is often the main reason your sewing machine won’t pick up the bobbins thread.
You’ll need to check if your needle is bent, blunt, or inserted backwards before moving on to other troubleshooting steps.
Using The Correct Needle Size
Your needle size directly impacts thread pickup success. Brother machines require 130/705 needles sized 11-16, but matching needle size to fabric weight prevents most stitch quality issues.
Follow this needle size guide for ideal fabric compatibility:
- Size 11 (75) – Lightweight fabrics like silk, chiffon, or thin cotton
- Size 14 (90) – Medium-weight materials including denim, canvas, or quilting cotton
- Size 16 (100) – Heavy fabrics such as upholstery, leather, or multiple fabric layers
Ensuring The Needle is Not Bent or Damaged
A bent needle acts like a broken compass—it can’t find its target.
A clogged bobbin case is like a traffic jam—nothing moves smoothly until you clear the mess.
Check your needle’s straightness by rolling it across a flat surface. Any wobble means replacement time.
Blunt needles struggle to pierce fabric cleanly, causing thread pickup failures. Needle damage from hitting pins or thick seams creates feeding problems.
Replace damaged needles immediately for proper needle condition and reliable stitching performance. Proper matching prevents fabric and thread issues.
Installing The Needle With The Flat Side Facing Back
After confirming your needle isn’t bent or damaged, proper needle installation becomes your next priority.
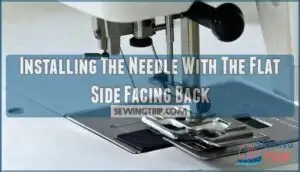
Push the needle as high as possible into the needle housing depth with the needle flat direction facing the machine’s back. This prevents twisting prevention issues and guarantees secure fastening.
Incorrect insertion symptoms include thread catching and poor stitch formation. Double-check the positioning before tightening the needle screw completely.
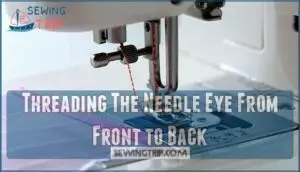
Threading The Needle Eye From Front to Back
Thread direction matters more than you’d think. The needle eye opening determines your threading success.
Here’s your step-by-step thread path:
- Insert thread from front to back through the needle eye
- Pull 4-6 inches of thread through the eye
- Check needle insertion is secure before threading
- Verify thread type matches needle eye size
Always thread with the take-up lever raised.
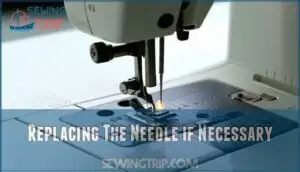
Replacing The Needle if Necessary
When your old needle’s acting up despite proper needle insertion, it’s time for needle replacement.
Damaged needle or blunt needle issues plague every sewist eventually.
Needle lifespan varies by fabric type and usage frequency.
Store specialty needles properly in designated needle storage containers.
Different needle brands offer varying durability.
Consider purchasing needle replacements to guarantee you always have a sharp needle on hand.
Always dispose of worn needles safely to prevent needle problems from recurring unexpectedly.
Bobbin Area Inspection and Troubleshooting
The bobbin area holds many clues when your sewing machine won’t pick up the bottom thread. Check this area first since problems here cause most thread pickup failures.
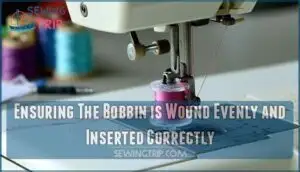
Ensuring The Bobbin is Wound Evenly and Inserted Correctly
Check your bobbin for Even Winding—lumpy thread creates tension problems that prevent proper thread pickup.
Match the correct Bobbin Type and Bobbin Size to your machine’s specifications. Wind thread smoothly without gaps or overlaps.
Insert following the Insertion Direction shown in your manual—backwards insertion causes sewing machine bobbin winding issues.
Proper Thread Tension starts with consistent bobbin thread preparation, ensuring a smooth sewing experience with proper thread pickup.
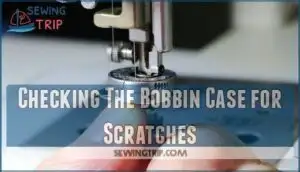
Checking The Bobbin Case for Scratches
Your bobbin case acts like a thread highway – and even tiny scratches can cause major bobbin case problems.
Small nicks create rough spots where your bobbin thread gets snagged, leading to thread looping and jamming issues that’ll drive you crazy.
- Scratch Impact: Minor scratches disrupt smooth thread flow
- Thread Snagging: Rough surfaces catch thread during operation
- Case Replacement: Damaged cases need immediate replacement
- Damage Prevention: Regular inspection prevents bobbin issues
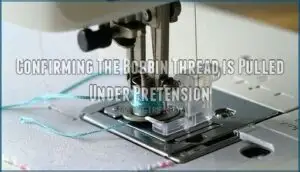
Confirming The Bobbin Thread is Pulled Under Pretension
After inspecting your bobbin case for damage, it’s time to verify proper thread positioning. Your bobbin thread must sit correctly under the pretension spring inside the bobbin case. This small metal piece controls thread flow during stitching.
| Check Point | Correct Position | Problem Signs | Quick Fix |
|---|---|---|---|
| Thread Path | Under spring tab | Loose loops on fabric | Re-thread under spring |
| Spring Tension | Snug but moveable | Thread breaks or bunches | Adjust tension knob slightly |
| Thread Tail | 4-6 inches long | Short tail causes jams | Pull more thread through |
| Bobbin Spring | Curved downward | Thread slips out easily | Check spring alignment |
Pull your bobbin thread gently – you should feel slight resistance. Too loose creates messy stitches underneath your fabric. Too tight causes thread breaks and fabric puckering.
Using The Correct Bobbin for The Machine
Compatibility matters when selecting your sewing machine’s bobbin. Different machines require specific bobbin types, and using the wrong one creates threading problems. Each bobbin has unique dimensions that affect how thread feeds through your machine.
- Bobbin material: Plastic bobbins work for most home machines, while metal ones suit industrial models
- Bobbin size: Class 15 and Class L bobbins have different diameters and heights
- Bobbin brands: Stick with your machine manufacturer’s recommended bobbin compatibility
- Bobbin winding: Even thread distribution prevents bobbin case installation issues
Different bobbins are made using various material options.
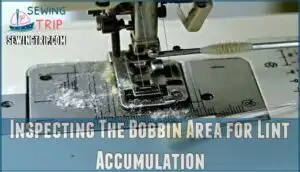
Inspecting The Bobbin Area for Lint Accumulation
Lint buildup acts like a roadblock for your bobbin thread. You’ll find this fluffy culprit hiding around the bobbin case, under the needle plate, and in tiny crevices.
Lint hides everywhere—bobbin case, needle plate, tiny crevices—blocking your thread like a sneaky roadblock.
Remove the bobbin and bobbin case, then use a lint brush or compressed air to clear debris. This simple sewing machine maintenance prevents thread jamming.
| Lint Removal Tools | Cleaning Frequency | Warning Signs |
|---|---|---|
| Lint brush | After every project | Thread keeps breaking |
| Compressed air | Weekly for heavy use | Bobbin thread won’t catch |
| Soft cloth | Monthly deep clean | Strange clicking sounds |
Regular Cleaning Schedule and Professional Cleaning Benefits keep your machine running smoothly.
Lint Prevention Tips include using quality thread and avoiding over-oiling. Proper Bobbin Case Cleaning guarantees consistent stitch formation.
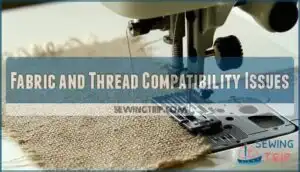
Fabric and Thread Compatibility Issues
Your fabric, thread, and needle must work together as a team for proper thread pickup.
When these materials don’t match correctly, your machine can’t form stitches and will skip the bobbin thread entirely.
Checking for Correct Combination of Fabric, Thread, and Needle
Your sewing machine fabric compatibility depends on matching three key components correctly.
Thread compatibility with your needle size affects stitch quality substantially. Material thickness determines which needle type you need for proper tension balance.
Check these needle-fabric pairing basics:
- Lightweight fabrics need size 9-11 needles with fine thread
- Medium fabrics work best with size 12-14 needles
- Heavy materials require size 16-18 needles with thick thread
- Stretch fabrics need ballpoint needles for clean penetration
Inspecting The Needle Plate Hole for Scratches
Even tiny scratches on your needle plate hole can wreak havoc on thread pickup and stitch quality.
Run your finger around the hole’s edge to feel for rough spots or burrs that snag bobbin thread.
These microscopic imperfections cause skipped stitches and poor performance during sewing machine troubleshooting.
Smooth scratches with fine sandpaper or consider replacement options for severely damaged plates, which can lead to poor performance.
Examining The Presser Foot for Scratches
Your presser foot works like a traffic cop, guiding fabric smoothly under the needle. Check for scratches that can snag fabric and disrupt thread pickup. Run your finger along the bottom surface to feel for rough spots.
- Scratched presser feet create uneven fabric feeding
- Damaged surfaces cause skipped stitches and tension problems
- Rough spots snag delicate fabrics during sewing
- Poor stitch quality results from presser foot damage
- Replacement feet restore smooth bobbin thread pickup, which is crucial for smooth fabric feeding and preventing tension problems.
Ensuring Compatibility Between Materials and Machine Settings
Material compatibility forms the foundation of successful sewing. Your fabric, thread, and needle must work together like a well-oiled team.
Heavy denim requires a size 16 needle and polyester thread, while delicate silk needs a size 9 needle with silk thread.
Machine settings should match your materials—adjust tension for different thread weights and select appropriate stitch length for fabric thickness.
Regular checks prevent thread tension problems ensuring balanced sewing.
Adjusting Presser Foot Pressure Based on Fabric Thickness
Why does your machine struggle with different fabrics?
Your presser foot pressure controls how tightly fabric gets compressed during sewing.
Light fabrics need less pressure for smooth feeding, while thick materials require more compression for proper stitch formation.
Incorrect pressure causes fabric feed issues and tension problems.
Adjust your sewing machine’s pressure dial to match fabric thickness for better stitch quality and tension balance.
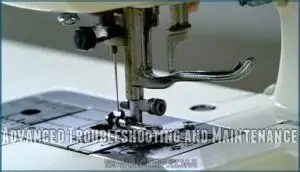
Advanced Troubleshooting and Maintenance
When basic fixes don’t solve your thread pickup problems, you’ll need to check more complex machine settings like needle bar height and timing alignment.
These advanced troubleshooting steps require careful attention to detail and may need professional service if the internal mechanisms are damaged or misaligned.
Adjusting Needle Bar Height if Other Solutions Fail
Your sewing machine’s needle bar height might need professional adjustment when basic fixes fail. This technical repair requires precise measurements and specialized tools.
The needle bar's position is critical for proper function.
Needle bar symptoms indicating adjustment needed:
- Persistent stitch skipping despite proper threading
- Timing correlation issues between needle and shuttle hook
- Heights impact on thread pickup mechanics
- Vibration at machine’s front during operation
- Loop formation problems affecting stitch quality
Seeking expertise prevents costly damage to your sewing machine repair project.
Checking Timing by Turning The Handwheel and Tugging The Needle Thread
When your sewing machine timing is off, turn the handwheel counterclockwise while gently tugging the needle thread.
You should see a bobbin thread loop appear through the needle plate if timing is correct. No loop means timing issues exist.
This handwheel timing check reveals whether your needle and bobbin hook meet properly, requiring professional timing adjustment. You might need to adjust the shuttle hook alignment if this occurs, which can help resolve sewing machine problems.
Rethreading Both Upper and Bobbin Threads According to The Machine’s Instructions
When timing issues persist, completely rethread your machine from scratch.
Start with Upper Threading by raising the take-up lever and following your machine manual’s path through all Thread Channels.
Remove the bobbin and rewind it properly for Bobbin Threading. This fresh start often resolves stubborn pickup problems that partial fixes can’t address, making it a good solution for complete concepts.
Ensuring Thread is Correctly Seated in Tension Discs and Pulled Through All Channels
After rethreading, check that your upper thread sits properly between the tension discs.
Raise the presser foot first – this opens the tension discs so thread can "snap" into place.
Follow the complete thread path through all thread guides, including the small hook above your needle.
Poor Tension Disc Alignment or Thread Path Obstructions prevent proper bobbin thread pickup.
Considering Professional Assistance for Complex Issues
Sometimes your sewing machine needs expert hands to fix deeper issues. When DIY solutions fail, it’s time to seek professional assistance from qualified technicians who can handle complex repairs.
Here are four signs you need professional help:
- Needle Bar Height adjustments – requires specialized tools and knowledge
- Timing Adjustments – complex synchronization between needle and bobbin mechanisms
- Component Misalignment – internal parts shifted from proper positions
- Professional Deep Cleaning – thorough maintenance beyond basic home care
For replacement parts, consider a brother service center for your needs. Contact a Brother Authorized Service Center or local sewing machine repair shop for expert diagnosis and repair.
Frequently Asked Questions (FAQs)
Why is my sewing machine not picking up bobbin thread?
Check your needle first—it’s likely bent, dull, or installed wrong. Rethread everything, clean lint from the bobbin area, and verify your bobbin’s inserted correctly with proper tension.
What should I do if my machine is not picking up bobbin thread?
Your machine’s acting like it’s forgotten how to sew!
First, rethread everything completely.
Check your needle isn’t bent, make certain the bobbin’s inserted correctly, and clean out any lint hiding underneath.
How do you re-thread a sewing machine?
Turn off your machine first.
Raise the take-up lever, then thread from spool through all guides and tension discs.
Thread the needle front to back.
Wind and insert your bobbin correctly underneath.
Why is my sewing machine not threading properly?
Like a stubborn door that won’t open, threading problems stem from simple oversights.
You’re likely missing the take-up lever position, skipping tension discs, or threading with the presser foot down.
Raise everything first.
How to troubleshoot a sewing machine bobbin?
First, remove the bobbin and check if it’s wound evenly.
Reinsert it properly with thread under tension.
Clean lint from the case, verify the correct bobbin type, and verify the case sits flush.
Do you need a bobbin thread for a sewing machine?
Absolutely, you’ll need bobbin thread like knights needed armor in battle.
Your sewing machine creates stitches by interlocking upper thread with bobbin thread underneath.
Without both threads working together, you can’t sew anything properly.
How do I get my sewing machine to pick up the bottom thread?
Raise your take-up lever to its highest position, then lower your needle into the fabric.
Gently pull the upper thread while turning the handwheel toward you to catch the bobbin thread underneath.
Why is my Brother sewing machine not picking up the bottom thread?
Nearly 40% of sewing machine problems stem from threading issues.
Your Brother machine likely has incorrect needle installation, improper bobbin insertion, or lint buildup.
Check needle’s flat side faces back, bobbin sits correctly, and clean thoroughly.
Why is my sewing machine not catching stitches underneath?
Your machine isn’t catching stitches because the needle’s bent, threaded wrong, or the bobbin’s inserted backwards.
Check your needle first, then rethread everything.
Clean out lint around the bobbins area too.
Why is the bobbin thread not catching on thick fabric?
Thick fabric creates resistance, thick seams block needle movement, thick layers prevent proper penetration.
You’ll need a heavy-duty needle, slower hand-turning through dense areas, and possibly a walking foot for consistent thread pickup.
Conclusion
Like a detective solving a case, you’ve now got the tools to crack the mystery when your sewing machine won’t pick up thread.
These seven fixes address the most common culprits behind this frustrating problem.
Start with the basics – proper threading and needle installation – then work through bobbin issues and fabric compatibility.
Most problems stem from simple oversights rather than mechanical failures, and with systematic troubleshooting, you’ll have your machine running smoothly again without expensive repairs.
- https://www.brother-usa.com/contact-us
- https://www.singer.com/frequently-asked-questions
- https://www.thesprucecrafts.com/bobbin-tension-2977981
- https://madamsew.com/blogs/sewing-blog/how-to-deal-with-thread-tension?srsltid=AfmBOooP5ElUycD-hQf7fbUPr-KFMpzTtECW7x_ujebJQYWuWk5NiDiN
- https://leatherworker.net/forum/topic/85632-is-tension-discs-wear-an-issue/



SusieBi
January 27, 2026 at 07:14 PM
Just to say a BIG thank you for the advice above. My sewing machine has been playing up ever since I had to change the needle. Following your steps and checks, touch wood, she seems to be working properly again. Yay!