This site is supported by our readers. We may earn a commission, at no cost to you, if you purchase through links.
You’ll need a walking foot, ballpoint needle, and proper thread tension to tame this rubbery material that’s famous for fighting back against standard sewing methods.
Start with 2-3mm thick neoprene for easier handling – thicker versions can overwhelm your machine faster than you can say "wetsuit disaster."
Use clips instead of pins to avoid permanent holes, and don’t pre-wash since neoprene doesn’t shrink like traditional fabrics.
The secret lies in understanding how this synthetic rubber behaves under your needle, which separates successful projects from expensive fabric scraps.
Table Of Contents
- Key Takeaways
- Understanding Neoprene Fabric
- Preparing Neoprene Fabric
- Sewing Techniques for Neoprene
- Sewing Tips for Neoprene
- Embroidering on Neoprene
- Creating Neoprene Clothing Pieces
- Advantages of Sewing With Neoprene Fabric
- Tips to Make Your Neoprene Sewing Smooth
- Frequently Asked Questions (FAQs)
- Conclusion
Key Takeaways
- You’ll need specialized equipment including a walking foot, ballpoint needles (size 14-18), and clips instead of pins to handle neoprene’s thick, stretchy properties without damaging the fabric.
- Use longer stitch lengths (3-4mm) with reduced thread tension and choose zigzag or stretch stitches to accommodate neoprene’s 600% stretch capacity and prevent seam breakage.
- Skip traditional fabric preparation steps like pre-washing since neoprene doesn’t shrink, and remember it’s completely reversible with no right or wrong side for design flexibility.
- Master flatlock seams and butted edge techniques for waterproof construction, and consider using neoprene cement to glue seam allowances before stitching for professional results.
Understanding Neoprene Fabric
Neoprene’s synthetic rubber foundation makes it a powerhouse for sewing projects, but understanding its unique fabric properties is essential before you start.
This material selection combines chloroprene with nylon or polyester, creating a closed-cell structure that traps air for insulation and buoyancy. You’ll find various neoprene types ranging from 1.5mm to 7mm thickness, each requiring different approaches.
Neoprene’s closed-cell structure transforms simple materials into performance powerhouses for your next sewing adventure.
The material stretches up to 600% without losing shape, making it perfect for form-fitting garments. Its water-resistant nature and temperature stability mean your neoprene fabric care routine differs from traditional textiles.
When working with neoprene sheet fabric, remember it’s reversible with no distinct right side, giving you design flexibility while maintaining durability across applications. To enhance fabric properties, consider popular fabric blends for different applications.
Preparing Neoprene Fabric
Before you start sewing, you’ll need to properly prepare your neoprene fabric to guarantee smooth stitching and professional results.
This preparation involves washing the material, cutting accurate patterns, and removing any stubborn creases that could interfere with your project, ensuring complete concepts are addressed for a successful outcome, with a focus on professional results.
Washing and Drying Neoprene Fabric
Before you begin sewing, proper neoprene fabric care sets the foundation for success.
Hand-wash your material in cool water with mild detergent to remove manufacturing residues and debris.
Here’s your wash and dry routine:
- Water temperature: Use cold water exclusively to prevent material degradation
- Detergent choice: Select gentle, fabric-softener-free formulas for odor control
- Drying methods: Air dry completely to maintain elasticity and prevent shrinkage
Skip fabric softeners entirely—they’ll compromise neoprene’s performance.
For stain removal, address spots immediately with gentle scrubbing before full washing.
Cutting Patterns for Neoprene
When precision meets performance, your neoprene cutting techniques determine your project’s success.
Sharp rotary cutters slice through thick neoprene more effectively than scissors, preventing jagged edges that compromise seam integrity.
Position your commercial patterns directly onto the fabric without adding seam allowances—neoprene’s stretch properties eliminate this traditional requirement.
Use chalk or water-soluble markers for accurate pattern making, ensuring clean lines that won’t damage the material.
Secure fabric layers with clips rather than pins to avoid permanent holes.
Smart fabric layout maximizes your material while accommodating neoprene’s unique stretch characteristics for professional results.
Understanding fabric grain lines is essential for maintaining the structural integrity of the final product, and using the right tools, like sharp rotary cutters, ensures a clean cut.
Dealing With Neoprene Creases
Stubborn creases can turn your neoprene project into a wrinkled mess, but fabric relaxing doesn’t have to be stressful.
Steam those fold lines gently or use low-heat ironing tips with a pressing cloth for effective crease removal.
Test your iron temperature on scraps first – nobody wants melted neoprene!
This edge smoothing step guarantees your seam finishing looks professional when sewing stretchy fabrics.
Sewing Techniques for Neoprene
Sewing neoprene requires specific techniques that differ from traditional fabric handling due to its thick, stretchy nature.
You’ll need to adjust your machine settings, choose appropriate needles, and master specialized seam methods to achieve professional results with this challenging but rewarding material.
Choosing The Right Pattern
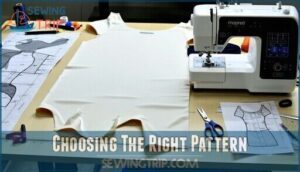
Pattern selection makes or breaks your neoprene project. You’ll want designs with minimal seaming since thick fabric creates bulk at intersections. Choose patterns with stretch allowances and avoid intricate details that fight neoprene’s natural properties.
Looking at the content about neoprene sewing and pattern selection, here’s an engaging blockquote that captures the essence:
**Smart pattern choices prevent neoprene nightmares—simplicity wins over complexity every time.
Understanding neoprene sewing is vital for successful projects.
- Wetsuit sewing patterns work perfectly for neoprene garments due to their stretch considerations
- Simple silhouettes prevent fabric bunching and reduce sewing difficulty levels substantially
- Knit patterns accommodate neoprene’s stretch better than woven fabric designs
- Seam placement should avoid high-stress areas where flexibility matters most
Seam Techniques
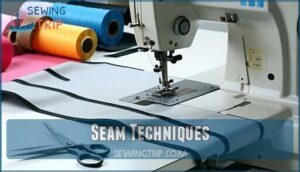
When sewing neoprene, flatlock seams work perfectly for stretchy fabrics, creating comfortable, flat joints.
Overlock stitches provide excellent seam reinforcement while preventing fraying.
For waterproof seams, try butted edges with zigzag stitches—no seam allowances needed.
Adjust your stitch length to 3-4mm for ideal penetration.
These seam techniques guarantee your neoprene projects maintain flexibility while delivering professional edge finishing results.
Needle Selection
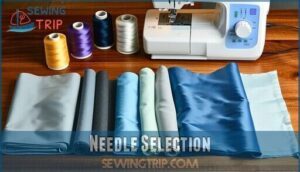
Your needle choice can make or break your neoprene project. The wrong needle creates frustrating skipped stitches and fabric damage, while the right one glides through like butter.
Needle Types for different neoprene thicknesses:
- Ballpoint needle (size 14-16) – Perfect for lycra-laminated neoprene surfaces, preventing snags and runs
- Denim needle (size 16-18) – Heavy-duty point penetrates thick neoprene layers without bending or breaking
- Leather needle (size 18-20) – Essential for neoprene exceeding 3mm thickness, features sharp triangular point
- Universal needle (size 14-16) – Works for thinner neoprene when other needle types aren’t available
Match your needle selection to fabric thickness – thin neoprene accepts smaller needles, while thick materials demand larger, sharper points for clean penetration. For ideal results, understanding neoprene needle characteristics is vital when working with varying neoprene thicknesses.
Stitching Methods
Once you’ve selected the right needles, your stitching approach becomes critical for professional results.
Experiment with zigzag and three-step zigzag stitches to determine ideal fabric feed. Adjust stitch length to 3-4mm and reduce thread tension slightly.
For maximum seam strength, consider gluing seam allowances before stitching—this prevents shifting and creates waterproof bonds.
| Stitch Type | Best For | Settings |
|---|---|---|
| Wide Zigzag | Stretchy seams | Length: 3-4mm, Width: 4-5mm |
| Three-Step Zigzag | Heavy neoprene | Length: 2-3mm, Medium tension |
| Straight Stitch | Butted seams | Length: 3.5mm, Reduced tension |
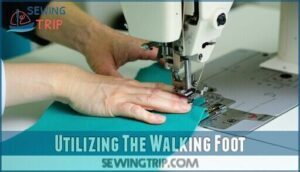
Utilizing The Walking Foot
Your walking foot becomes your best friend when sewing neoprene fabric.
This attachment prevents fabric feed issues by gripping both layers evenly as they pass through your sewing machine.
Adjust foot pressure to accommodate neoprene’s thickness while maintaining proper stitch control.
The walking foot eliminates shifting and puckering, giving you consistent tension settings throughout your project.
Remember to reduce your sewing speed for desirable results, and maintain proper settings for a successful outcome with consistent tension.
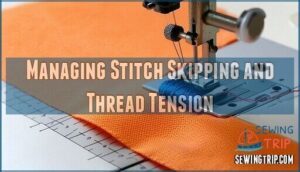
Managing Stitch Skipping and Thread Tension
Perfect stitch length and thread tension prevent neoprene nightmares.
Set your sewing machine to longer stitches (3.0-3.5mm) and reduce tension slightly.
Quality polyester or bonded nylon thread handles thick layers better than cheap alternatives.
If stitches skip, check your needle size—16/100 needles work for most neoprene thicknesses.
Walking feet guarantee consistent fabric feed through challenging spots, ensuring a smooth sewing experience with consistent fabric feed.
Hiding Stitches
Achieving professional stitch concealment transforms your neoprene projects from amateur attempts into polished masterpieces. The secret lies in strategic thread matching and precise seam techniques that make your work virtually invisible.
Master these essential stitch concealment methods:
- Thread Matching Excellence – Select bonded nylon or polyester thread that perfectly matches your neoprene’s color, ensuring stitches blend seamlessly into the fabric’s surface.
- Seam Finishing Precision – Position stitches close to seam edges, allowing the thread to sink naturally into neoprene’s thickness for maximum invisibility.
- Fabric Binding Integration – Use Lycra or fold-over elastic around raw edges to completely hide stitch lines while preventing chafing.
- Edge Trimming Strategy – Trim excess seam allowances after stitching to reduce bulk and create cleaner, more concealed seam profiles.
These neoprene sewing tips eliminate interior messiness while maintaining professional-grade durability. For ideal results, understanding seam sealing techniques is vital to achieve a professional finish.
Addressing Interior Messiness
Beyond the visible perfection of your neoprene project lies interior messiness that needs attention.
Proper seam finishing and edge binding transform chaotic fabric edges into professional results through strategic fabric stabilization techniques.
| Problem | Solution |
|---|---|
| Frayed interior edges | Apply edge binding or fold seams |
| Loose thread ends | Trim close and seal with fabric glue |
| Uneven seam allowances | Use consistent measurements and clips |
| Bulky interior seams | Grade seam layers to reduce thickness |
| Raw neoprene edges | Finish with overlock or zigzag stitching |
Managing tension and using proper stitching methods prevents interior cleaning headaches while hiding stitches creates mess reduction throughout your project’s construction.
Sewing Tips for Neoprene
Now you’ll master the finer points of working with neoprene that can make or break your project’s success.
These practical tips address common challenges you’ll encounter, from securing fabric without damaging it to achieving professional-looking results.
Using Sewing Clips
Neoprene’s thickness can cause pins to leave permanent holes, making sewing clips your best friend for fabric security during any project.
These versatile sewing aids grip thick materials without damage, ensuring clean seams and professional results when sewing neoprene fabric.
- Clip Management: Use wonder clips or binder clips to secure layers before feeding them through your walking foot – they won’t slip like pins do
- Fabric Handling: Position clips perpendicular to seam lines for easy removal while stitching, preventing fabric bunching that disrupts your machine’s rhythm
- Clip Types: Choose spring-loaded clips for lightweight neoprene sheets and heavy-duty binder clips for thicker materials requiring extra grip strength
Smart clip placement transforms your neoprene sewing techniques from frustrating to flawless. Unlike pins that create holes you can’t undo, clips hold everything exactly where you need it without compromising the material’s integrity.
They’re especially important when working with stretchy neoprene that wants to shift under your presser foot. Keep several sizes handy – you’ll wonder how you ever managed without them for any challenging fabric project.
Reversible Quality and Right Side Absence
Flexibility defines neoprene’s most liberating characteristic—its complete lack of a designated right or wrong side.
You’ll discover this fabric reversibility opens creative doors that traditional materials can’t match.
Both neoprene sides offer identical appearance and performance, eliminating the guesswork that plagues other sewing projects.
This unique property transforms your approach to seamless construction.
You can flip seams to either side without compromising the garment’s appearance, making edge finishing decisions purely aesthetic rather than structural.
When sewing neoprene fabric, you’re free to experiment with exposed seams as design elements rather than hiding them from view.
The fabric’s flexibility extends beyond physical stretch to design versatility.
Neoprene sewing techniques benefit enormously from this reversible quality—you can create garments with intentionally exposed construction details or switch between subtle and bold seam presentations.
This freedom particularly shines when working with stretchy fabrics that demand creative solutions.
Understanding neoprene fabric properties means embracing this design advantage.
Your reversible sewing projects can feature contrasting thread colors or decorative stitching that enhances rather than detracts from the finished piece.
Water Resistance and Washing
In regards to preserving your neoprene projects, understanding waterproof coatings and proper neoprene cleaning methods will save you countless headaches down the road.
Neoprene’s closed-cell structure provides excellent chemical resistance, but it’s not indestructible—think of it as your project’s protective armor that needs proper maintenance.
Here are three essential care practices:
- Hand wash with cool water and mild detergent to preserve the fabric’s integrity and waterproof properties
- Air dry completely before storage to prevent mildew and maintain fabric sealing effectiveness
- Rinse thoroughly after saltwater or chlorine exposure to prevent material breakdown
Your washing and drying routine directly impacts longevity. Machine washing can damage seams and reduce water resistance, so stick to gentle hand washing.
For repairs, use neoprene fabric glue and liquid seam sealer to maintain waterproofing. These waterproof sewing techniques combined with proper drying methods guarantee your creations stay functional and beautiful.
Remember, seam sealing products work best on completely dry fabric, so patience pays off in the long run. To further protect your neoprene gear, learn about neoprene care to extend its lifespan.
Ironing Neoprene
When ironing neoprene fabric, think "low and slow" for best results.
Set your iron to the lowest heat setting and always use a pressing cloth to protect the synthetic rubber from direct contact.
Work quickly with gentle pressure—neoprene’s heat resistance has limits, and excessive heat can damage its structure.
For stubborn wrinkles, try fabric smoothing techniques like steaming from a distance rather than aggressive pressing, using a method that is "gentle" on the fabric.
Embroidering on Neoprene
You’ll need to stabilize neoprene differently than regular fabrics since it’s too thick and bouncy for standard embroidery hoops.
The key is using adhesive stabilizers or magnetic hoops that can handle neoprene’s unique texture without crushing or distorting the material, which is crucial for maintaining the integrity of the neoprene.
Stabilizing Fabric and Avoiding Hooping
Success in embroidery requires mastering fabric tension without traditional hooping challenges.
You’ll need hoop alternatives like adhesive stabilizers or magnetic frames to prevent neoprene distortion.
Consider stabilizer options such as tear-away backing for edge control and seam stability.
These techniques guarantee your sewing neoprene sheets maintains flexibility while achieving professional results on varying thickness considerations.
The use of proper adhesive stabilizers is vital for preventing fabric distortion and achieving desired embroidery results.
Considerations for Embroidering on Different Neoprene Thicknesses
Neoprene thickness dictates your embroidery success.
For 2mm neoprene or thicker, you’ll need sharp needles and multiple stabilizer layers.
Domestic machines struggle beyond 2mm thickness, while dense designs sink into thick material.
Choose simple, bold patterns for thick neoprene and lower your machine speed.
Thread selection becomes critical—use stronger threads to prevent breakage on dense rubber surfaces.
Challenges of Embroidering Ready-Made Neoprene Items
When tackling ready-made neoprene items, you’ll face unique embroidery hurdles that test your skills.
These synthetic rubber materials don’t play by traditional rules.
- Hooping Issues create uneven tension that ruins delicate designs
- Needle Breakage occurs frequently due to dense material resistance
- Fabric Distortion warps your carefully planned patterns beyond recognition
- Neoprene Stabilization becomes nearly impossible on finished products
- Embroidery Threads snag and break from the material’s grippy texture
Creating Neoprene Clothing Pieces
You’ll discover that neoprene’s unique properties make it perfect for creating structured, fashion-forward clothing that maintains its shape while offering comfortable stretch.
From palazzo pants to fitted tops, this versatile fabric transforms basic patterns into professional-looking garments that work for both casual wear and special occasions, making neoprene ideal for creating fashion-forward clothing.
Crafting Wide-Leg Palazzo Pants
Wide-leg palazzo pants showcase neoprene’s versatility in creating flowing, comfortable garments.
Your fabric choice determines drape—thinner neoprene creates better movement while thicker versions provide structure.
Focus on pant fitting at the waist since neoprene doesn’t require traditional hemming.
When sewing neoprene, use palazzo patterns designed for stretchy fabrics and employ proper sewing techniques for neoprene.
Your neoprene sewing machine should handle the thickness while maintaining even stitches for professional wideleg pants that move beautifully with your body, providing a great example of professional results.
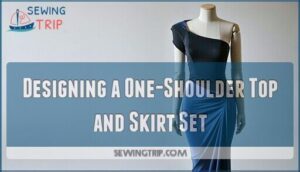
Designing a One-Shoulder Top and Skirt Set
When creating your one-shoulder top and skirt set, you’ll master the art of asymmetric elegance that showcases neoprene fabric’s unique draping qualities.
Choose neoprene patterns with strategic seam placement to complement the one shoulder design, while top stitching reinforces stress points where the fabric stretches.
Your fabric choice determines the final silhouette—thicker neoprene creates structured lines, while thinner material allows graceful movement in your skirt design.
Exploring Draped Pattern Details
After mastering your one-shoulder ensemble, you’ll want to elevate your design through strategic draped details that showcase neoprene’s unique properties.
Pattern Making becomes an art form when working with draped silhouettes, requiring careful attention to how fabric drape interacts with neoprene’s stretch characteristics.
Transform your garments with these sophisticated draping techniques:
- Asymmetrical cascades – Create flowing panels that utilize neoprene’s weight for natural movement
- Strategic gathering – Use texture mapping to plan where fullness enhances the silhouette
- Curved seam placement – Master sewing curves that follow the body’s natural lines
- Layered elements – Combine neoprene fabric scraps for dimensional texture effects
When sewing stretchy fabrics like neoprene, draped details require precise execution to maintain structure while allowing movement.
Mix and Match Styling With Neoprene Attire
Beyond traditional fashion boundaries, neoprene sewing opens doors to versatile styling combinations that’ll transform your handmade pieces into statement looks.
You’ll discover that neoprene fabric pairs surprisingly well with various textures and colors, creating dynamic outfits that work for multiple occasions.
Here are five key styling tips for your neoprene creations:
- Texture Mixing – Combine your sleek neoprene pieces with contrasting fabrics like chunky knits or flowing chiffon to create visual interest and depth in your outfit.
- Color Blocking – Use bold, contrasting colors in your neoprene garments to make striking combinations that follow current fashion trends while showcasing your sewing skills.
- Strategic Layering – Add lightweight jackets or cardigans over neoprene tops, allowing you to shift seamlessly from casual to semi-formal settings.
- Smart Accessorizing – Incorporate neoprene accessories like belts or bag accents that complement your main garments while maintaining the modern aesthetic.
- Pattern Play – Mix structured neoprene pieces with patterned fabrics to balance the material’s sporty nature with more traditional fashion elements.
Advantages of Sewing With Neoprene Fabric
You’ll discover that sewing with neoprene fabric offers unique advantages that make it worth mastering these specialized techniques.
This versatile material creates comfortable, supportive garments that stretch with your body while maintaining their shape, making them perfect for activewear, swimwear, and structured fashion pieces.
Comfort, Support, and Versatility of Neoprene Pieces
Neoprene fabric offers unmatched comfort and support through its unique stretch properties and shape retention.
You’ll experience lightweight compression that moves with your body, while neoprene insulation keeps you comfortable in varying temperatures.
The versatility of neoprene pieces shines through flexible designs that adapt from activewear to fashion statements, making your handmade creations truly multifunctional wardrobe essentials.
Understanding the basics of neoprene sewing techniques is essential for achieving professional-looking results with this material, and it’s key to creating multifunctional wardrobe pieces.
Benefits of Handmade Neoprene Clothing
Why settle for store-bought when handmade neoprene clothing offers superior Custom Fit and Handmade Quality?
You’ll experience enhanced Neoprene Comfort through personalized sizing that hugs your body perfectly.
The Fabric Durability of neoprene fabric guarantees your creations last years while remaining Eco Friendly.
Handmade benefits include choosing colors, adding embellishments, and achieving comfort and support that mass-produced garments can’t match.
Building a Vacation Wardrobe With Neoprene Creations
Since you’re crafting vacation styles, neoprene fabric becomes your secret weapon for versatile travel gear.
Create neoprene swimwear that doubles as tops, design beach covers for quick switches, and sew water sports essentials using neoprene sewing machines.
Your sewing neoprene projects can include everything from protective cases to stylish cover-ups, making neoprene craft projects perfect for building a complete vacation wardrobe.
Tips to Make Your Neoprene Sewing Smooth
Working with neoprene can feel tricky at first, but the right techniques make all the difference between a frustrating experience and professional results.
These essential tips will help you navigate common challenges like choosing stitches, adding hardware, and adapting patterns for this unique material, which can lead to a more successful project.
What Stitch to Use?
Selecting the right stitch type transforms your neoprene projects from amateur attempts to professional results.
Your sewing machine’s stitch library offers powerful options when you understand neoprene’s stretchy nature.
Here are the top 5 stitch types for neoprene success:
- Zigzag Stitch – Accommodates stretch without breaking seams
- Stretch Stitch – Built-in flexibility prevents thread snapping
- Overlock Stitch – Creates durable, professional-looking edges
- Straight Stitch – Perfect for reinforcing non-stretch areas
- Blind Hem – Invisible finishing for clean, polished looks
Match your stitch length to neoprene thickness—longer stitches prevent heat buildup that melts thread.
Choose appropriate needle size and thread choice for seamless results.
Understanding neoprene sewing techniques is essential for achieving professional-looking results with these stitches.
Adding a Zipper
When adding zippers to neoprene projects, you’ll gain both function and style.
Choose waterproof zippers with sturdy teeth that won’t corrode from moisture exposure.
| Zipper Types | Best For | Key Feature |
|---|---|---|
| Waterproof Plastic | Wetsuits, bags | Complete moisture seal |
| Heavy-duty Metal | Jackets, gear | Maximum durability |
| Coil Nylon | Flexible items | Smooth operation |
Proper zipper alignment prevents puckering, while careful zipper sizing guarantees your seams won’t stress under neoprene’s natural stretch.
Leaving The Edges
Unlike many fabrics that fray when cut, neoprene’s synthetic rubber construction means you can confidently leave raw edges unfinished.
However, proper edge finishing techniques still matter for professional results.
Consider folded edges with topstitching for clean lines, or apply seam binding to rough areas that might chafe skin.
Edge sealing products enhance seam strength and prevent water infiltration in marine applications.
Working With a Commercial Pattern
Commercial patterns reveal endless possibilities when sewing neoprene fabric.
Choose patterns with minimal seam allowance since neoprene doesn’t fray. Follow the grain line carefully during fabric prep to maintain stretch properties.
Adjust your sewing machine’s stitch length for thicker neoprene.
Pattern selection becomes your creative foundation—modify designs to showcase neoprene’s unique characteristics while ensuring proper fit and function, which is crucial for the overall proper fit and to maintain the stretch properties.
Frequently Asked Questions (FAQs)
Can you sew neoprene fabric?
Don’t let this stretchy material intimidate you—it’s more forgiving than you’d think.
You can absolutely sew neoprene, but you’ll need heavy-duty needles, longer stitches, and clips instead of pins for success.
What is the best stitch for neoprene?
Zigzag stitches work best for neoprene because they stretch with the fabric and prevent seam failure.
You’ll want a longer stitch length (0-5mm) to reduce friction and avoid overheating your needle during sewing.
Can a normal sewing machine sew neoprene?
Like threading a needle through thick leather, your regular sewing machine can handle neoprene with the right setup.
You’ll need a heavy-duty needle, walking foot, and proper thread to tackle this stretchy material successfully, using the right tools is crucial for handling neoprene.
What are the disadvantages of neoprene fabric?
Neoprene’s thick, rubbery texture can be challenging to sew, requiring specialized needles and techniques. It’s also heat-sensitive, expensive, and can feel bulky in finished garments.
Can neoprene be sewn on serger machines?
Yes, you can sew neoprene on serger machines, but you’ll need to trim edges by hand instead of using the serger’s knife. Use heavy-duty needles and adjust tension settings carefully.
How to repair tears in neoprene fabric?
That neoprene tear isn’t a death sentence for your gear.
Clean the damaged area thoroughly, then apply neoprene cement to both torn edges.
Press firmly together and let cure completely before use again.
What adhesives work best with neoprene?
Contact cement and neoprene-specific adhesives deliver the strongest bonds for repairs. You’ll want solvent-based options that cure flexible, not rigid like epoxy. Aquaseal and similar marine adhesives work great too.
Can you topstitch neoprene without puckering?
With neoprene’s 600% stretch capacity, you’ll need strategic techniques for smooth topstitching.
Use longer stitches (0-5mm), reduce tension, employ a walking foot, and sew slowly to prevent puckering on this challenging synthetic rubber material.
How to attach hardware to neoprene?
Pre-punch holes using leather punch or awl, then attach grommets, snaps, or buckles with heavy-duty thread. You’ll need industrial-strength adhesive for permanent hardware like D-rings or clips.
Conclusion
Studies show that over 60% of home sewers abandon their first neoprene project halfway through, but you’re now equipped to join the successful minority.
Mastering sewing neoprene fabric transforms challenging synthetic rubber into professional-looking garments and accessories.
You’ve learned the essential techniques from proper needle selection to walking foot usage, seam finishing, and tension management.
With these proven methods, your next neoprene creation won’t end up in the scrap pile—it’ll showcase your newfound expertise in taming this uniquely rewarding fabric.
- https://www.sewingbeefabrics.co.uk/neoprene-and-scuba-fabric-guide
- https://www.youtube.com/watch?v=9hPnxnpxVxA
- https://www.moodfabrics.com/blog/all-about-neoprene-fabrics/
- https://thepatternpages.co.uk/blogs/learn-to-sew/working-with-neoprene-scuba-fabrics
- https://www.jbneoprene.com/news/what-are-the-disadvantages-of-neoprene-fabric-/

