This site is supported by our readers. We may earn a commission, at no cost to you, if you purchase through links.
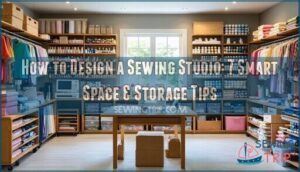 To design a sewing studio that works like magic, start with smart storage solutions.
Install wall-to-wall shelving and vertical organizers to keep supplies visible yet tidy.
Create dedicated work zones: a spacious cutting table, comfortable sewing machine area, and convenient ironing station nearby.
Maximize natural light while protecting fabrics with adjustable shades.
Choose furniture with adaptable compartments – think modular shelving and rolling carts that move where you need them.
Label everything and maintain a master list of item locations (trust me, you’ll thank yourself later).
Add inspiring touches like fabric displays and a large pin board.
The secret lies in combining functionality with personality to create a space that sparks creativity and is truly convenient.
Table Of Contents
- Key Takeaways
- Optimal Furniture Design:
- Effective Storage Solutions:
- Wall-to-wall Shelving to Save Space
- Vertical Storage Using Bookshelves for Efficient Organization
- Keep Essential Tools Visible and Easily Accessible
- Use Organizers for Scissors, Rotary Cutters, and Essentials
- Label Storage Boxes for Easy Identification
- Maintain a Master List of Item Locations for Reference
- Regular Purging and Sorting for Unused Items
- Optimize Closet Space for Efficient Room Usage
- Prioritize Work Surfaces:
- Maximize Natural Light:
- Inspiring Decor and Atmosphere:
- Testimonials:
- Continuous Improvement:
- Frequently Asked Questions (FAQs)
- Conclusion
Key Takeaways
- Create three essential work zones – You’ll need a dedicated sewing machine area, a spacious cutting table, and a convenient ironing station positioned within easy reach of each other for a smooth workflow.
- Invest in smart storage that adapts to your needs – Use modular shelving, such as DreamBox systems, wall-to-wall vertical organizers, and labeled containers to keep supplies visible and accessible while preventing duplicate purchases.
- Maximize natural light while protecting your fabrics – Position your workspace near windows for true color representation, but install UV-filtering shades to prevent fabric fading and damage from harsh sunlight.
- Design your space as an evolving workspace – Your sewing studio should grow with your skills and projects, so embrace continuous refinement and stay open to new organization ideas that improve your creative process.
Optimal Furniture Design:
Your furniture choices determine whether your sewing studio becomes a chaotic craft closet or an organized creative haven.
Smart furniture design means selecting pieces that adapt to your projects—from DreamBox shelving that transforms with your needs to modular wall units that keep your supplies visible and accessible.
Looking at this sewing room content, here’s a short blockquote that captures the adaptable furniture theme:
**Smart pieces transform chaos into organized creative bliss.
Adaptable Compartments Like DreamBox Shelving
Anyone designing their sewing studio design knows that DreamBox shelving transforms chaotic supplies into organized bliss.
This customization marvel adapts to your exact storage solutions needs, whether you’re housing:
- Fabric rolls and yardage collections
- Thread spools and bobbin organizers
- Cutting tools and precision notions
- Portable sewing machines and accessories
Smart space optimization beats cramped corners every time. The DreamBox also prevents duplicate purchases by keeping everything visible, which leads to organized bliss and a more efficient use of space, ultimately resulting in a customization marvel.
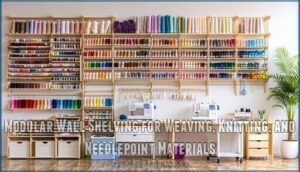
Modular Wall Shelving for Weaving, Knitting, and Needlepoint Materials
Modular wall units maximize your studio’s vertical space while keeping weaving threads, knitting yarns, and needlepoint floss within arm’s reach.
These customizable shelving systems offer impressive weight capacity for heavy materials and adjustable compartments that accommodate everything from bulky yarn cones to delicate silk threads.
You’ll love how display options showcase your colorful collection while smart space optimization frees up precious floor area, allowing for a more efficient use of vertical space.
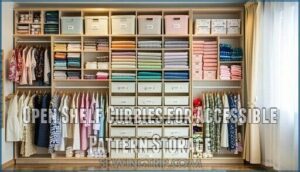
Open Shelf Cubbies for Accessible Pattern Storage
Transform your pattern chaos into organized bliss with open shelf cubbies that put every design within arm’s reach.
Smart sewing room design means maximizing visibility benefits while optimizing space efficiently.
- Compact pattern filing – Sort by garment type or size range
- Foldable stacking sections – Adjust shelf dimensions as your collection grows
- Button storage cubbies – Keep notions sorted by color and style
- Labeled pattern dividers – Create quick-reference sections for easy accessibility
Spacious Table for Ample Workspace
Your sewing studio design needs a spacious table that works as hard as you do.
Consider table height for comfort, surface material for durability, and table shape for your project size.
Mobility options let you reconfigure your sewing space organization easily.
Whether you’re cutting fabric or assembling quilts, ample work surfaces transform your sewing room layout into a productivity powerhouse.
A Sew Ready designs cutting table can provide an ergonomic and efficient workspace.
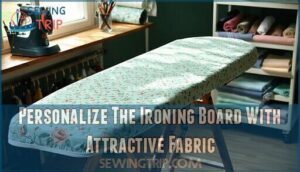
Personalize The Ironing Board With Attractive Fabric
Beyond mere function, your ironing board becomes a canvas for creativity through thoughtful fabric selection and pattern matching.
Choose heat-resistant cotton or fleece covers that complement your sewing room design while providing essential padding options for smooth pressing.
Edge finishing with contrasting binding adds professional flair, while DIY tutorials make customization affordable.
Transform this essential tool into stunning sewing decor that enhances your workspace’s aesthetic appeal.
For peak performance, consider that fleece offers durability compared to other materials, making it a great option for smooth pressing.
Effective Storage Solutions:
You’ll transform chaos into calm with smart storage that keeps every supply exactly where you need it.
Well-organized storage solutions turn your sewing studio into an efficient workspace where creativity flows freely without hunting for missing tools.
Wall-to-wall Shelving to Save Space
Wall-to-wall shelving transforms cramped sewing rooms into organized havens.
You’ll maximize verticality while creating stunning visual displays of your fabric collection.
- Adjustable Shelving: Install brackets that move up and down for changing storage needs
- Hidden Storage: Add cabinet doors to protect delicate fabrics from dust and sunlight
- Shelf Material: Choose sturdy wood or metal that supports heavy fabric bolts without sagging
- Installation Tips: Secure shelves into wall studs for maximum weight capacity and safety
- Maximize Verticality: Extend shelving from floor to ceiling for ultimate storage solutions
Vertical Storage Using Bookshelves for Efficient Organization
Why settle for cluttered surfaces when vertical storage can revolutionize your sewing room organization?
Bookshelves transform wall space into efficient storage goldmines, ensuring proper weight capacity for heavy fabric collections. Choose adjustable shelves to accommodate various bin sizes.
Match bookshelf material and style integration with your room’s aesthetic, and position shelves at ideal bookshelf height for easy access to frequently used supplies.
Keep Essential Tools Visible and Easily Accessible
Smart tool organization transforms your sewing room into an efficient workspace.
You’ll save precious time when everything’s within reach, turning chaotic crafting sessions into smooth creative flows.
- Mount pegboards near your sewing desk setup for scissors, rulers, and rotary cutters
- Install accessible shelves at eye level for frequently used notions and thread
- Create an ergonomic layout with tools positioned to minimize stretching and reaching
- Use clear storage bins with a labeling system for quick identification of supplies
Use Organizers for Scissors, Rotary Cutters, and Essentials
Once you’ve got your tools within arm’s reach, smart tool storage becomes your secret weapon for sewing success. Dedicated cutter holders keep your rotary cutters sharp and ready, while needle organizers prevent those tiny treasures from disappearing into the fabric abyss.
Thread sorters transform chaotic spools into rainbow displays that’d make any crafter smile. Your sewing kits deserve better than jumbled drawers.
Multi-compartment organizers give each tool its own zip code—scissors here, seam rippers there, measuring tools in their designated spots. These storage solutions aren’t just pretty; they’re productivity boosters that’ll save you countless minutes hunting for misplaced sewing essentials.
Quality sewing storage pays dividends when you’re mid-project and need that perfect tool instantly. Your sewing room organization becomes effortless when every sewing tool has a home. Effective storage systems often rely on sewing tool organizers to maximize space and efficiency.
Label Storage Boxes for Easy Identification
Once you’ve got your organizers in place, clear Box Labeling becomes your secret weapon for sewing room storage success.
Label Makers aren’t just office tools—they’re game-changers for your creative space. Color Coding systems help you spot what you need at a glance, while labeled storage boxes transform chaos into calm.
Your Organization Systems work best when every container tells its story.
Here’s how proper labeling transforms your space:
- No more treasure hunts through unlabeled boxes when you’re in the creative zone
- Quick visual scanning saves precious crafting time and reduces frustration
- Guest helpers can assist you without playing twenty questions about locations
- Future you will thank present you for these thoughtful Storage Tips
Whether you’re storing threads, patterns, or notions, fabric storage ideas shine brightest with clear identification. Your sewing room organization becomes effortless when these storage solutions work together seamlessly.
Maintain a Master List of Item Locations for Reference
Creating a master list transforms your storage solutions from chaos to clarity.
You’ll track every item’s location—from "blue thread in drawer three" to "vintage buttons in labeled storage boxes."
Digital apps like Evernote or simple spreadsheets work perfectly for inventory management and cataloging supplies.
This storage mapping system prevents duplicate purchases and cuts project setup time dramatically.
Regular Purging and Sorting for Unused Items
Once you’ve mastered organizing your storage, it’s time to tackle the items themselves.
Regular purging keeps your sewing space from becoming a fabric graveyard where good intentions go to die.
- Schedule quarterly decluttering sessions to prevent overwhelming buildup
- Sort items into keep, donate, and toss piles using the one-year rule
- Focus on duplicates and damaged supplies that steal precious storage space
- Document donation items for tax purposes while supporting local crafters
These minimalism strategies transform cluttered chaos into streamlined creativity.
Optimize Closet Space for Efficient Room Usage
When space feels tight, transforming your closet into a sewing powerhouse works wonders.
Install closet shelving and stackable drawers to house storage bins filled with notions and threads.
Tuck foldable tables inside for quick setup, while hidden compartments keep specialty tools organized.
This closet optimization strategy maximizes your sewing room storage without sacrificing precious studio space, making it a great way to create a closet optimization.
Prioritize Work Surfaces:
Your sewing studio needs three essential work zones to keep your creative process flowing smoothly.
You’ll want a dedicated machine area, proper cutting surface, and convenient ironing station all within easy reach of each other.
This setup ensures that you have a convenient ironing station, which is crucial for efficient work.
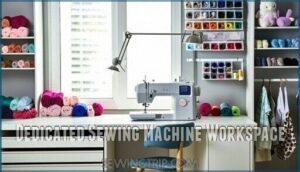
Dedicated Sewing Machine Workspace
Your sewing machine workspace should become the command center of your creative kingdom. Proper Machine Placement near electrical outlets eliminates cord chaos, while Sewing Ergonomics keeps you comfortable during marathon sessions.
Strategic Workspace Optimization transforms any corner into a productivity powerhouse.
- Position your sewing machine table at elbow height to prevent shoulder strain
- Install task lighting directly above your ergonomic sewing station for precision work
- Keep frequently used notions within arm’s reach using drawer organizers
- Designate specific zones for different sewing studio design functions
- Maintain clear sight lines across your dedicated sewing room for safety and efficiency in your sewing studio
Ideal Cutting Table or Adaptable Surfaces
With your sewing machine workspace optimized, you’ll need a cutting table that works as hard as you do.
The right cutting table design can make or break your workflow efficiency. Your cutting table should accommodate 45-inch fabric widths without folding, requiring a minimum 22-inch depth. Height matters too—position your cutting surface a few inches below elbow level when standing for comfortable fabric manipulation. Many sewers find that workspace optimization comes from choosing tables with adjustable legs, allowing customization from 30 to 50 inches.
Consider these cutting table essentials for your sewing studio design:
- Folding Tables with Extensions: Look for tables offering foldable side leaves that reduce width by 65% for storage while expanding to create generous work surfaces when needed.
- Surface Materials and Cutting Mats: Choose anti-snag lacquered surfaces that protect delicate fabrics while allowing smooth gliding across cutting mats.
- Ergonomic Sewing Station Integration: Select tables with reinforced construction and lockable wheels—you’ll appreciate the mobility when rearranging your sewing room furniture without sacrificing stability during precision cuts.
When selecting a cutting table, consider investing in cutting table systems to enhance your sewing experience.
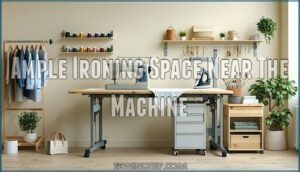
Ample Ironing Space Near The Machine
Picture your sewing machine workspace as a triangle—with your ironing station completing the perfect workflow.
You’ll want your ironing space within arm’s reach to seamlessly press seams without losing momentum.
| Ironing Solution | Space Required | Best For |
|---|---|---|
| Tabletop ironing mat | 2×3 feet | Small studios |
| Wall-mounted board | 4×2 feet | Medium spaces |
| Dedicated ironing station | 5×3 feet | Large rooms |
Smart machine placement creates this efficient workspace optimization triangle.
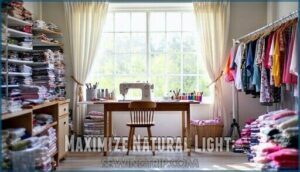
Maximize Natural Light:
Natural light transforms your sewing space into a vibrant workspace where colors appear true and details shine clearly.
You’ll want to position your main work area near a window, but don’t forget to add protective shades that filter harsh sunlight—your precious fabrics will thank you for preventing that dreaded fading.
This will ensure your workspace is both functional and protective of your materials, allowing you to work efficiently with vibrant colors and clear details.
Well-lit Space for Detailed Work
Proper sewing room lighting transforms your workspace from frustrating to fantastic.
Natural illumination streaming through windows provides the foundation, but you’ll need strategic task lighting for detailed work.
Position lamps near your machine and cutting table to eliminate shadows. Choose bulbs with daylight-mimicking light temperature for accurate color representation.
Good lighting isn’t just about brightness—it’s about visibility optimization that prevents eye strain and makes certain precision.
Even seasoned sewers find their skills improve dramatically when they can actually see what they’re doing clearly. Using an led sewing machine light can substantially enhance the overall lighting quality in your sewing studio.
Protect Fabrics From Sunlight Exposure With Shades
While natural light illuminates your workspace beautifully, you’ll need smart window treatments to shield your precious fabrics from harmful UV rays.
Choose fabric shades with built-in UV filters that block damaging sunlight while still allowing gentle illumination to flow through. These protective window treatments act like sunglasses for your studio, preventing fabric sensitivity issues and color fading.
Light blocking shades don’t mean sacrificing brightness—adjustable options let you control exposure throughout the day. Your fabric protection strategy should balance natural light benefits with sun protection, ensuring your materials stay vibrant for years, and this is crucial for maintaining fabric sensitivity and preventing color fading.
Inspiring Decor and Atmosphere:
Your sewing studio should reflect your creative spirit and inspire your next masterpiece.
Your sewing sanctuary should spark creativity and fuel your passion for every stitch.
Create a space that showcases your work through fabric displays, inspiration boards, and personal touches that make every moment spent crafting feel like pure joy.
Showcase Leftover Fabrics on Walls or as a Gallery Wall
Why settle for bare walls when your leftover fabric scraps can become stunning textile art? Transform your creative remnants into a personalized gallery wall that tells your sewing story.
- Frame fabric swatches in matching frames for a cohesive gallery wall display
- Create fabric collages by layering different textures and patterns on canvas boards
- Install floating shelves to showcase folded fabric bundles as colorful wall decor elements
Your fabric display becomes both creative storage and inspiring sewing room decor, turning wall space into a celebration of your craft. By incorporating upcycling old fabrics into your design, you can add unique and eco-friendly elements to your sewing studio.
Create a Showroom Atmosphere With Abundant Natural Light
Transform your sewing studio into a professional showroom by harnessing abundant natural light.
Position your workspace near windows to maximize daylight optimization, but protect delicate fabrics with adjustable window shades. This natural lighting creates an inviting atmosphere that showcases your work beautifully.
| Light Source | Benefits | Protection Method |
|---|---|---|
| Windows | True color representation, energizing workspace | UV-filtering window shades |
| Skylights | Even overhead illumination, spacious feel | Adjustable blinds or diffusers |
| Reflective Surfaces | Amplifies existing light, brightens corners | Mirrors, light-colored walls |
| Color Temperature | Mimics daylight for accurate fabric colors | 5000K-6500K LED supplements |
Natural light therapy benefits extend beyond visibility—it boosts creativity and reduces eye strain during detailed work.
Your sewing room design should balance abundant lighting with fabric protection, creating that coveted showroom atmosphere where every thread shines.
Display Areas and Fitting Closet for Customer Visits
Set up dedicated Visitor Areas with well-organized Display Racks showcasing your finest fabrics and finished pieces.
Create a private fitting closet with adjustable mirrors, proper lighting, and comfortable seating nearby.
Your Customer Showcase becomes the heart of your sewing studio, where clients can truly appreciate your craftsmanship and envision their own projects coming to life, making it a place where they can see your work as part of their own projects.
Incorporate Mini Quilts, Fabric, Notions, and Photos
Your sewing studio transforms into a personal gallery when you showcase your creative journey through fabric displays and craft showcase elements.
Mini quilts become stunning wall art that tells your quilting story, while colorful fabric swatches create vibrant photo galleries of your favorite materials.
Here’s how to create inspiring displays:
- Frame favorite fabric pieces as instant artwork for your quilting room design
- Display mini quilts on floating shelves to showcase your evolving skills
- Organize notions in clear jars for both storage and visual appeal in your sewing room decor
These personal touches make your sewing studio feel like home while keeping inspiration within reach.
Set Up a Large Pin Board for Inspiration and Decoration
Everyone needs a creative compass to guide their projects.
Install a large pin board as your sewing studio’s inspiration wall, where you’ll display fabric swatches, pattern ideas, and color palettes.
These vision boards become your personal creative displays, transforming plain walls into dynamic decor ideas that spark imagination.
Your craft stations deserve this visual motivation—it’s like having a cheerful design mentor always ready to help.
Testimonials:
You’ll find inspiration in the experiences of sewers who’ve transformed their spaces using these proven strategies.
Their success stories showcase how thoughtful planning creates both functional workspaces and beautiful creative havens that truly work, highlighting the importance of beautiful creative havens.
Praise for Gwen Gordon’s Teaching and Expertise From Satisfied Students
Gwen Gordon’s students consistently praise her transformative approach to sewing education.
Her teaching methods blend technical precision with creative freedom, earning exceptional Student Feedback across Online Reviews.
Her Expert Endorsements highlight three key strengths:
- Supportive mentorship that draws out your hidden potential in every project
- Real-world connections linking theoretical concepts to practical Sewing Community impact
- Personalized guidance adapting to your unique learning style and creative vision.
Gordon’s Teaching Expertise transforms ordinary sewing room design into extraordinary creative spaces.
Her Passion for Sewing and Design Shines Through in Her Instruction
Beyond grateful students, Gwen’s infectious enthusiasm transforms every sewing lesson into an inspiring adventure.
Her genuine love for fabric artistry creates a welcoming creative workspace where you’ll discover your own artistic expression. She doesn’t just teach techniques—she nurtures your creative freedom while building a supportive sewing community.
By mastering sewing workshop techniques, sewists can create professional-grade garments with ease.
Her passion elevates your sewing studio experience through:
- Design inspiration that sparks innovative sewing room organization ideas
- Technical mastery combined with encouragement for your sewing space journey
- Community building that makes learning sewing tips feel like joining a creative family
Continuous Improvement:
Your sewing studio will evolve as your skills and projects change, so embrace the journey of continuous refinement.
Keep experimenting with new organization ideas and layouts—what works today might need tweaking tomorrow, and that’s perfectly normal for any creative space.
Emphasize That The Sewing Room is a Work in Progress
Your sewing studio isn’t set in stone—it’s a living, breathing workspace that grows with your sewing journey.
What works today might need tweaking tomorrow, and that’s perfectly normal. Studio evolution happens naturally as your skills develop and projects change.
Embrace workspace flexibility and creative freedom by viewing your setup as ongoing improvement. This mindset transforms sewing room planning from a one-time task into an exciting adventure of continuous refinement and sewing room inspiration.
Encourage Exploration of More Sewing Room Organization Ideas
The crafting journey thrives on fresh inspiration and clever solutions.
Discovering new sewing room organization approaches can transform your workspace into an efficient, beautiful haven.
- Smart Sewing Stations: Create dedicated zones for different tasks, like embroidery corners or quilting areas with specialized storage nearby
- Innovative Fabric Bins: Use clear, stackable containers with labels showing fabric type, yardage, and project potential
- Multi-Purpose Crafting Zones: Design flexible spaces that adapt from cutting tables to design walls with simple adjustments
- Creative Storage Hacks: Install magnetic strips for scissors, use spice racks for thread, or repurpose shoe organizers for notions
- Cozy Sewing Nooks: Transform unused corners into productive mini-studios with rolling carts and wall-mounted supplies
Your sewing studio layout should evolve with your skills and interests.
Experiment with different sewing room storage solutions until you find what clicks.
Remember, the best sewing room design ideas come from understanding your unique workflow and embracing creative problem-solving.
Button for Further Interaction, Engaging Readers to Learn More
Ready to dive deeper into your sewing studio transformation?
Click that "Learn More" button and access a treasure trove of Interactive Tools and Learning Resources designed specifically for sewing room organization enthusiasts.
These Feedback Mechanisms will help you refine your sewing room design, turning your space into the ultimate creative sanctuary.
Your sewing room ideas deserve this next-level exploration to create the perfect sewing room organization!
Encourage Readers to Embark on Their Sewing Studio Design Journey With Newfound Inspiration
Through careful planning and thoughtful design choices, you’ll transform your creative workspace into a sewing studio that truly reflects your passion.
Start by defining your studio goals and embracing the design process with creative freedom.
Join the vibrant sewing community for fresh sewing room inspiration and organization ideas.
Your journey toward crafting joy begins now—one stitch at a time.
Frequently Asked Questions (FAQs)
Whats the ideal room size for sewing studio?
Imagine this: your sewing sanctuary can bloom anywhere.
You’ll thrive in spaces from 8×10 feet minimum to luxurious 12×20 rooms, but even cozy corners work magic when you’re clever with storage.
How much should I budget for studio setup?
Budget $500-$5,000 for your sewing studio setup.
Start with essentials: a decent sewing table ($100-400), basic storage solutions ($50-200), and good lighting ($100-300).
You’ll expand gradually as your skills and projects grow, adding specialized furniture and organization systems later, which will help you to have a more efficient workspace.
Which flooring works best for sewing spaces?
Hard floors like laminate, vinyl, or tile work best for sewing spaces. They’re easy to clean, durable under heavy furniture, and won’t catch dropped pins or threads like carpet does.
How do I manage fabric dust and lint?
Regular vacuuming with a shop vac or handheld vacuum tackles lint buildup on floors and surfaces.
Install air purifiers to capture airborne particles.
Use dryer sheets on fabric surfaces to reduce static cling that attracts dust and debris, with dryer sheets being a key tool and air purifiers helping to capture particles.
Should I soundproof my sewing room area?
Sewing machines generate 70-80 decibels—similar to traffic noise.
You’ll want soundproofing if you’re sewing late nights or have noise-sensitive neighbors.
Acoustic foam panels, heavy curtains, and rugs effectively dampen machine vibrations and mechanical sounds.
Conclusion
Transforming your space into a dream sewing sanctuary will absolutely revolutionize your creative process.
When you learn how to design a sewing studio that truly works, you’re investing in countless hours of joyful crafting ahead.
Remember, your perfect studio doesn’t happen overnight—it’s an ongoing journey of tweaks and improvements.
Start with one zone, master your storage system, and gradually build the organized, inspiring workspace you deserve.
Your future self will thank you for every thoughtful detail you add today to create a sewing studio that is an organized workspace.
- https://www.thelittlemushroomcap.com/revamping-sewing-space-the-ultimate-guide-to-organizing-your-sewing-room/
- https://suzyquilts.com/set-up-a-sewing-studio-part-1/
- https://faithandfabricdesign.com/2017/02/how-to-design-quilt-studio-sewing-room.html
- https://www.diaryofaquilter.com/organize-your-sewing-room/
- https://www.sewing.org/files/guidelines/2_101_setting_up_a_sewing_room.pdf

