This site is supported by our readers. We may earn a commission, at no cost to you, if you purchase through links.
You’ve spotted the perfect dress pattern, but it gaps at the neckline and pulls at the waist. Sound familiar? Most sewists face this frustration because store-bought patterns are designed for “average” bodies—and nobody’s actually average.
Learning pattern making changes everything. You’ll transform flat measurements into fabric pieces that actually fit your unique shape. Whether you’re tweaking a commercial pattern or drafting your own block from scratch, mastering these techniques means you’ll never settle for almost-right again.
The real magic happens when you understand how darts, grain lines, and seam allowances work together to create garments that move with your body instead of against it.
Table Of Contents
Key Takeaways
- Pattern making gives you complete control over fit and design by translating your exact measurements into custom blueprints that commercial patterns can’t match, eliminating the frustration of garments that gap, pull, or almost fit.
- You can choose from four proven methods—drafting from scratch, tracing existing garments, draping on dress forms, or modifying commercial patterns—each offering unique strengths depending on your project and skill level.
- Accuracy in body measurements and tools like flexible measuring tape, French curves, pattern paper, and dress forms form the foundation that prevents most fitting problems before they start.
- Mastering dart manipulation, seam allowances, and notch placement transforms basic blocks into endless design possibilities while common mistakes like grain line errors and poor dart placement can be fixed with straightforward adjustments.
What is Sewing Pattern Making?
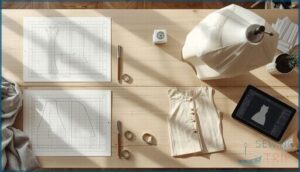
Pattern making is the art of creating blueprints for your garments before you ever pick up your scissors. Think of it as drafting the roadmap that takes your ideas from sketch to finished piece—giving you complete control over fit, style, and design.
Once you’ve drafted your pattern, mastering garment construction techniques ensures those blueprints turn into polished, professional-looking pieces.
Pattern making is the art of creating blueprints that give you complete control over fit, style, and design before you cut fabric
Let’s break down what pattern making really means and why it’s such a breakthrough for anyone who sews.
Definition and Importance
Pattern making is the process of creating templates that define every seam, dart, and edge in garment construction. Think of it as your blueprint—translating measurements into flat fabric pieces that fit together perfectly.
This sewing fundamental connects fashion design vision with real garment construction, giving you control over fit and style. Pattern drafting bridges creative textile science with practical pattern making and design, turning ideas into wearable reality!
Benefits for Sewists and Designers
Mastering sewing pattern making delivers tangible rewards. You gain creative freedom to design exactly what you envision while achieving made-to-measure fit that off-the-rack garments can’t match.
Pattern drafting skills boost your sewing techniques and open economic gains—custom pattern services command $25-$100 per hour. Plus, you’ll save time on future projects through reusable blocks.
Skill enhancement in sewing and pattern making transforms your entire approach to garment construction! For further inspiration, see how.
Overview of Pattern Making Methods
Once you understand the advantages of pattern development, you’re ready to explore your creative pattern-making options! You can choose from several proven approaches:
- Pattern Drafting – Build patterns from body measurements using mathematical precision
- Draping Techniques – Pin fabric on dress forms to see how it falls naturally
- Flat Pattern Making – Modify existing blocks through slashing and spreading
- Hybrid Methods – Combine manual drafting with digital grading software for flexibility
For a deeper look at the different pattern making methods, you can explore how each technique bridges design and garment creation. Each technique offers unique strengths for different projects.
Essential Tools for Pattern Making
You can’t build great patterns without the right tools in your hands. Think of your pattern making toolkit like a carpenter’s toolbox—each piece plays a specific purpose and makes your work easier and more accurate.
Let’s look at what you’ll need to get started and create patterns that actually fit.
Measuring Tools and Rulers
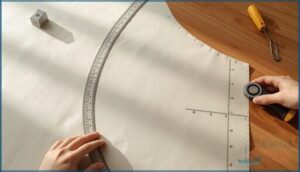
You can’t create accurate patterns without the right measuring tools—they’re your foundation! Start with a flexible measuring tape (60 inches or 150 cm) for body measurements. You’ll also need rulers: a clear plastic ruler, French curve for armholes, and a set square for right angles.
| Tool | Purpose |
|---|---|
| Measuring Tape | Body measurements and curves |
| Clear Ruler | Straight lines and seam allowances |
| French Curve | Armholes and hip curves |
Don’t forget marking tools, notch gauges, and a grading ruler for sizing!
A well-stocked sewing toolkit with quality hand tools makes transferring markings and measurements much faster and more accurate.
Pattern Paper and Tracing Wheels
Your pattern paper choices matter just as much as your tracing wheel! Swedish-type paper holds pencil marks beautifully without tearing, while translucent tracing paper lets you see patterns underneath. Carbon paper with a smooth tracing wheel transfers clean lines—just test pressure on scraps first!
- Choose 16-60 pound pattern weight based on your marking tools
- Use serrated wheels for dotted lines, smooth wheels for delicate fabric
- Keep papers flat and taped to prevent shifting during pattern drafting
- Clean your wheel after each use to avoid unwanted transfer marks
Dress Forms and Mannequins
A dress form becomes your silent sewing partner during pattern fitting and garment construction. You’ll find adjustable models that let you dial in bust, waist, and hip measurements, while torso mannequins keep focus on upper garment display. Full body versions with lower extensions are perfect for sewing draping and checking custom fit from shoulder to hem.
| Feature | Why It Matters for Pattern Making |
|---|---|
| Adjustable dials | Change measurements for custom fit testing |
| Foam covering | Holds pins securely during sewing patterns work |
| Removable sections | Switch between full and partial body for different garment types |
| Height adjustment | Test hemlines and proportions accurately |
| Rigid core | Provides stable support for fashion and apparel production |
Digital Pattern Making Software
Software brings pattern making into the digital age with tools that let you draft blocks right on screen. Adobe Illustrator leads digital pattern making with vector precision, while specialized programs handle grading tools and virtual prototyping.
You’ll create digital sewing patterns faster through software integration that exports production files. Pattern editing becomes a breeze—no eraser shavings required. Digital drafting transforms sewing pattern design completely!
Taking Accurate Body Measurements
Your pattern is only as good as your body measurements—seriously, this is where most fitting problems start. Taking accurate body measurements might feel a bit tedious, but it’s the foundation that makes everything else work.
Let’s walk through what you need to measure, how to get it right, and what to do with those numbers once you’ve got them.
Key Measurements Needed
You need about 15 essential measurements to create accurate sewing patterns that actually fit. Start with these three core categories:
- Upper body: neck base (14″), shoulder width (16½”), bust circumference, and back width
- Torso: natural waist, hip circumference (38″), and vertical lengths like center back (15″)
- Arms: bicep, wrist, and sleeve lengths
Your measuring tape becomes your best friend here!
Tips for Precise Measuring
Accuracy starts with proper tool maintenance—clean your measuring tape and rulers regularly to prevent dust buildup. Always measure twice, then average the readings for better precision.
Keep your set square and French curve flat against the body, and read at eye level to avoid parallax errors. Store your tracing wheel and half scale ruler in protective cases to maintain their calibration and extend their lifespan!
Recording and Using Measurements
Write measurements the moment you take them—memory fades fast! Use a notebook with columns for each quantity and unit, like “bust: 36 inches” or “waist: 28 inches.”
This recording method prevents mixups when you’re drafting flat pattern making designs later. Label each entry with the date and recheck your data validation before cutting fabric.
Measurement accuracy powers successful pattern making techniques, so keep your log organized and precise!
Pattern Making Methods Explained
There’s more than one way to create a sewing pattern, and the method you choose depends on your project and skill level.
Some techniques work better for certain garments, while others might feel more natural to you as you’re learning. Let’s look at the four main approaches you can use to make your own patterns.
Drafting Patterns From Scratch
Drafting patterns from scratch means you’re mapping your exact body measurements onto paper to create a fitted block or sloper. This foundation becomes your go-to template for countless designs.
The drafting process uses measurement techniques and drafting tools to translate three-dimensional curves into flat pattern making. You’ll add seam allowances and notches during block adjustment, creating custom patterns that fit perfectly.
Tracing Existing Garments
Garment tracing—or cloning clothes—lets you copy favorites without pattern drafting from scratch.
Lay your garment flat, smooth all seams, then trace outer edges onto pattern paper using weights to hold everything steady.
Mark dart placement, seam allowances, and notches as you go.
This pattern transfer method captures real-world fit, making sewing patterns that actually work for your body!
Draping Fabric on Dress Forms
While tracing works for existing pieces, draping techniques let you sculpt patterns directly on a dress form—like building with fabric. Pin muslin to your mannequin, letting gravity and fabric manipulation shape your design. This hands-on approach to clothing design reveals how garments move and fall in real space.
- Start with muslin preparation: pre-wash and press your fabric so it drapes accurately
- Keep pins parallel to body lines for smooth garment construction and production
- Mark necklines and armholes with chalk as you shape them on the form
- Transfer your draped creation to pattern paper with proper seam allowances and notches
Modifying Commercial Patterns
You don’t need to start from zero every time! Commercial patterns work as your foundation for patternmaking—just adjust them to solve fitting issues specific to your body.
Grade between sizes at the bust and hips. Swap dart adjustments to reshape the bodice. Change length alterations on sleeves or hems. Redraw neckline curves for better coverage.
These tweaks transform store-bought sewing patterns into custom-fit winners!
Step-by-Step Pattern Drafting Guide
Ready to create your first pattern from scratch? Drafting might seem intimidating at first, but it’s actually a series of simple steps that build on each other.
Let’s break down the drafting process into three manageable parts that’ll get you from measurements to a finished pattern.
Creating a Basic Block or Sloper
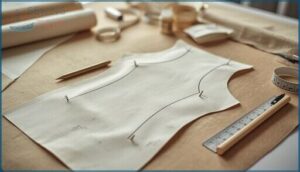
Think of your basic block as your personal fit blueprint. Start with your bodice fitting measurements to draft a simple sloper—front and back pieces with darts for shaping. This flat pattern drafting creates your foundation for every future design.
Test your block construction with muslin, then tweak dart placement until pattern validation shows a smooth, custom fit that’s all yours.
Adding Seam Allowances and Notches
Your pattern needs finishing touches before you cut fabric! Seam allowance calculation means adding extra fabric beyond your stitching line—usually 5/8 inch for woven fabrics. Notch placement tips help you mark matching points between pieces using small cuts or triangles.
- Use fabric marking methods like chalk or tracing wheels to transfer notches
- Apply precision cutting strategies by keeping notch marks on the seam allowance
- Follow curve sewing techniques by walking curved edges and marking carefully
- Standard pattern drafting and grading uses consistent allowances throughout
- Try a pattern notcher tool for quick, uniform marks!
Master these sewing techniques and tips for perfect pattern making every time.
Dart Manipulation Techniques
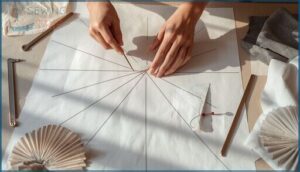
Dart manipulation unlocks creative freedom in pattern design. You’ll use pivot techniques to rotate darts around the bust point, slash methods to relocate fullness to new seams, and dart conversion to create pleats or gathers.
These garment construction techniques maintain grainline control and seam shaping while transforming basic slopers into custom styles. Pattern drafting and grading becomes your playground for unique sewing patterns!
Troubleshooting and Improving Patterns
Even experienced pattern makers hit snags—a dart that won’t lie flat, a sleeve that twists, or a waistline that gaps.
The good news? Most pattern problems have straightforward fixes once you know what to look for. Let’s walk through the most common issues and how to adjust your patterns for a fit that actually works.
Common Pattern Making Mistakes
Even small slip-ups in pattern making can create big headaches! Grain line errors cause garments to twist and hang awkwardly.
Watch your dart placement—too high or too low shifts shaping and creates gaping.
Seam allowance mistakes shrink your final fit, while poor notch systems delay assembly.
Size grading errors produce armhole mismatches across sizes. Solving fitting issues starts with catching these common pattern design pitfalls early.
Adjusting Patterns for Better Fit
Your garment should fit like a glove, not a tent! Common fit adjustments and pattern modifications transform ill-fitting designs into custom creations.
- Bust alterations reshape the princess seam or side bust for cup sizes C and larger
- Sleeve fitting tweaks adjust armhole depth to prevent underarm tightness
- Waist contours reduce gaping by redistributing ease around your torso
- Hip ease alters side seams for comfortable movement
These pattern making techniques solve fitting issues fast!
Tips for Customizing and Refining Designs
Tweaking your design unlocks true garment personalization! Start with pattern refinement: shift dart lines 1-2 mm toward center front to reduce waist bulk, or adjust sleeve caps by 2-4 mm for better shoulder ease. These sewing techniques transform basic sewing patterns into custom sewing masterpieces.
| Refinement Area | Adjustment Range | Impact on Fit |
|---|---|---|
| Side seam taper | 1-2 cm at hip | Sleek profile, preserved movement |
| Neckline depth | 5-10 mm | Suits varied shoulder widths |
| Dart leg shaping | Smooth or elongate | Changes shaping without altering bust |
| Waist highest point position | 5-8 mm toward center | Harmonious waistline balance |
Test each design optimization on muslin before cutting your final fabric—this sewing pattern creation strategy saves time and materials!
Frequently Asked Questions (FAQs)
How can I improve my pattern making?
Like upgrading from a Walkman to streaming, precision drafting transforms your patternmaking! Focus on fit analysis and fabric selection.
Practice creative pattern making techniques, perfect your sewing patterns, and keep learning pattern making fundamentals.
What are the 5 steps in pattern making?
Pattern creation follows five key steps: taking accurate measurements, drafting techniques for your basic block development, adding seam allowances and notches, making fitting adjustments on a dress form, and finalizing your pattern pieces.
What are the three principles of pattern making?
You shape garments using three timeless techniques, yet most beginners skip them entirely.
Dart manipulation, added fullness, and contouring shapes transform flat patterning into wearable art—these pattern principles release your creative freedom!
How can I make my own pattern for free?
You don’t need paid software—grab paper, tape, a ruler, and your measurements to draft a free block.
Start with basic blocks for pattern making, then trace existing garments or reuse blocks for new designs!
How do you choose the right fabric?
You want fabric that matches your garment’s purpose. Test drape, check fiber content for breathability, and consider weight—lighter fabrics suit dresses, heavier ones work for outerwear and structured pieces.
What’s the best way to store patterns?
A place for everything and everything in its place! Store sewing patterns flat in labeled manila envelopes or hanging files.
Digital storage with consistent file management keeps PDF patterns organized. Use pattern cardboard for durability and pattern notchers for marking.
How can you customize fit for children?
You’ll create custom proportions by drafting a child sloper, then add adjustable waist features and growth patterns.
Use kids size charts to plan fit alterations, ensuring your sewing patterns accommodate changing measurements beautifully!
How do you upcycle patterns creatively?
Transform old sewing patterns through creative reuse! Try pattern remixing by swapping darts for princess seams, layering different fabric weights, or adding bias binding from scraps.
Sustainable design makes eco fashion both personal and planet-friendly!
What are tips for sewing stretchy fabrics?
Stretchy success starts with the right needle—ballpoint or stretch types sized 70/10 to 90/14 prevent runs. A stretch stitch or wide zigzag gives fabric stability while allowing movement without breaking seams.
How do you grade patterns for different sizes?
Pattern grading scales your base pattern up or down using size increments at key points like bust, waist, and hip.
You can grade manually with rulers or use CAD software for automatic nested grading!
Conclusion
Think of the hours you’ve spent pinning and re-pinning ill-fitting garments—multiply that frustration by every project you’ll ever make. That’s what you avoid when you invest in sewing pattern making help now.
Your measurements become your superpower. Your blocks become blueprints for endless possibilities. And those commercial patterns? They’re just suggestions you’ll confidently reshape.
The difference between wearing handmade clothes and wearing clothes that fit like they were made for you starts here.


