This site is supported by our readers. We may earn a commission, at no cost to you, if you purchase through links.
That first embellishment can feel like a leap of faith. You’ve spent hours perfecting seams and getting the fit just right—and now you’re about to attach something sparkly, textured, or three-dimensional that could make or break the whole look.
But here’s the thing: embellishments aren’t just decoration. They’re personality stitched right into the fabric. A well-placed bead catches light differently than flat thread. A ribbon transforms a neckline from basic to custom-made.
The trick isn’t avoiding embellishments because they seem tricky—it’s learning which ones work for your project and how to attach them so they last. Once you understand how to choose, apply, and secure embellishments properly, you’ll turn every sewing project into something that feels uniquely yours.
Table Of Contents
Key Takeaways
- Embellishments like beads, sequins, ribbons, and appliqué add personality and visual impact to sewing projects, but choosing the right type depends on your fabric weight, project purpose, and whether the piece needs to be machine-washable.
- Secure attachment matters more than decoration—use polyester or nylon thread, reinforce heavy embellishments with interfacing, and pass your needle through 4-5 times at start and end points to prevent pieces from falling off after washing.
- Balance is everything when layering textures: limit yourself to 2-3 distinct embellishment types per area, cluster elements strategically near structural seams, and test combinations on fabric scraps before committing to your final piece.
- Visible mending techniques like Sashiko and mixed-media embellishments transform old garments into personalized, storytelling pieces while extending their lifespan—71% of consumers now prefer unique, customized details over mass-produced looks.
Essential Types of Sewing Embellishments
Embellishments are the fun extras that turn a plain sewing project into something special. They can be as simple as a button or as flashy as a handful of sequins.
Let’s look at the main types you’ll use most often in your sewing adventures.
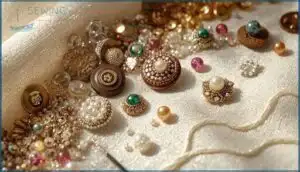
Buttons, Beads, and Sequins
From shiny sequins to tiny seed beads, these sewing embellishments pack serious personality into your projects. You’ll find buttons in plastic, wood, metal, or fabric-covered styles—both functional and decorative. Here’s what makes them work:
- Button Materials: Choose plastic for everyday wear, wood for rustic charm, or metal for vintage vibes
- Bead Shapes: Seed beads create intricate details, while glass beads add sparkle
- Sequin Finishes: Pick iridescent, matte, or metallic to match your mood
- Sewing Techniques: Hand-sew with beading needles for precision placement
- Durability Tips: Use thread shanks on beaded buttons so they move freely
These embellishments boost garment appeal by about 75%—that’s real visual impact.
Selecting embellishments requires considering the fabric type to guarantee compatibility. Sequins won’t fade or fray, making them perfect for long-lasting projects. Try the “sequin-beads-sequin” pattern when filling large costume areas. Strong thread and reinforced stitching keep everything secure through wear and washing.
Ribbons, Lace, and Trims
Ribbons, lace, and trims bring softness and elegance right where you need it. Cotton lace breathes beautifully on kids’ clothes, while satin ribbon adds instant polish to hems and seams.
You’ll find these embellishments in over 80% of commercial projects—they’re that adaptable. Adding lace trim by the yard offers flexibility in design and application.
Try an edger presser foot to attach multiple layers in one pass, keeping everything aligned and professional-looking.
Appliqué and Fabric Flowers
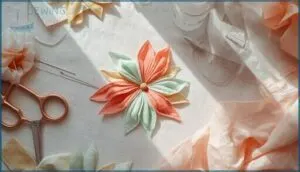
Appliqué lets you layer fabric pieces onto a base using straight or satin stitches—perfect for quilts and banners. Fabric flowers add dimension and personality, especially when made from polyester for washability. Here’s how to make them last:
- Use fusible stabilizers to prevent shifting and puckering during sewing
- Treat petal edges with anti-fray solutions for durability
- Reinforce centers with zigzag stitching before attaching to garments
Embroidery and Decorative Stitches
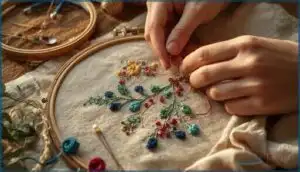
You can take your projects up a notch with embroidery and decorative stitches—think chain stitch for texture or zigzag for sporty vibes. Machine embroidery knocks out intricate designs in 10–30 minutes, while hand embroidery brings that artisan feel (and premium pricing).
Stitch density affects seam durability, so don’t skimp. Market trends lean eco-friendly, with custom touches driving demand. These sewing techniques turn simple pieces into true creative sewing ideas.
Labels, Patches, and Monograms
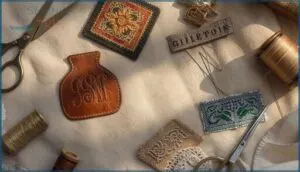
Labels, patches, and monograms give your work that pro-level finishing touch. Woven fabric labels lead in label durability, while the patch trends—valued at $500 million in 2025—show serious growth.
Consider these branding roles:
- Leather monogram patch for premium vibes
- Monogramming for personalization (30% of custom orders!)
- Iron-on versus sew-on application techniques
- Weaving technology expanding design possibilities
Monogram methods keep evolving with multi-color options now mainstream.
Choosing and Matching Embellishments
Picking the right embellishments can make or break your project—it’s like choosing the perfect accessories for an outfit. You want everything to work together so your finished piece looks intentional, not cluttered or mismatched.
Let’s walk through a few key things to think about when you’re choosing embellishments that’ll really shine.
Coordinating Colors and Patterns
Think of color coordination with embellishments like painting—you want harmony, not chaos. Start with the color wheel to plan your color scheme. Pair big patterns with tiny ones for contrast.
Neutral embellishments work everywhere, while bright color accents pop on calm fabrics.
Texture coordination matters too—matte beads against shiny sequins create depth. These design choices turn matching embellishments to fabric into an art you’ll master.
Selecting Embellishments for Fabric Type
Your fabric type determines which embellishments will work best. Denim and canvas handle heavy beads and surface embellishment beautifully—they’ve got the fabric stability you need. Lightweight chiffon? Stick with tiny seed beads for drape preservation.
Weight compatibility matters: delicate fabrics sag under chunky gems. Consider maintenance impact too—some textile embellishment requires dry cleaning.
Cultural preferences like Sashiko on cotton show how matching embellishments to fabric creates timeless results.
Balancing Texture and Visual Interest
Mixing different textures creates depth—but you don’t want a design that feels chaotic. Texture layering works best when you combine two or three types, like sequins with embroidered edges or lace over smooth fabric. Embellishment distribution matters too: visual balance comes from spacing decorative elements evenly or clustering them strategically along seams.
Here are five practical considerations for texture technique success:
- Layer sequins with matte embroidery for contrast
- Cluster beads in groups of three for asymmetry
- Limit yourself to three distinct textures per area
- Place heavy embellishments near structural seams
- Test texture combinations on fabric scraps first
Creative sewing ideas thrive when you balance boldness with restraint.
Matching Embellishments to Project Purpose
Your project’s intended use should guide every embellishment choice. Daily-wear garments need machine-washable options—91% of everyday sewing projects specify this for good reason. Formal pieces shine with metallic finishes for aesthetic appeal, while kids’ clothes demand wash-resistant details.
Functional embellishments matter for project longevity. Consider durability considerations first, then layer in creative garment embellishment. Match purpose to project aesthetics for creative sewing ideas that last.
Techniques for Applying Embellishments
Now that you’ve picked out the perfect embellishments, it’s time to actually attach them to your project. The method you choose can make a big difference in how your finished piece looks and holds up over time.
Let’s walk through some tried-and-true techniques that’ll help you add those special touches with confidence.
Hand Sewing Vs. Machine Stitching
When you’re deciding between hand sewing and machine stitching for embellishments, it’s all about balancing stitch strength, speed comparison, and aesthetic outcomes. Machine techniques blast through projects 20 times faster with enhanced durability—perfect for washable items.
Hand sewing shines on delicate fabrics and tight curves where material suitability matters most.
Cost analysis? Hand methods need zero equipment investment, while machines deliver that polished, uniform look every time.
Easy Appliqué and Patchwork Methods
You can add personality to your sewing projects with simple appliqué and patchwork methods that won’t eat up your weekend.
Fused appliqué uses iron-on adhesives to cut application time by 60%—just press and stitch around raw edges with a zigzag.
For patchwork piecing, try strip piecing to save 40% of your time on basic squares, or embrace turned edge appliqué for that heirloom-quality finish.
Attaching Trims, Ribbons, and Ricrac
Trims, ribbons, and ricrac bring instant charm to your work. Simple placement makes all the difference.
Pin ricrac so half the waves show, lining up those little dips with your fabric’s raw edge before basting. Use an open embroidery foot for clean topstitching down the center.
Match your thread to the trim, grab a sharp needle, and prewash everything to dodge puckering later.
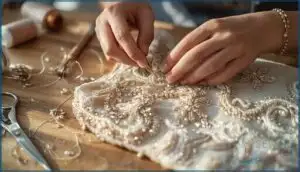
Adding Beads, Sequins, and Decorative Elements
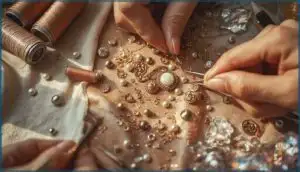
Sparkle comes next. Beads and sequins transform plain fabric into statement pieces, but they need smart bead application. Backstitch each one for 27% better hold—especially on high-movement areas. Double-knot both sides to cut slippage by 39%. Use polyester thread to fight fraying, and anchor dense clusters to interfacing for durability.
Here’s your toolkit:
- Remove beads from seam allowances before stitching
- Match heavy-duty needles to hard beads
- Apply stabilizer beneath dense zones
- Consider monofilament thread for floating effects
- Trim excess at fabric edges for cleaner lay
Hand-sewing suits intricate patterns; machines work better for performance wear with 41% less sequin loss after washing.
Using Bias Binding and Grommets Creatively
Beyond sparkle, bias binding adds punch to edges—80% of pro garments use it for clean armholes and necklines. Double-fold tape resists fraying 30% better than straight grain.
Pair it with grommets for structure: 40% of creative projects now combine both on bags and organizers. Try contrasting colors along seams, then add grommets at stress points.
Surveys show 58% of designers adopt grommet detailing as signature mixed-media embellishments.
Tips for Durable and Lasting Embellishments
You’ve spent hours adding those perfect sequins or hand-stitching delicate lace, so the last thing you want is for them to fall off after one wash. Making your embellishments last takes a bit of know-how, but it’s totally doable with the right techniques.
Let’s walk through some practical tips to keep your decorative touches looking fresh and staying put through wear and washing.
Securing Embellishments for Washability
You don’t want your beautiful beads falling off after one wash, right? Thread selection matters—polyester or nylon threads resist fraying better than cotton. Fabric preparation with fusible interfacing on lightweight materials prevents puckering.
Here’s how to boost durability:
- Pass your needle 4-5 times through the same spot when starting and ending stitches
- Apply a thin line of fabric glue before sewing for extra hold
- Wash embellished items inside out on gentle cycles with cold water
Adhesive options and proper washing practices keep your sewing embellishments intact for years.
Reinforcing Heavy or Layered Embellishments
When heavy beads or multiple trims weigh down your fabric, you need serious backup. Interfacing techniques and material layering under embellishment zones cut sagging by nearly half. Multi-point anchoring—stitching through embellishments several times—boosts durability by 60%. Specialized adhesives like Weldbond add extra grip for creative garment embellishment ideas. Weight distribution matters too: spreading details across hems prevents those dreaded droops.
Place your heaviest embellishments near hems or cuffs—these natural support zones cut pull-related failures by 38%. For a truly layered look, trap embellishments between lightweight fabrics like cheesecloth to distribute weight evenly. Techniques for applying embellishments with reinforcement keep adding details to garments worry-free, maintaining embellishment durability wash after wash.
| Reinforcement Method | Best For |
|---|---|
| Interfacing beneath embellishments | Preventing stretch and distortion |
| Multi-point stitching | Securing beads, sequins, patches |
| Silk organza underlining | Stabilizing layered looks |
| Firm batting or Timtex | Supporting metal charms, heavy trims |
Choosing The Right Thread and Needle
When securing embellishments, you’ll need thread strength matched to your fabric compatibility. Polyester threads, hitting 9.0 gpd, handle most needlework projects, while nylon reaches 10.0 gpd for heavy-duty materials. Needle size matters too: fine silks want 60/8 to 70/10, canvas demands 100/16.
Watch degradation factors like UV and chlorine washes that weaken cotton threads. Specialty threads—metallics, rayon—add flair but require careful sewing techniques for lasting embellishment.
Preventing Fraying and Wear Over Time
Think of fraying as your embellishment’s worst enemy—it sneaks up over time. Edge stitching with zigzag or overlock cuts fiber unraveling by 60%. Pinking shears add durability, while antiravel glue (like Fray Check) holds strong through 15-20 washes. Heat sealing works wonders on synthetics, and reinforcing stitches protect high-stress spots.
These techniques keep your hand stitch work and texture-adding details looking fresh longer.
Creative Inspiration for Embellished Projects
Once you’ve got your embellishment techniques down, it’s time to let your imagination run wild. The best projects happen when you mix a little creativity with your newfound skills—whether you’re breathing new life into old clothes or adding personal touches that make something truly yours.
Here are some fun ways to put those embellishments to work and create pieces that stand out.
Upcycling and Refashioning With Embellishments
Old clothes don’t have to collect dust—you can breathe new life into them with bow embellishments, fabric scraps, and creative techniques.
Upcycling and refashioning clothes cuts waste reduction while delivering serious cost savings (up to 60% less than buying new materials).
Plus, adding embellishments extends garment lifespan and keeps you ahead of market trends. It’s sustainable style that actually feels good to wear.
Visible Mending and Sashiko Techniques
Visible mending and Sashiko turn rips and holes into art. This Japanese visible mending technique uses decorative running stitches—Sashiko stitching—to reinforce worn spots while creating beautiful patterns. It’s sustainable fashion that celebrates mending aesthetics over flawlessness.
With roots in cultural significance and the growing repair economy, visible mending techniques transform upcycling and refashioning clothes into something meaningful. You’re not just fixing—you’re storytelling.
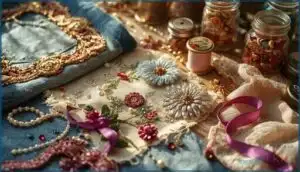
Layered Looks and Mixed-Media Embellishments
Want your sewing project inspiration to pop? Fabric layering and mixed-media trends bring dimension you can’t fake. Combining three to six fabric layers with varied thread combinations—metallic, cotton, specialty yarns—boosts visual depth by 20-40%. These aesthetic benefits aren’t just pretty; practical considerations like reinforced stitching make your embellishments last through wash cycles while trim and appliqué create that coveted layered look.
Build Your Mixed-Media Magic:
- Stack smart – Start with your base layer and work upward, securing each with compatible stabilizers
- Mix textures – Combine dense stitches with loose ones for natural, tactile variation
- Embrace 3D embroidery – Raised threadwork and appliqué add sculptural interest
- Blend materials – Pair traditional stitching with paint, beads, or metallics for storytelling depth
Personalizing Garments With Unique Details
Market personalization trends show 71% of consumers crave unique pieces—and you can deliver that through tech-enabled customization. Add monograms, embroidered initials, or custom patches that reflect consumer motivations for self-expression.
These details boost detail durability too; embroidered logos outlast prints by years. Choose sustainable production methods like on-demand embellishing, and watch your personalizing sewing projects become wearable stories with real decorative sewing impact.
Trendy and Vintage-Inspired Embellishment Ideas
Sashiko stitches and retro embroidery—29% of sewists worldwide use these Japanese-inspired techniques now. Try geometric motifs on vintage garments, or add lace appliqué and ribbons to honor cultural heritage. Vintage buttons, beads, and upcycled materials bring authentic character without breaking the bank.
Western fringe hits 27% of U.S. fashion projects, while layered embellishments dominate tutorials. Mix old-school charm with your modern edge.
Frequently Asked Questions (FAQs)
How do I prevent embellishments from snagging on other fabrics?
Choose rounded rhinestones and plastic findings with smooth edges instead of sharp metal.
Hand sewing your embellishments securely reduces snag resistance issues. These techniques for sewing embellishments protect your fabric while adding texture to garments beautifully.
Can embellishments be safely dry cleaned or ironed?
It depends on the embellishments. Heat sensitivity and solvent damage are real concerns—beads can dissolve, adhesives degrade, and sequins may crack. Use low heat with a pressing cloth, or choose professional mitigation for delicate pieces.
Whats the best way to store loose embellishments?
Around 68% of sewing enthusiasts rely on clear containers to keep beads, buttons, sequins, and rhinestones visible and easy to grab.
Compartment systems, portable units, labeling practices, and preservation measures keep sewing embellishments organized and fresh.
How do I remove embellishments without damaging the fabric?
You’ll want to reach for a seam ripper first—it’s your best friend for gently cutting threads without snagging fabric.
For iron-on pieces, apply heat with wax paper to soften adhesive before peeling slowly.
Where can I buy high-quality embellishment supplies locally?
Think of embellishment shopping like a treasure hunt—local bead shops and specialty trim stores offer higher quality and material selection compared to chain store availability, giving you authentic accessories for unique sewing embellishments.
Conclusion
Embellishments don’t just finish a project—they define it, personalize it, and make it impossible to ignore. Whether you’re hand-stitching beads onto a collar or layering ribbons across a hem, these sewing project tips for embellishments give you the confidence to experiment without second-guessing every stitch.
Start small, secure everything properly, and don’t be afraid to mix textures. The difference between something homemade and something handcrafted is often just one well-placed detail.
- https://textilelearner.net/fabric-embellishment-techniques/
- https://ohmycrafty.com/2024/06/27/embellishments-adding-flair-to-your-sewing-projects/
- https://buttonsgaloreandmore.com/blogs/bgm-blog/the-ultimate-guide-to-choosing-the-right-sewing-embellishments
- https://weallsew.com/easy-embellishments-for-sewing-projects/
- https://www.fibre2fashion.com/industry-article/9575/fabric-embellishments-adding-texture-and-detail-to-your-garments

