This site is supported by our readers. We may earn a commission, at no cost to you, if you purchase through links.

Prewash your fabric to avoid that heartbreak moment when your finished garment shrinks. Practice straight stitches until they become second nature, and always cut on the grainline for that professional drape.
Consistent seam allowances make or break your project’s appearance. Backstitch at seam beginnings and ends, and keep your workspace organized.
Master these fundamentals, and you’ll notice the difference immediately. The secret lies in understanding why these techniques work together to create a professional finish.
Table Of Contents
Key Takeaways
- Master your tools first – You’ll need sharp needles, quality scissors, and proper lighting to create professional-looking stitches, as these are not luxuries but necessities for accurate work.
- Prepare your fabric properly – You must prewash fabrics to prevent shrinkage disasters and always cut on the grainline to achieve that professional drape and fit.
- Focus on consistent fundamentals – You’ll transform your sewing by maintaining steady seam allowances, backstitching at beginnings and ends, and practicing straight stitches until they are second nature.
- Practice before you commit – You should always test your techniques, thread tension, and stitch settings on scrap fabric before starting your actual project to avoid costly mistakes.
Essential Tools for Accurate Sewing
You’ll discover that having the right tools can transform your sewing from frustrating to fantastic—it’s like trying to paint a masterpiece with a broken brush versus a quality one.
The secret to professional-looking results lies in choosing proper needles, sharp scissors, accurate measuring tools, and creating a workspace that sets you up for success.
Choosing The Right Needles and Thread
The right needle and thread combo can make or break your sewing project—literally! Choose needle sizes 8-19 based on your fabric weight, with smaller numbers for thicker materials.
Match your thread type to fabric for best results. Understanding the proper use of sewing needles is essential for achieving professional-looking stitches.
- Cotton thread works perfectly with cotton fabrics and natural fibers
- Polyester thread offers durability and stretch for synthetic materials
- Heavy-duty thread handles denim, canvas, and upholstery projects
- Silk thread provides luxury finish for delicate fabrics and heirloom pieces
Importance of Sharp Scissors and Cutting Tools
Sharp scissors are game-changers for precision cutting.
Quality tools transform frustrating sewing into smooth, professional results
Dull blades create jagged edges that throw off your entire sewing project.
Invest in quality fabric shears and keep them exclusively for cutting fabric—never paper or other materials.
A good cutting mat protects your blades and gives you straight lines.
Clean cuts mean better seam alignment and professional-looking garment construction every time.
Using sharp scissors with proper sharp blade maintenance is essential for achieving accurate cuts and ensuring proper maintenance.
Using Measuring Tools and Pattern Weights
Accurate measuring techniques make the difference between professional results and homemade disasters.
Your measuring tape should lay flat against fabric without stretching, while pattern weights keep everything perfectly positioned during cutting.
Essential measuring and weighting tools:
- Flexible measuring tape for curves and body measurements
- Clear quilting ruler for straight lines and seam allowances
- Pattern weights to secure pieces without pin holes
- Fabric marking tools for precise placement
- Rotary cutter with cutting mat for clean edges
Pattern accuracy depends on weight distribution across your fabric.
These tools guarantee sewing precision in every garment construction project you tackle.
Preparing a Proper Workspace
Your workspace organization directly impacts your sewing accuracy.
Set up your sewing station with good workspace lighting to prevent eye strain and mistakes.
Keep sewing tools within arm’s reach using smart tool storage solutions.
An ergonomic setup prevents fatigue during long sewing projects.
Even sewing for beginners benefits from proper organization—it’s like cooking in a tidy kitchen versus a cluttered mess.
Effective sewing project planning involves utilizing sewing planning tools to optimize workspace and workflow.
Fabric Preparation for Precision
Your fabric preparation sets the foundation for every successful sewing project, so don’t skip this essential step if you want professional-looking results.
Proper washing, pressing, and cutting techniques will save you from those frustrating "why doesn’t this fit?" moments that make even experienced sewers want to throw their projects in the corner, which can be avoided with proper techniques.
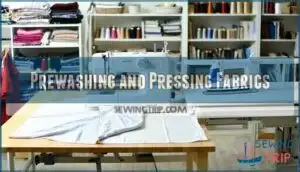
Prewashing and Pressing Fabrics
Proper fabric preparation sets you up for success before you even thread your needle. Think of it as laying the foundation for a house—skip this step, and everything built on top might wobble.
- Prewash all fabrics using the same temperature you’ll wash the finished garment
- Test for fabric shrinkage by measuring a square before and after washing
- Check fiber content labels to determine appropriate water temperature and drying method
- Press fabrics completely flat using steam to set fibers straight and eliminate wrinkles
- Finish raw edges with zigzag stitching to prevent fraying during the washing process
This fabric preparation prevents costly surprises later—nobody wants their carefully sewn shirt to shrink into doll clothes after the first wash! Different weave types and thread counts react differently to water and heat, so testing prevents disasters.
Fabric softening treatments can interfere with stitching, making prewashing even more important for sewing basics and beginner sewing projects. Understanding fabric prewashing methods is essential for achieving professional results in sewing.
Cutting on The Grainline
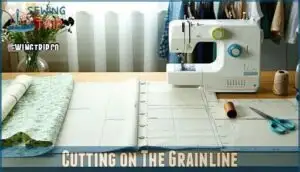
Once you’ve prepped your fabric, grainline alignment becomes your secret weapon for professional results.
The grainline marking on sewing patterns isn’t just decoration—it’s your roadmap to fabric orientation success.
Place pattern pieces parallel to the selvage edge for precision cutting.
When you ignore grainline, your finished project might twist or hang awkwardly.
Master this fundamental sewing technique and watch cutting errors disappear from your fabric preparation routine.
Accurate Measuring and Marking Techniques
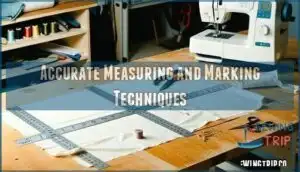
Before making your first cut, invest time in precise measuring and marking fabric—your future self will thank you!
Use measuring tools like rulers and tape measures alongside seam guides to guarantee consistent seam allowance throughout your project.
Mark grainline alignment carefully, as this foundation affects how your finished piece hangs and moves.
Master these ruler techniques early, and your sewing patterns and tutorials will translate into professional-looking results through disciplined machine sewing practices.
Handling Delicate or Stretchy Fabrics
Delicate fabrics demand gentle handling to prevent damage during sewing.
Treat your delicate fabrics like precious heirlooms—they deserve gentle hands and patient hearts
Here’s how to tackle these temperamental materials:
- Use ballpoint needles (65/9 or 70/10) to minimize snags in knit fabrics
- Stabilize with tissue paper underneath during delicate cutting to prevent distortion
- Apply narrow zigzag stitches for stretchy seams that flex without popping
Lower your presser foot pressure and support lightweight fabric fully—never let it hang off your cutting table, or you’ll stretch it out of shape before you even start sewing.
To achieve professional results, consider sewing techniques for handling delicate materials.
Mastering Stitching Techniques
Building solid stitching techniques is like learning to walk before you run—you’ll need these fundamentals for every project that follows.
Once you’ve mastered straight lines and consistent seam allowances, you’ll transform from someone who "sort of sews" into someone who creates garments that actually look store-bought.
Practicing Straight and Zigzag Stitches
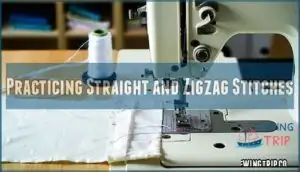
Now you’ll build muscle memory through repetition.
Start with scrap fabric to master stitch control and fabric tension before tackling your actual project. Practice creates confidence, and confidence creates beautiful seams.
| Stitch Type | Best Practice |
|---|---|
| Straight stitch | Keep steady sewing speed, maintain consistent stitch length |
| Zigzag stitch | Adjust width for fabric thickness, test on scraps first |
| Thread management | Check tension dial, rethread if stitches look loose |
| Speed control | Start slow, increase gradually as comfort builds |
| Hand sewing techniques | Practice running stitch for beginner sewing foundation |
Understanding Seam Allowances
Once you’ve mastered basic stitches, accurate seam allowance becomes your secret weapon for professional results. Most patterns use ⅝ inch seam allowance, but consistency matters more than perfection.
Your sewing machine’s throat plate markings act like guardrails for straight seams. Understanding proper seam allowance techniques is essential for achieving a professional finish.
- Use seam guides or magnetic attachments for consistent fabric shrinkage prevention
- Check stitch tension regularly—loose threads create wobbly seam allocation
- Practice edge finishing techniques on scraps before tackling your tote bag tutorial
Backstitching and Securing Threads
Once you’ve nailed your seam allowances, securing those threads becomes your next victory. Proper thread tension prevents loose stitches from unraveling, while backstitch tips guarantee durability. Start each seam with a few backstitches, then end the same way for stitch reinforcement.
Using the right sewing needle types is vital for achieving professional-looking results.
| Common Problem | Quick Fix |
|---|---|
| Thread keeps breaking | Check needle size matches fabric weight |
| Stitches look loose | Adjust machine’s thread tension dial |
| Knots show on fabric surface | Pull threads to wrong side before knotting |
Master these knotting techniques: tie small overhand knots, weave your needle through previous stitches, or use your machine’s automatic backstitch function. These secure stitches will make your beginner sewing projects last for years, not months.
Pivoting at Corners for Sharp Edges
Master corner pivoting to transform your sewing techniques from amateur to professional.
Stop your sewing machine with the needle down, lift the presser foot, and rotate your fabric precisely.
This fabric manipulation creates razor-sharp edges in garment construction.
Lower the foot and continue stitching for flawless seam precision.
Practice this edge finishing method on scrap fabric before tackling your sewing project—your sewing classes never taught you this game-changing trick for your sewing machine!
Understanding different sewing techniques is essential for achieving professional results.
Tips for Cleaner Seams and Finishes
You’ll discover that perfect seams aren’t just about straight lines—they’re the foundation that transforms amateur projects into professional-looking garments.
These finishing techniques will help you create polished edges that won’t fray, pucker, or come undone after a few washes, which is the key to professional-looking garments with polished edges.
Using Basting and Staystitching
Two critical basting techniques and staystitching tips will transform your fabric stability and stitch control.
These preparatory sewing techniques prevent stretching and guarantee seam precision in any garment construction project.
- Basting stitches hold fabric pieces temporarily in place before permanent stitching, giving you perfect alignment every time
- Staystitching prevents curved edges from stretching during construction, especially around necklines and armholes
- Practice both techniques on scrap fabric during sewing classes to master these essential skills
Pressing Seams for Flatness
Once you’ve finished your seam allowance stitching, pressing becomes your secret weapon for professional-looking garment construction.
Heat and steam work magic on fabric fibers, setting them into perfect alignment.
This essential sewing technique transforms bumpy seams into smooth, flat perfection that’ll make your sewing project shine, using firm, downward motions—no dragging the iron across delicate threads, and press seams open or to one side.
Employing French Seams and Slip Stitches
French seams and slip stitches elevate your beginner sewing from amateur to polished professional.
These sewing techniques provide superior seam finishing while maintaining perfect stitch tension and thread control.
- French seams – Double-stitch method encases raw edges, preventing fabric stretch
- Slip stitch – Nearly invisible edge binding for hems and linings
- Precise allowances – Measure carefully for clean, professional results
- Practice first – Test these stitches and patterns on scraps before your project
Applying Whipstitch and Blanket Stitch
Whipstitch tips and blanket stitch techniques elevate your edge finishing game. You’ll master fabric binding by controlling stitch tension—too tight bunches fabric, too loose looks sloppy.
These beginner sewing stitches transform raw edges into professional-looking seams that won’t fray or unravel over time. Understanding the stitch strength differences is essential for selecting the right stitch for your project.
| Stitch Type | Best Uses | Spacing Guide |
|---|---|---|
| Whipstitch | Hemming jeans, pillow closures | 1/8" to 1/4" apart |
| Blanket Stitch | Napkins, stuffed animals | 1/4" to 3/8" apart |
| Overcast Stitch | Preventing fraying | 1/8" consistently |
| Binding Stitch | Quilt edges, blankets | 1/4" from edge |
| Decorative Edge | Appliqué, visible seams | Vary for design |
These hand sewing techniques require patience but deliver results that’ll make your grandmother proud!
Common Mistakes and How to Avoid Them
Even seasoned sewers make mistakes that can turn a perfect project into a frustrating puzzle—but knowing what to watch for saves you time, fabric, and sanity.
These common pitfalls are completely avoidable once you understand the simple tricks that keep your stitching straight, your fabric flat, and your tension just right.
Preventing Fabric Bunching and Stretching
Fabric bunching transforms your pristine sewing project into a wrinkled mess faster than you can say "seam ripper."
Master fabric tension and grainline control with these essential stretch management techniques:
- Use proper interfacing tips – stabilize stretchy fabrics before cutting
- Maintain consistent seam allowance – guides prevent uneven pulling
- Employ sewing stabilizers – tear-away backing supports delicate materials
- Monitor sewing machine tension – balanced settings prevent fabric distortion
Avoiding Crooked Seams
When you’re fighting wonky seams that zigzag like a drunken sailor, slow down and guide your fabric gently.
Keep consistent seam allowance by aligning fabric edges with your machine’s guide marks.
Maintain steady fabric tension without pulling or pushing the material through, and use proper stitch length settings to ensure accuracy.
Use follow the grainline for straight stitch accuracy throughout your sewing project, and remember to maintain steady fabric tension for the best results.
Managing Thread Tension
Perfect Thread Tension keeps your sewing machine humming like a well-tuned engine.
Test on scrap fabric first—you’ll spot loops or puckering instantly. Start with your machine’s default setting, then adjust the needle tension dial in tiny increments.
Remember: higher numbers mean tighter tension. Clean those tension discs regularly; lint buildup throws everything off balance, making even simple sewing techniques frustrating, which affects the overall thread tension.
Practicing on Scrap Fabric Before Projects
Before you tackle that sewing project, grab some Scrap Fabric for Trial Runs.
Practice Stitches on fabric sampling help you test thread tension, needle size, and sewing techniques without ruining your main material.
These sewing tests reveal how your fabric behaves—does it pucker, stretch, or fray, and Smart sewers always do fabric sampling first, which is like a dress rehearsal for your sewing patterns, saving heartache later.
Frequently Asked Questions (FAQs)
How to troubleshoot skipped stitches effectively?
Like troubleshooting a telegraph’s hiccupped signals, check your needle first—it’s often dull or wrong size.
Re-thread everything, adjust tension settings, and verify you’re using quality thread that matches your fabric weight.
What causes uneven stitch length consistency?
Inconsistent machine tension, worn feed dogs, improper threading, or varying fabric thickness create uneven stitches.
You’ll also see length variations from inconsistent sewing speed, dull needles, or incorrect presser foot pressure settings, which can be considered as inconsistent issues.
How to maintain proper thread tension balance?
Tension troubles trip up seamless stitching! You’ll need to test upper and bobbin tensions on fabric scraps, adjusting gradually until stitches lay flat without puckering or loose loops appearing.
When to change sewing machine needles?
You’ll know it’s time for a fresh needle when you notice skipped stitches, thread breaks, or dull popping sounds through fabric.
Change needles before starting new projects for crisp, professional results.
How to fix puckered seams after sewing?
Puckering’s absolutely maddening!
First, check your needle – a dull one creates chaos.
Adjust thread tension carefully, use proper presser foot pressure, and slow down your stitching speed for smoother seams.
Conclusion
Research shows that 68% of sewers abandon projects due to frustrating mistakes.
Don’t become that statistic! These sewing skills to improve accuracy aren’t just techniques – they’re your roadmap to confident stitching.
Practice these fundamentals consistently, and you’ll watch your precision soar. Remember, even master seamstresses started with wobbly stitches.
Trust the process, embrace mistakes as learning opportunities, and soon you’ll be creating garments that rival store-bought quality.
- https://www.sewcanshe.com/blog/how-to-sew-easy-baskets-with-10-squares-layer-cake-leftover-project
- https://www.sewmuchado.com/tutorial-felt-flash-cards-memory-game/
- https://happiestcamper.com/how-to-make-a-reversible-table-runner-for-beginners/
- https://promo.seamwork.com/sewing-supplies-freebie/
- https://www.moodfabrics.com/blog/tips-for-sewing-with-lightweight-fabrics/

