This site is supported by our readers. We may earn a commission, at no cost to you, if you purchase through links.
To start, you’ll cut fabric strips, join them with diagonal seams, and press for a crisp fold.
Next, you’ll attach the binding to your quilt, folding it to the front and securing with stitches.
You’ll also learn to handle corners with precision and achieve a professional finish.
Now, let’s break it down further – what’s the best way to guarantee a smooth binding process, and what common mistakes should you avoid to get that perfect finish?
Table Of Contents
Key Takeaways
- You’ll master quilting binding by cutting fabric strips at the right width, joining them with diagonal seams, and pressing them into perfect double-fold binding, which will transform your quilts from homemade to professional masterpieces.
- To guarantee a smooth binding process, you’ll need to prep your quilt edges and binding strips, which involves basting your quilt’s raw edges, measuring the perimeter accurately, and calculating exactly how much binding fabric you’ll need.
- You’ll learn to handle corners with precision by creating perfectly mitered corners, folding and trimming your binding so every corner lies flat and smooth, and using techniques like corner clipping to reduce bulk.
- By following key techniques like using a walking foot, pressing seams open, and securing binding with machine or hand stitching, you’ll achieve a professional finish on your quilt, with options to add decorative touches like prairie points or ruffled bindings for a unique look.
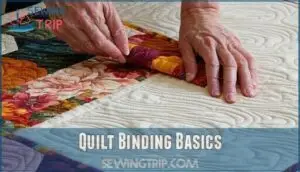
Quilt Binding Basics
You’ll start your binding journey by mastering three essential steps: cutting fabric strips at the right width, joining them with diagonal seams for smooth corners, and pressing them into perfect double-fold binding.
Master these three binding essentials and transform your quilts from homemade to professional masterpieces.
These basics form the foundation for every professional-looking quilt finish you’ll create.
Cutting Fabric Strips
Before you start cutting, grab your rotary cutter and ruler.
Cut binding strips 2¼ inches wide along the straight of grain for most quilts. This strip width creates perfect double-fold binding.
Calculate your fabric needs by measuring the quilt’s perimeter and adding 10 extra inches. Pre-washing fabric beforehand helps prevent shrinkage.
Sharp cutting methods guarantee clean edges and accurate seam allowances for professional results.
Joining Strips With Diagonal Seams
Why settle for bulky, wasteful seams when diagonal joins create professional results? This quilt binding technique reduces fabric waste while boosting seam strength.
Place strips right sides together at 90-degree angles, then sew diagonally across the intersection. You can simplify this process by using a specialized sewing tool.
- Angle Precision: Draw a diagonal line from corner to corner before stitching
- Bulk Reduction: Trim seam allowances to ¼" after sewing
- Seam Strength: Press seams open for durability and flatness
Pressing Strips for Double-Fold Binding
Once your diagonal seams are joined, it’s time to create that professional double-fold finish.
You’ll press each binding strip in half lengthwise with wrong sides together. This creates the classic double-fold binding that wraps beautifully around your quilt edges.
| Ironing Temperature | Technique | Result |
|---|---|---|
| Cotton setting | Press binding strips in half lengthwise | Creates sharp fold line |
| Medium heat | Use Best Press spray for crisp edges | Professional finish |
| Steam function | Pre-pressing flattens seam allowance | Reduces bulk |
| Consistent pressure | Hold iron 3-4 seconds per section | Even, lasting creases |
The key to perfect double fold binding lies in consistent pressure and proper heat. Your iron should glide smoothly along each strip, creating that crisp edge that’ll make your quilt binding techniques shine.
Take your time here – rushing leads to wobbly folds that’ll haunt you later when you’re trying to attach the binding.
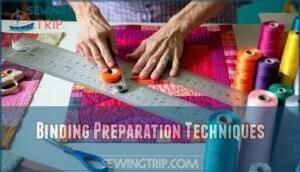
Binding Preparation Techniques
Before you attach binding to your quilt, you’ll need to prep both your quilt edges and binding strips to guarantee smooth application.
This preparation step involves basting your quilt’s raw edges, measuring the perimeter accurately, and calculating exactly how much binding fabric you’ll need.
Basting Quilt Edges
Now that you’ve prepared your binding strips, it’s time to secure your quilt sandwich. Basting prevents shifting during the binding process and creates clean, professional edges.
Here’s your basting game plan:
- Basting Purpose: Stabilizes quilt layers within 1/4″ of raw edges
- Walking Foot: Guarantees even feeding through multiple fabric layers
- Stitch Length: Use long stitches for easy removal later
- Hand Basting: Perfect alternative when machine access is limited
- Basting Alternatives: Spray basting or safety pins work too. Many quilters find adhesive quilt options particularly convenient.
Measuring Quilt Perimeter
Grab your measuring tape and walk around your quilt’s edges like you’re taking its measurements for a custom suit. Accurate measurement starts with laying your quilt flat and measuring each side carefully.
Don’t forget corner considerations – those rounded edges or sharp turns affect your perimeter calculation. Add ten inches to your total for fabric allowance and joining seams.
Wider bindings create a frame-like effect, enhancing the quilt’s visual appeal with a frame-like effect.
Calculating Strip Length
Now that you’ve measured your quilt’s perimeter, it’s time to crunch the numbers for your binding strips.
Add 10 inches to your perimeter measurement for joining seams and corners.
Divide this total by your fabric width to determine how many strips you’ll need.
This simple math prevents running short and accounts for Binding Shrinkage Factor during the quilt binding process.
Attaching Quilt Binding
Now you’re ready to attach your prepared binding strips to your quilt sandwich, which is where your careful prep work pays off.
You’ll start by sewing the binding to the back of your quilt using a walking foot, then fold it over to the front for a clean, professional finish that’ll make your quilt look store-bought.
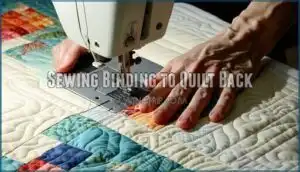
Sewing Binding to Quilt Back
Start sewing your binding to the quilt’s back side—it’s like building a foundation that’ll support your entire finish. Your walking foot becomes your best friend here, feeding layers evenly while you maintain that vital ¼" seam allowance.
Follow these essential steps for machine binding quilt success:
- Begin stitching 3" from your starting point
- Use consistent ¼" seam allowance throughout
- Stop precisely ¼" before each corner for pivoting
- Keep tacking layers smooth under your walking foot
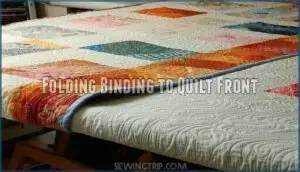
Folding Binding to Quilt Front
Once you’ve sewn the binding to your quilt’s back, it’s time to wrap it around like a cozy blanket edge.
Press the binding away from the seam, then fold it over to the front.
The folded edge should cover your machine stitching line completely, and for a polished look, remember to pin along the way to keep everything smooth and aligned for the next step.
For a professional finish, remember to press seams open.
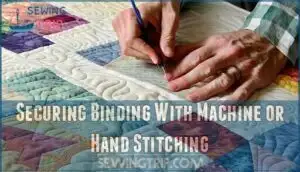
Securing Binding With Machine or Hand Stitching
Now you’ll secure that folded binding with either machine or hand stitching. Machine binding offers speed and strength, while hand binding creates invisible stitches for a refined look.
The envelope method keeps everything tidy by abutting edges perfectly.
Your securing options include:
- Decorative stitches for bold visual impact
- Invisible hand stitches for seamless results
- Secure machine topstitching for durability
For those preferring handwork, consider exploring resources for binding.
Handling Quilt Corners
Getting your quilt corners right can make or break your entire binding project, but don’t worry—it’s easier than you think once you know the tricks.
You’ll learn to create perfectly mitered corners that look professional and sharp, plus how to fold and trim your binding so every corner lies flat and smooth.
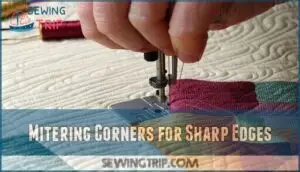
Mitering Corners for Sharp Edges
Creating perfect mitered corners transforms amateur binding into professional-looking quilting techniques.
Stop stitching exactly 1/4″ before each corner, then fold your binding strip up at a 45-degree angle.
This creates those sharp points you’re after. Fold it back down, aligning with the next edge.
The diagonal fold prevents bulk while achieving miter perfection and clean corner angles.
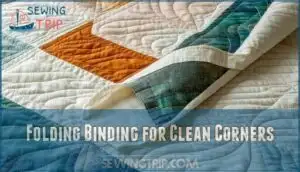
Folding Binding for Clean Corners
Once you’ve achieved Mitered Perfection at each corner, proper folding becomes your secret weapon.
Hold your binding with a stiletto for Precise Mitering, then fold the fabric back down along the quilt edge.
This creates sharp, clean lines that scream professional quality.
Understanding woven fabrics stability is key for achieving crisp corners.
Corner Clipping reduces bulk, making your quilt binding corners lie flat and smooth every time.
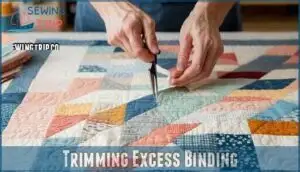
Trimming Excess Binding
After folding your binding perfectly, you’ll notice some extra fabric hanging around those corners. Don’t worry – trimming excess binding is like giving your quilt a clean haircut.
Here’s how to get those corners looking sharp:
- Trim seam allowance to ¼ inch using sharp scissors for clean cuts
- Reduce bulk by clipping corners diagonally without cutting through stitching lines
- Use proper trimming tools like small embroidery scissors for precision work
- Check binding tails are even before making final cuts on diagonal seams
These steps will help you achieve a professional finish on your quilt, ensuring that the binding looks neat and tidy.
Binding Types and Variations
You’ve got several binding options that’ll change how your quilt looks and feels when you’re done.
Each type serves a different purpose, from simple continuous strips that work great for beginners to fancy prairie points that’ll make your quilt stand out at the next guild meeting, using complete concepts to enhance the overall design.
Continuous Strip Binding
Continuous binding wraps your quilt edges with two protective fabric layers for durable edges.
This sewing technique creates seamless application by joining strips end-to-end diagonally.
Your fabric selection matters—choose quality cotton for best results.
The continuous binding method offers excellent tension control and bulk reduction.
This quilt binding tutorial shows you’ll cover the entire perimeter without stopping, making your binding process efficient and professional-looking.
The method ensures that you can achieve a seamless and durable finish with excellent tension control.
Bias Binding for Curved Edges
When your quilt features curves, bias binding becomes your best friend.
Cut strips on the bias grain for maximum stretch and flexibility. This prevents distortion and allows smooth curve ease stitching around rounded edges.
The diagonal cut creates flexible edge finishes that hug curves without puckering. Choose cotton fabrics for best results in your bias binding projects.
Self Binding for Simple Finish
Your quilt’s backing fabric becomes the star with selfbinding—a time-saving technique that wraps around to finish edges.
This streamlined approach eliminates separate binding strips while showcasing beautiful backing prints.
- Backing Fabric Choice: Select sturdy cotton that complements your quilt top design
- Layer Thickness Issues: Creates thinner edges since only one fabric layer wraps around
- Durability Considerations: Less robust than traditional binding for heavy-use quilts
- Best Project Types: Perfect for wall hangings, baby quilts, and decorative throws
Prairie Points for Decorative Edge
While traditional binding creates clean edges, prairie points add that special wow factor your quilts deserve.
These folded triangles transform ordinary borders into decorative masterpieces through smart fabric selection and precise point placement.
You’ll master layering techniques by overlapping or spacing points evenly.
Securing points requires careful stitching along raw edges, while corner adaptations guarantee perfect mitered finishes for professional-looking quilting results.
Ruffled Bindings for Feminine Touch
Ruffled bindings bring soft elegance to your quilt binding tutorial.
Choose lightweight fabrics for better ruffle density and movement. Set your machine’s longest stitch length, then gather fabric strips to create those feminine ruffles.
Attachment method matters—pin carefully before stitching. These sewing techniques add texture and charm.
Follow care instructions to maintain that delicate ruffled look through washing.
Frequently Asked Questions (FAQs)
What are the different ways to bind a quilt?
You’ll find various binding methods, including double-fold, single-fold, bias, and ruffled bindings, each offering a unique finish to your quilt project.
What is the formula for binding a quilt?
You’ll need to measure the quilt’s perimeter, add 10 inches, then cut strips, usually 2 1/4 inches wide, to create your binding, ensuring a snug fit.
What is the best stitch length for quilt binding?
Beautifully beginners, you’ll want a longer stitch length, typically 3-4 mm, for quilting binding to allow for easy flexibility and a smooth finish on your quilt edges.
What thread color should I use for binding?
You should use a thread color that matches your quilt’s binding fabric, so it blends in seamlessly, creating a professional and polished finish on your quilt.
Can I use cotton fabric for quilt binding?
What a relief, you can breathe easy – yes, you can definitely use cotton fabric for quilt binding, it’s a popular choice, and works wonderfully.
How tight should quilt binding be sewn?
You should sew quilt binding snugly, but not too tight, allowing for a smooth, even finish, and a comfortable drape, with about 1/4 inch seam allowance for flexibility.
What needle size is best for binding?
You’ll want a sharp needle, size 8 or 10, to easily pierce fabric and batting for a smooth binding process, ensuring a professional finish on your quilt.
Can I use serger for finishing binding edges?
You can finish binding edges with a serger, it’s a great way to prevent fraying, but make sure to test your stitches first to guarantee a clean finish.
Conclusion
You’re on a roll now, and it’s time to tie up loose ends.
Mastering sewing techniques for quilting binding takes practice, but you’ve got this.
You’ll be a pro at sewing techniques for quilting binding in no time, creating beautiful quilts with ease and precision, and that’s a wrap.
- https://christaquilts.com/2022/11/21/detailed-quilting-tutorial-how-to-bind-your-quilt/
- https://southerncharmquilts.com/2019/10/02/exploring-the-many-ways-of-binding-a-quilt/
- https://www.reddit.com/r/quilting/comments/15pbbq3/different_ways_to_bind_a_quilt/
- https://forum.missouriquiltco.com/forum/we-don-t-know-much-but-we-know-quilters/quilting-questions/1957056-newbie-would-like-to-know-best-binding-technique-you-use
- https://www.mollyandmama.com.au/how-to-bind-a-quilt/

