This site is supported by our readers. We may earn a commission, at no cost to you, if you purchase through links.
 Sewing binding on a quilt might seem intimidating, but with a few neat tricks, you’ll finish like a pro.
Start by aligning your binding strips with the quilt top, keeping edges even.
Sew with a consistent ¼-inch seam allowance, using smooth stitches—like you’re playing your favorite song on repeat.
When you get to the corners, fold at a 45-degree angle for those crisp mitered corners that scream "precision!"
Finish the binding either by hand or machine for a near-invisible stitch.
With these steps, your project will look dazzling, hinting at even more quilting secrets ahead.
Table Of Contents
- Key Takeaways
- Sewing Binding on a Quilt
- Quilt Binding Placement
- Quilt Binding Formula
- Joining Quilt Binding Ends
- Advantages of Machine Binding
- Setting Up Your Sewing Machine
- Making The Quilt Binding
- Machine Binding Tutorial Steps
- Mitering a Corner on The Quilt Front
- The Back View of Machine Bound Quilts
- Frequently Asked Questions (FAQs)
- Conclusion
Key Takeaways
- You’ll need to measure your quilt’s perimeter and add extra for seam allowances when calculating your binding length.
- Use a ¼-inch seam allowance for consistent stitching, and miter your corners at a 45-degree angle for a crisp, professional look.
- A walking foot on your sewing machine will help you feed fabric evenly, resulting in a smoother, more professional finish.
- You can choose between hand-sewing or machine-sewing your binding to finish, depending on your preference and time constraints.
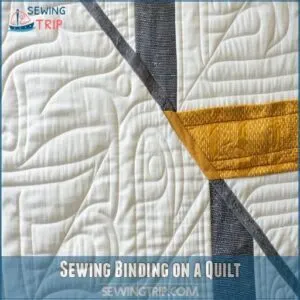
Sewing Binding on a Quilt
When you’re ready to secure the final touch on your quilt masterpiece, sewing binding is your ultimate step. Don’t worry, it’s easier than trying to untangle last year’s holiday lights!
Attaching The Binding
First things first: grab your binding strips and align their raw edges with the quilt top, starting halfway down one side.
Think of it as a dance—keeping steady binding tension is key.
Use a ¼-inch seam allowance to stitch along.
Don’t rush; maintain smooth, even stitches.
It’s like making quilt magic with practical quilt binding techniques.
Mitering The Corners
You’ve nailed attaching the binding; now let’s tackle those tricky corners.
Mitering corners feels like folding the perfect napkin at a fancy dinner—frustrating initially, but oh-so-satisfying!
To achieve perfect miters, stop sewing ¼ inch before the corner, fold the binding at a 45-degree angle, then continue sewing.
With these corner tips, your quilt’s edges will impress!
Sewing The Binding
Now that those corners are perfectly mitered, let’s sew!
Use your walking foot for even feeding.
Maintain a consistent ¼” seam allowance.
Remember these three things:
- Smooth, steady stitches.
- Even fabric tension.
- A happy, confident you!
Sewing your quilt binding is a breeze; you got this!
Finishing The Binding
Time to wrap up by finishing the binding.
Press the binding with a hot iron, smoothing those neat edges like a pro.
Hand-stitch or machine-stitch for securing stitches, ensuring minimal stitch visibility.
Remember, mastering quilt binding techniques means you’ve tamed the beast—binding a quilt with flair!
These quilt binding tips will have your work looking A-grade in no time.
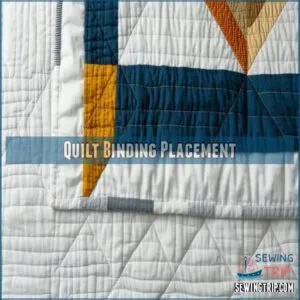
Quilt Binding Placement
When you’re lining up that quilt binding, precision is your best friend.
Machine binding makes this easier, letting you zip the binding along the edge perfectly.
Think of mitered corners as the magic trick that turns ordinary quilts into showstoppers.
To guarantee a snug fit, accurately trim the quilt sandwich to accommodate batting overlap and extra fabric for seam allowances, as seen in the extra wide quilt binding tutorial sewing wide binding strips.
Here are some golden pointers:
- Pin the binding evenly as if you’re laying tracks for a train.
- Use machine binding to speed things up.
- Miter those corners tightly for a sharp finish.
- Pick binding fabric that complements the quilt and jazzes up its look.
- Make sure the binding stays put, securing a snug fit for years to come.
With these steps, you’ll master quilt binding placement, making every quilt look like a masterpiece.
Quilt Binding Formula
You’ve got your quilt top ready and the excitement is building, but first, let’s calculate the quilt binding formula.
Don’t worry, it’s as easy as pie—just measure the quilt’s perimeter, add a smidge for wiggle room, and figure out how wide you’ll cut those strips!
Calculate Total Binding Length
Measuring your quilt perimeter might seem like measuring your kitchen for new cabinets—it sounds tedious but is totally worth it.
You’ll want to add 10 extra inches for seam allowances and wiggle room.
Here’s how it breaks down:
- Measure quilt perimeter
- Add 10 inches for seam allowance
- Calculate total binding length
- Gather fabric pieces accordingly
- Start stitching!
Cut Binding Strips Width
Cutting binding strips is like prepping for the big game—choose wisely to score a home run!
When selecting your binding width, you can also consider shopping online for the perfect width, like finding the ideal quilt binding width options to match your quilt’s needs.
Pick strips 2 to 2 1/4 inches wide; this gives you wiggle room for single or double fold binding.
Here’s a nifty table to guide you through the details:
| Topic | Recommended Width | Fabric Type | Effect |
|---|---|---|---|
| Single Fold Binding | 2 inches | Light/Medium | Sleek finish |
| Double Fold Binding | 2 1/4 inches | Medium/Heavy | Sturdy, durable |
| Complementary Fabric | Select by tone | Matches quilt | Unified look |
| Contrasting Fabric | Bold choice | Opposite tones | Dramatic impact |
Always align strips with the fabric grain for stability—think of it like the backbone holding everything together.
Keep in mind, fabric width influences how many WOF strips you’ll need, so factor that in when calculating.
Now, get cutting and prepare to wow them with your artistry!
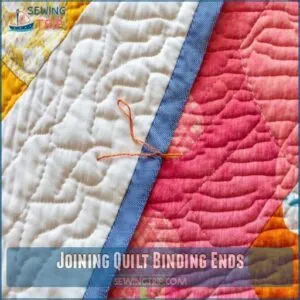
Joining Quilt Binding Ends
Ready to join those quilt binding ends? It’s easier than you think!
First, pin the ends together at a jaunty 45-degree angle. Leave a tiny ¼-inch overhang on each.
To keep those ends secure while you sew, use Quilt Binding Clips for a smooth, even finish.
Sew along that diagonal line, using a ¼-inch seam allowance.
Now, the magic happens: press that seam open! This little trick keeps everything nice and flat.
Next, fold your long strip in half, wrong sides together, and press again.
See? A perfectly smooth, continuous binding, ready to encircle your quilt beautifully.
This diagonal seam method is key for a truly professional-looking finish—no bumps or bulges here!
You’ve successfully joined your quilt binding ends. Your smooth finish is almost ready!
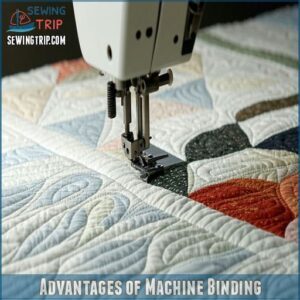
Advantages of Machine Binding
When you’re short on time but big on ambition, machine binding is your quilt’s best friend, offering both speed and a polished finish.
Machine binding gives your quilt a professional look.
Imagine breezing through the last step with stitches so precise your friends will wonder if you’ve got a secret quilting fairy helping out.
Convenient and Time-Saving Option
Imagine wrapping up a quilt faster than you can say "thimbleful."
Machine binding is your go-to time-saver, turning quilt finishing from a chore into a breeze.
No more tedious hand-stitching—just set up your sewing machine, pick the perfect thread, and explore those decorative stitches.
Achieve a polished look with a consistent quarter-inch seam, and enjoy the freedom to experiment with different binding methods.
Provides a Professional Finish
For a polished quilt finish, machine binding is your go-to.
It delivers neat edges and even stitches, lending a professional shine.
To achieve this professional look, setting up your sewing machine with the right thread, such as one that complements your quilting thread selection, is important.
The stitching looks tidy on both sides, making it an ideal method for beginners who want results without hassle.
Use cotton or polyester thread, depending on your style, and experiment with decorative stitches for those finishing touches.
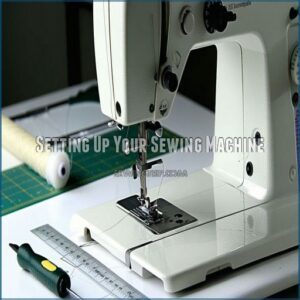
Setting Up Your Sewing Machine
Before you get started binding your quilt with a sewing machine, make sure everything is set up correctly for smooth sailing.
Thread it with high-quality cotton thread.
For even stitches, adjust the needle tension.
Use a size 80/12 or 90/14 needle, depending on your quilt’s heft.
Stick to a straight stitch setting and a stitch length of 2.5-3 mm.
Choose a quarter-inch foot to nail those seam allowances.
And don’t skimp on the essentials—rotary cutter, acrylic ruler, and cutting mat are your trusty sidekicks.
Oh, and remember to park the needle down for those nimble corner turns.
Now your machine’s beautifully ready to tackle quilt binding like a champ!
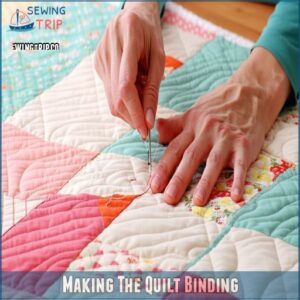
Making The Quilt Binding
Let’s get started by cutting those quilt binding strips to perfection and joining them diagonally for a seamless look; these are the building blocks of your quilt’s sturdy edge.
Don’t forget to trim the corners and press the seams—think of it like ironing your Sunday best, just with fabric and fewer wrinkles!
Cutting Strips and Joining Them Diagonally
Once your sewing machine’s ready, it’s time to cut your binding strips.
Use a 2 1/2-inch width on the bias for flexibility—perfect for those pesky curves.
You can also purchase pre-cut binding strips from a reliable quilt store.
Join them diagonally to keep things smooth and reduce bulk.
Trim away the excess triangles and press those seams open.
Now, fold your long strip in half lengthwise, getting it prepped for the quilt.
Trimming Corners and Pressing Seams
After sewing your quilt binding strips, it’s time to finesse those corners!
Trim those corners to get rid of extra bulk – think of it as a mini-surgery for your quilt.
Then, press those seams open nice and flat.
A crisp seam allowance makes all the difference!
This guarantees a smooth, professional look for your beautiful quilt.
Machine Binding Tutorial Steps
Ready to master the art of machine binding?
You’re about to tackle those mitered corners and join binding strips like a quilting pro,
with steps so clear even your pet might lend a paw—or a paw-sewing stitch!
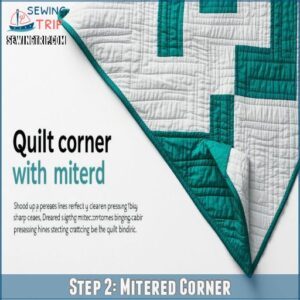
Step 2: Mitered Corner
Transforming those tricky corners into beautifully mitered ones can make your quilt truly pop.
Get into mitering with confidence by focusing on the details, particularly when sewing the binding to the quilt front using a quarter inch seam allowance.
- Precise Corner Folding: Aim for sharp creases.
- Pressing: Use a hot iron for clean lines.
- Proper Stitching: Make sure it’s durable.
- Quilt Binding: Achieve a polished look.
- Sewing Binding Corners: Add personality.
Happy stitching!
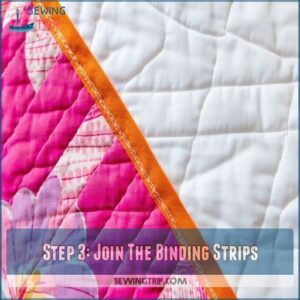
Step 3: Join The Binding Strips
Grabbing your sewn strips, align them at right angles for a diagonal seam.
It’s like giving them a twisty dance move; this reduces bulk and gives a smooth finish.
Sew along the diagonal mark, and remember to trim the excess.
Press open those seams flat with your iron.
Voilà, you’ve got binding strips ready for action!
Mitering a Corner on The Quilt Front
Corners can be tricky, but with a bit of focus, you’ll master mitering techniques like a pro, especially when using a 45-degree angle to reduce fabric bulk and prevent fraying, as seen in techniques for professional mitered corners.
Imagine you’re giving your quilt a crisp, professional hug at each corner.
Start by sewing binding to the edge of the quilt until you’re a seam allowance away from the corner.
Lift the needle and turn the quilt as if you’re giving it a playful twirl.
Fold the binding upward, press like you’re ironing out wrinkles in a shirt, and bring it back down to form a neat triangle.
This little dance creates mitered corners that look polished.
Remember, pressing tips and accuracy are key—your quilt deserves a finish that makes everyone say, "Wow!"
Enjoy this quilt binding tutorial and keep those stitches straight.
The Back View of Machine Bound Quilts
When you flip your quilt, you’ll notice that machine binding gives the back a neat, uniform finish, enhancing the quilt’s overall look.
With precise stitching, it’s like giving your quilt a professional touch-up—minus the hefty price tag!
What Does The Back Look Like?
Peeking at the back view of your quilt, you’ll notice the neat appearance of hidden seams and a beautifully finished edge—like the back of a picture-perfect postcard.
This polished look is often achieved by using techniques such as mitering corners, which result in tight stitches and a secure edge.
With machine binding, your stitches hold tight, making the quilt edges secure and tidy.
It’s a satisfying end to your quilt binding journey, leaving you ready to tackle more projects!
Why Machine Binding a Quilt?
So, you’ve seen the back—neat and tidy, right?
That’s the magic of machine binding!
It’s a time-saver, offering a professional finish with smoother seams than hand-sewing.
Plus, you get creative options with stitch choices and consistent binding.
It’s a win-win!
Frequently Asked Questions (FAQs)
How do you bind a quilt?
They say, "a stitch in time saves nine," and binding a quilt is like wrapping a cozy hug around your creation.
Secure the edges with a folded fabric strip, sewing it for a durable, finished look.
Enjoy!
How to make the binding for the quilt?
To make quilt binding, cut fabric strips crosswise, sew them together diagonally, and iron the seams flat.
Attaching the binding to your quilt involves folding the strip lengthwise, pressing, and attaching it to your quilt, leaving an extra 10 inches for finishing.
What is sewing binding on a quilt?
Sewing binding on a quilt involves attaching a fabric strip around the quilt’s edges to finish it off neatly.
Use your sewing machine to secure it in place, ensuring a clean look and preventing fraying.
Can you use machine binding on a quilt?
Absolutely, you can use machine binding on a quilt!
It’s a faster, reliable method that gives your quilt a neat, professional finish.
Plus, you can get creative with decorative stitches to add a unique touch.
How to sew binding to quilt?
Want a perfectly bound quilt?
First, attach the binding to the front.
Then, fold it to the back and stitch it down.
Easy peasy, lemon squeezy!
You’ll be amazed how neat it looks.
Do you sew the edges of a quilt before binding?
Funny enough, you might think sewing the edges first would make life easier, but nope!
Just trim the excess batting and backing before binding.
This gives you a neat canvas to attach the binding securely.
What is the formula for binding a quilt?
To calculate quilt binding, measure the quilt’s perimeter, add 10-12 inches for joining.
Divide this by the fabric’s width (usually 42 inches) to get the number of strips needed.
Then choose your binding width, typically 2 ¼" or 2 ½".
What foot do you use to sew binding on a quilt?
Use a walking foot to sew binding on a quilt.
It helps feed multiple fabric layers evenly, reducing puckers and frustration.
This trusty foot works like magic, making your quilt binding smoother and more professional-looking.
How to sewing binding on a quilt?
Start by cutting strips and joining them diagonally.
Fold and iron these for neat edges.
Attach the binding to your quilt’s edge, sew with care—watch those corners!
Finish by folding over and sewing all around.
Should quilt binding be sewn on the front or back?
Binding a quilt is like putting icing on a cake—it makes all the difference.
Sew it on the front for a neat finish, then fold to the back for a seamless look and feel.
Conclusion
Imagine the quilt you’ve lovingly crafted, each stitch like a note in a peaceful melody.
As you wrap up this project with the tips from this quilt binding tutorial, you’re not just finishing; you’re adding a professional touch that stands out.
With these practical steps, sewing binding on a quilt becomes a delightful process, leaving you ready for your next creative journey.
Enjoy the confidence in crafting masterpieces one quilt at a time!

