This site is supported by our readers. We may earn a commission, at no cost to you, if you purchase through links.
 Start with the right tools: sharp fabric scissors, matching thread, and needles sized for your fabric weight.
You’ll save money and extend your wardrobe’s life by mastering basic hand-stitching techniques. Clean your workspace and iron the damaged area before beginning any repair work.
Choose invisible stitches like slip stitch for professional-looking fixes, or embrace visible mending with decorative techniques that turn tears into style statements.
Practice on scraps first to build confidence. The secret lies in matching your stitch type to the fabric’s stretch and weight—cotton needs different handling than knits or delicate silks, which is key to professional-looking fixes.
Table Of Contents
Key Takeaways
- Start with quality tools – You’ll need sharp fabric scissors, matching thread, and needles sized for your fabric weight to achieve professional-looking repairs that last.
- Match your stitch to the fabric – Use straight stitches for woven materials, catch stitches for stretchy knits, and slip stitches when you want invisible repairs.
- Prep your workspace properly – Iron the damaged area flat and clean your workspace before starting any repair work to ensure smooth, lasting results.
- Embrace visible mending techniques – Transform tears into decorative features using sashiko stitching, blanket stitch reinforcement, or creative darning that celebrates imperfection as art.
Basic Sewing Techniques
You’ll master three essential hand-sewing techniques that form the foundation for most clothing repairs.
These basic stitches work for everything from loose buttons to torn seams, giving you the skills to fix clothes instead of throwing them away, and you’ll learn to master these techniques to fix clothes.
Straight Stitch Fundamentals
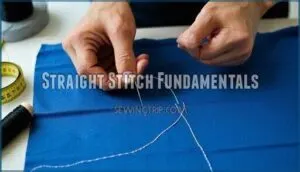
Your straight stitch serves as the foundation for all mending clothes repairs.
Start with consistent lines by keeping your stitch length uniform, about 1/8 inch apart. Control fabric feed by gently guiding material while maintaining steady tension control.
Proper stitch length selection impacts seam durability.
Practice proper seam allowance spacing to guarantee strong, lasting repairs that won’t pull apart with wear, ensuring a lasting repair.
Basting and Slip Stitches
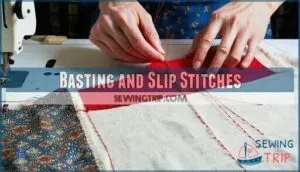
Once you’ve got the hang of a straight stitch, it’s time to explore basting techniques and slip stitch uses.
Basting stitches act like sewing’s sticky notes—temporary and easy to remove. Slip stitches, or ladder stitches, make invisible seams for mending clothes.
For durable seams, consider using the backstitch technique.
Try these:
- Basting stitch for holding fabric in place
- Slip stitch for invisible seams
- Ladder stitch for closing stuffed items
Backstitching for Embroidery
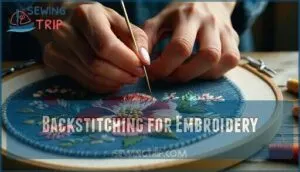
Backstitching creates clean embroidery outlines and lettering techniques that make visible mending beautiful.
You’ll thread your needle, then work backwards through each stitch to form solid lines.
This hand stitching method works perfectly for decorative accents on any fabric choice.
Keep your thread tension consistent for professional results that transform tears into artistic statements.
Choosing Right Stitches
You’ll pick different stitches based on what needs fixing and which fabric you’re working with.
Running stitches work great for simple repairs and hems, while whipstitches prevent fraying edges and catch stitches handle stretchy materials without breaking.
Running Stitch for Repairs
Running stitch works like your trusty friend for basic repairs on both knits and woven fabrics.
You’ll thread your needle, make small, even stitches in a straight line for hem repairs and simple seams.
This foundational technique handles patch attachment beautifully when you need quick fixes, and it’s your gateway to confident repair clothing skills by mastering this hand stitching method first.
Whipstitch for Hemming
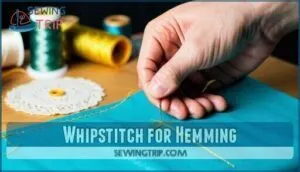
Perfect for hemming jeans and closing pillow sides, the whipstitch (overcast stitch) creates clean, durable edges that prevent fraying.
This versatile repair technique works wonders on cushion edges and stuffed animals too. As a versatile stitch, it’s often seen as the Swiss Army knife of stitches.
- Thread through fabric edge at an angle – creates the characteristic diagonal pattern that locks raw edges securely
- Keep stitches evenly spaced – maintains professional appearance while ensuring consistent strength across the entire hem
- Pull snug but don’t pucker – proper tension prevents bunching while creating a flat, polished finish for clothing alterations
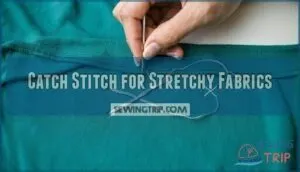
Catch Stitch for Stretchy Fabrics
While hemming creates finished edges, stretchy fabric types like knits and jersey need special treatment.
You’ll use the catch stitch (cross stitch) to maintain elasticity retention in waistbands and seams.
| Catch Stitch Tension | Decorative Catch Stitch | Alternative Stretches |
|---|---|---|
| Keep loose for stretch | Add contrasting thread | Zig-zag stitch works too |
| Test on fabric scraps | Creates visible X pattern | Blanket stitch alternative |
| Avoid puckering seams | Creates visible X pattern | Hand-sewn stretch seams |
| Maintains fabric give | Shows repair intentionally | Prevents thread breaking |
| Essential for mending | Makes flaws beautiful | Accommodates movement |
This stitch requires a specialized sewing tool for best results.
This sewing tip prevents fabric repair disasters when clothing alterations require flexibility.
Mending Clothes Essentials
Before you start mending, you’ll need the right tools and prep work to guarantee your repairs last.
Choose thread that matches your fabric weight and color, select needles sized 8-14 for most clothing repairs.
Always iron your garments flat before stitching for professional-looking results, and ensure you have the correct materials to achieve this, including thread that is appropriate for your fabric.
Thread and Needle Selection
Matching your thread types to fabric weight makes the difference between repairs that last and ones that fail.
Choose polyester thread for durability on most fabrics, or sashiko thread for heavy denim. Needle selection matters equally—use sharp needles for woven fabrics and ballpoint for knits.
Color matching your thread slightly darker than the fabric creates invisible repairs. For best results, it’s best to match thread fiber to fabric, ensuring a durable outcome.
Fabric Preparation and Ironing
After picking the right thread and needle, don’t skip fabric preparation.
Prewash importance can’t be overstated—shrinking surprises aren’t fun.
Ironing techniques matter too: use proper steam settings for wrinkle prevention and smooth seams.
Iron before you cut, not after.
Fabric stabilizers help keep things steady.
Think of ironing as giving your fabric a spa day—wrinkle removal makes sewing a breeze, and it’s all about smooth seams.
Sewing Machine Basics
While hand sewing focuses on mending, understanding your sewing machine opens up countless repair possibilities.
Machine threading becomes second nature with practice—thread flows from spool through guides to needle.
Tension adjustment controls how tightly threads lock together, preventing loose or puckered seams.
Stitch selection lets you match repairs to fabric weight, and bobbin winding guarantees smooth stitching.
While needle replacement keeps your machine running smoothly for years.
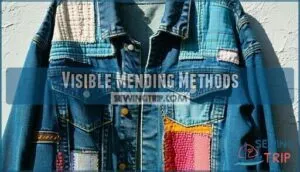
Visible Mending Methods
You don’t need to hide your clothing repairs anymore—visible mending turns necessary fixes into decorative features that add character to your garments.
These three techniques transform torn fabric, worn edges, and holes into eye-catching design elements that celebrate the art of repair.
Sashiko Stitch for Decoration
Transform tears and worn spots into stunning decorative features using sashiko, a Japanese mending technique that’s both functional and beautiful. This ancient method turns repair work into art.
Make tears beautiful—sashiko transforms damage into decorative art that celebrates imperfection.
Sashiko’s origins trace back to when it was used as a means to mend.
Use sashiko patterns to create eye-catching designs:
- Asanoha (hemp leaf) – symbolizes growth and protection
- Seigaiha (ocean waves) – represents tranquility and strength
- Geometric grids – offer modern, minimalist appeal
Thread choices matter for visual impact. White cotton thread on denim creates classic contrast, while matching colors blend subtly. Select sturdy sashiko thread that won’t break under tension.
Modern applications include patching fabric on jackets, reinforcing pocket corners, and darning socks with decorative flair. This visible mending technique celebrates imperfection as beauty.
Blanket Stitch for Reinforcement
Beyond basic repairs, the blanket stitch transforms worn edges into decorative focal points while strengthening vulnerable areas.
You’ll create edge reinforcement that doubles as decorative edging along cuffs, hems, and pocket openings.
Master corner stitching by pivoting at right angles, maintaining consistent spacing throughout.
This sewing technique excels at securing patches with visible seams that celebrate rather than hide repairs, making clothing restoration both functional and beautiful.
Darning for Hole Repair
When faced with holes in your favorite garments, darning offers a time-tested solution that’s both practical and creative.
Darning transforms holes into opportunities for creative expression and lasting repairs.
This textile repair technique weaves new threads across damaged areas, basically rebuilding the fabric’s structure.
Here are three essential darning approaches:
- Woven darning – Creates parallel stitches with perpendicular weaving for sturdy sock darning
- Swiss darning – Mimics original knit patterns for invisible mending results
- Creative darning – Uses contrasting threads and decorative patterns for visible repair statements
Choose darning needles with large eyes and select darning materials that match your fabric’s weight.
For the best results, use the thinnest hand-sewing needle for precise work.
Practice these darning techniques on scraps first – you’ll master clothing mending faster than expected.
Frequently Asked Questions (FAQs)
What is the best stitch for mending clothes?
About 70% of clothing gets discarded due to minor damage that could be easily repaired.
You’ll want to use a backstitch for most clothing repairs since it’s incredibly strong and durable, perfect for seams and structural fixes.
What are the two points to consider before mending clothes?
First, assess the fabric type and damage extent.
Then, prewash the fabric to prevent size changes after mending.
Choose appropriate thread and needle for your specific fabric weight and repair type.
How to start mending clothes?
Start by gathering your supplies: sharp scissors, matching thread, and a needle. Clean the damaged area, then choose the appropriate stitch for your fabric type and damage.
How to visible mend a hole in fabric?
Like tending a garden, visible mending celebrates imperfection.
Use Sashiko stitch or decorative patches to transform holes into focal points.
Choose contrasting thread colors and create patterns that highlight rather than hide the repair, using techniques like Sashiko stitch.
How do you match thread color to faded fabric?
Hold faded fabric against light to see its true undertones, then test thread on a hidden seam. Choose slightly lighter than the fade—it’ll darken when sewn and blend naturally.
Whats the best way to reinforce weak seams?
Use a backstitch along the original seam line to create a second, parallel reinforcement.
This double-stitching technique distributes stress across two lines instead of one, preventing future tears and extending your garment’s life substantially.
How do you mend without a sewing machine?
Hand sewing repairs torn clothes effectively using backstitch for strong seams, running stitch for hems, and slip stitch for invisible closures.
Thread your needle, knot securely, and pull stitches taut without bunching fabric for lasting results, utilizing techniques like slip stitch to ensure professional-looking repairs.
When should you replace versus repair clothing?
Replace worn items that cost more to fix than replace, when repairs won’t last, or damage affects function.
Repair quality pieces with sentimental value, designer items, or simple fixes like loose buttons and small tears.
How do you prevent patches from puckering?
Iron your fabric completely flat before patching. Choose patches with matching stretch and weight. Baste the patch first, then sew with even tension throughout.
Conclusion
Mastering these mending methods makes your wardrobe wonderfully wearable again.
These sewing tips for mending clothes transform torn garments into treasured pieces.
You’ll discover that hand-stitching repairs often outlast the original construction. Start small with simple tears, then tackle complex projects as your confidence grows.
Each mended item saves money while reducing textile waste. Keep practicing these techniques regularly—your skills will improve with every stitch.
Soon, you’ll view clothing damage as creative opportunities rather than costly problems.
- https://practicalembroidery.eu/mending-tools-and-materials/
- https://www.reddit.com/r/sewing/comments/16fk334/how_do_i_get_into_sewing_and_mending_my_clothes/
- https://madamsew.com/blogs/sewing-blog/hand-sewing-stitches-mending
- https://so-sew-easy.com/hand-sewing-stitches-for-making-clothes-by-hand/
- https://sanbornmills.org/workshops/sashiko-basics-and-visible-mending/

