This site is supported by our readers. We may earn a commission, at no cost to you, if you purchase through links.
 Working with slippery fabrics doesn’t have to be a wrestling match. Start by stabilizing silk and satin with spray starch or tissue paper underneath while cutting.
Use ultra-sharp scissors and extra-fine pins to prevent snags. Cut single layers when possible, and employ pattern weights instead of pins to avoid shifting.
For sewing, reduce presser foot pressure and use a shorter stitch length. French seams work beautifully for professional edges.
The secret weapon? A walking foot that feeds fabric evenly through your machine. These sewing tips for slippery fabrics transform frustrating projects into satisfying successes.
Master these fundamentals, and you’ll discover advanced techniques that make even the most challenging materials behave perfectly.
Table Of Contents
Key Takeaways
- Prep your fabric first – Pre-wash to prevent shrinkage, apply spray starch for stability, and use tissue paper underneath when cutting to stop fabric from shifting around.
- Choose the right tools – Use ultra-sharp scissors or rotary cutters, extra-fine pins that won’t snag, and pattern weights instead of pins to keep fabric from moving during cutting.
- Adjust your machine settings – Lower presser foot pressure, use shorter stitch lengths (1.5-2mm), and consider a walking foot to feed fabric evenly through your machine.
- Master professional finishing techniques – Use French seams for enclosed edges, press with low heat and a pressing cloth, and handle fabric gently throughout the entire process.
Preparing Slippery Fabrics
Success with slippery fabrics starts long before you cut your first piece—proper preparation makes all the difference.
You’ll transform frustrating materials like silk and satin into manageable, professional-looking projects by taking time to prep your fabric correctly.
Pre-washing and Drying Techniques
Most slippery fabrics need prewashing to prevent fabric shrinkage and stabilize fibers.
Hand wash delicate fabrics like silk in cool water with mild soap for gentle care. Machine wash on delicate cycle works for treated fabrics.
Handle silk like liquid gold—gentle care prevents heartbreak and ensures beautiful results every time.
Air-dry flat or hang supported—avoid wringing wet fabric. Low heat drying suits synthetic blends but test first for fabric relaxation.
To achieve the best results, consider using pre washing techniques for your fabrics, especially for delicate fabrics and to ensure fabric relaxation and prevent fabric shrinkage.
Pressing and Ironing Methods
Master the iron’s heat settings to transform your pressing game from disaster to professional perfection.
Proper heat management prevents scorching while achieving that crisp, polished finish your delicate fabrics deserve.
- Set iron temperature to silk or synthetic settings (medium heat) for most slippery fabrics
- Control steam output by using minimal steam or dry heat to prevent water spots
- Test heat levels on fabric scraps before pressing your actual garment pieces
- Move iron continuously in smooth, gliding motions to avoid heat damage or shine
- Press seam finishes with gentle downward pressure, lifting rather than dragging the iron
Understanding vital temperature settings is essential for working with various fabrics.
Using Silk Organza or Fine Cotton Pressing Cloths
Protecting delicate fabrics during pressing requires a barrier between your iron and the material.
You’ll want silk organza or fine cotton pressing cloths to prevent scorching and shine marks.
These protective layers maintain fabric integrity while ensuring smooth results.
| Pressing Cloth Type | Best For | Benefits |
|---|---|---|
| Silk Organza | Silk, satin, chiffon | Transparent, heat-resistant, no texture transfer |
| Fine Cotton | All slippery fabrics | Breathable, prevents shine, readily available |
| Muslin (lightweight) | Delicate synthetics | Gentle protection, easy to see through |
Applying Spray Starch or Fabric Stabilizer
Spray starch and fabric stabilizers transform fussy fabrics into manageable materials.
Test your chosen product on scraps first—some fabrics react unexpectedly. Apply light, even coats, letting each layer dry completely before adding more.
This stiffening method reduces slippage during cutting and prevents stretching. Remember, you can always add more starch, but removing excess requires rewashing your precious yardage, which can be a precious loss.
Essential Tools and Materials
Having the right tools transforms frustrating fabric wrestling matches into smooth sewing sessions.
You’ll need ultra-sharp cutting tools, specialized pins, and precise marking instruments to tame even the slipperiest silks and satins.
Ultra-sharp Scissors and Rotary Cutters
Your cutting tools make or break your success with silky fabrics.
Microserrated scissors grip slippery materials, preventing slides that ruin precision cutting.
Rotary cutters with tungsten steel blades slice through satin cleanly, reducing fabric distortion by 40%.
Sharp fabric shears are non-negotiable—dull blades cause fraying and misaligned cuts.
Regular blade maintenance keeps your cutting techniques flawless.
Investing in high quality sharp scissors is essential for achieving professional results with sharp scissors.
Silk Pins and Extra-fine Glass-head Pins
When working with delicate fabrics, your pin selection makes all the difference between professional results and frustration.
Silk pins and extra-fine glass-head pins slip through fabric fibers without creating permanent holes or snags. These specialized tools guarantee fabric handling stays smooth while maintaining seam security.
Always test your extrafine pins on scraps first—sharp needles sewing requires matching your needle choice to achieve superior stitch quality when hand basting method proves necessary for sewing with silky fabrics.
The right choice of silk sewing pins can substantially impact the overall quality of the garment, ensuring smooth fabric handling and seam security with the use of delicate fabrics.
Tailor’s Chalk and Disappearing Ink Pens
Accurate marking makes all the difference when you’re working with silky surfaces that shift at the slightest touch.
Tailor’s chalk and disappearing ink pens become your best friends for drawing darts, pleats, and seam lines without leaving permanent marks.
These fabric markers let you trace patterns with confidence, knowing your markings will vanish when needed.
Mastering sewing tool essentials is vital for achieving professional results in sewing slippery fabrics like silk and satin, which requires working with sewing slippery fabrics.
Rotary Cutter and Self-healing Mat
A rotary cutter paired with a self-healing mat transforms slippery fabric cutting from frustrating to precise.
The mat’s surface grips fabric better than your cutting table, preventing unwanted shifts during cuts.
Sharp rotary blades slice through delicate materials cleanly, reducing fraying compared to scissors.
Replace blades regularly for peak performance, and clean your mat to maintain its grip for consistent fabric stabilization.
Using a rotary cutter mat is essential for accurate cuts and extending the life of your tools, which helps in achieving consistent fabric stabilization.
Cutting and Handling Techniques
When you’re cutting slippery fabrics like silk or satin, precision becomes your best friend because these materials love to shift and slide at the worst possible moments.
You’ll need to slow down and use smart techniques that keep everything perfectly aligned, from finding the grain line to using the right cutting tools, which involves techniques.
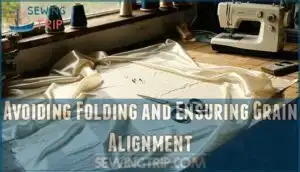
Avoiding Folding and Ensuring Grain Alignment
When you’re handling slippery fabrics, resist the urge to fold them unless absolutely necessary.
Folding creates layers that slip and slide, making fabric alignment nearly impossible.
Instead, work with single layer cutting whenever possible.
If you must fold, carefully align the grain line first – draw a thread or use a quilting ruler to guarantee your fabric distortion stays minimal and your seam accuracy remains sharp.
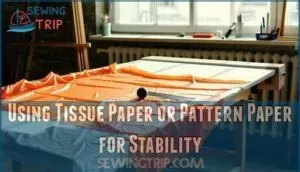
Using Tissue Paper or Pattern Paper for Stability
Place tissue paper beneath slippery fabrics when cutting to create friction and prevent shifting.
This tissue paper trick acts as fabric stabilization, giving your rotary cutter better edge control.
The paper interfacing method works especially well for sewing slippery material like silk and chiffon.
You’ll get straighter cuts without the fabric sliding around your cutting surface.
Using the tissue paper method can greatly improve your results when working with difficult fabrics.
This technique is a simple yet effective way to achieve more accurate cuts, making it a valuable tool for sewers working with challenging materials like silk and chiffon.
Employing Pattern Weights and Cutting Mats
Switch from stabilizing tissue layers to pattern weights and cutting mats for superior fabric control.
Pattern weights eliminate pin holes that damage delicate materials while providing consistent pressure across your pattern pieces.
Position your cutting mat beneath slippery fabric, then arrange pattern weights strategically along pattern edges.
This mat placement creates a stable foundation that prevents fabric shifting during cutting, ensuring precise grain alignment throughout your project.
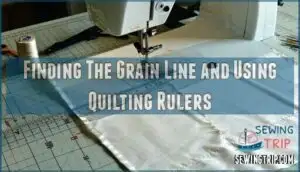
Finding The Grain Line and Using Quilting Rulers
Nobody wants crooked cuts ruining their silk masterpiece. Finding the grain line prevents wonky seams and makes your fabric behave predictably.
Draw a thread from the fabric edge to reveal the straight grain, then use quilting rulers to maintain perfect alignment throughout cutting.
- Use a quilting ruler against the selvage edge to establish straight cutting lines
- Draw a thread from the crosswise grain to check fabric alignment before cutting
- Place your cutting mat’s grid lines parallel to the fabric’s grain for accuracy
- Mark grain lines with tailor’s chalk when working with pattern pieces
- Double-check grain alignment before each cut to prevent fabric distortion and improve sewing precision
Sewing and Finishing Techniques
Once you’ve cut your slippery fabric with precision, the real challenge begins at the sewing machine.
The right needle, thread choice, and machine settings will transform your frustrating fabric into a beautiful finished piece.
Choosing The Right Needles and Threads
Precision matters in needle selection and thread compatibility for slippery materials.
Your sewing tension depends entirely on matching the right components to your fabric’s delicate nature.
| Fabric Type | Needle Choice | Thread Recommendation |
|---|---|---|
| Silk, Satin | Microtex needle 70/10 | 60wt polyester or silk |
| Chiffon, Organza | Universal needle 60/8 | Fine polyester thread |
| Charmeuse, Rayon | Microtex needle 65/9 | 50wt high-quality polyester |
| Lightweight Crepe | Universal needle 70/10 | Silk or fine polyester |
| Taffeta, Dupioni | Microtex needle 80/12 | Matching polyester thread |
Choose Microtex needles for their sharp points that pierce cleanly without snagging.
Fine thread choices like 60-weight polyester minimize bulk while maintaining strength.
This combination guarantees superior stitch quality during sewing with slippery materials.
Adjusting Presser Foot Pressure and Stitch Length
Two key adjustments transform your sewing machine into a slippery fabric ally. Lower presser foot pressure prevents fabric distortion, while shorter stitch length increases seam stability.
- Reduce presser foot pressure to lighten the grip on delicate materials
- Set stitch length to 1.5-2mm instead of standard 2.5mm for better control
- Use a walking foot to feed fabric layers evenly through the machine
- Adjust thread tension slightly lower to prevent puckering on lightweight fabrics
- Test all sewing machine settings on fabric scraps before starting your project to ensure seam stability and prevent errors, making it a crucial step for a successful sew, with the right thread tension.
Using French Seams and Narrow Hems
When you’re sewing slippery fabrics, French seams and narrow hems become your secret weapons for professional-looking results.
French seams enclose raw edges completely, preventing fraying while creating clean interiors perfect for sheer fabrics. Start with a 5/8" seam allowance, sew wrong sides together, trim to 1/8", then flip and sew right sides together.
| Technique | Best For | Seam Allowance | Finish Quality | Durability |
|---|---|---|---|---|
| French Seam | Silk, chiffon, organza | 5/8" initial | Enclosed edges | Excellent |
| Narrow Hem | Lightweight scarves | 1/4" double fold | Clean finish | Very good |
| Rolled Hem | Delicate edges | 1/8" fold | Invisible finish | Good |
| Flat Fell | Structured garments | 5/8" standard | Sturdy finish | Outstanding |
| Pinked Edge | Non-fraying fabrics | Standard | Quick finish | Fair |
For narrow hems, fold the raw edge twice—first 1/8", then another 1/8"—creating a neat, barely-there finish that won’t add bulk to your delicate fabric.
Mastering narrow hem techniques is essential to achieve a professional finish on lightweight fabrics.
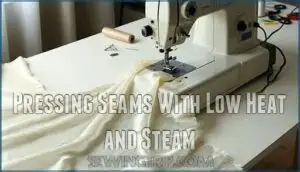
Pressing Seams With Low Heat and Steam
Gentle heat control transforms tricky seam finishing into smooth success.
Set your iron to low heat settings and use minimal steam to prevent moisture stains on silk.
Always place a silk organza pressing cloth between the iron and fabric for protection.
Press lightly rather than dragging—this fabric relaxation technique prevents distortion while achieving professional results in your delicate fabric projects.
Troubleshooting and Tips
Even experienced sewers can hit snags when working with slippery fabrics, but a few smart strategies will save your sanity.
You’ll avoid most headaches by testing everything first and handling your fabric like it’s made of liquid gold.
Handling Fabric Gently and Minimizing Pinning
Your fabric handling technique can make or break your project with slippery materials. Think of these fabrics as temperamental partners – they respond better to gentle persuasion than force.
Delicate sewing requires patience and a light touch throughout every step.
To handle these fabrics effectively, consider the following techniques:
- Support fabric weight with your palms rather than gripping with fingertips
- Move fabric slowly between cutting table and machine to prevent stretching
- Pin sparingly within seam allowances, testing placement on scraps first
- Keep one hand ahead of presser foot while sewing to guide without pulling, ensuring a smooth process with gentle persuasion and light touch.
Using Fabric Weights or Tape Instead of Pins
When pinning becomes problematic, fabric weights offer superior control for slippery materials.
Pattern weights distribute pressure evenly without creating holes or snags that pins might leave. Tape alternatives like washable fabric tape can secure edges temporarily.
These weighted stability methods prevent shifting during cutting while maintaining fabric integrity.
You’ll find fabric weights particularly effective when working with delicate silks, preventing fray and distortion, and providing overall stability.
Pre-washing Fabric to Prevent Shrinkage and Distortion
Prevention beats frustration every time—pre-washing fabric prevents shrinkage surprises that can derail your entire project.
Slippery fabrics like silk and rayon require delicate care through gentle cleaning methods.
Use cold water, mild detergent, and mesh bags for fiber relaxation without distortion. This fabric preparation step eliminates chemicals and stabilizes weaves, ensuring your sewing with delicate fabrics stays true to size throughout construction.
Frequently Asked Questions (FAQs)
How to sew slippery fabric without a walking foot?
Nearly 70% of sewers abandon slippery fabric projects due to frustration.
You’ll conquer silk without a walking foot by using tissue paper underneath, reducing presser foot pressure, sewing slowly, and gently guiding fabric front and back, which helps to conquer frustration.
How to make fabric not slippery?
Apply spray starch or fabric stabilizer to temporarily stiffen the material before cutting and sewing. You can also layer tissue paper underneath for extra grip and stability.
How to hem slippery stretchy fabric?
Use a walking foot and shorter stitches to control stretch. Baste hems first, then sew slowly while gently guiding fabric. Add tissue paper underneath for stability and prevent puckering.
What tension settings work best for slippery fabrics?
Like taming a wild horse, tension settings require a delicate balance for slippery fabrics.
Start with slightly reduced upper thread tension and normal bobbin tension.
Test on scraps first, adjusting gradually until stitches lie flat without puckering or loops, using a delicate approach to achieve the right balance.
How do you prevent fabric from bunching up?
Slowing down prevents bunching better than any quick fix.
Hold fabric gently behind and in front of your presser foot, use tissue paper underneath for stability, and reduce your machine’s presser foot pressure to let fabric feed smoothly, this includes using tissue paper underneath for added stability and reducing pressure for a smoother feed with gentle handling.
Can you use regular zippers with silk fabrics?
Regular zippers can work with silk, but they need extra care. Choose lightweight zippers and baste them in place before machine stitching to prevent shifting and puckering along the seam.
Whats the best way to hem chiffon?
Chiffon’s delicate nature demands careful handling when hemming.
Start with a rolled hem using your machine’s rolled hem foot, which creates a narrow, professional finish.
Alternatively, hand-stitch a baby hem by folding the edge twice and securing with tiny stitches for the most elegant result.
How do you fix puckered seams afterwards?
You can’t fully fix puckered seams after sewing, but you can minimize them.
Gently stretch the fabric while pressing with low heat and a pressing cloth, or carefully unpick and re-sew with tissue paper underneath.
Conclusion
Picture yourself smoothly gliding fabric through your machine, creating flawless seams without a single pucker or pulled thread.
These essential sewing tips for slippery fabrics will transform your relationship with challenging materials like silk and satin.
You’ll discover that preparation, the right tools, and proper technique make all the difference.
Once you’ve mastered these fundamentals, you’ll confidently tackle any slippery fabric project with professional results every time.
- https://www.oxfordfabric.net/news/what-is-the-shrinkage-rate-of-textile-fabrics.html
- https://mypacklove.com/blog/label/sewing-fabric-types-your-expert-guide-to-mastering-different-materials/
- https://chiuvention.com/blog/for-shrinkage-rates-you-need-to-understand-these
- https://www.fabricsgalore.co.uk/blogs/fabric-news/to-pre-wash-or-not-to-pre-wash-prepping-fabrics-for-sewing
- https://makeitfakeit.wordpress.com/2012/05/10/pre-wash-brainwash/


