This site is supported by our readers. We may earn a commission, at no cost to you, if you purchase through links.
 Looking for some sewing hacks? You’ve come to the right place!
Tired of fighting with your fabric? Try using painter’s tape for perfect pleats – it’s a game-changer!
Need to thread a needle faster? A little hairspray does the trick.
Don’t forget those pesky bobbins – store them with elastic to keep them organized.
These simple sewing hacks will boost your skills. Seriously, they’re that good.
We’ve got tons more clever tips and tricks to share, including some seriously mind-blowing ones you won’t believe.
Ready to level up your sewing game?
Table Of Contents
- Key Takeaways
- Fabric Cutting & Manipulation Hacks
- Using Muslin for Slippery Fabrics
- Keeping Fabric Scissors Sharp
- Pressing Fabric With a Hair Straightener
- Sewing Perfect Corners
- Using Binder Clips for Binding
- Freezer Paper for Pattern Cutting
- Painter’s Tape for Pleats & Ruffles
- Marking Seam Allowances With Rubber Bands
- Finding Fabric Grain
- Using Tissue Paper for Sticky Fabrics
- Preventing Knit Stretching With Zig-Zag Stitch
- Stabilizing Seams With Stay Tape
- Preventing Static on Tulle
- Threading, Stitching & Sewing Technique Hacks
- Gathering Fabric With Yarn
- Strengthening Threads With Wax
- Easy Needle Threading With Hairspray
- Sewing Over Lumpy Fabrics
- Sewing in Zippers
- Stay Stitching Curves
- Stronger Buttons With Dental Floss
- Threading Elastic Without a Bodkin
- Adding a Ruler to Your Sewing Machine
- Washi Tape as a Seam Guide
- Using an X-Acto Knife as a Seam Ripper
- Practicing on Fabric Scraps
- Tucking in Serger Threads
- Using a Special Hemming Foot
- Organization & Storage Hacks for Sewing
- Storing Bobbins With Elastic
- Using Fabric Scraps for Stuffing
- Improving Acrylic Ruler Grip
- Storing Notions in Mason Jars
- Stabilizing Large Thread Spools
- Using Binder Clips for Fabric
- Using Washers as Pattern Weights
- Designing Quilt Blocks With Graph Paper
- Easy Measuring Tape Access
- Managing Wires With Desk Grommets
- Hanging Small Items With Command Hooks
- Keeping Sewing Machines Dust-Free
- Maintaining Sewing Bag Shape
- Efficiency & Troubleshooting Hacks
- Sewing Extra Buttons
- Turning Small Projects Inside Out
- Preventing Slipping Paddles
- Preventing Buttons From Popping
- Altering Shirt Sizes
- Sewing in Elastic
- Using a Laser for HSTs
- Quick Needle Threading With Hairspray
- Using a Safety Pin for Elastic
- Quick PDF Pattern Assembly
- Pressing Fabric Without an Iron
- Reducing Bulky Seams
- Cleaning, Maintenance & General Tips
- Sharpening Pins With Steel Wool
- Using a Glue Gun for Quick Projects
- Threading Drawstrings With a Safety Pin
- Cleaning Your Sewing Machine
- Cleaning a Fuzzy Rotary Mat
- Using Old Sheets for Practice
- Preserving Paper Patterns
- Alternative Pattern Paper
- Collecting Fabric Scraps for Stuffing
- Improving Ruler Grip With a Pop Socket
- Using Mason Jars for Storage
- Using Washi Tape as a Seam Guide
- Identifying Needle Sizes With Nail Polish
- Versatile Uses for Washi Tape
- No-Stitch Seam Closure
- Easy Zipper Installation
- Keeping Scissors Handy
- Double Needle Techniques
- Advanced Gathering Techniques
- Buttonhole Sewing Hacks
- Serger Finishing Techniques
- Zipper Installation Techniques
- Frequently Asked Questions (FAQs)
- Conclusion
Key Takeaways
- You can use everyday items like painter’s tape, hairspray, and binder clips for efficient sewing solutions.
- Mastering fabric manipulation techniques, like using muslin for slippery fabrics and freezer paper for pattern cutting, improves accuracy and control.
- Simple thread and needle hacks, such as using beeswax to strengthen thread and hairspray for easier threading, enhance your stitching experience.
- Effective organization and storage methods, including using mason jars for notions and elastic for bobbins, optimize your sewing space and workflow.
Fabric Cutting & Manipulation Hacks
Ready to tame those tricky fabrics and cut like a pro?
You’ll find game-changing tricks here to make your fabric prep a breeze,
from clever cutting techniques to smart manipulation hacks that’ll have you sewing like a seasoned pro in no time.
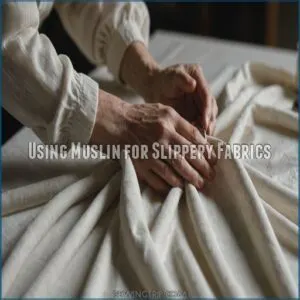
Using Muslin for Slippery Fabrics
Wrestling with slippery fabrics? Muslin’s your secret weapon.
Layer it under tricky materials like silk or satin to keep them from sliding around.
This old-school hack gives you better control when cutting, ensuring precise patterns.
Plus, muslin’s a budget-friendly way to test fits before using pricey fabric.
It’s like having training wheels for your sewing projects – steadying your hand and boosting your confidence.
Keeping Fabric Scissors Sharp
Now that you’ve got your slippery fabrics under control, let’s talk about keeping your fabric scissors sharp.
It’s simple: use them only for fabric.
Treat your scissors like VIPs – they get exclusive access to cloth, nothing else.
Store them safely, away from other tools.
For maintenance, invest in a good sharpening tool or take them to a pro.
Sharp scissors are a game-changer, making your cutting smooth and precise.
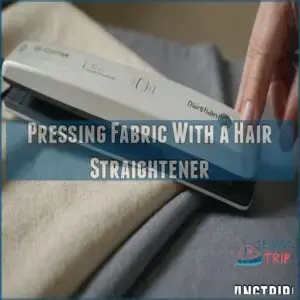
Pressing Fabric With a Hair Straightener
Your trusty hair straightener isn’t just for taming frizz—it’s a secret weapon for pressing fabric in tight spots.
Between buttons or embellishments, this tool works wonders.
Here’s how to master this clever sewing hack:
- Start with low heat to avoid scorching delicate fabrics
- Use a thin cloth as a barrier for extra protection
- Press for 5-10 seconds, then check your progress
- Let the fabric cool before handling to set the press
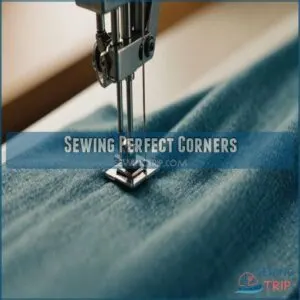
Sewing Perfect Corners
Sewing perfect corners can make or break your project.
Here’s a game-changing trick: as you approach the corner, stop with the needle down.
Lift the presser foot, pivot the fabric 90 degrees, and lower the foot.
Continue sewing.
Mastering essential sewing techniques, such as hand stitches and machine essentials, takes practice but is worth the effort. This technique works wonders on all fabric types and sewing machines.
Practice on scrap fabric first – you’ll be turning corners like a pro in no time!
Using Binder Clips for Binding
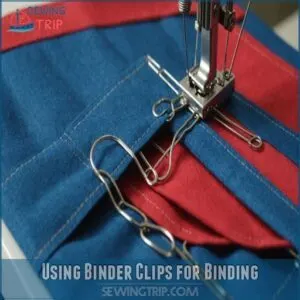
Those trusty binder clips from your desk drawer can transform into perfect binding assistants.
They’ll hold fabric layers steady while you stitch, saving you from pin marks and slipping seams.
Let these office supplies become your new favorite sewing hack – they’re cheaper than fancy clips and work just as well.
- Medium clips work best for most fabrics, while mini clips shine on delicate materials
- Space clips about 2 inches apart for the best control
- Use larger clips for thick fabrics like denim or multiple layers
Freezer Paper for Pattern Cutting
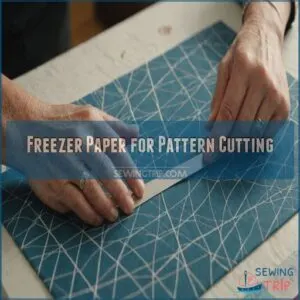
Every smart sewist keeps freezer paper in their toolkit.
Press it onto your fabric with a warm iron, and it’ll stick like a dream without leaving any residue.
You’ll love how it holds pattern pieces firmly in place while you cut.
For slippery fabrics, this hack’s a game-changer.
When you’re done, just peel it off – no fuss, no muss.
Painter’s Tape for Pleats & Ruffles
With a roll of painter’s tape in your craft arsenal, you’ll master perfect pleats and ruffles every time.
Place the tape at your desired intervals to mark pleat positions consistently.
You can even create intricate patterns by layering different pleat depths.
When you’re done sewing, the tape peels off cleanly without leaving residue.
It’s like having a third hand that never gets tired!
Marking Seam Allowances With Rubber Bands
Say goodbye to messy chalk marks.
You can also find specialized rubber bands for seam allowance marking, such as those available on sewing supply websites like seam allowance rubber bands.
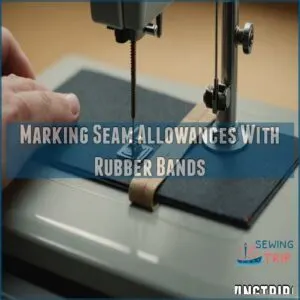
You can master precision seam allowances using a simple rubber band hack. Just wrap a band around your sewing machine’s base plate at your desired measurement. It’ll act as your perfect guide while
Finding Fabric Grain
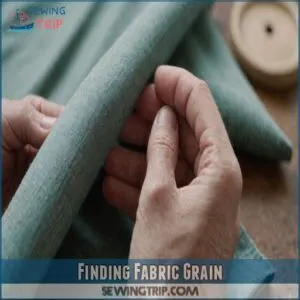
Fabric grain mysteries can drive you nuts, but here’s a game-changing trick: clip into the selvage and gently pull a loose thread.
You’ll reveal a perfect grain line that runs parallel to the warp threads.
Test it by folding your fabric – the edges should align perfectly.
Follow this line while cutting to prevent your garment from twisting like a pretzel later.
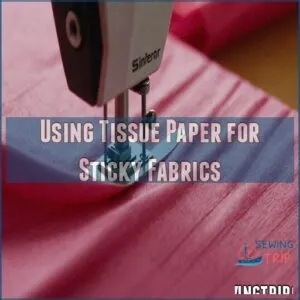
Using Tissue Paper for Sticky Fabrics
Tired of sticky fabrics making your sewing machine throw a tantrum? Let’s fix that!
Now that you’ve mastered finding the grain, here’s a game-changing hack using tissue paper. Place it between your presser foot and tricky fabrics for smooth sailing.
Here’s why it works:
- Acts as a stabilizer for slippery materials
- Prevents sticky residue on your machine
- Tears away easily when you’re done
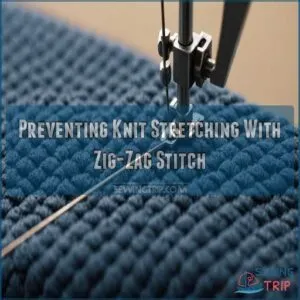
Preventing Knit Stretching With Zig-Zag Stitch
How do you keep those stretchy knits from turning into a wavy mess?
Your trusty zig-zag stitch is the secret weapon.
Set your machine to a medium width and length, then let the stitch do its magic by moving with the fabric as you stretch.
You’ll prevent those pesky waves and keep your knits looking professionally finished every time.
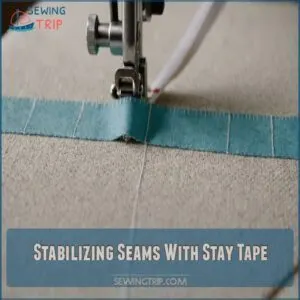
Stabilizing Seams With Stay Tape
Want to take your sewing to the next level?
Let’s talk about stay tape – it’s like a secret weapon for your seams!
This nifty little strip keeps your fabric from stretching out of shape.
Just pin it along the seam line before you sew.
It’s a game-changer for necklines, shoulders, and waistbands.
Trust me, once you try it, you’ll wonder how you ever sewed without it!
Preventing Static on Tulle
Let’s tame that pesky tulle static! You’ve got a few tricks up your sleeve.
Spritz your tulle with a water bottle for a quick fix.
For longer-lasting results, try anti-static sprays or a fabric softener solution.
Humidity’s your friend here – a humidifier in your sewing room can work wonders.
Remember, handling tulle gently and storing it properly helps prevent static buildup.
These sewing hacks will keep your tulle smooth and static-free!
Threading, Stitching & Sewing Technique Hacks
Get ready to level up your sewing game with these genius threading, stitching, and technique hacks.
You’ll discover tricks to make tricky tasks a breeze and boost your sewing skills in no time.
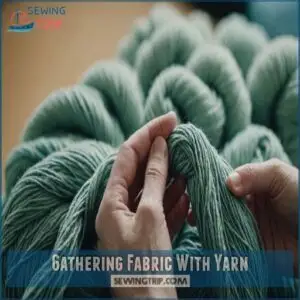
Gathering Fabric With Yarn
Ready to gather fabric like a pro?
Grab some yarn and let’s revolutionize your sewing game.
Stitch a zigzag over the yarn, leaving loose ends.
Then, pull the yarn to create perfect gathers.
This trick works wonders on all fabric types, from delicate silks to sturdy denims.
Play with yarn colors for a fun twist or keep it neutral.
You’ll never struggle with gathering again!
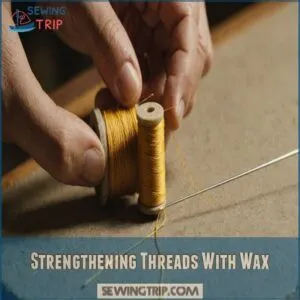
Strengthening Threads With Wax
Yarn’s great for gathering, but what about strengthening your thread?
Enter the realm of wax! This old-school trick is a game-changer for hand sewing.
Just run your thread over a block of beeswax and watch the magic happen.
Your thread becomes stronger, less likely to tangle, and glides through fabric like a hot knife through butter.
It’s like giving your thread superpowers!
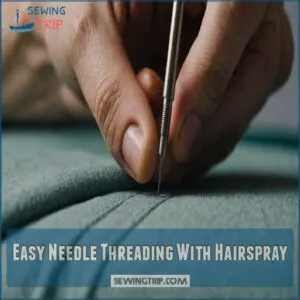
Easy Needle Threading With Hairspray
Struggling with slippery threads? Give hairspray a whirl for easy needle threading.
This nifty trick stiffens the thread, making it a breeze to guide through the eye.
Here’s how to master this game-changing hack:
- Grab your favorite hairspray
- Spritz the thread end lightly
- Let it dry for a few seconds
- Thread with newfound ease
You’ll save time and frustration, making your sewing sessions smoother than ever.
Who knew hairspray could be such a handy sewing sidekick?
Sewing Over Lumpy Fabrics
Lumpy fabrics can turn your sewing project into a bumpy ride.
Here’s a nifty trick: place a plastic bag over the fabric to help your presser foot glide smoothly.
Adjust your machine’s pressure and choose a longer stitch length to navigate those tricky textures.
For extra stubborn lumps, try hand-basting problem areas first.
With these tips, you’ll conquer those fabric mountains like a pro!
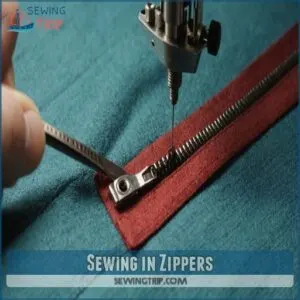
Sewing in Zippers
Sewing zippers seamlessly can feel like threading a camel through a needle.
Choose the right zipper type and use a zipper foot for precision.
Practice zipper placement by marking your fabric first.
Invisible zippers add elegance but require patience.
If it’s not quite right, try these sewing techniques and tools.
A bit of zipper troubleshooting goes a long way!
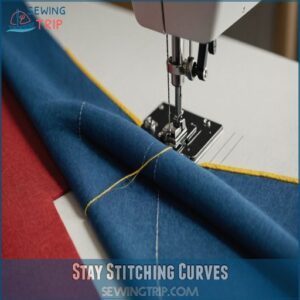
Stay Stitching Curves
Taming curves in your sewing project? Stay stitching is your secret weapon.
It helps prevent distortion, keeping fabric smooth and ready for precise sewing magic.
Simply sew within the seam allowance on curved edges.
Whether you’re working with slippery silks or sturdy cottons, this technique keeps fabrics intact.
It’s one of those sewing tips you’ll want to try right away!
Stronger Buttons With Dental Floss
After mastering curves with stay stitching, let’s tackle button woes with a quirky twist.
Swap regular thread for dental floss when sewing buttons.
It boosts button strength and longevity, ensuring your buttons don’t go AWOL during key moments.
This DIY button reinforcement trick is one of those sewing hacks that’ll have you sewing stronger closures effortlessly.
Plus, it’s budget-friendly!
Threading Elastic Without a Bodkin
Using dental floss strengthens buttons, but what about threading elastic without a bodkin?
Grab a large safety pin or the capped end of a pen—your new DIY bodkin!
This clever alternative tool slides easily through casings.
Whether working with wide or narrow elastics, selecting the right fabric, like choosing the correct fabric type, is crucial for a successful project. Troubleshooting tips keep your sewing tricks sharp.
It’s like magic without the wand!
Adding a Ruler to Your Sewing Machine
Got an itch for precision in your sewing projects? Attach a DIY ruler to your machine! Here’s how:
- Ruler Placement: Stick ruler tape or craft vinyl to your sewing machine for easy access.
- Boost Sewing Accuracy: Align your fabric effortlessly.
- Enjoy Handy Measuring Tools: No more searching for misplaced rulers. This sewing hack saves time and hassle!
Washi Tape as a Seam Guide
Imagine this: you’re mid-project, stitching away, and your seam goes wonky.
Enter washi tape! It’s your crafty hero for curves and quilting.
Just stick it down and follow the line. It’s like a GPS for your fabric.
| Use | Benefit |
|---|---|
| Curves | Smooth lines |
| Quilting | Consistent paths |
| Topstitching | Precise seams |
| Binding | Neat edges |
Washi tape—who knew?
Using an X-Acto Knife as a Seam Ripper
Need a super-precise seam ripper? Several sewing hacks exist! An X-Acto knife, believe it or not, can be a surprisingly effective alternative. Remember X-acto Knife Safety though!
- Its sharp blade excels at seam removal.
- Maintain Blade Sharpness for precision cutting.
- Practice on scraps first.
- Control is key; use gentle pressure.
- Consider it one of your alternative tools.
This sewing shortcut offers amazing control, but always prioritize safety.
Practicing on Fabric Scraps
Wrestling with leftover fabric? Turn those scraps into practice gold.
By mastering stitches on your sewing scraps, you’ll boost skills without wasting precious material.
Perfect for beginner projects, these scraps help you save money and reduce waste.
Plus, upcycling these bits into creative notions is both eco-friendly and satisfying.
Embrace fabric cutting challenges and transform them into opportunities!
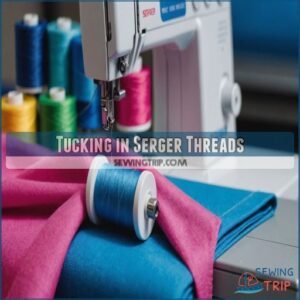
Tucking in Serger Threads
You’ve practiced on scraps, now it’s about keeping your serger threads tidy.
Tuck serger threads in to prevent frustrating unraveling moments.
Use a darning needle to thread those ends back through the stitches—simple as pie.
With this sewing hack, you master serger thread maintenance, ensuring seams stay secure and your sewing projects look professional.
It’s all about neatness and control!
Using a Special Hemming Foot
Got your serger threads tucked in? Good on you!
Now, let’s chat about hemming feet.
These little sewing accessories are game changers, letting you nail those pesky hems effortlessly.
Different hem foot types can handle a mix of fabrics.
Troubleshoot any hiccups for smooth sailing.
Consider it another handy tool in your sewing kit, ensuring perfect hems every time.
Organization & Storage Hacks for Sewing
Keeping your sewing space tidy doesn’t have to be a Herculean task.
With simple hacks like using mason jars for storage and binder clips for fabric,
you’ll find everything’s in its right place faster than you can say "bobbin.
Storing Bobbins With Elastic
Ever struggled to keep your bobbins neat and tidy?
Try this nifty idea: loop elastic through your bobbins and keep them in check!
It’s a quick fix for bobbin organization and helps you maintain thread control without fuss.
Different elastic types work wonders, fitting snugly around sewing bobbins.
Add this to your sewing storage hack list for clever DIY solutions.
Using Fabric Scraps for Stuffing
While managing bobbins with elastic, consider giving your fabric scraps a new life as stuffing.
It’s eco-friendly and perfect for stuffed toys or pillows.
Keep those sewing notions organized and maximize scrap storage with this creative hack.
Try these stuffing options:
- Stuffed toys
- Decorative pillows
- Pin cushions
- Draft stoppers
- Pet beds
Repurposing scraps saves space and money!
Improving Acrylic Ruler Grip
Frequently, you wrestle with slippery acrylic rulers?
A simple pop socket adds instant grip!
This inexpensive sewing accessory improves your ruler grip considerably, boosting your sewing efficiency.
It’s a fantastic ergonomic grip solution for all your sewing tools and supplies.
No more dropped rulers mid-cut!
Consider adding this sewing hack to your sewing mat area.
You’ll thank yourself later.
Storing Notions in Mason Jars
Imagine this: Mason jar organization at its finest.
Store sewing notions like buttons and pins in repurposed jars, complete with clever jar lid hacks.
This DIY notions storage is both practical and stylish.
Label each jar with fun jar labeling ideas to keep your sewing tools and supplies organized.
It’s like turning chaos into creativity, one mason jar at a time!
Stabilizing Large Thread Spools
Ever feel like your thread spools have caught the wandering bug?
Keep them in check with some clever tricks:
- Use a wide-mouth mason jar for instant stability.
- Create a DIY spool stand with wooden dowels.
- Try washi tape to secure the spool’s edge.
These simple solutions make sure your sewing supplies stay organized and ready for action.
Using Binder Clips for Fabric
Got a spool wobbling away? Secure those slips with binder clips. They’re not just for paper; think of them as your go-to mini vice grips.
Clip size matters here—pick ones that match your fabric weight. It’s all about placement tricks too.
Keep layers steady, making sewing solutions easy peasy. Who said sewing supplies can’t multitask?
Using Washers as Pattern Weights
When binder clips aren’t cutting it, consider washers as pattern weights.
They’re a nifty washer alternative, offering excellent weight distribution across your sewing patterns.
Grab a variety of washer sizes to match different fabric weights.
This hack frees you from sewing pins and spares your fingertips.
Washers are affordable, reusable sewing weights perfect for your craft arsenal.
Designing Quilt Blocks With Graph Paper
While washers keep patterns steady, graph paper is your trusty ally for quilt block patterns.
Explore design variations and block symmetry with ease.
Grab your sewing ruler and scissors to bring those patterns to life.
To sprinkle creativity onto your quilting, try these tips:
- Sketch in colored pencils.
- Experiment with symmetry.
- Test design on small squares.
- Create diverse color palettes.
Easy Measuring Tape Access
Imagine never losing your measuring tape again!
Attach a magnetic tape holder or tape storage solution right on your sewing table.
It’s like giving your tape its own VIP parking spot—always ready when you need to sew.
These sewing table hacks keep your space tidy and make accessing your sewing ruler as easy as pie.
Managing Wires With Desk Grommets
Speaking of easy access, let’s tame those unruly sewing machine wires!
Desk grommets are your new best friend.
They keep things neat and tidy.
Here’s why you need them:
- Improved cable organization.
- Reduced clutter on your workspace.
- Protection from accidental snags.
- A cleaner, more professional look.
Choose from various desk grommet types to find the perfect fit for your sewing space.
Grommet installation is super easy!
Hanging Small Items With Command Hooks
Ever find yourself drowning in buttons, spools, and tiny notions cluttering your sewing space?
Command hooks are your simple, genius solution.
To maximize their effectiveness, consider utilizing storage solutions like pegboards, as seen in clever sewing room organization ideas, sewing room storage solutions.
Hang small items with ease—thread cutters, measuring tapes, or embroidery hoops.
This little hack adds order to your sewing room.
Keeping Sewing Machines Dust-Free
Keeping your sewing machine dust-free is essential for smooth operation.
A dusty machine leads to frustration, but a few simple hacks keep it clean.
Consider pipe cleaners as affordable dust-brushers.
Regularly vacuum around your machine area too.
Finally, cover your machine with cloth when not in use.
Get ahead of the dust, and you’ll sew happily every time!
- Frustration-free sewing
- Less cleaning, more sewing
- Happy, dust-free machine
Maintaining Sewing Bag Shape
Dust-free sewing also means tidy bags.
To keep your sewing bag’s shape, consider reinforcing its structure with plastic canvas or stiffening fabric.
For a durable and structured base, you can use plastic canvas sheets to create a rigid frame.
This little trick helps maintain a sleek and supportive bag lining.
Here’s a quick view of solutions:
| Item | Purpose | Result |
|---|---|---|
| Plastic Canvas | Structure Support | Rigid Frame |
| Stiffening Fabric | Strengthen Shape | Firm Surface |
| Reinforcement | Bag Durability | Long Lasting |
| Bag Lining | Interior Structure | Neat Finish |
| Iron Techniques | Shape Retention | Crisp Lines |
Keep those sewing goodies organized!
Efficiency & Troubleshooting Hacks
When those sewing snags pop up, you need quick solutions to keep your project rolling smoothly.
From preventing buttons from popping off to mastering PDF pattern assembly, these efficiency and troubleshooting hacks have you covered like a trusty thimble.
Sewing Extra Buttons
Sew extra buttons inside your coat sleeves for quick fixes on the go.
This clever button placement means you won’t fumble for replacements when one disappears.
It’s a simple sewing hack, perfect for beginners.
Use matching sewing needles and durable thread for added button durability.
Explore button types and alternatives to keep your garments functional and stylish.
Happy sewing!
Turning Small Projects Inside Out
Got a project ready, and you’re turning it inside out?
To avoid damaging your fabric, use safety pins for tricky fabrics, ensuring a smooth finish.
Grab a straw and chopstick to help get those tricky fabrics right side out without a fuss.
Small items like this can be a real bear, but with the right tools, it’s a breeze.
Keep your tools handy with these sewing hacks:
1.
Preventing Slipping Paddles
Flipping tiny projects inside out can be tricky!
Now, let’s tackle those pesky slipping sewing machine paddles.
A simple rubber band around the paddle solves this!
It increases friction, keeping things steady.
Here’s a handy guide:
| Problem | Solution |
|---|---|
| Paddle slips | Rubber band |
| Loose paddle | Tighten screw |
| Worn paddle | Paddle replacement |
| Sticking paddle | Paddle cleaning, lubrication |
| Noisy paddle | Sewing machine maintenance |
Preventing Buttons From Popping
Tired of runaway buttons? Let’s tackle that head-on.
Your sewing confidence needs a boost, so guarantee strong button placement with these tips:
- Use a button shank for added stability.
- Choose quality thread to match fabric strength.
- Practice sewing techniques on your sewing machine for consistent results.
Say goodbye to unexpected pop-offs and surprise wardrobe malfunctions!
Altering Shirt Sizes
After keeping your buttons secure, let’s reshape those shirts that don’t fit just right.
Adjusting shirt sizes is like a makeover for your wardrobe.
Need it smaller? Stitch up the sides to take in seams.
For bigger adjustments, try altering the bust or collar.
Hemline alterations can add flair, while adjusting sleeve length offers a fresh look.
Grab your sewing scissors and start sewing!
Sewing in Elastic
Baggy shirts getting you down?
Try sewing in elastic to revamp your wardrobe. Master stretch control with the right elastic types and casing methods.
Use sewing techniques that guarantee smooth, even stitching.
If things go awry, pronto troubleshooting tips can save the day.
A little practice makes perfect—elastic wizardry will turn you into a sewing superstar!
Using a Laser for HSTs
Elastic’s in place, now focus on laser-guided accuracy for HSTs.
To ensure perfect seams every time, make sure to maintain a consistent seam allowance and also check out common seam mistakes to fix. A laser beam on your sewing machine helps create perfect seams every time.
Whether you’re stitching cotton or denim, this tool helps nail those tricky angles.
Remember laser safety and add variety to your quilt patterns.
It’s like having a GPS for your threads, guiding you through fabric types with ease.
Quick Needle Threading With Hairspray
Conquer tricky needle threading with hairspray for a fast-paced sewing adventure.
Hairspray isn’t just for hair; it stiffens thread tips, turning stubborn threading into a breeze.
Spritz, wait a moment, and thread away with ease.
This handy hack simplifies the process and keeps you sewing like a pro.
Exploring hairspray alternatives can also enhance your sewing toolkit.
Using a Safety Pin for Elastic
So, you’ve mastered speedy needle threading? Great! Now, let’s tackle elastic threading.
Forget wrestling with bodkins; use a safety pin! It’s a game-changer.
Here’s how:
- Attach the pin to one end of your elastic.
- Feed it through your casing.
- Secure the elastic ends.
- Remove the pin. Easy peasy!
This sewing shortcut saves time and frustration. You’ll become an elastic-threading ninja in no time!
Quick PDF Pattern Assembly
Wrangling elastic with safety pins? Let’s shift gears to quick PDF pattern assembly. Tape gun tips save you time and hassle.
Keep patterns organized and ready for assembly with digital storage. Here’s a quick breakdown:
| PDF Pattern Hacks | Assembly Efficiency |
|---|---|
| Use a tape gun | Faster alignment |
| Pre-cut pieces | Less confusion |
| Number your sections | Easy organization |
| Digital backups | Lost-proof |
Pressing Fabric Without an Iron
While you’re on the go or your iron’s gone AWOL, there are nifty alternatives to ironing.
Use a wooden stick to press creases, or grab a hair straightener for those stubborn spots.
No-iron fabrics exist for a reason—try them!
For quick fixes, fabric steaming works wonders.
Master these pressing techniques, and you’ll outsmart those pesky wrinkles every time.
Reducing Bulky Seams
You’re conquering wrinkled edges — now time to tackle bulky seams.
Trim those seam allowances like a pro, grabbing your trusty seam ripper and double needle.
Opt for lightweight fabrics to reduce bulk, and use savvy stitch selection for smooth finishes.
To master even stitching, learn about finishing seams and hemming, as these techniques play a crucial role in sewing. Embrace your sewing machine’s seam guide, ensuring even stitching.
Your seams will lay flat without distortion, making your projects look fantastic.
Cleaning, Maintenance & General Tips
Keeping your sewing tools and space in top shape doesn’t have to feel like a chore.
With these quick maintenance tips, you’ll spend less time cleaning and more time bringing your creative projects to life!
Sharpening Pins With Steel Wool
After troubleshooting those pesky sewing problems, grab some steel wool. It’s a secret weapon for pin maintenance, tucked right into your pincushion. Keep your pins sharp, extending their life and impact. Consider these benefits:
- DIY pincushions with steel wool
- Enhance sharpness impact
- Pin maintenance and care
- Different pincushion types
- Practical sewing tips and shortcuts
Using a Glue Gun for Quick Projects
Switching from sharpening pins, grab that glue gun for a fast fix!
It’s your ally for swift fabric bonding, quick repairs, or adding embellishments to DIY accessories.
Just remember glue gun safety—no one likes a sticky couch!
Use it for sewing shortcuts and scraps management.
| Situation | Emotion |
|---|---|
| Finishing fast | Relief |
| Smooth outcome | Satisfaction |
| Sticky mishap | Annoyance |
| Perfect design | Joy |
Threading Drawstrings With a Safety Pin
Because wrestling with stubborn drawstrings is a common sewing frustration, try this simple trick, especially when working with a classic drawstring bag design that involves french seams and a grosgrain ribbon.
Open a safety pin and attach it to one end of your drawstring.
Then, check out this drawstring bag tutorial for more creative tips on customizing your bag’s aesthetic and functionality.
- Feed the pin through the
Cleaning Your Sewing Machine
Taming that wayward drawstring, you sorted out your sewing project’s hiccups.
Now, let’s talk about a clean sewing machine, your trusty sidekick.
Regular lint removal ups its game.
Oil lubrication keeps parts moving smoothly, and needle cleaning prevents skipped stitches.
Don’t forget bobbin care—crafting precision awaits.
You’ll master sewing like a pro, ready to tackle new challenges!
Cleaning a Fuzzy Rotary Mat
After you’ve polished your sewing machine, don’t overlook your fuzzy rotary mat.
Keeping it clean extends its life and boosts cutting precision.
Use a lint roller and an old gift card to gather fuzz.
Here are your go-to mat care tips:
- Swipe a lint roller
- Scrape with a card
- Gently wash with soap
- Avoid high heat
- Store it flat
Using Old Sheets for Practice
Got some old sheets tucked away? They’re perfect for testing patterns and practicing fabric manipulation.
Jump in with mockups with zero guilt—mishaps are just part of learning, right?
To improve your sewing skills and master various techniques, prioritize quality over price when choosing a sewing machine, considering budget-friendly options. Use sheets to master sewing tips without fretting over costly mistakes.
Mastering basic stitches and techniques, such as the straight stitch and zigzag stitch, can be achieved by following tutorials on best sewing machine beginner tips. Even beginners with a sewing machine can benefit, gaining confidence while managing sewing scraps efficiently.
Preserving Paper Patterns
Practicing with old sheets got you inspired? Protecting your paper patterns can feel like you’re guarding a treasure map.
Roll them up and slip them into mailing tubes for safe pattern storage.
Try folding them using your sewing iron for crisp edges.
And don’t forget, a bit of tape can work wonders for quick pattern repair, extending their life.
Alternative Pattern Paper
Preserving those paper patterns is smart, but consider alternative pattern paper to spice things up!
Swap your usual picks with:
- Recycled paper for eco-friendly crafting
- Newspaper to add some fun prints
- Butcher paper for durability
- DIY pattern paper made from muslin
- Tracing fabric to reduce fraying
These alternatives make tracing easier and prevent fabric fraying.
Collecting Fabric Scraps for Stuffing
Rethink throwing away those pesky scraps!
Use them as stuffing for pillows, plush toys, and more.
Your creative reuse cuts costs and aids textile recycling.
Check out this quick guide:
| Scrap Type | Stuffing Use |
|---|---|
| Cotton pieces | Doll making |
| Fleece bits | Pet beds |
| Quilting scraps | Cushions |
| Denim leftovers | Draft stoppers |
| Knit fragments | Stuffed animals |
Collect with joy and purpose!
Improving Ruler Grip With a Pop Socket
Speaking of scraps, let’s talk about improving your ruler grip!
Attaching a pop socket to your acrylic ruler is a game-changer.
It’s a simple sewing hack that boosts your sewing productivity.
You’ll find it easier to handle, especially with those fiddly measurements.
- Better control for precise cutting.
- No more dropped rulers mid-project!
- A simple upgrade for improved sewing organization.
- It’s a fantastic pop socket use, improving your grip considerably.
Using Mason Jars for Storage
Why let chaos reign in your sewing room when a few mason jars can bring order?
Embrace these storage solutions to keep your space tidy.
Use them to organize notions and manage sewing scraps efficiently.
Try fun jar decorating ideas.
Whether it’s sewing fabric or threads, repurposing jars can save space and add charm to your creative sanctuary.
Using Washi Tape as a Seam Guide
Tired of chasing those elusive seam guides?
Grab washi tape! Its colorful charm isn’t just for scrapbooks.
Stick it right where you need a perfect seam allowance.
Gone are the days of multiple markings.
When you’re done, peel it off cleanly with no residue.
It’s like magic for your sewing tutorials.
Try different washi tape types for added fun!
Identifying Needle Sizes With Nail Polish
Ever struggled to find the right needle size in your sewing kit?
Paint the flat ends with your favorite nail polish colors!
This nifty trick helps you create a custom needle size chart through easy color coding.
It makes organizing needles a breeze.
From sewing machines to double needles, consider this simple sewing advice your new BFF.
Versatile Uses for Washi Tape
Washi tape is your creative sidekick in sewing.
Use it to organize scattered notions or as seam guides on your machine.
Need to manage fabric scraps? Washi tape does the job with flair.
It even works as a quick fix marking tool for fabric.
Embrace this colorful, sticky helper to make your sewing life a breeze!
No-Stitch Seam Closure
When you’re looking for a quick fix, no-stitch seam closures save the day.
Grab some no-sew fabric tape or fusible webbing for a hem that holds up without a single stitch.
Iron-on hem tapes and fabric glue work wonders too.
With heat bonding, even bias tape can be a breeze.
Embrace these trusty sidekicks to simplify your sewing life!
Easy Zipper Installation
No-stitch seam closures offer a sneak peek into craft simplicity, paving the way for easy zipper installation.
Ever fumbled with a zipper foot or invisible zippers? Focus on aligning the zipper tape and slider with precision. Use sewing guides to keep zipper teeth straight.
Hemming is smoother with bias tape. These steps turn any novice into a zipper master.
Keeping Scissors Handy
A designated spot keeps those snipping tools within easy reach. Consider a magnetic strip for quick access; it’s a lifesaver!
Or, maybe a cute scissor holder on your sewing station?
Proper scissor cord management prevents tangles. Don’t forget regular cleaning!
A little oil keeps them sharp, preventing frustration. You’ll sew faster and neater.
Happy sewing!
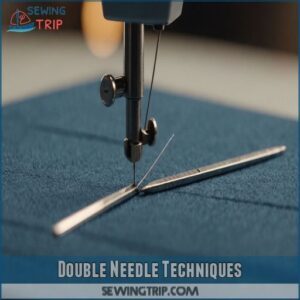
Double Needle Techniques
Ever noticed how a double needle can instantly step up your sewing game?
You’ll make your projects look polished and professional, whether you’re adding decorative stitches or aiming for perfectly even hems.
Creating Even Stitches With a Double Needle
Struggling with even stitches when using a double needle? Let’s tackle that!
Make sure the tension is just right—too tight, and your threads could snap. Keep the fabric taut but don’t stretch it.
For thick fabrics, a twin needle with a wider gap works wonders.
Beginners, it’s smart to practice on scrap fabric. Use a sewing seam guide for perfect symmetry.
Using Double Needles for Decorative Stitching
After you’ve nailed those even stitches, try using double needles for decorative stitching.
They’re like the magic wands of sewing, making your projects pop with parallel lines. It’s all about adjusting your sewing machine for perfect tension.
Experiment with threads and fabrics; it’s a Twin Needle Tricks treasure trove. Unleash your creativity, but first verify your machine is compatible by checking the [double needle compatibility](https://sewingtrip.com/can-you-use-a-double-needle-on
Choosing The Right Double Needle Size
Get ready to master double needle sewing. Picking the right size can make or break your project.
When searching for the perfect double needle, consider exploring a double needle set.
Here’s how to choose wisely:
- Fabric Thickness: Match needle size with your fabric’s width and weight.
- Thread Choice: Use compatible sewing threads for each task.
- Stitch Type: Opt for the right needle size for decorative or straight stitches.
Troubleshooting Double Needle Problems
That frustrating skipped stitch? It’s likely a simple fix!
Check your Double Needle Tension; uneven tension causes unbalanced stitches.
Misaligned needles? They need to be perfectly spaced.
Broken threads? Clogged needle eyes are the usual culprit.
Remember, even experienced sewers face these hiccups. A quick check often solves the problem, leaving you stitching happily again.
Advanced Gathering Techniques
Mastering advanced gathering techniques can take your sewing projects to the next level.
You’ll learn different methods to suit any project and discover how to control the amount of gathering perfectly, adding a polished touch to every creation.
Different Methods for Gathering Fabric
Switching gears from double needling, let’s explore fabric gathering with flair.
Ruffle gathering is your go-to for playful textures, while pleat gathering gives you sophisticated control.
Shirring can add a whimsical touch, perfect for drapery.
Smocking methods bring vintage charm, ideal for any beginner looking to impress.
Remember, a trusty sewing seam ripper will be your best friend!
Gathering With Different Thread Types
Exploring thread types can change how you gather fabric, just like using different tools for your garden.
- Use serger thread for smooth gathers—great for delicate fabrics.
- Experiment with sewing elastics to create stretchy gathers.
- Adjust thread tension to avoid fabric distortion.
- Pick the right thread weight to control gathering speed.
Controlling The Amount of Gathering
You’ve tackled gathering with various thread types; now let’s master controlling the amount of gathering.
Adjust gathering ratios and thread tension to suit your fabric density.
Whether you’re using a serger thread or sewing elastics, fine-tuning gathering tools and speed gives you control.
Think of it like orchestrating a symphony—each element in harmony creates a stunning result.
Gathering for Specific Projects
Why struggle with gathering on specific projects when you can master it?
- Baby Clothes Gathering: Use elastic to guarantee comfort and fit.
- Drapery Techniques: Heavy fabrics need strong thread.
- Wedding Dress Gathering: Muslin helps in testing delicate gathers.
- Quilting Methods: Manage seams with a sewing rotary cutter and scraps effectively.
Engage and elevate your skills!
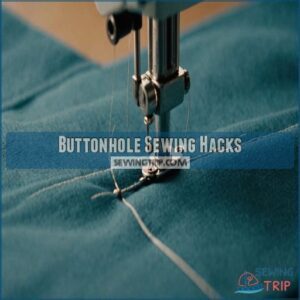
Buttonhole Sewing Hacks
Buttonholes can be tricky, but mastering them transforms any garment from homemade to high-fashion.
With a few clever tips, you’ll stitch professional-looking buttonholes like a boss, whether by hand or machine.
Creating Professional-Looking Buttonholes
Crafting buttonholes can be tricky, but here’s the secret to professionalism: rely on interfacing tips and fabric stabilizers.
Position your button placement accurately for consistency.
Use automatic buttonholes for ease, especially when enhancing your sewing skills.
Picture neat buttonholes as the final stitch in perfect fabric hemming. With these techniques, even sewing for beginners transforms into a pro-level craft.
Different Buttonhole Techniques
Master buttonholes with ease! Whether you’re aiming for stretchy buttonholes or precise button placement, explore techniques like machine settings for uniform results or delve into hand-sewing tips for that personal touch.
With a sprinkle of sewing motivation, even beginners can skillfully size and style buttonholes.
Ignite your sewing inspiration and transform buttonholes with these essential skills.
Troubleshooting Buttonhole Problems
Buttonholes aren’t aligning right? It happens.
Check machine tension or those pesky buttonhole thread issues first.
Sometimes, a small hole size adjustment solves the problem.
Don’t overlook button placement techniques—keep it precise.
Automatic buttonhole errors can lure anyone into a sewing slump. But remember, with some sewing knowledge and a bit of sewing motivation, you’ll conquer these challenges in no time!
Hand-Sewing Buttonholes
When buttonhole problems arise, hand-sewing can save the day. Grab your embroidery thread and needle threading hacks to boost precision.
Use buttonhole stabilizers for that crisp look.
Start with fabric prep tips using muslin fabric to practice those hand-stitching techniques. Incorporate embroidery patterns to add flair.
With these tricks, you’ll sharpen your sewing knowledge and impress with showstopping buttonholes.
Machine-Sewing Buttonholes
So, you’ve mastered hand-sewn buttonholes? Great! Now, let’s tackle machine-sewn ones. They’re a game-changer!
Here’s what you need to know:
- Use stabilizer materials for a clean finish.
- Adjust your machine tension; it’s key.
- Practice on some muslin fabric first. You’ll be making perfect buttonholes in no time!
Serger Finishing Techniques
Master serger finishing techniques to bring a professional touch to your sewing projects without breaking a sweat.
You’ll wonder how you ever finished seams without it, and the right settings can make all the difference between fab and drab.
Different Types of Serger Finishes
You’ve tackled buttonholes, but now it’s serger time. Explore overlock techniques to give your projects a professional finish.
From narrow hemming to creating decorative edges with chainstitch methods, sergers offer a crisp look.
Remember, differential feed helps manage tricky fabrics and cuts down on scrap waste. Consider utilizing an overcast stitch presser foot for effortless finishing on a variety of fabrics.
Got a sewing ironing board? It’s perfect for those final touches!
| Technique | Benefit | Application |
|---|---|---|
| Overlock | Professional finish | Seams and edges |
| Narrow Hemming | Clean look | Lightweight fabrics |
| Chainstitch Methods | Decorative styling | Creative projects |
Choosing The Right Serger Settings
Got your serger ready? Check those settings like you’re prepping for a dance-off.
Thread tension adjustments can make or break your project. Consider fabric thickness and stitch length options like a chef with seasoning—just right.
Toss in interfacing materials for stability.
The differential feed techniques? Priceless for fabric that moves too much.
It’s like managing sewing scraps on a tiny ironing board!
Finishing Seams Without a Serger
Even without a serger, you can give your seams a polished finish.
Here are three overlock alternatives:
- Zig-Zag Stitch: Use this to prevent fraying.
- Pinked Edges: Cut them with pinking shears for a clean look.
- French Seams: Perfect for delicate fabrics, hide raw edges inside the seam.
These methods reinforce seams and manage scraps.
Troubleshooting Serger Problems
Encountering serger thread issues or tension problems can unravel your project dreams. Adjust tension settings to match your fabric weight.
For broken serger loopers or timing adjustments, a quick fix might require professional help.
And if you’re dealing with a dull blade, serger blade replacement is key.
Manage your sewing scraps efficiently to keep your workspace tidy.
| Problem | Quick Fix |
|---|---|
| Serger thread issues | Check and re-thread |
| Broken loopers | Seek professional assistance |
| Dull serger blade | Replace the blade |
Serger Maintenance
Wrestling with serger troubles can often lead to realizing the importance of maintenance.
Keep it singing by regularly oiling the mechanics—don’t skip on serger oil.
Examine tension issues and smooth out blade sharpening.
For a fuzz-free experience, practice fuzz removal regularly.
Mind the thread path and smartly manage your sewing scraps to prolong your machine’s life.
Zipper Installation Techniques
Ready to conquer zipper installation? We’ll cover everything from basic hand-sewing to mastering invisible zippers, so let’s get those zippers zipped up!
Installing Different Types of Zippers
Switching gears from serger finishes, let’s tackle zippers!
You’ve got several types to choose from—each with unique quirks.
Use a zipper foot for precision and avoid common problems like puckering.
Consider invisible zippers for a seamless look.
Practice on sewing scraps to conquer zipper troubleshooting.
It’s as easy as pie once you get the hang of it!
Hand-Sewing Zippers
Every zipper’s a story waiting to be sewn by hand.
Lean on your trusty zipper foot and guide that zipper tape like a pro.
Steer clear of that invisible zipper’s trap, focusing instead on smoothly moving the zipper slider.
Use hand-stitching as your artistic stitch, and keep sewing scraps management handy for those unexpected bits.
It’s mastery at your fingertips.
Machine-Sewing Zippers
Installing a zipper with a sewing machine can seem intimidating, but it’s simpler than it looks.
First, select a zipper foot—it’s your secret weapon for precision.
Then, practice on sewing scraps to perfect your technique.
And remember, not all zippers are created equal.
- Choose the right zipper type.
- Manage sewing scraps wisely.
- Troubleshoot for smooth zipping.
Invisible Zipper Installation
Mastering invisible zipper installation is a game changer.
Start with the right zipper foot; it’s key for perfecting that seamless finish.
Adjust your zipper length to fit the project; no surprises here!
Use these invisible zipper tips: align your fabric edges carefully, sew slowly, and keep calm.
Remember, invisible zipper sewing is more about finesse than speed.
Troubleshooting Zipper Problems
When the zipper teeth skip, it’s like a squirrel missing nuts—it just doesn’t work.
If your zipper’s stuck or won’t close, rub wax on the track.
For separating teeth, replace them or use pliers to tighten.
Invisible zipper issues? Check alignment.
A little patience and practice, and your zipper will zip smoothly every time.
Frequently Asked Questions (FAQs)
What are the best sewing hacks for jeans?
Revamp your jeans with these hacks!
Use a curved needle to sew thicker seams easily.
Hem jeans sans bulk by folding in a triangle at corners.
Repair holes with decorative patches or embroider them for a unique touch.
What are some sewing hacks?
Grab a hair straightener to press tricky spots, or use a zig-zag stitch for stretchy fabric.
Keep scissors sharp for smooth cuts.
Try binder clips in place of pins.
You’ve got this, sewing superstar!
Can sewing hacks change the way you sew?
Absolutely, sewing hacks can revolutionize your projects.
They simplify tricky tasks, speed up your process, and often add a dash of creativity.
Picture sewing those perfect seams every time – it’s like having a secret weapon!
How many sewing hacks are there?
There are countless sewing hacks out there, making it hard to nail down an exact number.
From innovative ways to handle tricky fabrics to clever storage solutions, these tips can transform your sewing adventures into a smooth experience.
Are there Smart sewing hacks?
Slippery sewing secrets streamline your stitching success!
Keep scissors sharp for clean cuts.
Use tape to tame pleats.
Press perfect corners by pivoting.
Try hairspray for threading ease.
Each trick tackles trouble, transforming tedious tasks into joy.
How many sewing hacks will change your life?
It depends on your sewing skills and needs!
A few clever tricks can boost your efficiency.
Mastering even one new hack can feel revolutionary.
You’ll find yourself sewing faster and smarter.
How do I sew with stretchy fabrics?
Stretchy fabrics can be tricky!
Use a zig-zag stitch to allow movement,
and a ballpoint needle to prevent snags.
Stabilize seams with stay tape for a finished look.
Practice patience, and you’ll nail it!
What are tips for sewing curves smoothly?
When sewing curves, use stay stitches to prevent distortion, and clip notches on the seam allowance for ease.
Slow down your sewing speed, pivot as needed, and use lots of pins or clips for accuracy.
How can I prevent fabric from fraying?
Fraying fabric frustrates many.
Fraying can be fought by using pinking shears for a zigzag edge, applying fabric glue or clear nail polish on raw edges, or simply serging seams.
These tricks keep your projects tidy and professional.
What are common sewing machine tension issues?
Ever had stitches look like a tug-of-war?
That’s tension trouble.
Common issues include loops on the back, uneven stitching, and breaking threads.
Adjust your top or bobbin tension dials to fix these pesky problems quickly.
How to choose the right interfacing material?
Choosing interfacing might seem as thrilling as watching paint dry, but it’s important.
Match the weight of your fabric, decide if you want fusible or sew-in, and make sure it complements your fabric’s drape and purpose.
Conclusion
Think of sewing as a quilt; each stitch and patch is a chance to improve.
These sewing hacks are your needle, crafting a masterpiece effortlessly.
You’ve got the painter’s tape for pleats, hairspray for threading, and elastic tricks to organize those pesky bobbins.
Every tip is designed to make your sewing smoother and more fun.
Get started with these hacks and watch your skills transform just like that fabric in your hands.
Happy sewing adventures await!

