This site is supported by our readers. We may earn a commission, at no cost to you, if you purchase through links.
 Puckering happens when fabric gathers or wrinkles along seam lines, creating an unprofessional finish.
You can prevent this frustrating issue by using the right needle size for your fabric weight, adjusting your machine’s tension settings, and selecting quality thread that won’t stretch.
Sharp needles pierce cleanly without distorting fabric fibers, while proper tension keeps stitches balanced.
Always test your settings on scraps first, and consider using spray starch to stabilize lightweight fabrics before sewing.
Professional seamstresses know that small adjustments make huge differences in final results, and paying attention to these details can lead to a more professional finish.
Table Of Contents
Key Takeaways
- Match your needle size to fabric weight – you’ll prevent puckering by using size 70/10 for lightweight fabrics, 80/12 for medium weights, and 90/14 for heavy materials while replacing needles every 8 hours of sewing.
- Adjust machine tension and use quality thread – you can eliminate seam distortion by testing tension settings on fabric scraps and choosing low-elongation threads that match your fabric’s weight and type.
- Stabilize tricky fabrics before cutting – you’ll gain better control over lightweight or slippery materials by applying spray starch in light, even coats and cutting challenging fabrics on the crossgrain instead of lengthwise.
- Hold fabric taut while sewing and press immediately – you can prevent uneven feeding by maintaining gentle, consistent pressure with both hands and pressing each seam right after stitching using appropriate heat settings for your fabric type.
Preventing Seam Puckering
You’ll encounter seam puckering when fabric layers don’t feed evenly through your machine, creating unsightly wrinkles that can ruin your project’s appearance.
Fabric layers that refuse to cooperate turn perfect projects into puckered disasters.
The right combination of fabric preparation, thread selection, and machine adjustments prevents this common sewing frustration before it starts, ensuring a better outcome through proper machine adjustments**.
Choosing Right Fabric
When choosing fabric for sewing projects, fabric weight and fiber content directly impact puckering potential.
Lightweight fabrics like silk and chiffon pucker easily due to minimal structural stability, while heavier materials like denim resist distortion.
Natural fibers handle better than synthetics during fabric handling.
Consider weave type and fabric drape – tightly woven fabrics jam under stitching, causing fabric puckering.
Test fabric compatibility before starting your project.
Improper stabilization can lead to fabric distortion issues, which may result from minimal structural stability and improper stabilization, affecting the overall quality of the project.
Selecting Fine Thread
Fine thread weight acts like a precision instrument for preventing sewing puckering. You’ll want to match your thread material to fabric type for best results.
A key factor is to examine thread’s tensile strength for seam durability.
- Thread Weight: Choose 60-100wt for lightweight fabrics
- Thread Material: Use polyester or silk for flexibility
- Needle Compatibility: Pair fine thread with smaller needles (60/8-70/10)
- Thread Tension: Reduce machine tension when using finer threads
- Thread Type: Select low-elongation threads to minimize stretching
Using Spray Starch
Spray starch transforms tricky fabrics into manageable materials.
Starch application creates fabric stabilization, giving you better sewing ease and control.
Apply light, even coats before cutting and pressing.
For those seeking specific fabric options, online resources are available.
Watch for needle gumming—clean your needle with silicone gel if it gets sticky from starch buildup.
| Fabric Type | Starch Amount | Application Method | Expected Result |
|---|---|---|---|
| Lightweight silk | Light mist | Spray before cutting | Reduced shifting |
| Polyester satin | Medium coat | Apply then press | Better control |
| Cotton voile | Heavy application | Soak then iron | Firm handling |
| Slippery rayon | Multiple light layers | Build up gradually | Stable fabric |
The key to successful starch application is using the right amount and method for your specific fabric type, ensuring better control and stable fabric handling.
This approach allows for reduced shifting and firm handling, making the sewing process easier.
By following these guidelines and being mindful of needle gumming, you can achieve professional-looking results with ease.
Cutting on Crossgrain
When polyester and satiny fabrics stretch during sewing, you’ll find relief by adjusting your pattern layout.
Cut these tricky woven fabrics with the grain direction running crosswise instead of lengthwise. This bias cutting technique changes how fabric stretch behaves under your needle.
Sandra Betzina recommends this crossgrain approach because it prevents puckering before you even start stitching.
Mastering Sewing Techniques
You’ll master four essential techniques that transform problematic seams into professional-quality results. These methods work together to eliminate puckering before it starts, giving you the control needed for flawless stitching.
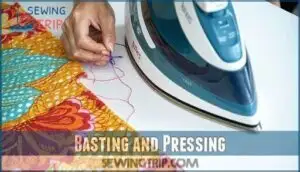
Basting and Pressing
Basting stitches act like temporary roadmaps, guiding your fabric layers into perfect alignment before permanent stitching.
You’ll prevent distortion by hand-basting curved seams or using spray basting for quick fabric stabilization.
Pressing techniques transform puckered disasters into crisp, professional seams. Press each seam immediately after stitching, using seam shaping methods to prevent puckering and maintain clean lines throughout your project, ensuring a professional finish.
Adjusting Machine Tension
Machine tension adjustment prevents puckering by balancing thread forces.
Start with tension dial basics at medium settings, then test fabric scraps to find ideal balance.
Adjust needle tension incrementally while monitoring bobbin case tension.
Thread type impact varies – match weights between top and bobbin threads.
Proper sewing machine dials are essential for achieving this balance.
Proper sewing machine tension creates balanced stitch formation without fabric distortion, which is crucial for preventing fabric distortion.
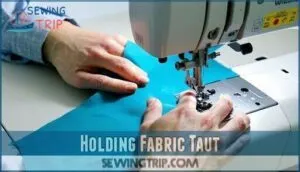
Holding Fabric Taut
Your hands control fabric tension more than you think.
Keep gentle, even pressure on both fabric layers as they feed through your machine. Place one hand behind the presser foot and one in front, maintaining consistent grip strength without pulling.
This hand placement guarantees fabric feed stays smooth, preventing the uneven tension that causes puckering. Remember – you’re guiding, not forcing the fabric through, which is crucial for maintaining even pressure.
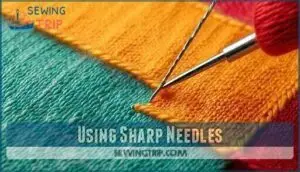
Using Sharp Needles
Sharp needles are your secret weapon against puckering nightmares. When your needle penetrates fabric cleanly, you’ll get smooth, precise stitches every time.
A dull needle pushes through fabric like a bulldozer—sharp needles slice cleanly for flawless seams.
- Replace needles after 8 hours of sewing or when you hear popping sounds
- Choose sharp point types for woven fabrics to prevent fabric damage
- Match needle size selection to fabric weight – finer needles for lightweight materials
- Use specialty needle uses for challenging fabrics like denim or leather
- Test needle and thread combinations on scraps before starting your project
Dull needles can cause issues, so consider techniques for sharpening them to maintain your sewing efficiency and prevent fabric damage.
Troubleshooting Puckering Issues
When you’ve already tried the basic prevention methods but puckering still appears in your finished seams, it’s time to troubleshoot your machine settings and setup.
These four systematic checks will help you identify and fix the specific cause of your puckering problem.
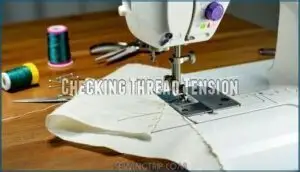
Checking Thread Tension
Thread tension acts like the heartbeat of your sewing machine—when it’s off, everything suffers.
Check your tension settings by examining test stitches on fabric scraps. Balanced stitches show equal thread on both sides, while puckering often signals tight upper tension.
Adjust tension dials gradually, testing with your specific thread weight and fabric type combination.
Proper tension guarantees balanced stitches, impacting seam strength and fabric appearance, which is crucial for the overall seam quality.
Re-threading The Machine
Why should improper threading plague your seams with tension problems? Start by removing all thread from your machine, following the correct thread path through every guide and tension disc.
Check needle position and verify thread quality matches your fabric weight. Proper sewing machine threading eliminates most tension issues, making sewing machine troubleshooting easier.
Regular sewing machine maintenance includes correct threading procedures. When needle tension seems off, re-threading often resolves bobbin issues before adjusting dials, which is a key part of sewing machine troubleshooting.
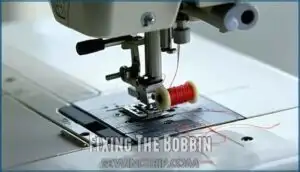
Fixing The Bobbin
Tangled thread creates frustration faster than you can say "seam ripper."
Check your bobbin case for lint buildup and verify proper bobbins winding with even thread distribution.
Wrong bobbin size or material affects sewing machine tension, causing immediate puckering issues.
Replace damaged bobbins and verify correct bobbin tension for smooth sewing machine troubleshooting and effective sewing machine maintenance.
Clipping Seam Allowances
When curved seams bunch up like accordion pleats, clipping seam allowances provides essential corner relief and bulk reduction.
Strategic notch placement at clipping angles releases tension that causes seam puckering.
- Corner Relief: Small clips prevent fabric from bunching at sharp turns
- Bulk Reduction: Trimmed allowances eliminate thick, lumpy seams
- Tension Release: Proper clipping angles stop pulling that creates puckers
These sewing techniques improve sewing machine tension distribution across curved areas.
Advanced Sewing Methods
Professional sewers use specialized techniques to eliminate puckering when standard methods fall short.
These advanced approaches target the root causes of fabric distortion, ensuring your seams lie perfectly flat every time.
Using Basting Tape
Basting tape eliminates the guesswork when securing piping or managing curved seams.
You’ll apply the tape directly to fabric edges, preventing layer shifting during sewing. This technique works especially well for puckering prevention on tricky materials.
Choose water-soluble options for easy residue removal, or explore tape alternatives like temporary spray adhesives for complex projects. Consider using specific tape products for best results to achieve a professional finish with basting tape.
Preventing Layer Shifting
When sewing fabric layers, you must prevent shifting to avoid seam puckering.
Secure hemming techniques include using basting alternatives like pins or staples before stitching.
Pinning techniques work well for lightweight fabrics, while staple usage provides stronger holds for heavier materials.
Tape types vary – choose adhesive options that won’t leave residue.
These fabric layers control methods guarantee both pieces feed evenly through your machine, eliminating puckering prevention issues completely, using techniques like basting alternatives.
Selecting Right Needle Size
Everyone benefits from selecting the proper needle size for their fabric weight.
Use size 70/10 for lightweight fabrics, 80/12 for medium weights, and 90/14 for heavy materials.
Sharp point needles work best with woven fabrics, while ballpoint needles suit knits.
Change your needle every eight hours of sewing to prevent damage signs like skipped stitches or fabric pulls, ensuring a smooth sewing experience with minimal damage.
Choosing Low Elongation Threads
Thread composition matters more than you think when preventing seam puckering.
Choose cotton or low-elongation polyester threads that stretch only 5-9% before breaking, unlike regular polyester’s 24% stretch.
This thread choice reduces fabric distortion during sewing.
Match thread weight to your fabric’s density and pair with appropriate needle sizes for ideal stitch quality and tension adjustments.
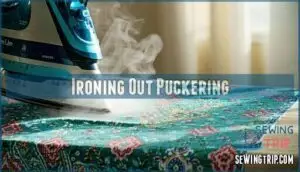
Ironing Out Puckering
You can rescue puckered seams with proper pressing techniques that smooth out fabric distortions.
Steam and controlled heat will relax fibers and eliminate those frustrating wrinkles that make your sewing look unprofessional, using techniques that involve proper pressing and controlled heat.
Pressing Seams Thoroughly
Your iron becomes your best friend when seam puckering strikes after you’ve sewn.
Set the iron temperature according to your fabric type and use pressing cloths on delicate materials.
Press seams flat first, then open or to one side based on your seam finishes.
Seam pressing guarantees smoother machine quilting.
Steam usage helps relax fibers, but avoid excessive moisture that could distort the fabric during seam pressing, ensuring a better quilting experience.
Using Steam Iron
Heat releases steam’s power to smooth stubborn puckered seams effectively.
Set your iron temperature according to fabric type—cotton handles high heat while synthetics need lower settings.
Adjust steam settings to match your material’s needs. Use a pressing cloth on delicate fabrics to prevent shine or damage.
Clean your iron regularly to maintain peak steam output and prevent mineral buildup that affects performance, ensuring you always have effective ironing capabilities.
Avoiding Excessive Heat
Temperature matters more than you might think when pressing seams.
Synthetic fabrics melt quickly under excessive heat, causing permanent fabric damage that creates unsightly marks and stiffening.
Check your iron settings before touching any fabric, use medium heat for most materials, and low for delicates.
Test on scraps first to prevent heat damage and fabric melting disasters.
Ironing on Wrong Side
Despite your best pressing efforts, sometimes puckering persists on the right side of your fabric.
Flipping your work over reveals the secret weapon many professionals use. Ironing on the wrong side protects delicate fabric surfaces while allowing you to apply necessary heat and steam for effective sewing troubleshooting.
- Set appropriate temperature control based on your fabric type
- Apply steam usage through a pressing cloth for extra protection
- Use gentle ironing techniques to avoid preventing shine on synthetic materials
- Press seams flat before attempting any additional sewing tips adjustments
Frequently Asked Questions (FAQs)
How to prevent puckering while sewing?
Tired of fabric bunching up like an accordion?
Use smaller needles, fine thread, and slightly longer stitches.
Stabilize stretchy fabrics with spray starch, hold fabric taut while sewing, and adjust your machine’s tension settings for smooth seams.
How to keep seams straight when sewing?
Use presser foot guides, seam allowances marked on your machine, or painter’s tape as straight-line references. Keep your eyes on the guide, not the needle. Maintain steady fabric feeding speed.
How do I prevent puckering when sewing curves?
Clip curved seam allowances every half-inch to prevent fabric bunching. Use sharp-point needles with shorter stitches, stabilize with interfacing, and ease layers gently through your machine’s presser foot.
Can interfacing cause fabric to pucker?
Interfacing can cause puckering if you choose the wrong weight or apply too much heat during fusion.
Match interfacing weight to your fabric and use appropriate temperature settings to prevent distortion.
Does thread color affect puckering issues?
Thread color doesn’t directly affect puckering—it’s thread type and weight that matter. However, contrasting colors make puckering more visible, while matching colors help camouflage minor issues you’d otherwise notice.
Why does my serger create puckered seams?
Your serger likely creates puckered seams because you’re pulling the fabric while sewing, using incorrect tension settings, or threading improperly.
Check your differential feed adjustment and make certain you’re guiding fabric gently without stretching it.
How can presser foot pressure prevent puckering?
Adjusting your presser foot pressure helps both fabric layers feed evenly through the machine.
Too much pressure can stretch the bottom layer, while too little lets fabric shift and bunch, causing puckering in seams.
Conclusion
Like seamstresses with their trusty thimbles from days of old, you’ll master these sewing tips to prevent puckering with practice and patience.
Start by choosing the right needle size and thread quality for your fabric weight.
Adjust your machine’s tension settings carefully, and don’t skip testing on scraps first.
Hold your fabric taut while stitching, and press seams thoroughly afterward.
These fundamental techniques will transform your sewing from amateur to professional-quality results every time.
- https://www.amefird.com/wp-content/uploads/2010/01/Minimizing-Seam-Puckering-2-5-10.pdf
- https://www.nationalsewingcircle.com/video/quick-tips-for-preventing-seam-puckering-017019
- https://www.youtube.com/watch?v=IXWrXKFEAdo
- https://www.sailrite.com/How-to-Avoid-Fabric-Puckering
- https://www.tiktok.com/@veetanner.sewingteacher/video/7372301834339323168

