This site is supported by our readers. We may earn a commission, at no cost to you, if you purchase through links.
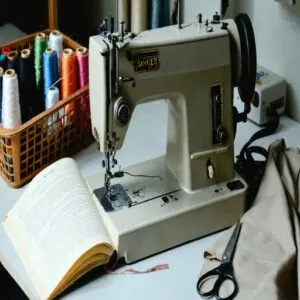 You’re struggling with Singer sewing machine presser foot problems, which can be frustrating.
Common issues include a stuck lever, decreased stitch length, fabric puckering, and clicking sounds.
To troubleshoot, check your presser foot attachment, clean and lubricate the machine, and adjust the stitch length.
You’ll also want to inspect for damage and mechanical issues.
By identifying the root cause, you can make adjustments to get your machine running smoothly again, and we’ll explore these solutions in more detail to help you master your Singer sewing machine‘s presser foot.
To achieve this, it’s essential to understand the importance of regular maintenance and troubleshoot common problems efficiently.
Ultimately, the goal is to ensure your Singer sewing machine operates at its best, providing you with a seamless sewing experience and helping you create high-quality projects with smoothly running machines.
Table Of Contents
Key Takeaways
- You’ll want to check your presser foot attachment, clean and lubricate your machine, and adjust the stitch length to troubleshoot common Singer sewing machine presser foot problems like stuck levers and fabric puckering.
- To fix issues like uneven stitches or fabric gathering, you should adjust the presser foot pressure, check thread tension, and ensure the feed dogs are engaged, and consider using the right needle for your fabric type.
- Regular maintenance is key to preventing presser foot problems, so you should clean your machine regularly, inspect for damage, and replace worn parts to keep your Singer sewing machine running smoothly.
- By following basic troubleshooting steps, like checking the walking foot attachment and adjusting the stitch length, and advanced troubleshooting steps, like testing the machine without the walking foot and repositioning the lever, you’ll be able to identify and fix presser foot problems efficiently.
Presser Foot Attachment Issues
You’re experiencing presser foot attachment issues with your Singer sewing machine, and it’s causing problems like uneven stitches or fabric puckering.
To fix these issues, you’ll need to identify the root cause, whether it’s a lever stuck in the up position or incorrect stitch length, and then follow the troubleshooting steps to get your machine running smoothly again, addressing issues such as uneven stitches.
Lever Stuck in Up Position
You’re dealing with a stuck lever, a common issue.
To fix it, check for obstructions and misalignment. Consider these possible causes:
- Faulty spring
- Lever adjustment
- Mechanical failure
- Bent foot
Adjust the presser foot lever to resolve the issue, ensuring smooth sewing operations. Regular maintenance can help prevent presser foot problems and reduce the need for frequent repairs to avoid presser foot problems.
Needle Continues to Move, Foot Does Not
You’re troubleshooting Foot Movement Issues.
Check:
- Needle binding
- Needle wobble
- Needle deflection
- Needle skipping, adjusting Presser Foot Tension to resolve presser foot problems, like the presser foot won’t raise or is stuck, to prevent Mechanical Failure and Fabric Feed Errors.
Proper presser foot tension adjustment is essential for various fabrics and stitch types.
Stitch Length Decreases
You notice stitch length decreasing, often due to incorrect presser foot pressure.
A misaligned presser foot can also contribute to presser foot problems issues.
| Stitch Tension | Fabric Thickness | Thread Breakage |
|---|---|---|
| Low | Thin | Frequent |
| Medium | Medium | Occasional |
| High | Thick | Rare |
| Very High | Very Thick | Very Rare |
| Adjustable | Adjustable | Adjustable |
Adjust presser foot guide and tension settings for consistent stitch lengths.
Fabric Puckers
You’re experiencing fabric puckers, a common presser foot issue.
To fix it, consider:
- Adjusting presser foot pressure
- Checking thread tension
- Ensuring feed dogs are engaged
- Using the right needle
Cleaning your machine regularly, as fabric tension and pucker causes can be resolved with proper presser foot adjustment and maintenance.
Proper presser foot tension adjustment is essential for various fabrics.
Clicking Sounds Heard
You hear a clicking noise from your Singer sewing machine’s presser foot.
Check foot pressure and throat plate for damage or debris. Make certain proper foot alignment to reduce the clicking sound.
A misaligned presser foot can cause various presser foot problems issues.
Adjust the presser foot for smooth, quiet sewing, resolving common presser foot issues and problems.
Basic Troubleshooting Steps
You’re about to tackle some common presser foot issues with your Singer sewing machine, and it’s great that you’re taking the first step.
By following these basic troubleshooting steps, you’ll be able to identify and fix problems quickly, getting you back to sewing in no time.
Check Walking Foot Attachment
If your presser foot is giving you grief, make sure your walking foot attachment is properly secured. A wobbly walking foot can lead to walking issues and stitch quality problems.
Using the correct presser foot is essential for various sewing tasks.
- Secure the walking foot to your machine.
- Check Foot Alignment and ensure smooth Fabric Guidance.
- Verify the lever pressure and needle foot height.
Addressing these Attachment Tips early can prevent fabric puckering and improve Stitch Quality, saving you from singer walking foot troubleshooting and presser foot compatibility headaches down the line.
Clean and Lubricate
Clean your Singer sewing machine’s presser foot by brushing away lint and applying a compatible lubricant to moving parts.
Use the right oil viscosity to maintain fabric protection and prevent damage.
Regular maintenance schedules can help with presser foot troubleshooting and singer presser foot repair, ensuring smooth sewing.
Inspect for Damage
Inspect your Singer presser foot for damage, checking for:
- Bent or broken parts
- Loose screws
- Signs of spring malfunction
- Misaligned eccentric adjustment
- Damaged rod or knee lifter alignment
Damaged feet, bent needles, or broken springs can cause issues. Replace worn parts to prevent fabric tears and guarantee smooth presser foot troubleshooting for your Singer machine, ensuring a troubleshooting process that is efficient.
Adjust Stitch Length
Adjust your stitch length for ideal results.
Use a medium length, then fine-tune based on fabric thickness and presser foot pressure.
| Stitch Control | Length Settings |
|---|---|
| Thin fabrics | Short length |
| Thick fabrics | Long length |
| Delicate fabrics | Medium length |
| Heavy fabrics | Extra long |
| General sewing | Medium length |
For optimal sewing results, it is essential to consider the type of fabric being used, as this will impact the length settings.
Check for Mechanical Issues
Now you’re checking for mechanical issues, a common culprit behind presser foot problems, such as a stuck pressure foot control or bent presser foot.
Look for faulty parts, worn components, friction issues, or alignment problems that might cause the presser foot lever not to work or the presser foot to get stuck.
Advanced Troubleshooting
You’re moving on to advanced troubleshooting, where you’ll test your machine without the walking foot and reposition the lever to identify any issues.
By following these steps, you’ll be able to examine the spring mechanism, check for obstructions, and lubricate the lever and needle bar to get your Singer sewing machine presser foot working smoothly again.
Test Machine Without Walking Foot
To troubleshoot presser foot problems, remove the walking foot and test your Singer machine with a standard presser foot.
This will allow you to check sewing performance and fabric guidance to identify foot alignment issues.
Ensuring proper machine calibration and presser foot adjustment is crucial to resolve issues like a stuck pressure foot control or presser foot lever not working.
Reposition Lever
To fix a stuck presser foot lever, try these steps:
- Wiggle it gently
- Apply oil
- Check alignment.
Adjust the screw for proper spring tension, ensuring smooth Lever Adjustment and Foot Alignment for ideal Pressure Control and Stitch Regulation, guiding fabric with ease, avoiding a stuck pressure foot control.
Examine Spring Mechanism
You’re now examining the spring mechanism, a key component affecting presser foot performance.
Check for weak spring tension, misalignment, or wear and tear, and adjust or replace as needed to make sure smooth lever movement and proper presser foot pressure.
Avoiding mechanism failure and a stuck presser foot lifter is crucial for optimal performance.
Check for Obstructions
Now that you’ve examined the spring mechanism, focus on debris removal to resolve presser foot problems.
Inspect your Singer sewing machine for thread tangles, fabric snags, or machine clogs, especially around the feed dogs and bobbin area, to prevent singer sewing machine presser foot issues.
Lubricate Lever and Needle Bar
Now that you’ve checked for obstructions, it’s time to lubricate the lever and needle bar.
Apply high-quality sewing machine oil sparingly to moving parts, then adjust the lever and align the needle bar.
This lever maintenance and needle care will boost sewing performance and machine efficiency, ensuring your presser foot lifter and presser foot lever work smoothly.
Manual Testing
You’ll start by manually testing your Singer sewing machine’s presser foot to identify any issues.
By moving the lever up and down, you can check for smoothness in motion and identify any sticking points that may be causing problems.
Manually Move Lever Up and Down
You’re taking control of your Singer sewing machine’s presser foot issues.
To assess Lever Movement, try Manual Adjustment:
- Unplug the machine
- Locate the presser foot lever
- Move it up and down
- Check for sticking points, ensuring the presser foot lifter operates smoothly.
Check for Smoothness in Motion
You’ve manually moved the lever, now check its motion.
Verify it glides easily, quietly, and without resistance, addressing potential motion issues and presser foot problems for effective sewing performance and machine balance.
Particularly when the presser foot won’t raise or keeps dropping off, affecting fabric flow, it is crucial to address these problems for optimal performance, including effective sewing.
Identify Any Sticking Points
You’ll often notice sticking points as you move the lever.
Look for:
- Sudden resistance
- Jerky motion
- Hesitation
- Unusual sounds, which can indicate presser foot problems, like the singer sewing machine presser foot not raising or dropping off, causing stitch issues and fabric problems.
Adjust Needle Bar Height
Adjusting the needle bar height requires calibration.
Loosen the screw and move the bar up or down, aiming for the needle’s eye to be just above the bobbin case.
Tighten the screw securely once aligned, ensuring proper stitch formation and presser foot balance for excellent sewing accuracy.
Additional Considerations
You’re now considering additional factors to resolve your Singer sewing machine presser foot issues.
By testing with different fabrics and settings, consulting your user manual, and seeking professional repair if necessary, you’ll be able to identify and fix the problem efficiently, which will help you to efficiently resolve the issue.
Test With Different Fabric and Settings
You test fabrics and settings to fix presser foot problems.
Try:
- Varying foot thickness
- Adjusting thread tension
- Changing needle size
- Altering stitch type
- Switching fabric compatibility to rule out material-specific issues and adjust pressure foot adjustment for effective sewing machine presser foot performance.
Consult User Manual for Specific Instructions
Consult your Singer sewing machine manual for specific instructions on presser foot installation and troubleshooting tips.
| Manual Section | What You’ll Find |
|---|---|
| Presser Foot Types | Compatibility guide |
| Fabric Compatibility | Best foot for each fabric |
| Specialty Feet | Uses and attachment instructions |
| Foot Replacement | Step-by-step guide |
Follow manual guidance to resolve presser foot problems and master sewing basics.
Seek Professional Repair if Necessary
You’re at a crossroads with your Singer sewing machine presser foot problems.
Consider:
- Repair Costs
- Service Centers
- Technician Qualifications to guarantee a smooth repair process for your presser foot lifter, saving you from further singer sewing machine repair headaches and costly presser foot replacement.
This will help you navigate through the process efficiently, ensuring that your Singer sewing machine is back in working order with minimal headaches.
Parts Involved
You’ll need to identify the parts involved in your Singer sewing machine’s presser foot to troubleshoot problems.
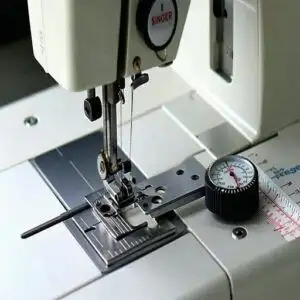
The key components include the presser foot, faceplate, presser bar, pressure knob, feed dogs, throat plate, and presser foot gauge, which you’ll examine to resolve common issues.
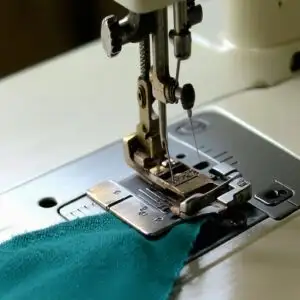
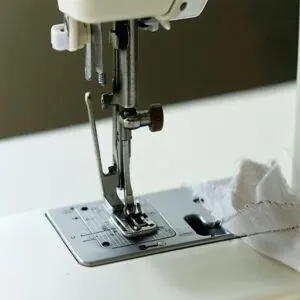
Presser Foot
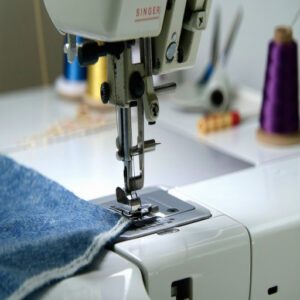
You examine the presser foot, an important component with various types, requiring tension and pressure for ideal sewing performance.
It affects fabric guidance and machine maintenance, and potentially causing presser foot problems if not compatible or properly adjusted.
For specific presser foot needs, explore available sewing machine presser foot products.
Faceplate
To maintain smooth operation, remember:
- Check alignment
- Clean components
- Inspect for wear
- Replace if necessary.
Proper Faceplate Removal and Plate Adjustment are key, involving Screw Alignment and Faceplate Cleaning, and possibly Plate Replacement, like the presser footplate 221 removal, to keep your singer presser foot lever and presser foot lifter working smoothly.
For specific parts, explore these Singer faceplate removal products, which can aid in Plate Replacement and ensure your machine operates with the correct Screw Alignment.
Presser Bar
You’ll want to check your presser bar regularly for proper height and alignment.
Inspect the spring and eccentric for wear. Verify the presser foot fork moves freely.
Adjusting the presser bar tension and presser foot pressure can prevent common sewing issues, promoting smooth presser foot operation and ideal foot balance.
Consider available sewing machine presser bar products for replacements or upgrades, which can be a key factor in achieving smooth presser foot operation.
Pressure Knob
Adjust the pressure knob for proper tension control, ensuring smooth foot alignment.
Lubricate and clean it regularly to prevent stiffness.
If worn out, consider knob replacement to resolve pressure foot problems, like those on the Singer 9860, and maintain consistent stitch quality.
Feed Dogs
You check the feed dog position for smooth fabric feeding.
- Feed Dog Adjustment
- Dog Tooth Replacement
- Fabric Guidance
- Feed Mechanism helps resolve sewing machine presser foot problems by ensuring proper presser foot pressure, which involves smooth fabric feeding and proper presser foot.
Throat Plate
To resolve Throat Plate Issues, you’ll address plate adjustment for effective sewing performance.
Consider these steps:
- Inspect for scratches
- Verify proper alignment
- Replace if damaged, to maintain fabric guidance and prevent a stuck presser foot lifter on your Singer sewing machine presser foot.
This process ensures that your sewing machine operates smoothly, with the proper alignment being crucial for preventing issues like a stuck presser foot lifter.
Presser Foot Gauge
Use your presser foot gauge for calibration, ensuring proper height and foot alignment.
| Gauge Settings | Foot Alignment | Pressure Adjustment |
|---|---|---|
| 5/16" | Centered | Balanced |
| 1/4" | Offset | Tight |
| 3/8" | Aligned | Loose |
| 1/2" | Misaligned | Uneven |
Importance of Proper Height and Alignment
You’ll want to make sure your Singer sewing machine’s presser foot is at the proper height and alignment to achieve balanced pressure for fabric holding and feeding.
By doing so, you’ll prevent skipped stitches and fabric wandering, which can be frustrating and ruin your sewing projects.
Balanced Pressure for Fabric Holding and Feeding
To master your Singer sewing machine, follow these steps for balanced pressure:
- Adjust pressure
- Calibrate gauge
- Align feet, ensuring proper fabric tension and feed control for smooth stitch regulation and preventing presser foot problems like worn-out pressure foot on singer 9860, which is crucial for smooth stitch regulation.
Prevents Skipped Stitches and Fabric Wandering
Proper presser foot height and alignment prevent skipped stitches and fabric wandering, ensuring even fabric feeding.
Correct alignment is key.
| Stitch Regulation | Fabric Control | Tension Adjustment |
|---|---|---|
| Presser Foot Alignment | Sewing Technique | presser foot pressure |
| skipped stitches | fabric gathering | uneven fabric feeding |
| presser foot lifter | ||
The table outlines key factors in sewing, including Stitch Regulation and Fabric Control, which are crucial for achieving professional results.
Setting The Height
You’re about to adjust the presser foot height on your Singer sewing machine, an important step in resolving common presser foot problems.
By following the correct procedure, you’ll make sure proper fabric feeding and prevent issues like skipped stitches or uneven tension, which are complete concepts to consider for a smooth sewing experience, and understanding common presser foot problems is key.
Use a Presser Foot Gauge (5/16 Thick)
To calibrate your Singer sewing machine’s presser foot, try:
- Placing gauge
- Pressing down
- Tightening clamp
- Verifying pressure
Ensure calibration with a 5/16" gauge for best sewing accuracy and proper foot alignment.
Raise The Needle and Presser Foot
Raise the needle and presser foot to begin setting the height.
Make sure the presser foot lifter is working, as a stuck lifter can cause issues.
This step is essential for proper Needle Alignment and Foot Adjustment, affecting Presser Height and Sewing Tension, as well as Fabric Guidance on your Singer machine.
Place The Gauge Under The Presser Foot
Now that you’ve raised the needle and presser foot, place the gauge under it to make sure accurate height adjustment.
This adjustment affects presser foot pressure and needle clearance, a key step in foot calibration and gauge alignment.
For proper fabric guidance on your Singer sewing machine, this step is crucial as it ensures accurate height adjustment.
Tighten The Presser Bar Clamp
Now that the gauge is in place, tighten the Presser Bar Clamp securely, ensuring proper Clamp Adjustment and Bar Alignment.
This step is essential for maintaining even presser foot pressure and preventing issues with your Singer sewing machine presser foot, such as uneven stitching or fabric gathering, which can be avoided with proper Clamp Adjustment and Bar Alignment.
Aligning The Foot
You’re now to align the foot, which is an important step in ensuring your Singer sewing machine runs smoothly.
By centering the needle between the foot toes and pressing the foot down on the gauge, you’ll be able to achieve proper alignment and get back to sewing with ease.
Center The Needle Between The Foot Toes
Now that you’ve set the height, center the needle between the foot toes for proper Needle Alignment.
This ensures even Fabric Guidance and Pressure Control to prevent singer sewing machine presser foot problems.
Like uneven Stitch Quality, by making this simple Foot Adjustment.
Press The Foot Down on The Gauge
Now that you’ve centered the needle, press the foot down on the gauge. This guarantees proper foot calibration and gauge setting.
Key steps include:
- Checking presser foot pressure
- Adjusting pressure adjustment
- Maintaining fabric guidance for stitch regulation on your Singer sewing machine presser foot.
Remove The Gauge
Now, carefully remove the gauge.
| Step | Action | Result |
|---|---|---|
| 1 | Remove | Free |
| 2 | Check | Align |
| 3 | Adjust | Accuracy |
Fix singer sewing machine presser foot problems by ensuring proper gauge removal and presser foot alignment for effective sewing accuracy.
Finishing Up
You’re almost done fixing your Singer sewing machine’s presser foot problems.
Now, you’ll replace the pressure knob, put the faceplate back on, and check that the needle and fabric are feeding properly.
Replace The Pressure Knob (3 Threads Showing)
Now you’re ready to replace the pressure knob, showing 3 threads, to make sure proper pressure adjustment and thread tension, which affects sewing accuracy and fabric control.
Solving common pressure foot problems like the ones found in Singer 9860 models, by adjusting the presser foot pressure.
Replace The Faceplate
Replacing the faceplate involves removing screws, then adjusting plate alignment.
Consider these steps:
- Faceplate Removal
- Screw Adjustment
- Plate Alignment
- Lever Calibration
- Frame Repair to fix singer sewing machine presser foot problems, ensuring a proper presser foot replacement singer start.
The process is critical for singer sewing machine and presser foot problems, to ensure a proper replacement and start.
Check Needle Clearance and Fabric Feeding
You’re almost done.
Check needle clearance by moving the needle down slowly, making sure it doesn’t hit the presser foot.
Test fabric feeding with a scrap piece, adjusting presser foot pressure if needed, to prevent feed issues and guarantee smooth stitch quality.
Frequently Asked Questions (FAQs)
Why does my sewing machine presser foot keep falling off?
You’ll want to check if your presser foot screw is loose, as this is a common cause for it falling off.
Tighten it to secure the foot in place properly, which is a crucial step to prevent the issue from happening again, and make sure to check the screw regularly to avoid any problems.
Why is my thread bunching underneath the Singer sewing machine?
You’re likely experiencing thread bunching due to incorrect upper tension, so check and adjust your thread tension settings to resolve the issue and achieve smooth stitching.
How to fix a presser foot on a sewing machine?
You’ll master fixing a presser foot by checking tension, cleaning, and lubricating it, or adjusting its height for smooth sewing performance, ensuring your machine runs like a well-oiled machine.
How to fix presser foot on Singer sewing machine?
You’ll fix your Singer sewing machine’s presser foot by checking tension, cleaning, and lubricating it, or replacing it if damaged, following the user manual’s specific guidance and troubleshooting tips.
How to adjust sewing machine foot pressure?
You adjust sewing machine foot pressure by turning the dial or knob, ensuring proper tension for smooth sewing, and consulting your machine’s manual for specific guidance and recommendations.
What will happen if the pressure on a foot presser is not correct?
You’ll encounter uneven stitches, fabric bunching, or skipped stitches if the pressure on your foot presser isn’t correct, affecting your sewing project’s overall quality and appearance substantially.
Can a worn presser foot cause uneven stitches?
You’ll likely experience uneven stitches if your presser foot is worn, as it can’t apply even pressure, causing fabric to feed inconsistently and resulting in poor stitching quality.
How often should I replace my sewing machines presser foot?
A stitch in time saves nine," so replace your presser foot every 6-12 months or when showing signs of wear to guarantee even stitches and prevent sewing machine issues.
Are universal presser feet compatible with all Singer models?
You’ll find that universal presser feet aren’t always compatible with all Singer models. It’s essential to verify your machine’s specifications before making a purchase to guarantee a perfect fit.
What causes a presser foot to leave marks on fabric?
When the shoe fits, you’re golden,
but a presser foot leaving marks on fabric is often due to incorrect pressure.
Dirty or damaged feet, or using the wrong foot type for the fabric, can also cause issues.
Conclusion
You’ve tackled those pesky Singer sewing machine presser foot problems.
By following these steps, you’ve resolved issues like stuck levers and fabric puckering, mastering your machine’s presser foot.
Now, you can sew smoothly, avoiding common singer sewing machine presser foot problems and creating high-quality projects with ease.
- https://craftsing.com/singer-sewing-machine-presser-foot-problems/
- https://www.justanswer.com/small-appliance/oqxwe-singer-walking-foot-isn-t-working-properly-lever.html
- https://singerco.com.au/learn-create/5-common-sewing-machine-problems-how-to-fix-them-at-home-with-singer/
- https://singer-featherweight.com/blogs/schoolhouse/presser-foot-height-adjustment-and-alignment
- https://www.thesewingdirectory.co.uk/presser-foot-pressure-adjustment/

