This site is supported by our readers. We may earn a commission, at no cost to you, if you purchase through links.

Test your stitch length and tension on scraps first—this saves you from the heartbreak of ruined projects. Strong polyester thread won’t snap under pressure, while trimming seam allowances to different lengths prevents bulky ridges that look like speed bumps.
The secret weapon? Fabric clips hold everything steady better than pins, which can create holes in delicate materials.
Table Of Contents
Key Takeaways
- You’ll need a size 16/100 denim needle and walking foot to handle thick fabric layers without breaking needles or creating uneven stitches.
- Test your stitch length (3.5-4mm) and tension settings on fabric scraps first to avoid ruining your main project with poor stitch quality.
- Use fabric clips instead of pins to hold layers together without creating holes, and trim seam allowances to different lengths to reduce bulk.
- Choose strong polyester thread and simple patterns with fewer seams when working with multiple thick layers to prevent thread breaks and machine strain.
Preparing Thick Fabrics for Stitching
You’ll need to prep your thick fabrics carefully before you start stitching, or you might end up wrestling with bunched seams and broken needles like you’re in a fabric wrestling match.
Choose simple patterns with fewer seams, test your stitch combinations on scraps first, and make sure your machine can actually handle the thickness you’re planning to sew.
Choosing Suitable Fabrics
Your fabric selection sets the foundation for successful multi-layer sewing. Choose fabrics with similar fiber content and weave density to prevent puckering when layering sheer fabrics over heavier materials.
Consider fabric weight carefully—mixing different weights creates bulk challenges. Texture matters too; smooth cottons pair better than rough canvas with delicate silks.
Match project suitability with fabric thickness for best results.
Selecting Projects With Minimal Bulk
Once you’ve chosen your fabric, weight matters, and smart project complexity decisions follow naturally. Simple pattern choices become your best friend when working with thick fabrics and multiple layers of fabric. A fewer seams best approach reduces bulk and headaches. Fabric weight affects drape, so choose wisely.
Here’s your bulk reduction focus strategy:
- Pick beginner-friendly patterns – Skip complex designs with multiple fabric layers
- Choose straight-seam projects – Bags and cushions beat fitted garments
- Avoid gathered details – Pleats and ruffles multiply fabric thickness problems
- Start with accessories – Perfect your fabric layering techniques on smaller items
Selecting The Right Tools and Needles
You’ll want to grab heavy-duty needles like denim or leather needles in sizes 90-100, since regular needles will snap faster than you can say "oops" when tackling thick fabric sandwiches.
The right needle paired with strong polyester thread and a walking foot turns your sewing machine from a struggling lightweight into a fabric-chomping champion.
Needle Types for Multiple Layers
Once you’ve prepared your thick fabrics, selecting the right needle becomes your secret weapon. Size 16/100 jeans/denim needles handle multiple dense layers like champions, while their reinforced shafts prevent those frustrating mid-project breaks.
Universal needles work for lighter stacks, but ballpoint needles struggle with thick seams. Match your needle size guide to fabric ply impact—heavier materials need bigger needles for clean penetration.
Selecting the correct needle ensures even stitches and avoids unsightly holes.
Thread Selection for Strength
Your needle choice sets the foundation, but thread selection makes or breaks your project’s durability. Heavy fabrics demand strong thread – think core-spun threads with polyester cores wrapped in cotton for flexibility.
Bonded thread benefits include reduced fraying and exceptional tensile strength. Thread weight matters too; heavier weights like 40 or 30 handle multiple layers better than lightweight options.
For outdoor projects, UV resistant thread prevents degradation and color fading over time. You can find the right heavy duty options for your project online.
Specialized Presser Feet for Thick Fabrics
Transform your thick fabric battles into victories with the right presser foot arsenal. Special feet tackle stubborn layers like champions, ensuring smooth stitching where standard feet surrender. Knowing your machine’s shank type is vital for compatibility.
- Walking Foot – Feeds multiple layers evenly, preventing shifting and puckering
- Roller Foot – Glides over sticky or textured thick fabrics effortlessly
- Teflon Foot – Non-stick coating manages vinyl and leather without dragging
- Adjustable Guide – Maintains consistent seam allowances on bulky materials
- Compensating Foot – Tips over thick seams automatically for uninterrupted stitching
Setting Up Your Sewing Machine for Thick Layers
Before you start stitching through thick layers, you’ll need to adjust your machine’s settings to handle the extra bulk without breaking needles or creating uneven stitches. Think of it like switching your car to four-wheel drive before hitting rough terrain—your machine needs the right setup to power through those challenging layers smoothly.
Your machine needs the right setup to power through challenging layers smoothly
Adjusting Stitch Length and Tension
When you’re stitch adjustments become your sewing machine’s best friend, proper tension balance and stitch length prevent skipped stitches and layer slippage. Start with longer stitches for thick fabrics—your machine won’t fight the fabric feed as much. Incorrect tension can lead to thread bunching issues, requiring careful adjustment for balanced stitches.
| Thread Type | Stitch Length | Tension Setting |
|---|---|---|
| Cotton/Polyester | 3.0-3.5mm | Medium (4-5) |
| Heavy Duty | 3.5-4.0mm | Medium-High (5-6) |
| Upholstery | 4.0-4.5mm | High (6-7) |
| Denim/Canvas | 3.5-4.0mm | Medium-High (5-6) |
| Multiple Layers | 4.0-4.5mm | Adjust as needed |
Higher stitch density creates stronger seams but can cause puckering in thick materials.
Machine Power and Limitations
Beyond adjusting machine settings, understanding your sewing machine’s power becomes the make-or-break factor. Home machines generally handle 2-4 fabric layers before struggling, while industrial machines power through six or more layers effortlessly. When your machine can’t deliver, you’ll face skipped stitches and tension quality issues that no amount of tweaking can fix. Many vendors supply specialized sewing machines for various projects.
- Layering Capabilities: Most home machines max out at 4 layers; pushing beyond causes motor strain and stitch variation.
- Power Gap: Industrial sewing machine motors deliver 400-550 watts versus home machines’ 60 watts—that’s nearly 10x more muscle.
- Reality Check: Sometimes your machine just isn’t built for the job, and that’s okay—know your limits before starting ambitious projects.
Using Walking and Roller Feet
When your machine struggles with thick fabrics, specialized presser feet become your best friends. The walking foot offers outstanding walking foot benefits by moving fabric layers simultaneously, eliminating feed dog influence problems that cause uneven stitching. For sticky or slippery thick fabrics, roller foot uses include smooth feeding without drag.
Explore product options to find the perfect fit for your needs. Check foot compatibility with your machine settings before switching. These specialized feet solve fabric feeding issues that standard presser feet can’t handle.
Step-by-Step Techniques for Stitching Layers
You’ll need specific tactics to tackle those tricky intersections where multiple thick layers meet, like when hemming a bag corner or sewing across bulky seams.
These proven methods will help you guide your fabric through smoothly while keeping your machine happy and your fingers intact.
Managing and Thinning Seam Bulk
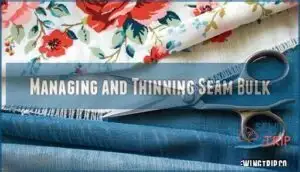
After adjusting your machine settings, you’ll need to tackle seam bulk head-on. Trim seam allowances to different lengths—this layered seam grading prevents thick ridges. Cut the bottom layer shortest, middle layers progressively longer. Use sharp fabric scissors for clean cuts.
Press seams open when possible, using steam to flatten stubborn thick fabrics. Consider seam finishing techniques like serging or pinking shears to prevent fraying while reducing bulk.
Using Clips and Pressing Tools
Once you’ve trimmed bulk, proper holding and pressing become your best friends. Fabric clips are great here—they grip thick fabrics better than pins without creating holes.
Steam is another key tool, softening stubborn layers before pressing. Use a tailor’s clapper for seam pressing, applying firm pressure to flatten thick seams. For extra-stubborn spots, try mallet flattening with gentle taps over cloth protection.
Hand-Sewing and Basting for Control
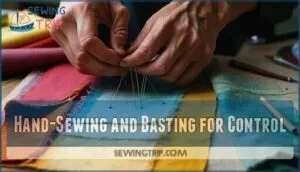
Sometimes your machine just can’t handle the pressure—literally. When thick fabrics and multiple layers team up against you, hand-sewing becomes your secret weapon.
Basting techniques let you test-drive complex projects before committing to permanent seams. You’ll gain exceptional fabric control, positioning layers exactly where they belong. One such technique involves using the ladder stitch method for invisible closures.
Hand sew through trouble spots first, then machine-stitch the easier sections. This precision stitching approach saves needles and sanity.
Troubleshooting and Achieving Professional Results
Even with the best techniques, you’ll sometimes hit snags like skipped stitches, needle breaks, or uneven seams when working with thick layers. The good news is that most problems have simple fixes, and knowing a few troubleshooting tricks will help you achieve those crisp, professional results that make your projects look store-bought.
Solving Common Sewing Problems
Frustration builds when sewing problems derail your multi-layer project. Skipped stitches often signal wrong needle selection for fabric layers. Tension issues create thread bunching underneath. Check your presser foot pressure—too light won’t grip properly.
Seam puckering happens when you pull fabric instead of letting feed dogs work. Needle breakage occurs from forcing thick sections too quickly through your machine.
Addressing thread bunching problems often involves correcting the threading.
Regular Maintenance and Needle Replacement
Consistency is your sewing machine’s best friend. Change your needle every 6-8 hours of stitching—dull needles cause skipped stitches and tension nightmares. Clean your machine regularly, focusing on feed dog care to prevent lint buildup.
Proper needle selection for your fabric type extends needle lifespan substantially. This preventative maintenance keeps your machine humming smoothly through thick layers.
Tips for Clean Finishes and Durable Seams
Master seam allowance finishes by pressing them open and trimming excess bulk. Topstitching techniques add strength while creating professional edges on thick fabrics.
For multiple layers of fabric, faced hem durability beats basic folding—it’s your secret weapon. Binding thick edges prevents fraying and adds structure.
Hand-sewing strength comes from careful backstitching at stress points.
Frequently Asked Questions (FAQs)
How do you sew through thick fabric?
You’ll need a heavy-duty needle (size 90-100), longer stitch length, and walking foot. Use clips instead of pins, go slowly, and consider hand-wheeling through thick sections.
How long should a stitch be?
Stitch length depends on your fabric and purpose. For regular sewing, use 5mm. **Thick fabrics need 3-5mm to prevent bunching.
**
Topstitching works best at 5-5mm for visibility and durability.
What is layering in quilting?
Layering in quilting creates the classic "quilt sandwich" – you’ll stack three essential layers together.
The decorative quilt top goes on top, fluffy batting provides warmth in the middle, and backing fabric finishes the bottom.
Do straight stitches work best on thick fabric?
Straight stitches aren’t always your best friend with thick fabric. **You’ll want longer stitch lengths—around 5-5mm—to prevent bunching.
**
Sometimes a small zigzag works better for materials like faux leather.
What are quilting stitches?
Think of making a sandwich – quilting stitches are the stitches that hold these three layers of a quilt together – the top, batting and the back. You’ll create padded texture through these layers.
What happens if a fabric is too thick to sew?
When fabric’s too thick, your machine will struggle, skip stitches, or break needles. You’ll hear grinding sounds as it fights the bulk.
Sometimes you’ll need a heavy-duty machine or professional help.
How do you prevent fabric shifting during stitching?
Like trying to hold onto a slippery fish, preventing fabric from shifting requires the right grip.
Use clips instead of pins, basting stitches, or a walking foot to keep layers aligned perfectly during stitching.
Can polyester batting be sewn through easily?
Yes, you can sew through polyester batting easily with proper needle selection. Use a size 90/14 needle and lengthen your stitch to 3-5mm. The fluffy texture compresses nicely under your presser foot.
What causes thread breaking when sewing layers?
Thread breaks happen when you’re using the wrong needle size, too-tight tension, or dull needles. Heavy thread through thick materials creates friction that snaps weaker threads mid-stitch.
Should you backstitch when starting thick seams?
Absolutely skip backstitching – it’s like trying to hammer through concrete!
Start thick seams by slowly hand-turning your machine’s wheel for the first few stitches, then gradually increase speed for better control.
Conclusion
Like Rome wasn’t built in a day, mastering stitching fabric layers takes practice and patience. **Success starts with the right needle, proper machine settings, and quality tools.
**
Remember to test on scraps before diving into your main project—this simple step prevents costly mistakes. When stitching fabric layers becomes second nature, you’ll tackle any thick material with confidence, creating professional-looking garments that last.
- https://www.skillshare.com/en/blog/the-right-stitch-types-to-use-no-matter-what-youre-sewing/
- https://www.twigandtale.com/blogs/twig-and-tale-blog/finishing-seams-an-overview-of-techniques
- https://www.thesewingdirectory.co.uk/lining-techniques/
- https://www.magnetichoop.com/blogs/news/quality-stitch-mastery-evaluating-achieving-and-maintaining-professional-results
- https://www.ohscarf.com/article/what-are-the-common-fabric-stitching-and-sewing-defects-in-fabrics.html


