This site is supported by our readers. We may earn a commission, at no cost to you, if you purchase through links.
First, check if the guide’s mounting screw has loosened over time – tighten it gently with a small screwdriver. Next, inspect the guide itself for cracks or wear that might prevent proper grip.
Make sure you’re threading correctly through all guides in sequence, as improper threading creates extra tension that can dislodge guides. Sometimes the guide simply needs a thorough cleaning to remove lint buildup around its base.
The real game-changer lies in understanding why this happens repeatedly, and addressing the root cause, such as improper threading, loosened screw, or lint buildup, to prevent future issues and ensure smooth sewing machine operation, which can be a common sewing machine hiccup.
Table Of Contents
Key Takeaways
- Check and tighten loose mounting screws – Your thread guide pops off because the screws holding it in place have loosened over time, so grab a small screwdriver and gently tighten them to restore stability.
- Clean lint buildup around the guide base – Accumulated lint creates friction and prevents proper grip, so use a soft brush or compressed air to remove debris from around your thread guide’s mounting area.
- Thread your machine correctly with proper tension – You’re creating extra stress on the guide when you skip threading steps or use incorrect tension settings, so always raise the presser foot and follow the proper threading sequence.
- Upgrade to metal guides for durability – If you’re dealing with worn plastic guides that keep failing, consider replacing them with metal alternatives that’ll withstand constant use and vibration better.
Thread Guide Issues
When your thread guide keeps popping off mid-project, it’s usually because something’s loose, worn, or not sitting right on your machine.
You’ll need to check if the guide itself has loosened up, if the mounting screws need tightening, or if years of use have simply worn down the parts that keep everything in place, which can be due to years of use.
Loose Thread Guides
When your thread guide feels wobbly, it’s often due to loose mounting screws that need immediate attention.
This thread guide problem creates frustrating stitching inconsistencies that’ll drive you crazy.
Check these common culprits:
- Loose mounting screws – causing guide instability
- Poor attachment mechanism quality – leading to frequent repairs
- Worn screw threads – requiring professional servicing or replacement
Tighten screws carefully to restore thread guide stability and prevent future thread guide fixes.
Worn Thread Guides
Extended use takes its toll on every component.
Guide Material deteriorates over time, creating Wear Patterns that affect performance. You’ll notice scratches, chips, or rough edges where thread constantly rubs.
These imperfections disrupt Tension Impact and compromise Stitch Quality.
When your thread guide is broken beyond repair, consider Replacement Options. Metal guides outlast plastic ones, making them smart upgrades for heavy-use machines.
Misaligned Thread Guides
When your thread guide sits crooked like a wonky picture frame, you’ve got a misaligned thread guide problem on your hands.
Check mounting screw issues first—they’re often the culprit behind thread guide loose situations. Use precision adjustments with a small screwdriver to realign the guide.
For stubborn cases, professional servicing with diagnostic tools can identify deeper misaligned problems requiring thread guide repair or replacement.
Inconsistent tension often indicates thread guide problems, which may require precision adjustments or professional servicing to fix.
Improper Threading Techniques
Skipping steps in your threading process creates a domino effect of threading problems.
You’ll face unthreading when you don’t raise the presser foot before threading—this keeps tension discs closed.
Start with needle position at its highest point, follow the correct thread path, and maintain proper threading order.
Wind your bobbin evenly to prevent thread guide problems during operation.
Causes of Thread Guide Popping
Your thread guide doesn’t just pop off randomly – there’s always a specific reason behind this frustrating problem.
Understanding what causes material fatigue, mechanical wear, vibration effects, and incorrect tension settings will help you fix the issue once and for all.
Material Fatigue
Over time, your thread guide experiences material fatigue from constant use.
Even the toughest thread guides eventually surrender to the relentless wear of daily sewing marathons.
Plastic degradation weakens the mounting points, while metal fatigue creates stress fractures in alloy components.
Even high-quality thread guides have a limited component lifespan.
When fragile plastic thread guides become brittle, they’re prone to breaking.
Consider upgrading to reinforced metal alternatives for better durability and longer-lasting performance.
Mechanical Wear
Constant use wears down your thread guide through repeated friction and contact.
This mechanical wear creates loose connections and material degradation over time.
You’ll notice wear patterns where the thread guide attaches to your sewing machine.
Component fatigue weakens mounting points, causing the guide to pop off unexpectedly.
Regular stress analysis helps identify failing parts before complete breakdown occurs.
Regular maintenance can prevent these issues and guarantee smooth sewing operation.
Vibration Effects
Sewing machine vibration creates machine resonance that gradually loosens your thread guide’s mounting screws.
Over time, this constant movement compromises structural integrity, leading to component loosening. You’ll notice increased sewing machine vibration during high-speed stitching.
Dampening solutions like rubber mats under your machine help reduce these effects.
Regular sewing machine maintenance includes checking thread guide tightness after heavy use sessions, which can help prevent issues caused by machine resonance.
Incorrect Tension Settings
Wrong tension settings stress your thread guide beyond its limits.
When you’ve got the tension dial cranked too tight, it yanks threads with excessive force, loosening guide attachments over time.
Fabric thread pairing matters too—heavy threads need different settings than delicate ones.
Check your tension dial calibration and analyze stitch appearance.
Proper bobbin tension impact prevents thread guide problems through balanced thread tension during sewing machine troubleshooting.
Thread Tension Troubleshooting
When your thread guide won’t stay put, faulty tension settings often create the extra stress that makes it pop off during sewing.
You’ll need to check your tension dial, clean those tension discs, and add some lubrication to get everything working smoothly again.
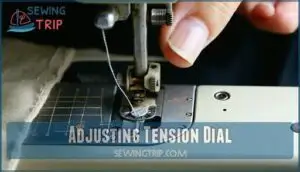
Adjusting Tension Dial
Your tension dial is like a volume knob for thread control.
Your sewing machine’s thread guide is like a traffic cop—when it’s not doing its job, everything goes haywire.
Start by checking tension dial markings – most machines work best between 3-5.
Fabric type effect matters: lightweight fabrics need lower settings, while heavy materials require higher tension.
Thread thickness impact is vital too.
Many sewers also buy tension dials for replacement.
Test on scrap fabric first, adjusting gradually until you achieve balanced stitch formation and consistent results, using your tension dial as a tool for thread control.
Cleaning Tension Discs
Your tension dial won’t help much if your tension discs are clogged with lint.
Turn off your machine and remove the top thread completely. Use a soft brush or compressed air for lint removal between the discs.
Check disc alignment while cleaning – they should sit parallel. This simple cleaning restores proper tension balance and smooth thread flow.
Clean monthly for best results.
Lubricating Moving Parts
When friction builds up in your machine’s moving parts, lubricating mechanisms becomes your secret weapon for smooth operation.
Apply specialized sewing machine oil to the needle bar and feed dogs for effective friction reduction. Regular application of proper lubricant types prevents wear and keeps your thread guides stable.
This simple sewing machine maintenance step stops most threading headaches before they start. Improper lubrication can cause machine malfunctions, which highlights the importance of proper lubricant types and smooth operation.
Preventing Thread Guide Problems
You don’t have to wait for your thread guide to pop off again if you stay ahead of the problem with simple maintenance habits.
A few minutes of preventive care each week will save you hours of frustration and keep your sewing projects running smoothly.
Regular Cleaning
Lint buildup acts like tiny roadblocks in your thread path, causing your thread guide to work overtime.
Clean your sewing machine weekly using a soft brush for lint removal around the needle plate, bobbin case, and tension discs.
This simple machine maintenance step prevents friction that loosens thread guides. A clean machine equals stable threading and fewer headaches.
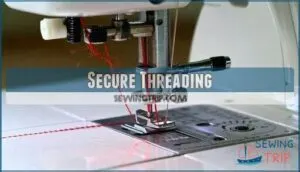
Secure Threading
Beyond regular cleaning, proper threading technique prevents your thread guide from working loose during operation.
Threading correctly creates secure attachment points that resist vibration and mechanical stress.
Follow these threading fundamentals for rock-solid thread guide stability:
- Start with needle position at its highest point – This prevents thread path tension from pulling your thread guide loose during initial setup
- Maintain proper threading order through each guide – Skip a guide and you’ll create uneven bobbin threading tension that loosens components
- Check tension balance after threading – Incorrect settings create stress that can break your thread guide replacement over time
Reinforcing Fragile Parts
Fragile plastic thread guides crack under pressure, but you can strengthen them before they fail.
Apply clear nail polish to hairline cracks for quick epoxy reinforcement. Metal sleeves slide over worn guides for added durability.
A loose thread guide, as explained in this guide, can cause uneven stitch quality.
For serious reinforcement, consider 3D printed custom braces that clamp around vulnerable attachment points, creating rock-solid secure attachment for your thread guide.
Using High-Quality Thread Guides
When your thread guide is broken or loose, it keeps causing headaches, investing in higher-quality materials makes all the difference.
Metal alloy guides with reinforced construction outlast flimsy plastic parts every time.
These upgrades deliver better tension control and improved stitch quality compared to basic models.
Consider upgrading to durable metal options for enhanced longevity.
OEM alternatives and aftermarket thread guides often match original specs while offering superior durability at reasonable prices.
Advanced Thread Guide Maintenance
When basic fixes don’t solve your thread guide problems, you’ll need to tackle more complex maintenance tasks that address the root causes.
These advanced techniques require precision tools and careful attention to detail, but they’ll transform your sewing machine’s performance from frustrating to flawless.
Upgrading Vintage Machines
Older machines often benefit from upgrading vintage machine thread guides with modern metal replacements.
These upgrades solve persistent thread guide problems while maintaining your machine’s character.
Consider these upgrade options for thread guide issues:
- Metal Replacements – Swap plastic guides for enhanced durability and improved tension control
- Modern Threading systems that reduce frequent adjustments and breakage
- Aesthetic Considerations – Choose finishes that complement your vintage machine’s original design
- Enhanced Durability components that’ll outlast original thread guide broken parts
Using Precision Screwdriver Sets
When tackling a thread guide problem, the right tools make all the difference.
Screwdriver size matters—using the wrong size strips screws and worsens your thread guide loose situation.
Quality sets offer torque control and ergonomic handles for precision work.
Different screw head types require specific bits.
Invest in a good set to guarantee secure attachment and prevent your thread guide broken headaches from recurring.
Proper guide placement helps guarantee consistent tension adjustment for consistent results and to achieve proper guide alignment.
Replacing Damaged Parts
Sometimes your precision screwdriver work won’t fix everything.
When thread guide assembly parts are cracked or worn beyond repair, you’ll need replacements. OEM parts offer perfect compatibility, while aftermarket options provide budget-friendly alternatives.
Consider metal upgrades for plastic components that keep failing. Finding the right thread guide parts can extend the life of your sewing machine.
Don’t forget footer replacement or bobbin replacement if these sewing machine parts show damage during your thread guide replacement project.
Synchronizing Needle and Hook Movement
Beyond replacing broken components, your sewing machine’s needle position and hook timing must work in perfect harmony.
When synchronization errors occur, you’ll notice skipped stitches and thread breakage.
Check that your needle reaches its lowest point exactly when the hook catches the thread loop.
Adjust looper adjustment screws carefully – this precise stitch formation prevents most sewing machine troubleshooting headaches, ensuring perfect harmony.
Frequently Asked Questions (FAQs)
How do you fix a threading problem?
You’ll need to rethread your machine with the presser foot raised.
Check your tension settings, replace bent needles, clean lint from the thread path.
Make certain you’re using quality thread that matches your needle size.
Why does my sewing machine keep breaking thread?
Thread breaks happen when you’re using incorrect tension settings, damaged needles, or poor-quality thread.
Check your threading path, replace bent needles, and adjust tension dial settings to match your fabric weight, focusing on complete concepts to resolve the issue.
How do I know if my sewing machine is unthreaded?
Your sewing machine whispers its distress through silent needles and loose loops.
You’ll notice no thread emerging from the needle, tangled stitches forming underneath, or thread pooling where it shouldn’t—clear signs you’re unthreaded.
These signs indicate a problem that needs to be addressed to continue sewing properly.
Why is threading important in a sewing machine?
Proper threading creates the foundation for every stitch you’ll make.
Without correct threading through tension discs and guides, you’ll face broken threads, skipped stitches, and frustrating jams that’ll stop your project cold, which emphasizes the importance of correct threading.
How do I know if my thread is wrong?
You’ll spot trouble right off the bat when thread keeps breaking, creates loose stitches, or tangles underneath.
Check for bumps, knots, or fraying – these signal low-quality thread that’ll cause headaches.
Should you use a sewing machine if your thread breaks?
No, you shouldn’t continue sewing when your thread keeps breaking.
Stop immediately and troubleshoot the issue.
Check your needle, thread quality, tension settings, and threading path before resuming to prevent fabric damage, and this will help you to prevent damage.
Why does my thread keep coming out of the thread guide?
That sinking feeling hits when your thread won’t stay put.
You’re likely threading incorrectly or your tension’s off.
Check if you’re threading with the presser foot raised and verify proper tension settings for smooth sewing.
Why does my thread keep popping?
Your thread keeps popping because of incorrect tension settings, improper threading, or a damaged needle. Check your tension dial, rethread with the presser foot raised, and replace bent needles immediately.
How do I stop threads from coming out?
Like a stubborn child escaping your grasp, threads slip away when you don’t secure them properly.
Check your needle threading, raise the presser foot, pull enough thread tail, and make certain proper tension settings for secure stitches.
Why does my thread keep falling out?
Your thread’s falling out because you’re threading incorrectly, using the wrong needle size, or have tension issues.
Always raise your presser foot before threading, pull enough tail through, and check your needle isn’t bent or damaged to ensure proper threading and to prevent issues like threads falling out due to incorrect threading.
Conclusion
Coincidentally, most sewers discover their thread guide keeps popping off right before important projects.
You’ve now got five proven fixes to tackle this frustrating issue head-on. Whether it’s tightening screws, cleaning lint buildup, or adjusting threading techniques, these solutions work consistently.
Don’t let a wayward thread guide derail your creativity. Apply these maintenance tips regularly, and you’ll prevent future pop-offs while keeping your machine running smoothly for years ahead, ensuring a smoothly running machine.
- https://www.pexels.com/photo/person-sewing-white-sewing-machine-4622215/
- https://www.ijfmr.com/papers/2023/4/23888.pdf
- https://www.researchgate.net/publication/248958502_Sewing_threads
- https://pubs.aip.org/aip/acp/article/2969/1/050028/2933722/Analysis-of-impact-of-the-tension-force-of-needle
- https://www.sewthebest.com/sewing-machine-maintenance/

