This site is supported by our readers. We may earn a commission, at no cost to you, if you purchase through links.
First, check your threading—sounds basic, but even a tiny misstep can throw tension off.
Verify the thread is seated correctly in the tension disks and bobbin case.
Adjust the tension dial gradually, testing as you go.
If seams are puckering or stitches look uneven, balance the upper and bobbin tension until they lock neatly in the middle.
Dusty tension disks or low-quality thread could also be the culprits.
Regular cleaning and using good thread go a long way.
A smooth stitch might just be one tweak away!
Table Of Contents
Key Takeaways
- Check your threading carefully; even small missteps can mess up your tension.
- Clean tension disks and bobbin cases regularly to avoid lint buildup disrupting your stitches.
- Adjust the upper tension dial and bobbin tension gradually, testing on scrap fabric to find balance.
- Use high-quality thread and service your machine annually to prevent tension problems and ensure smooth operation.
Thread Tension Basics
Thread tension is what keeps your stitches balanced and your seams sturdy. Without proper tension, you’ll see messy loops, puckered fabric, or even broken thread ruining your projects.
Definition of Thread Tension
Tension, defined simply, is the push-and-pull balance that keeps upper and lower thread tension working together in harmony.
The harmony of thread tension is the perfect balance, ensuring flawless stitches and strong, professional-quality seams every time.
It’s like a handshake between threads, ensuring stitch formation happens smoothly.
With proper thread control and balanced pressure, your stitches stay snug and seams strong.
Think of sewing machine tension as the glue holding your fabric masterpiece together.
Incorrect threading can cause most tension problems, which is a common issue that can be resolved by understanding the basics of thread tension.
Importance of Balanced Tension
Balanced tension is key to professional sewing.
Balanced tension ensures flawless stitches, durable seams, and a polished finish—your secret to creating professional-quality sewing projects every time.
It guarantees stitch durability, strong seam quality, and fabric appearance that’s smooth and uniform.
When tension balance is off, it leads to uneven stitches and thread tension issues.
Proper tension adjustment maintains consistent results, preventing breaks or messy seams, and testing and fine-tuning tension certifies stitch quality, making every project shine.
Factors Affecting Thread Tension
Sometimes, small details make all the difference.
Material thickness, thread type, and needle size play huge roles in thread tension issues.
A poorly wound bobbin or dry machine parts can throw off balance too.
Even slight changes in upper thread tension or bobbin tension need attention, as regular tension adjustment keeps your stitches perfect.
Avoiding puckers, loops, or tension problems altogether is crucial for maintaining quality stitches.
Consequences of Incorrect Tension
If tension problems are left unchecked, you’ll spot loose stitches, fabric puckering, and even thread breakage.
These issues compromise seam integrity and stitch quality, leading to fabric damage or complete project failure.
Tight stitches may distort fabric, while loose ones break easily, and you’ll waste thread fixing mistakes.
Always test tension on scraps to avoid frustration, and ensure that your project turns out as intended with proper seam integrity and stitch quality.
Tension Mechanism Components
Understanding the tension components in your sewing machine is key to smooth stitching.
From the tension disks to the bobbin mechanism, each part plays a critical role in keeping your stitches balanced.
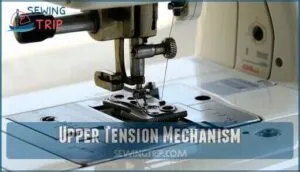
Upper Tension Mechanism
The upper tension mechanism keeps your stitches looking great.
The tension dial adjusts the pressure on the thread, working with tension disks, a spring, and the thread guide to control flow.
Dust or lint here messes things up, so regular upper tension cleaning helps avoid component damage.
Check for jerky thread movement—it’s a sign tension settings might need tweaking.
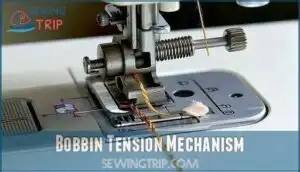
Bobbin Tension Mechanism
The bobbin tension mechanism is often overlooked but plays a critical role in stitch quality.
Check the bobbin case springs for wear and verify correct bobbin placement. Misplaced bobbins or incorrectly set case screw adjustments can cause bobbin winding issues.
Lint buildup effects also disrupt the tension mechanism, so clean regularly. Always test bobbin threads after any bobbin case adjustments.
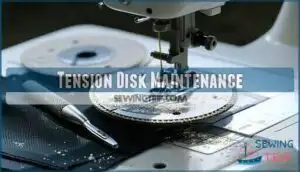
Tension Disk Maintenance
Lint buildup effects can throw your tension disk alignment off and frustrate sewing projects.
To keep sewing machine tension in check, gently clean tension disks using disk cleaning tools or a soft cloth. You can find a tension disk cleaner online.
Make spring tension checks a habit to guarantee smooth stitching. Include tension disks cleaning in your sewing machine maintenance routine regularly.
For persistent issues, schedule professional servicing frequency annually.
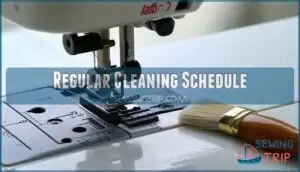
Regular Cleaning Schedule
Keep your sewing machine running smoothly with regular cleaning. Stick to a schedule for removing lint and maintaining tension.
Try these steps:
- Remove lint from tension discs and thread paths weekly.
- Clean components like the bobbin case after every project.
- Oil moving parts as recommended.
- Include professional servicing annually for better sewing machine maintenance.
Consistent care prevents tension frustration! Regular maintenance is key to keeping your sewing machine in good condition, with regular cleaning and professional servicing being essential for its longevity.
Adjusting Thread Tension
Adjusting thread tension might seem tricky at first, but it’s all about finding the right balance between the top and bobbin threads.
By making small, precise adjustments, you’ll guarantee your stitches are even and your seams are strong.
Mechanical Machine Adjustments
For mechanical machines, sewing machine tension adjustment starts with the tension dial settings.
Test the tension knob range, adjusting incrementally.
Check disk cleaning methods—grime disrupts balance.
Spring tension checks are key; verify they’re not worn.
For bobbins, use the bobbin case screw for fine-tuning.
These simple manual adjustment tips can fix tension screws and keep stitches smooth.
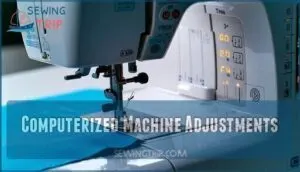
Computerized Machine Adjustments
Computerized machines simplify tension adjustments but still need your input. Use digital tension settings to fine-tune control.
Here’s how:
- Navigate the screen interface for precise tension dial settings.
- Check if saved tension profiles fit different fabrics or stitches.
- Update machine software for smoother operation.
To diagnose issues, it’s important to inspect stitch formation on a test piece.
- Experiment with tension adjustment techniques to avoid puckering or loose stitches, ensuring a smooth and even stitch formation with proper machine operation.
Auto-Adjusting Tension Features
Some modern machines simplify sewing machine tension with automatic tension systems.
Using sensor technology and algorithm accuracy, they adapt to material recognition, making sewing smoother.
Concerned about customization? User override lets you tweak settings if needed.
This feature enhances long-term reliability while reducing tension troubleshooting.
Automation keeps thread tension balanced, saving you frustration during sewing machine tension adjustment and countless projects!
Some Pfaff models, like the Pfaff Ambition 620, offer convenient auto tension for consistent stitching.
Troubleshooting Common Issues
If your sewing machine tension troubleshooting feels like solving a mystery, start simple.
Spot tension imbalance by checking stitches—loops or puckering flag issues. Inspect bobbin placement; a loose fit disrupts flow.
Adjust tension dial settings incrementally, testing on scrap fabric. Re-threading the machine with the presser foot up fixes alignment hiccups.
Stay patient—sewing machine tension problems often need small tweaks!
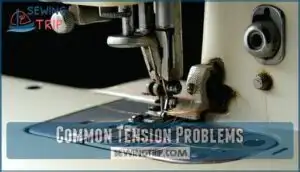
Common Tension Problems
When your sewing machine stitches look uneven or keep tangling, it’s likely a tension problem.
From puckered seams to broken threads, these common issues can quickly turn a fun project into a frustrating mess.
Seam Puckering and Breaking
Seam puckering often feels like dragging a rake through sand—rough and uneven.
Check your fabric weight and thread type first. A tight tension relationship can crush lightweight fabrics.
Adjust the stitch length and use differential feed to prevent stretching. If thread breaking or uneven tension persists, rethread carefully.
Fixing sewing machine tension issues will smooth things out!
Thread Breaking and Uneven Tension
If thread breaking or uneven tension keeps ruining your stitches, look for culprits like thread quality, needle type, or fabric choice.
Incorrect threading or a misaligned thread path can also spark chaos.
Slow down your machine speed and try subtle thread tension adjustments, testing on scrap fabric helps, as these quick fixes often reveal hidden thread tension solutions!
Bobbin Unwinding Issues
Loose bobbins can cause bobbins thread issues like constant unwinding or tangling.
To fix it:
- Tighten the casing screw gently if backlash occurs.
- Rewind uneven bobbin winding to avoid snagged thread during stitches.
- Verify you’ve got the right bobbins type for your machine.
Improper threading can also lead to thread bunching issues.
A well-wound bobbin keeps your stitches smooth and frustration-free!
Gaps in Seams and Low Tension
If you spot gaps in your seams, it’s likely a low thread tension balance.
Start with a quick tension diagnosis: check sewing machine tension settings, rethread, or adjust the upper dial slightly.
Skipped stitches? Inspect your needle type and fabric feed.
Loose stitching often signals issues needing sewing machine tension adjustment.
Test fixes on scrap fabric first.
Troubleshooting Tension Issues
You can fix most thread tension issues with a few simple checks and adjustments. Start by identifying the problem, testing your settings, and ensuring everything is threaded properly.
Identifying Tension Imbalance
When diagnosing sewing machine tension issues, start by observing stitch appearance. Are loops visible? Fabric distortion or thread looping often signals tension imbalance.
Listen for audible cues like uneven thread tension sounds. Use test swatches to spot inconsistencies before tackling projects.
Properly balanced thread tension keeps stitches smooth and durable, making tension issues identification essential for mastering sewing machine tension balance. Addressing these problems often requires checking for thread guide obstructions, which can be a key factor in achieving properly balanced thread and resolving thread tension issues.
Checking Bobbin Placement
Incorrect bobbin placement can derail your sewing.
Start by checking the bobbin case seating and ensuring it’s inserted properly.
Watch out for the wrong bobbin type or bobbin size compatibility, which can cause tangles.
Use these quick checks:
- Verify bobbin thread direction matches your manual.
- Confirm bobbin fits snugly.
- Inspect for bobbin thread issues.
- Check for bobbin winding consistency.
Adjusting Tension Dial Settings
To fix tension issues, start with the sewing machine tension dial.
Adjust tension dial settings in small increments to avoid overcorrecting.
Always keep the presser foot up for accurate threading.
Test tension adjustment techniques on scrap fabric, using contrasting thread colors for clarity.
If problems persist, combine these tension troubleshooting tips with rethreading the machine for proper tension issues resolution, which involves careful troubleshooting.
Re-Threading The Machine
Re-threading your machine might feel like hitting a reset button, but it works wonders! Start with the presser foot up and verify proper threading.
Follow the thread path carefully, checking thread guides and spool placement.
Skip common threading mistakes by reviewing your manual.
After threading, test with a scrap fabric to confirm everything’s aligned.
- Raise presser foot before threading.
- Follow thread guides and spool placement.
- Correct threading path errors or snags.
- Check alignment for proper tension reset.
- Test the machine on scrap fabric.
The key to successful re-threading is to be meticulous and patient, ensuring each step is completed correctly to avoid having to re-do the process, which can be frustrating and time-consuming, affecting the overall threading process and potentially leading to threading mistakes.
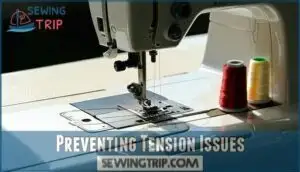
Preventing Tension Issues
You can prevent frustrating tension issues by keeping your sewing machine clean and well-maintained.
Using high-quality thread and servicing your machine regularly will also help keep your stitches smooth and trouble-free.
Regular Machine Maintenance
Keep your sewing machine in top shape with regular care.
Remove lint often to prevent clogs, and clean tension discs gently.
Oiling mechanisms keeps parts moving smoothly.
Inspect your needle for damage—it impacts tension too.
Proper maintenance involves using specialized machine lubricants.
Follow machine cleaning frequency guidelines and don’t skip professional checkups annually.
These sewing machine maintenance tips guarantee balanced stitches and frustration-free projects!
Using High-Quality Thread
Using high-quality thread might feel minor, but it’s a game-changer for sewing machine tension.
Low-quality thread causes problems like breakage or skipped stitches.
Start easy:
- Choose strong, smooth threads for better tension consistency and stitch appearance.
- Avoid lint-heavy thread types to reduce cleaning issues.
- Consider reputable brands—they balance strength and flexibility.
Your projects will thank you!
Consider using specialized sewing products to further enhance your sewing experience.
Avoiding Improper Threading
Improper threading creates chaos faster than a tangled fishing line.
Always thread with the presser foot up; it guarantees proper tensioning.
Follow the threading order precisely—missing thread guides or skipping the spool placement invites disaster.
Double-check for thread path obstructions or bobbin winding errors.
Machine threading needs patience; threading issues solutions often start with careful, consistent practice.
Servicing The Sewing Machine
A well-serviced sewing machine is the secret to tension bliss.
Schedule professional servicing yearly for oiling mechanisms, part replacement, and motor maintenance.
Timing adjustments and tension disk cleaning prevent jams.
Regular sewing machine tension cleaning clears lint buildup, avoiding thread nests.
Don’t skip machine dirt cleaning in the bobbin area—it keeps stitches consistent and tension balanced, ensuring smooth sewing success.
Frequently Asked Questions (FAQs)
How to fix sewing machine thread tension?
Adjusting sewing machine tension sounds tricky, but it isn’t rocket science.
Start with the upper tension dial—small turns usually fix it.
Check the bobbin case tension too.
Always test adjustments on scrap fabric first!
Why does my thread keep looping under fabric?
Your thread loops under fabric because the upper tension is too loose or the machine isn’t threaded properly.
Check the tension dial, rethread the machine with the presser foot up, and test on scrap fabric to ensure proper threading and tension.
How to tell if tension is wrong on a sewing machine?
If your stitches look like a tangled bird’s nest or seams pucker like a bad attitude, your tension’s off!
Check for uneven or visible threads on fabric sides, and tweak settings gently.
Why is the tension so tight on my sewing machine?
Your machine’s tension might be too tight if the upper thread pulls the bobbin thread to the top.
Check for stuck thread, clogged tension disks, or incorrect settings, and adjust the tension dial slightly lower to resolve the issue, focusing on complete concepts such as these to improve the machine’s performance.
Why does thread frequently twist during sewing?
It’s funny how thread loves drama, isn’t it?
Twisting happens when thread spools incorrectly or tension isn’t balanced.
Check threading paths, spool placement, and tension settings to keep the thread running smooth and tangle-free.
How can ambient humidity impact thread tension?
Humidity affects thread tension by increasing moisture absorption, making threads swell or weaken.
This disrupts smooth stitching.
Use a dehumidifier or silica gel in your sewing space to keep threads steady and tension balanced.
What is the effect of thread lubricants on tension?
Think of thread lubricants as a secret handshake—they reduce friction, letting the thread glide smoothly.
This helps maintain consistent tension, prevents snapping, and improves stitch quality, especially with tricky fabrics or high-speed sewing.
How to handle tension issues with metallic threads?
Metallic threads can be tricky!
Lower the upper thread tension slightly, use a metallic needle, and thread a spool net to prevent tangling.
Test on scrap fabric until the stitches balance beautifully without snapping.
Conclusion
Fixing thread tension issues in your sewing machine might feel like untangling chaos, but it’s simpler than it seems.
A quick check of your threading, tension disks, and bobbin placement often solves the problem.
Dust those tension disks and ditch poor-quality thread for smoother stitches.
Adjust your tension dial incrementally and test as you go.
With regular maintenance and these quick fixes, you’ll keep your machine humming effortlessly, leaving tension troubles in your sewing past.
- https://www.goldstartool.com/blog/can-sewing-machines-automatically-adjust-tension.htm
- https://www.allbrands.com/categories/850
- https://www.youtube.com/watch?v=9ekWAnJDt5I
- https://www.justanswer.com/small-appliance/ocpf0-tension-problems-not-sure-dial-turn.html
- https://quiltingwemple.com/troubleshoot-sewing-machine-tension

