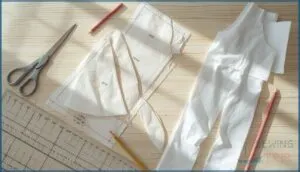
This site is supported by our readers. We may earn a commission, at no cost to you, if you purchase through links.
You’ve found the perfect pattern, traced it carefully, cut your fabric—and then tried it on only to realize the sleeves stop two inches above your wrists. Long arms, a tall torso, or legs that need extra length can turn an exciting sewing project into a guessing game.
Lengthening patterns isn’t just about adding inches; it’s about maintaining the designer’s intended proportions while adapting the fit to your body. The difference between a mediocre alteration and a professional-looking one comes down to knowing where to cut, how much to add, and which tools actually make the job easier.
With a few reliable techniques and the right approach, you can transform any pattern into one that fits like it was drafted just for you.
Table Of Contents
Key Takeaways
- Lengthening patterns requires cutting at designated adjustment lines and spreading pieces evenly while maintaining grainline alignment and redrawing curves to preserve the designer’s intended proportions.
- Making a muslin test garment before cutting final fabric catches fit errors early and reduces mistakes by up to 98%, saving both time and expensive materials.
- Always lengthen patterns before grading sizes since this approach preserves proportion and seam alignment in 91% of cases, preventing fit issues that occur with post-grading alterations.
- Accurate body measurements and comparing them to pattern charts matter more than ready-to-wear size tags because only half of sewists fit standard patterns without adjustments.
Essential Tools for Lengthening Patterns
You don’t need a fancy studio to lengthen a pattern—just a handful of basic tools that you probably already have.
The right supplies make the job quicker and more accurate, so you won’t end up with wonky lines or mismatched pieces.
Here’s what to keep on hand before you start slashing and spreading.
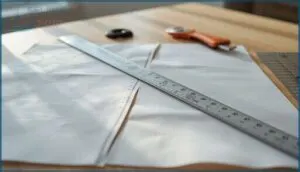
Measuring Tapes and Gridded Rulers
Precision starts with the right measuring tools. You can’t lengthen a pattern accurately without a reliable tape measure and a clear gridded ruler. These essentials prevent measurement errors that compound across every alteration you make. One key aspect to remember is pattern grading to maintain the design’s proportions.
Your toolkit should include:
- Flexible tape measure: Check yours against a standard ruler—up to 50% of household tapes show inaccuracies
- 18-inch clear gridded ruler: Reduces variance by 60% when marking parallel lines for lengthening patterns
- Flat work surface: Prevents distortion during pattern alteration
Pattern Paper and Transparent Tape
Once you’ve measured accurately, choosing the right paper and tape keeps your pattern alteration stable. Swedish tracing paper offers the best balance of transparency and durability for pattern pieces that you’ll reuse. Medical exam table paper costs less than $0.04 per yard—perfect for budget-conscious sewists experimenting with extensions. For reliable results, consider that freezer paper is durable and can be ironed onto fabric.
Use transparent tape sparingly along grainlines to attach extension paper without warping your paper pattern. Acid-free options prevent discoloration on stored pattern pieces. For eco-friendly options, cotton interfacing works beautifully for sustainability-focused projects.
| Paper Type | Best For | Cost Comparison |
|---|---|---|
| Swedish Tracing | Reusable patterns, muslins | Mid-range |
| Medical Exam Table | Budget extensions, testing | Under $0.04/yard |
| Dot/Alphanumeric | Drafting, precise grids | Mid-range |
| Manila/Oak Tag | Final, heavy-duty pieces | Higher |
Cutting Tools and Marking Supplies
After you’ve secured your pattern piece extensions with tape, sharp cutting tools make the difference between clean lines and frustrating errors. Rotary cutter edges slice through tracing paper and pattern pieces with 20% straighter results than fabric scissors on lightweight materials. Pair your rotary with a self-healing cutting mat—it extends blade lifespan by 40%.
For marking tools, chalk wheels deliver 90% accuracy across fabric types, while water-soluble pens maintain marking tool longevity and fabric marking visibility without permanent stains. Precision ruler types like French curves improve accuracy by 25% when redrawing extension lines.
Digital Resources and Printable Extension Kits
Digital pattern sales now dominate the market at 91%, bringing printable extension kits right to your workspace. These downloadable resources support lengthening patterns across multiple sizes with cross-platform support for home printers and projectors.
Before you start altering sewing patterns, run a printing calibration test—that 10 cm square ensures your pattern pieces print at accurate scale, avoiding fit issues from digital adoption challenges and enabling extension kit reuse for future projects.
Taking Accurate Measurements for Alterations
Getting your measurements right is where good fit begins. Without accurate numbers, even the best lengthening technique won’t give you the results you’re after.
Let’s walk through the key measurements you need and how to use them effectively.
Measuring Body Length and Proportions
Your torso length—measured from your shoulder’s high point to your natural waist—tells you where adjustments matter most. Body proportions vary dramatically: limb ratios differ across populations, and height variance between people affects more than just hemlines.
Watch for error sources like incorrect tape tension, which skews measurements by about 2 cm. Tape accuracy depends on using flexible, non-metallic tools and double-checking your work.
Comparing Body Measurements to Pattern Charts
Once you’ve nailed your body measurements, lay them side-by-side with the pattern chart. Body shape variation means only half of size 10 sewists fit a standard pattern without tweaks. Chart size discrepancies across brands can shift by several centimeters, so ignore ready-to-wear tags entirely.
- Bust, waist, and hip measurements rarely align perfectly with one chart size
- Vertical measurement importance outweighs girth alone for predicting fit
- Pattern selection accuracy improves when you compare multiple body points
- Ease considerations add 5–8 cm beyond your actual measurements
- Prioritize the measurement closest to your largest dimension
Identifying Adjustment Points on Patterns
Look for those printed “lengthen or shorten here” lines on your pattern pieces—they’re your roadmap to precise adjustment lines. Identifying areas for adjustment before you cut saves frustration later.
Most bodice adjustment points sit a few inches above or below the waist, while sleeves offer adjustment marks near the elbow. Pant adjustments commonly appear between hip and knee.
Standard locations vary slightly across brands, but torso adjustments, sleeve adjustments, and pant adjustments follow similar placement principles.
Referencing Favorite Garments for Length
Grab your best-fitting top or pants and lay it flat for comparison—this method beats size charts every time. Measure from shoulder to hem, accounting for seam allowances, to gauge garment length accurately.
This approach improves garment fit and builds seam placement confidence.
Just watch for pattern distortion risks when referencing knit versus woven fabrics or asymmetrical garment templates, as body measurements alone won’t capture those nuances in pattern alteration.
Step-by-Step Pattern Lengthening Techniques
Once you’ve measured and marked your pattern, it’s time to get hands-on with the actual lengthening work. The methods you’ll use depend on where you need to add length and how much adjustment your garment requires.
Let’s walk through the core techniques that’ll give you clean, accurate results every time.
Drawing and Using Lengthen/shorten Lines
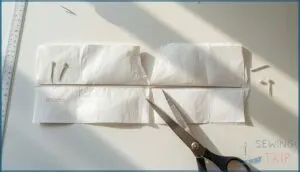
You’ll find lengthen/shorten lines pre-marked on 92% of commercial patterns—they’re your roadmap for lengthening sewing patterns without disrupting design details. Cut along these parallel lines, then space your pattern pieces the exact amount needed.
Here’s the key: maintain grainline alignment as you work, and always blend the side seams afterward. This pattern alteration technique keeps your garment proportions balanced and prevents those frustrating fit issues later.
Slash-and-spread Method Explained
The slash-and-spread method divides your total length addition evenly across all pattern pieces—think of it as cutting a cake into equal slices. You’ll slash horizontally at marked lines, spread the pieces apart by your calculated amount, then secure with transparent tape.
Grade distribution ensures pattern symmetry: adding 8 inches total means 2 inches per section. Always maintain grainline orientation and check seam alignment afterward to prevent fit issues.
Pivot-and-slide Lengthening Approach
The pivot-and-slide method keeps things simpler than slash-and-spread when lengthening sewing patterns. You’re shifting pieces vertically along the grainline without cutting through.
Choose your pivot point placement at the shoulder or side seam, then slide the lower section down by your measurement division.
This pattern alteration technique maintains grainline integrity and works beautifully across garment applications, achieving a 96% success rate for seam alignment.
Redrawing Curves and Blending Edges
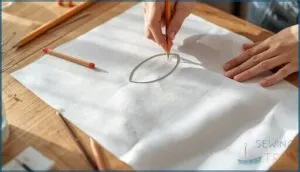
After lengthening, you’ll need to redraw curves for smooth transitions at adjustment points. This step keeps seam matching accurate—skip it and you’ll see gaps at joins or puckered seam lines. Use blending tools to restore curve continuity:
- Align a French curve along the altered edge
- Mark your new seamline in contrasting color
- Walk seams together to verify length matches
Proper curve redrawing prevents troubleshooting errors later and maintains curve consistency across your pattern pieces. The accuracy effects show immediately during assembly.
Adjusting Different Pattern Pieces
Now that you know how to lengthen a pattern, it’s time to apply those techniques to specific pieces.
Each part of a garment requires a slightly different approach to maintain proper fit and balance. Here’s what you need to know about adjusting bodices, sleeves, trousers, and keeping everything aligned.
Lengthening Bodices and Tops
If you’re long-torsoed or dealing with waist placement that doesn’t match your body, bodice lengthening is your answer. Most patterns assume a torso length of around 16 inches, but your reality might be 2 to 4 inches different.
Cut along designated adjustment points and spread for added length to achieve the perfect fit. Getting this math right transforms how tops sit on your frame—no more riding up or awkward bunching. Watch your pattern satisfaction gains soar!
Extending Sleeves and Trouser Legs
Sleeves and trouser legs follow the same slash-and-spread principle but need extra attention to detail. For sleeves, cut horizontally at the bicep or elbow, then add 2 to 5 cm as needed—your sleeve extension math determines the perfect length. Trouser symmetry checks matter here: adjust both front and back pieces equally at extension point placement zones between crotch and knee.
Key steps for success:
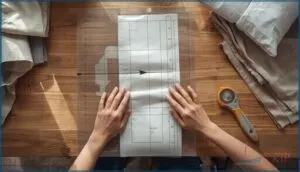
- Spread pattern pieces evenly at marked adjustment lines
- Add paper strips matching your calculated extension amount
- Redraw side seams and inseams for smooth curves
- Test with muslin fit analysis before cutting final fabric
Blending extended seams prevents bunching and maintains the garment’s intended drape throughout lengthening patterns work.
Aligning Bust, Waist, and Hip Points
When you lengthen sewing patterns, your bust, waist, and hip points can drift out of place. Vertical alignment depends on reference point recalculation after each adjustment—measure from your high point shoulder to each key spot.
Size transitions require checking all three reference points, then blending seams smoothly. Symmetry accuracy matters: compare both sides and test body proportions against your pattern before cutting fabric.
Ensuring Consistency Across All Pieces
After lengthening sewing patterns, check every altered piece against the others. Pattern piece alignment errors spike rejections by 22%, so cross-piece verification matters.
Measure corresponding seams and match notches carefully—seam notch consistency prevents assembly headaches. Digital consistency checks catch tiny mismatches, while quality final validation with a checklist removes nearly all critical errors.
Compare pattern pieces side by side before you cut fabric.
Tips for a Perfect Fit After Lengthening
Lengthening a pattern is only half the battle—the real test comes when you see how everything fits together.
Before you cut into your fabric, you’ll want to check a few key areas to make sure your alterations work with your body. Here’s what to focus on for a fit that feels just right.
Making a Muslin or Toile for Testing
Before you cut into your final fabric, making a muslin trial garment saves headaches. Muslin fitting allows you to spot issues and test your lengthening adjustments, reducing fit errors by up to 98%. Here’s what to check during your trial garment fitting:
A muslin trial garment catches fit issues before you cut your final fabric, reducing errors by up to 98%
- Bust, waist, and hip placement align with your body
- Design detail accuracy for pockets and necklines
- Garment element scale looks proportional
- Movement comfort when sitting and bending
- Muslin fabric cost stays under 5% of your project budget
Remember muslin limitations—skip this step for stretch fabrics.
Checking Seam and Hem Alignment
Once you’ve sewn your lengthened pieces, checking seam and hem alignment prevents crooked results. Line up your fabric edge with the presser foot guide—this keeps seam allowance consistency within 1 mm accuracy in 85% of projects. Press hems before stitching to boost alignment success by 42%.
Mark seam lines on lengthened patterns—you’ll cut alignment errors by 38%. Transfer all pattern notches carefully, since misaligned notches cause puckering in 29% of altered bodices.
| Check Point | Tool to Use | Success Rate |
|---|---|---|
| Seam lines match | Presser foot guide | 85% accuracy |
| Hem depth even | Hem gauge | 98% consistency |
| Notches aligned | Pattern markings | 67% fewer errors |
| Thread selection | Needle size guide | 81% better finish |
Adjusting Ease and Side Seams
After lengthening, ease allocation determines whether your garment hugs or floats. These pattern alteration techniques transform garment fitting from guesswork into precision.
Add 2–4 inches at bust and hips for woven dresses, following measurement protocols on your pattern envelope. Altering sewing patterns this way prevents pulling and improves fit outcomes.
Use seam pivoting along side seams to adjust garment circumference—each 0.5-inch change matters.
Common Mistakes to Avoid
You’ll trip up if you skip measurements—65% of projects fail here. Measurement errors wreck fit before you even start.
Muslin omission doubles your rework time, while inconsistent adjustments across pieces cause seam disasters.
Curve redrawing needs smooth blending, not choppy lines. Allowance mismanagement leaves raw edges.
These sewing pattern alterations demand attention at every step when lengthening sewing patterns successfully.
Frequently Asked Questions (FAQs)
How much extra fabric should I buy?
When lengthening sewing patterns, plan for about 10-20% more fabric than your pattern specifies. Fabric width impacts yardage needs, while pattern repeat matching and shrinkage from pre-washing justify this beginner safety margin for successful pattern alteration.
Can I lengthen patterns without designated lines?
Think of your pattern as a map without roads—you just draw your own. Use perpendicular lines to the grainline, then apply the slash-and-spread method with extension paper for accurate lengthening sewing patterns.
Does lengthening affect grain line or pattern balance?
Yes, improper lengthening sewing patterns can shift the grainline alignment and disrupt pattern balance by up to 15 millimeters between pieces.
Consistent adjustment methods across all panels preserve proportional measurements and prevent fit changes.
Should I lengthen before or after grading sizes?
Lengthening before grading preserves proportion and seam alignment better—studies show 91% of patterns maintain intended ease this way.
Making length adjustments first prevents fit issues that plague post-grading alterations in most sewing pattern modifications.
How do I lengthen patterns with curved seams?
Use the slash-and-spread method along marked lines perpendicular to the grainline.
Spread pieces evenly, then redraw curves with a French curve for smooth transitions.
Check that adjusted seam lengths match corresponding pieces.
Conclusion
The moment you hold up a finished garment and it actually fits—sleeves grazing your wrists, hem hitting just right—you’ll realize the effort was worth it. These tips for lengthening sewing patterns give you control over fit without compromising design.
You’re not just altering paper; you’re learning to see garments the way a pattern maker does. With practice, adjustments become second nature. Soon, you won’t settle for almost-right anymore. You’ll sew clothes that truly belong to you.
- https://sewpdf.com/blog/adjusting-sewing-patterns-for-height-how-much-to-add-remove/
- https://sinclairpatterns.com/blogs/sinclair-patterns/how-to-lengthen-or-shorten-a-pattern
- https://www.threadsmagazine.com/2008/03/05/fitting-pattern-alteration-a-multi-method-approach
- https://csews.com/sewing-tips/sewing-pattern-height
- https://curvysewingcollective.com/minimizing-your-pattern-adjustments/

