This site is supported by our readers. We may earn a commission, at no cost to you, if you purchase through links.

Keep seam rippers handy for inevitable mistakes, maintain consistent seam allowances using measuring gauges, and press seams flat for professional results.
Sharp scissors stay sharp when you never use them on paper, while proper lighting and organized workspace prevent costly errors.
The secret lies in preparation—stabilizing slippery fabrics with starch, following grainlines religiously, and practicing techniques on scraps first transforms chaotic projects into smooth creative processes.
Table Of Contents
- Key Takeaways
- Essential Sewing Tools for Success
- Keeping Your Sewing Tools in Top Shape
- Setting Up an Efficient Sewing Workspace
- Preparing Fabric for Best Results
- Cutting Fabric Accurately Every Time
- Choosing The Right Needle and Thread
- Mastering Core Sewing Techniques
- Finishing Seams and Edges Neatly
- Avoiding Common Sewing Mistakes
- Staying Organized and Inspired
- Frequently Asked Questions (FAQs)
- Conclusion
Key Takeaways
- Invest in quality tools and maintain them properly – You’ll avoid frustration by using sharp fabric shears exclusively for cutting fabric, changing needles every 8 hours, and keeping scissors sharp by never using them on paper.
- Prepare your fabric thoroughly before cutting – You’ll prevent disasters by pre-washing all fabric to avoid shrinkage, pressing seams flat, and following grainlines religiously for proper fit and drape.
- Set up an organized, well-lit workspace – You’ll work more efficiently when your tools are within arm’s reach, you’ve got proper lighting to prevent errors, and your space stays organized with storage solutions.
- Practice techniques and plan projects carefully – You’ll achieve professional results by practicing new skills on scraps first, maintaining consistent seam allowances, and choosing projects that match your skill level while exciting your creativity.
Essential Sewing Tools for Success
You’ll master sewing projects faster when you invest in the right tools from the start.
Quality scissors, sharp needles, and a reliable seam ripper form the foundation of every successful project, turning frustrating mistakes into smooth sailing, with quality tools making all the difference.
Must-Have Sewing Tools
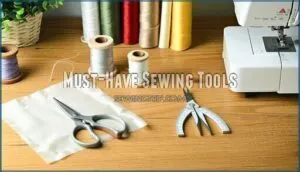
Four essential sewing tools form your foundation for success.
Sharp fabric scissors cut cleanly through materials, while a seam ripper saves projects when mistakes happen.
- Quality fabric shears – Keep exclusively for cutting fabric
- Seam ripper – Essential for correcting errors without damage
- Sharp needles – Replace every eight hours of sewing time
- Measuring tools – Sewing gauge ensures precise seam allowances
These sewing supplies transform chaotic projects into controlled masterpieces.
Having the right sewing scissors is vital for achieving professional results.
Choosing Quality Scissors and Shears
Quality scissors and shears transform your sewing experience from frustrating fabric battles to smooth, precise cuts.
Professional sewists swear by investing in well-crafted tools that maintain their edge through countless projects.
| Feature | Basic Scissors | Professional Shears |
|---|---|---|
| Scissor Materials | Stainless steel blades | High-carbon steel construction |
| Handle Ergonomics | Standard plastic grips | Contoured, cushioned handles |
| Edge Retention | Frequent sharpening needed | Long-lasting sharp performance |
Choose fabric shears exclusively for cutting fabric—never paper or pins. This preserves blade sharpness and prevents dulling.
Quality cutting techniques require proper scissor materials and ergonomic handles that reduce hand fatigue during extended sewing sessions.
When selecting the right tools, consider investing in high-quality sewing scissors to improve your overall sewing performance.
Importance of Seam Rippers and Gauges
Mistakes happen, even to experienced sewers, making seam rippers your best friend for fabric handling emergencies.
This sharp tool safely removes stitches without damaging material. Sewing gauges provide measurement tools for accurate hems, pleats, and buttonholes.
Together, these sewing tools improve sewing accuracy through precise gauge calibration and reliable seam repair capabilities for successful sewing projects.
Having the right essential sewing kit items is vital for efficient and accurate sewing.
Needle Types and When to Use Them
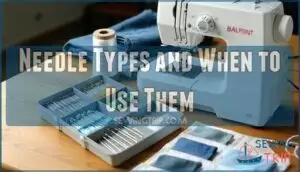
Choosing the right sewing needles transforms your stitching from frustrating to flawless.
Sharp needles paired with proper needle sizes for your fabric weights make all the difference in your sewing techniques.
- Universal needles (sizes 8-19): Work with most cotton and polyester fabrics, with smaller numbers handling heavier materials
- Ballpoint needles: Essential for knits and stretch fabrics to prevent snags and runs
- Denim needles: Heavy-duty construction tackles thick seams and multiple layers without breaking
Keeping Your Sewing Tools in Top Shape
Well-maintained tools are the secret to professional-looking results that’ll make you wonder why you ever struggled with dull scissors and lint-filled machines.
Sharp tools transform frustrating projects into smooth, professional masterpieces
You’ll save hours of frustration and create cleaner seams when your equipment works as hard as you do, achieving professional-looking results.
How to Keep Scissors Sharp
Sharp blades make all the difference in sewing success. Keep your scissors cutting clean by using them only on fabric—paper dulls blades four times faster.
Wipe blades after each use to remove lint buildup. Store scissors in fabric cases to reduce dulling by 40%.
Use steel wool as a pin cushion; it naturally sharpens pins and needles. Professional sharpening every six months restores factory-edge performance for serious sewists.
Cleaning and Maintaining Sewing Machines
After every project, your sewing machine craves attention like a neglected houseplant.
Dust and lint accumulate in the bobbins and feed dogs, creating friction that’ll sabotage your next masterpiece.
Clean regularly with pipe cleaners and coffee stirrers for debris removal, and you’ll keep your machine purring smoothly.
Apply machine oil to designated points monthly following your manual’s specifications to ensure longevity.
- Clean the filter and bobbins area after each use to prevent lint buildup
- Use surge protection and proper cable management to safeguard against power damage
Maintaining Pins and Needles
Pins and needles stay sharp longer when you store them properly.
Use steel wool as your pin cushion – it naturally sharpens pins with each use.
Keep needles in magnetic organizers or fabric books to prevent dulling against hard surfaces.
Replace sewing machine needles every eight hours of stitching or after each project.
Sharp tools mean cleaner cuts and fewer snags on delicate fabrics.
Organizing Bobbins and Trims
Beyond maintaining sharp needles, organized bobbins storage transforms your sewing room efficiency.
Scattered threads create chaos that derails projects fast.
Here’s your trim management system:
- Use toe separators – Keep bobbins neat and prevent thread tangles in drawers
- Wrap trim around cardboard – Pin fabric scraps and ribbon to prevent unraveling
- Label plastic boxes – Sort sewing notions by color, type, or project needs
- Magnetic bowls work – Keep small thread organization supplies within arm’s reach
- File cabinet method – Store larger fabric pieces using separators for easy access
Smart sewing tools organization means you’ll spend more time creating and less time hunting through messy containers for that perfect thread color.
Effective sewing storage solutions can greatly improve your overall sewing experience.
Setting Up an Efficient Sewing Workspace
Your sewing workspace is the foundation of every successful project, and getting it right can make the difference between frustration and flow.
A well-designed workspace turns chaotic projects into smooth, creative flow
A well-organized setup with proper lighting and strategic tool placement transforms even complex projects into manageable tasks, making a well-organized workspace a key to achieving flow.
Optimizing Lighting for Accuracy
Proper lighting transforms your sewing accuracy from guesswork to precision.
Natural light provides the best color temperature for matching threads and fabrics, but task lighting fills the gaps when daylight fades.
Position LED options with adjustable color temperature near your workspace—cool white mimics daylight while warm white reduces eye strain.
Skip lamp shades that cast shadows; you need direct illumination on your needle and seam lines for flawless sewing techniques.
Keeping Tools Within Reach
Your sewing station setup determines project success—arrange frequently used sewing tools and supplies within arm’s reach to maintain workflow momentum.
Position scissors, seam rippers, and measuring tools in dedicated spots near your machine.
Smart workspace layout keeps thread, bobbins, and pins accessible without stretching or searching, which transforms chaotic sewing sessions into smooth, productive experiences.
Using Pegboards and Storage Boxes
Pegboards transform chaotic sewing rooms into organized workspaces.
Mount one above your cutting table for instant tool organization. Hang scissors, rulers, and rotary cutters on hooks for easy access.
Storage boxes complement pegboards perfectly – use clear plastic containers for buttons, pins, and small notions. Label everything for quick identification.
This workspace optimization system keeps your sewing tools and supplies visible and within arm’s reach, streamlining your creative process with instant tool organization.
Storing Fabric to Prevent Wrinkles
Why stack fabric in cramped drawers when you can store it properly?
Use a file cabinet with separators to keep different fabric types organized and wrinkle-free.
Roll heavier fabrics around tubes for Storage Bins, while lighter materials benefit from careful Fabric Folding.
This Wrinkle Prevention method beats cramming everything together.
Smart Shelf Organization lets you see your fabric selection instantly, making fabric preparation faster for any project.
Preparing Fabric for Best Results
Your fabric prep work determines whether your finished project looks homemade or professionally crafted.
Take the time to pre-wash, press, and cut with precision—these foundational steps prevent costly mistakes and guarantee your garments maintain their intended fit and appearance, which is crucial for a professionally crafted look.
Pre-Washing and Pre-Treating Fabric
Before you cut that first piece, take control of your fabric’s destiny through proper pre treatment.
Fabric preparation prevents the heartbreak of shrunken sweaters and bleeding dyes that can ruin months of careful work.
- Fabric shrinkage testing reveals up to 10% cotton shrinkage after first wash
- Color bleeding from dark fabrics affects 27% of sewers’ projects
- Pre treatment removes manufacturing chemicals and sizing residues
- Fabric softening occurs naturally through washing, improving drape
- Fabric selection benefits from understanding each material’s wash behavior
Pressing and Flattening Fabric
Steam transforms wrinkled fabric into sewing-ready material.
Press fabrics completely flat using proper iron settings and steam for wrinkle removal and fabric relaxation.
This essential fabric preparation step sets fibers straight, creating the foundation for accurate cutting and professional seam pressing.
Master these sewing basics now—your thread choices and sewing techniques depend on perfectly prepared fabric to ensure a quality outcome, which relies on understanding the importance of sewing basics.
Using The Right Cutting Tools
Quality cutting tools make the difference between amateur and professional results.
Sharp scissors dedicated solely to fabric prevent fraying and guarantee clean edges. Fabric shears with longer blades handle multiple layers smoothly.
Rotary cutters paired with cutting mats deliver precision for quilting and straight lines.
Keep seam guides handy for consistent measurements throughout your sewing projects, ensuring clean edges and utilizing sharp scissors dedicated to the task.
Cutting Fabric Accurately Every Time
You’ll discover that accurate cutting transforms your entire sewing experience from frustrating to fantastic. Master these essential techniques and watch your projects align perfectly every time.
Finding and Following The Grainline
Finding the grainline transforms your sewing from amateur to professional.
Look for the selvage edge—that’s your roadmap to perfect fabric orientation.
Align pattern pieces parallel to this edge for proper drape and fit.
This grainline identification step prevents twisted seams and guarantees your garment hangs correctly, making all your careful pattern placement and cutting techniques worthwhile.
Using Pinking Shears to Prevent Fraying
Pinking shears are your secret weapon for fraying prevention without a serger.
These zigzag-edged cutting tools create a decorative scalloped edge that naturally resists unraveling.
When you cut fabric with pinking shears, you’re basically pre-finishing your seams.
They work best on woven fabrics like cotton and linen.
Don’t rely on them alone for heavy-use seams, but they’re perfect for linings and lightweight sewing projects requiring quick edge binding.
Cutting Slippery and Delicate Fabrics
Silk and satin fight back when you cut them.
Stabilizing fabrics with spray starch transforms these rebels into cooperative partners.
Place tissue paper underneath slippery materials—it grips like a secret handshake.
Pattern weights beat pins for delicate weaves.
Sharp rotary cutters slice cleanly without lifting fabric.
Single-layer cutting prevents shifting disasters that’ll make you question your sewing techniques.
A walking foot can help guarantee even fabric feeding.
Measuring and Double-Checking Dimensions
Accurate measuring eliminates 80% of sewing mistakes before they happen.
Use a clear ruler or measuring tape, checking dimensions twice against your pattern pieces.
Mark critical points with water-soluble pens for precision.
Create muslin mockups for complex garments to test fit alterations before cutting expensive fabric.
These sewing techniques prevent costly do-overs and guarantee professional results.
Choosing The Right Needle and Thread
Your needle and thread choices can make or break your entire project before you even start stitching.
Getting this foundation right sets you up for smooth sewing sessions and professional-looking results every time.
Selecting Needle Sizes for Fabric Types
Beyond basic universal needles, your fabric weight guide should include specialty needle types for superior results.
Use size 60/8-70/10 for lightweight silks, 80/12-90/14 universal needle uses for cottons, and 100/16+ for heavyweight denim.
Stretch needle guide recommends ballpoint needles for knits, while needle point types like microtex prevent snags on delicate materials.
Selecting the right needle and thread guarantees professional sewing results via professional sewing results.
Choosing Quality Thread to Prevent Lint
Quality thread makes all the difference in your sewing success. Cheap thread breaks easily, sheds lint, and clogs your machine’s mechanisms. You’ll spend more time cleaning than creating.
5 Signs Your Thread Is Working Against You:
- Thread Fiber breaks mid-seam – leaving you frustrated and starting over
- Lint Buildup clouds your bobbin case – creating messy, uneven stitches
- Thread Weight feels inconsistent – causing tension nightmares
- Spool Quality unravels poorly – tangling and knotting constantly
- Thread Storage looks fuzzy – indicating cheap manufacturing shortcuts
Invest in polyester or cotton thread from reputable brands. Your sewing techniques improve when your sewing materials cooperate. To find reliable options, consider browsing a site for premium thread options. Store spools upright in cool, dry places. Quality thread flows smoothly, reduces fabric stress, and keeps your machine running clean.
Changing Needles Frequently
Fresh needles are your sewing machine’s best friend.
Replace them every eight hours of sewing time or after each project to prevent fabric damage and maintain stitch quality.
Dull needles create skipped stitches, fabric snags, and thread breakage.
Your needle lifespan directly impacts sewing efficiency and troubleshooting headaches.
Keep spares handy—switching out worn needles transforms frustrating sewing sessions into smooth, professional results.
Specialized Needles for Denim and Stretch
Heavy fabrics like denim demand specialized denim needles with reinforced shafts and sharp points to pierce thick weaves without fabric damage.
Stretch needles and ballpoint needles feature rounded tips that slip between knit fibers rather than cutting them.
Match your needle size to fabric weight—size 16-18 for denim, 11-14 for stretch materials.
These sewing techniques prevent skipped stitches and torn fabric on your sewing machine. For heavyweight denim, consider using needles with a size of 100/16.
Mastering Core Sewing Techniques
You’ll build confidence and precision when you master these fundamental techniques that separate amateur work from professional results.
These core skills become second nature with practice, transforming every project into a polished piece you’re proud to wear or display, with precision that enhances your work.
Practicing Straight and Zigzag Stitches
Nothing beats mastering straight and zigzag stitches before tackling complex sewing techniques.
Practice stitch length adjustments and tension control on scrap fabric to perfect your needle position and fabric feed.
These fundamental stitches form the backbone of seam straightness in every project.
Master these sewing machine basics, and you’ll gain confidence for advanced sewing tips and techniques that separate beginners from seasoned sewists.
Keeping Consistent Seam Allowances
Once you’ve mastered basic stitches, maintaining uniform seam allowances becomes your next milestone.
Consistent measurements separate amateur work from professional results, and the right tools make this achievable.
- Seam guides attach to your machine’s throat plate for foolproof measurements
- Magnetic presser feet keep fabric aligned without constant adjustment
- Marking tools help you draw accurate cutting lines on practice fabrics
- Basting stitches temporarily hold layers together before permanent sewing
Backstitching for Durability
Backstitching transforms weak seams into fortress-strong reinforcement stitching that withstands years of wear.
You’ll secure seams by stitching backward at the beginning and end of every seam, preventing unraveling even under stress.
Set your stitch length to 2-3mm and use quality thread type that matches your fabric weight.
This fundamental sewing technique takes seconds but saves hours of repair work later.
Pressing Seams for a Professional Finish
Pressing seams transforms amateur work into polished pieces.
Heat and steam set fabric fibers straight, creating flat professional finishes that define quality garments.
Your pressing tool selection matters—use proper temperature settings for different materials.
These seam pressing techniques and fabric fiber setting methods separate beginners from experienced sewists who understand that pressing isn’t optional and that it requires a good understanding of fabric fibers.
Finishing Seams and Edges Neatly
Your seams deserve better than raw, fraying edges that scream "homemade" instead of "handmade." You don’t need expensive serging equipment to achieve professional-looking finishes that’ll make your projects look store-bought.
Preventing Fraying Without a Serger
You don’t need a serger to achieve professional seam finishes.
Zigzag stitching along raw edges prevents fraying on most fabrics, while fray check adds chemical protection for synthetics.
Bias binding completely encases edges for durability, and hand overcasting works beautifully on delicate materials.
These sewing techniques give you complete control over your seam allowance treatment without expensive equipment.
Using French, Whip, and Blanket Stitches
French seams encase raw edges completely, creating a polished finish that prevents fraying.
You’ll fold fabric wrong sides together, sew, trim, then flip and sew again.
Whip stitching offers quick edge finishing with diagonal stitches over raw edges.
Blanket stitch provides decorative finishing for felt and fleece, combining function with visual appeal in your sewing projects, using a technique that offers a complete concept of edge finishing.
Slip Stitching for Invisible Hems
Slip stitching creates perfectly invisible hems that look professionally finished.
This hand sewing technique catches just a few fabric threads with each stitch, making your hemming work disappear completely.
You’ll pick up tiny bits of the main fabric while securing the hem fold.
Choose thread that matches your fabric exactly for best results, and practice this invisible stitching method on scraps first – it’s easier than you think once you get the rhythm down.
Edge Finishing Practice on Scrap Fabric
Before diving into advanced stitching, grab your fabric scraps and practice different stitch types.
Compare French seams against zigzag finishes on various materials to see which works best.
Adjust your thread tension and seam allowance while testing each technique.
These practice projects build muscle memory and confidence, and you’ll master sewing techniques through repetition, discovering which methods suit different fabrics perfectly, leading to better sewing techniques.
Avoiding Common Sewing Mistakes
Even the most careful sewers make mistakes, but you can prevent most common errors with proper preparation and technique.
Learning to spot and fix issues like fabric bunching, tension problems, and crooked seams will save you time and frustration on every project, by utilizing proper technique.
Preventing Fabric Bunching and Stretching
Fabric bunching and stretching can sabotage your sewing projects, but proper fabric stabilization prevents these frustrations.
Your sewing machine works best when you control key variables that affect fabric movement. Confirming proper thread tension adjustment is also key to preventing puckering.
- Adjust presser foot pressure – lighten pressure for delicate fabrics, increase for thick materials
- Use basting or staystitching on curves and bias edges to prevent stretching during construction
- Select appropriate needles – ballpoint for knits, sharp for wovens to minimize fabric distortion
- Check feed dog control – verify they’re moving fabric evenly without pulling or bunching
- Practice tension adjustment on scrap fabric before sewing your actual project pieces
Managing Thread Tension
Proper thread tension keeps your stitches balanced and prevents frustrating loops or puckering.
Start with your machine’s standard setting (usually 4-5) and test on scrap fabric before sewing.
Adjust bobbin tension carefully—it should pull steadily from the case without jamming.
Different thread types and fabric weights require fine-tuning, so don’t skip those test runs.
Avoiding Crooked Seams
Crooked seams happen when you lose control over fabric handling and stitch control.
Use seam allowance guides or magnetic attachments to maintain straight lines consistently.
Keep your fabric flat against the machine bed and guide it gently without pulling.
Practice guiding tools like edge guides help you stay on track.
After stitching, use proper pressing technique to set your seams straight and professional-looking, which is crucial for a professional-looking finish.
Practicing on Scrap Fabric
Test-runs on leftover materials facilitate sewing mastery through hands-on technique refinement.
Before tackling your main project, practice stitch control and tension adjustment on fabric scraps that match your actual material.
This project simulation builds fabric familiarity while letting you experiment with different sewing techniques.
Smart sewers know that fifteen minutes of practice prevents hours of seam-ripping frustration on your finished piece.
Staying Organized and Inspired
A well-organized sewing space and clear project plan can transform your stitching from stressful to satisfying.
You’ll save time, reduce mistakes, and actually enjoy the creative process when everything has its place and you know exactly what you’re making, which can make the experience more satisfying.
Creative Storage Solutions for Notions
Transform everyday items into DIY organizers that maximize your sewing room space.
Repurposed containers like mason jars hold buttons perfectly, while ice cube trays sort small notions.
Create portable storage with tackle boxes for on-the-go projects.
Labeling systems keep everything findable when creativity strikes, turning chaos into organized bliss, with these sewing tips.
Time-Saving Sewing Hacks
Beyond traditional pins and scissors, modern sewing hacks revolutionize your workflow.
Quick Cutting with rotary tools slashes prep time while Fast Pressing using hair straighteners tackles tight spots.
Efficient Seams emerge from Wonder clips that secure fabric faster than pins.
Glue Sewing replaces stitching for simple hems, and portable Matchbox Kits handle emergency repairs anywhere.
Planning Projects for Fewer Errors
Smart project planning prevents most sewing disasters before they happen.
Define your project scope clearly—know exactly what you’re making and why.
Your fabric choice and pattern selection should align with your skill level and timeline management goals.
Double-check measurement accuracy twice, then measure again, to ensure measurement accuracy and prevent errors.
Map out each step beforehand, as this systematic approach reduces cutting errors and prevents costly fabric waste during your sewing projects.
Making Projects That Excite You
Passion fuels persistence when sewing projects get tough. Choose designs that spark your creative exploration and align with your skill development goals.
Personalized projects keep you motivated through challenging techniques.
- Start with patterns featuring colors or styles you genuinely love wearing
- Mix beginner-friendly techniques with one new skill per project for steady growth
- Follow sewing tutorials for designs that solve real wardrobe gaps you’ve identified
- Share successes with online sewing communities for encouragement and sewing advice to support your skill development.
Frequently Asked Questions (FAQs)
How do you learn to sew?
Learning to sew isn’t rocket science, but it’ll open up endless creative possibilities.
Start with basic stitches on scrap fabric, then tackle simple projects like pillowcases.
Practice consistently, watch tutorials, and don’t rush—mastering fundamentals beats perfectionism every time.
What are the best sewing tips for beginners?
Start with quality tools: sharp fabric scissors, proper needles for your fabric weight, and good lighting.
Always prewash fabric, practice on scraps first, and press seams after sewing for professional results.
How can I improve my sewing skills?
Practice consistently on scrap fabric to master tension and stitch control.
Focus on one new technique per project, like zippers or buttonholes.
Press seams properly and maintain sharp tools for professional results.
How do I choose the right fabric for my first sewing project?
Like building a house, you’ll need the right foundation for success.
Choose cotton or cotton blends for your first project—they’re forgiving, stable, and won’t shift during cutting or sewing, giving you confidence to master basic techniques.
How do you make sewing easier?
Keep your tools sharp and organized within arm’s reach. Pre-wash fabrics, maintain consistent seam allowances, and press seams as you go. Practice basic stitches on scraps first.
How do I become a good sewist?
Eighty-five percent of professional sewists master techniques through consistent practice on scrap fabric.
You’ll develop expertise by focusing on one skill per project, maintaining sharp tools, and pressing seams properly for professional results.
How do I fix skipped stitches?
Check your needle first—replace it if it’s dull or bent.
Adjust thread tension and make certain you’re using the correct needle size for your fabric weight.
Clean lint from your machine’s feed dogs, and then proceed with caution to ensure smooth operation.
What causes thread to keep breaking?
Thread breaks when you’re using poor-quality thread, an incorrect needle size, or excessive machine tension.
Replace that telegraph-era spool with quality thread, match your needle to fabric weight, and adjust tension settings properly.
This will help prevent thread breaks and ensure a smoother sewing experience with quality thread.
How do I sew stretchy fabrics successfully?
Use ballpoint needles and stabilize with tissue paper when working with stretchy materials.
Maintain consistent tension, avoid pulling fabric, and consider using a walking foot for even feeding through your machine.
When should I use interfacing?
Surprisingly, your latest project might’ve been perfect without interfacing! You’ll need interfacing when sewing collars, cuffs, buttonholes, or waistbands to add structure and prevent stretching. It’s recommended for enhancing durability.
Conclusion
Perfect project performance proves possible through persistent practice and preparation.
These tips for successful sewing projects transform your creative journey from chaotic to controlled.
You’ll discover that quality tools, proper workspace setup, and fabric preparation prevent most common problems.
Master consistent techniques, maintain sharp scissors, and change needles regularly for professional results.
Remember to practice on scraps before tackling final pieces.
With these foundational strategies, you’ll create beautiful, durable garments that showcase your growing skills and artistic vision.
- http://andreasnotebook.com/keep-scissors-sharp/
- https://www.makeit-loveit.com/using-the-double-needle-without-the-2nd-spool-holder/
- http://www.raegunramblings.com/2012/06/how-to-gathering.html
- https://sew4home.com/tips-resources/sewing-tips-tricks/how-clean-your-sewing-machine-get-smoother-sewing-fewer-repairs
- https://www.joann.com/on/demandware.static/Sites-JoAnn-Site/Sites-joann-project-catalog/-/images/hi-res/project/pdf/PA00223.pdf

