This site is supported by our readers. We may earn a commission, at no cost to you, if you purchase through links.
You’ll create raised, sculptural elements by adding extra batting to specific design areas, then securing them with careful hand quilts.
This traditional technique requires patience but rewards you with quilts that beautifully catch light and shadow.
Start with quality cotton fabric, appropriate batting, and sharp needles.
Mark your design, stitch around the areas you want raised, stuff them through small openings, then close with invisible stitches.
The dimensional texture creates visual drama that’s impossible to achieve with regular quilting methods alone, resulting in quilts that have a unique ability to catch light and shadow.
Table Of Contents
Key Takeaways
- You’ll need specific materials for success: lightweight cotton or linen fabric, high-loft batting for dimension, sharp trapunto needles, and quality marking tools that won’t permanently stain your work.
- Master the stuffing technique by stitching around your design outlines first, then carefully inserting batting or yarn through small openings in the backing fabric to create those beautiful raised areas.
- Control your hand quilting tension when working through thicker trapunto layers – use longer needles, maintain consistent stitch spacing, and practice the rocking motion with lighter pressure than regular quilting.
- Finish professionally by removing all temporary markings, blocking your quilt flat to correct any distortion, and adding complementary binding that showcases your dimensional work without competing with it.
Essential Materials for Trapunto Quilting by Hand
You’ll need the right materials to create stunning trapunto quilts that showcase those beautiful raised designs.
Getting your supplies sorted first means you can focus on mastering this gorgeous technique without any hiccups along the way, and this preparation is key to stunning results.
Choosing The Right Fabric
Your fabric choice sets the foundation for stunning trapunto quilting results.
Your fabric choice becomes the canvas for dimensional masterpieces that come alive under every touch.
Lightweight cotton or linen works best because they’re soft, have excellent drape, and won’t fight your needle.
Consider these fabric selection essentials:
- Fabric weight: Choose lightweight quilting cotton for easy manipulation
- Fiber content: Natural fibers like cotton and linen provide the best results
- Color considerations: Light colors showcase dimension better than dark ones
- Print scale: Small prints or solids work better than large, busy patterns
Think of your fabric as the canvas for your three-dimensional masterpiece.
Many retailers offer various types of this fabric.
Muslin fabric makes an excellent practice choice while you’re learning the ropes!
Selecting Appropriate Batting
With your fabric selected, batting becomes your project’s foundation. Batting loft determines your trapunto’s dramatic effect. High-loft wool or polyester creates bold, puffy designs, while cotton delivers subtle dimension.
| Batting Type | Fiber Content | Best Effect |
|---|---|---|
| Wool | Natural | Maximum puff |
| Polyester | Synthetic | Lightweight volume |
| Cotton | Natural | Gentle raise |
Test washability and consider batting weight for comfortable quilting techniques. To prevent dust accumulation, it’s recommended to store batting in a pillowcase or sheet.
Needles and Thread for Trapunto
Success in trapunto quilting starts with the right needles and thread – think of them as your precision instruments for creating dimensional magic.
Your tools are precision instruments for creating dimensional magic.
Needle Size matters tremendously for trapunto technique. You’ll want a six-inch trapunto needle from trusted brands like Clover or Bohin for stuffing, plus a sharp quilting needle for stitching. The long needle glides through thick layers without wrestling.
Thread Type determines your project’s durability and appearance:
- Aurifil 50wt cotton thread for delicate hand quilting with perfect stitch tension
- Acrylic bulky yarn (soft, loosely twisted) for stuffing raised areas effectively
- Specialty threads like silk for traditional elegance or water-soluble for temporary basting
Color Matching your quilting thread to fabric creates subtle dimension, while contrasting colors make bold statements. You can find specific needle options online.
Marking Tools for Design Transfer
Now that you’ve sorted your needles and thread, let’s talk about getting those gorgeous designs onto your fabric! Marking tools are your secret weapon for design transfer in trapunto quilting.
Here’s what works best:
| Tool Type | Best For | Watch Out For |
|---|---|---|
| Fabric pencils | Fine details | Can be permanent |
| Chalk markers | Dark fabrics | May rub off easily |
| Water-soluble pens | Most projects | Test first! |
Tracing templates work like magic for complex patterns. You’ll trace your design onto template plastic, then mark through the holes onto your fabric. It’s foolproof once you get the hang of it!
Freehand drawing gives you creative freedom, but practice on scraps first. Your grandmother probably did this – no fancy tools needed, just steady hands and confidence.
Digital printing is today’s game-changer. Print your design directly onto special transfer paper, then iron it onto your fabric. It’s like having a personal design assistant!
Remember: always test your marking tools on fabric scraps. Nothing’s worse than permanent marks on your masterpiece! These quilting techniques make quilting tutorials much easier to follow. For intricate designs, consider using fine-point marking tools.
Scissors and Trimming Implements
Your cutting arsenal makes or breaks your trapunto quilting success! Sharp tools guarantee clean edges and precise work every time.
Here’s your essential cutting toolkit:
- Fabric shears – 8-10 inch scissors with ergonomic handles for comfortable, accurate cuts through multiple layers
- Small embroidery scissors – 4-inch pointed tips perfect for trimming batting close to stitching lines without damaging fabric
- Rotary cutter – Creates straight edges and handles specialty cutting tasks with blade sharpening options for consistent performance
Preparing Your Quilt Top for Trapunto
Three simple steps will transform your fabric into a trapunto-ready canvas. First, fabric selection matters—choose lightweight cotton or linen that flows like silk through your fingers. These quilting fabrics won’t fight you during the process!
Next, create your quilt sandwich by layering your chosen fabric with batting choice that’ll give you the perfect puff. Cotton batting whispers subtlety, while wool batting shouts boldness—pick your personality!
Finally, secure everything using your preferred basting methods. Whether you’re team safety pins or spray-baste devotee, make sure there’s zero wiggle room. Design smoothness depends on wrinkle prevention at this stage—smooth out every bump and bubble like you’re tucking in a sleepy child.
Your quilting marking adventures await, but first, verify your foundation is rock-solid. To improve fabric stability, consider pre-washing the material before starting. This preparation stage isn’t glamorous, but it’s absolutely vital for trapunto quilting success.
Marking and Stitching Trapunto Designs
Now you’re ready to bring your designs to life through precise marking and careful stitching techniques.
This step transforms your prepared quilt top into a dimensional masterpiece, so take your time and enjoy watching each motif come together with every stitch, creating a truly masterpiece.
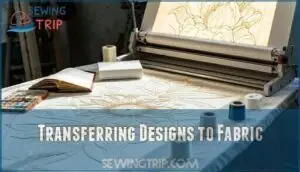
Transferring Designs to Fabric
Your design transfer journey starts with choosing your weapon!
Tracing methods work perfectly with templates placed under fabric. Freehand drawing lets your creativity flow directly onto cloth.
Digital printing offers precision for complex patterns. Pouncing designs creates dotted outlines through perforated paper.
Stencil application gives crisp, repeatable shapes. Each marking tool serves different quilting designs – pick what feels natural for your trapunto quilting adventure!
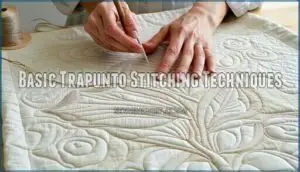
Basic Trapunto Stitching Techniques
With your design transferred, master the foundation of trapunto quilting through proper stitching techniques.
Use backstitch or running stitch for motif outlining, maintaining consistent stitch density around shapes.
Your needle should glide smoothly through layers, creating secure channels for later stuffing insertion.
Focus on even spacing—think of it like drawing with thread!
Practice securing knots on the backing side to keep everything tidy.
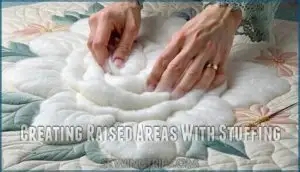
Creating Raised Areas With Stuffing
Master the art of dimensional stuffing with careful material selection and technique. Choose from stuffing materials variety like cotton batting, wool, or polyester for different effects.
Control yarn thickness effects to achieve your desired lift – thinner materials create subtle dimension while thicker ones produce bold relief. Adjust stitching density impact around motifs to enhance contrast.
Practice avoiding overstuffing by testing fullness from the front view. Use multiple stuffing passes for gradual buildup, ensuring even distribution throughout your trapunto quilting masterpiece.
The technique works for any fabric size or shape.
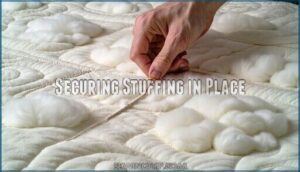
Securing Stuffing in Place
Once your stuffing’s snugly nestled inside those outlined shapes, you’ll need to lock it down properly. Think of it as tucking your design into bed – gentle but secure!
Here are your securing stuffing essentials:
- Knotting Techniques – Tie small, firm knots on the backing side using cotton thread
- Stitch Direction – Work from center outward to prevent stuffing density shifts
- Avoiding Gaps – Whip-stitch opening edges closed completely
Use a blunt tapestry needle for this trapunto technique step. Maintaining even tension, a key to quality, can be achieved by practicing basic hand stitching. Securing ends properly prevents your beautiful hand quilting from going flat over time!
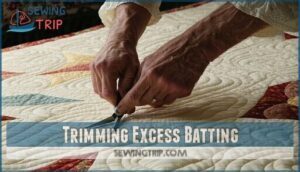
Trimming Excess Batting
After securing your stuffing materials, precise trimming becomes your next artistic challenge.
Using sharp trimming tools, carefully cut excess batting along your stitched outlines, protecting the quilt top from accidental snags.
Work slowly around each stuffed section to maintain clean edges and preserve those beautiful layered effects that make trapunto quilting so stunning.
| Tool Type | Best Use |
|---|---|
| Sharp fabric scissors | Detailed trimming work |
| Rotary cutter | Straight-line cuts |
| Seam ripper | Correcting mistakes |
This careful fabric protection step guarantees your hand quilting masterpiece maintains crisp, professional-looking dimensions while avoiding snags that could ruin hours of painstaking work.
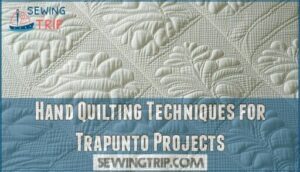
Hand Quilting Techniques for Trapunto Projects
Once you’ve prepared your trapunto design and created those beautiful raised areas, you’ll need to master specific hand quilting techniques to bring everything together perfectly.
Working with trapunto’s thicker layers requires adjustments to your usual quilting approach, but don’t worry—these techniques will help you create stunning results.
These techniques will help you create professional-looking results that’ll make your friends wonder how you did it!
Choosing Quilting Patterns
With your trapunto designs stitched, picking quilting patterns becomes your next creative adventure.
Pattern Complexity should match your skill level—start with simple echo quilting around motifs, then graduate to intricate feather patterns.
Consider Scale Considerations and Fabric Compatibility when choosing designs.
Here are three pattern approaches that’ll make your heart sing:
- Traditional crosshatch – Creates stunning texture contrast with raised trapunto areas
- Flowing feathers – Adds elegant movement that dances around your dimensional motifs
- Custom stippling – Lets you create unique backgrounds that highlight your trapunto work perfectly
Tension Control in Hand Quilting
When hand quilting trapunto projects, mastering tension control prevents fabric distortion and guarantees professional results.
Keep your thread weight consistent with your needle size – heavier threads need larger needles to avoid hand fatigue. Practice the rocking motion with light pressure to maintain stitch evenness while securing knot security.
Trapunto quilting requires looser tension through thick layers, so test different quilting techniques hand approaches on scraps first.
Remember, hand quilting with proper tension control creates beautiful quilting stitches that make your dimensional designs truly shine!
Maintaining Consistency in Stitch Size
Perfect stitching rhythm comes with practice, just like learning to ride a bike. Your Stitch Length Uniformity depends on Consistent Hand Pressure and finding your natural tempo. Needle Size Impact affects how smoothly thread moves through fabric, while Thread Thickness Effects determine stitch visibility.
Practice Stitch Samples help you develop muscle memory for even spacing in Trapunto quilting. Hand quilting becomes second nature once you establish your personal quilting stitches rhythm.
Proper preparation includes pre-washing and ironing to prevent shrinkage. Remember, stitch consistency flows from relaxed shoulders and steady breathing.
- Feel proud watching your stitches march across fabric like tiny soldiers
- Smile knowing each stitch brings your beautiful creation closer to completion
- Celebrate those perfectly spaced stitches that make your heart sing with joy
Working With Thicker Layers
Tackling trapunto quilting’s thicker layers requires smart adjustments to your hand quilting techniques.
Choose longer needles and heavier thread to handle the bulk effectively.
| Challenge | Solution | Pro Tip |
|---|---|---|
| Needle Size struggles | Use size 18-22 needles | Sharp points pierce cleanly |
| Fabric Compression issues | Gentle, steady pressure | Don’t force through layers |
| Layer Stability problems | Secure basting every 4 inches | Pin curves extra carefully |
| Stitch Visibility concerns | Contrast thread colors | Test on scraps first |
| Machine Compatibility limits | Hand quilting works best | Embrace the slower pace |
These quilting techniques for trapunto guarantee your raised designs stay perfectly formed while maintaining consistent stitch quality throughout your project.
Finishing Touches for Trapunto Quilts
You’ve put your heart into creating those beautiful raised trapunto motifs, and now it’s time to give your quilt the perfect finishing touches.
These final steps will transform your handwork into a stunning masterpiece that’s ready to display or gift with pride!
Removing Temporary Markings
After completing your intricate trapunto quilting, clearing away those temporary markings becomes your next artistic checkpoint.
Start with fabric compatibility testing on scraps to avoid surprises. Heat your iron and watch disappearing ink lines vanish effortlessly. For stubborn marks, mark removal tools and removal solution alternatives work wonders.
- Test removal methods on fabric scraps first to prevent damage
- Apply heat carefully with your iron to dissolve water-soluble marks
- Use gentle solutions like diluted soap for persistent marking removal
Remember, mark persistence factors vary by marking tools and fabric type. Different quilting techniques trapunto require specific stain prevention tips. Your trapunto quilting masterpiece deserves this careful attention to marking removal during quilting hand stitching completion.
Blocking The Finished Quilt
Once your markings disappear, you’ll tackle quilt tension issues head-on through blocking.
Steam blocking methods work wonders for correcting size distortion while preventing fabric shrinkage.
Lay your trapunto quilt flat, mist lightly, and gently stretch to proper dimensions.
Professional blocking services handle complex pieces, but most quilters master this finishing touch at home.
Your dimensional areas need special attention during quilting blocking.
Adding Binding and Borders
Looking at your trapunto quilt, you’ll want binding and borders that complement your dimensional masterpiece.
Select fabric choices that harmonize with your design, then explore various binding types like bias or straight-grain.
Consider border styles from simple frames to elaborate decorative edges with mitered corners for professional polish.
Your trapunto quilting deserves quilting borders and quilting binding that showcase every raised detail beautifully.
Caring for Trapunto Quilts
Your beautiful trapunto quilt deserves proper care to maintain its stunning dimension! Hand wash with cold water and gentle detergent, then air dry flat on towels.
Store in breathable cotton bags away from sunlight and humidity.
- Cleaning methods: Use dye-free detergent and support the quilt’s weight during washing
- Storage solutions: Fold with acid-free tissue and rotate every 3-6 months
- Preventing damage: Keep away from direct heat and inspect regularly for repairs
Showcasing Your Trapunto Masterpiece
Now you’re ready to show off your masterpiece! Photo staging is key—capture those raised areas by shooting at angles where natural light hits the dimensional details. The shadows created by your trapunto quilting will make viewers say "wow!"
Social sharing on platforms like Instagram and Facebook lets you connect with fellow quilting enthusiasts. Use hashtags like #trapuntoquilting and #quiltingshowcase to reach your tribe. Your quilting projects might inspire someone to try this technique!
Online platforms like Etsy or Facebook Marketplace are perfect for selling your work. Many people love handmade gift ideas, especially during holidays. Your unique quilting inspiration could become someone’s treasured family heirloom.
Don’t forget quilt shows! Local guilds and county fairs showcase traditional crafts. Entering competitions gives you feedback from experienced quilters and celebrates your hard work. Whether you win ribbons or just share your passion, displaying your finishing touches completes the creative journey beautifully.
Frequently Asked Questions (FAQs)
What is a trapunto quilt?
Like a mountain peak rising from flat terrain, a trapunto quilt creates dramatic three-dimensional texture by stuffing batting or yarn into quilted pockets.
Transforming ordinary fabric into sculptural art with raised, puffy designs.
How do you make a trapunto quilt?
You’ll create trapunto by marking designs on your quilt top, stitching around the outlines, then inserting yarn or batting from the back to create raised, dimensional effects.
What tools do you need to make a trapunto quilt?
You’ll need specialized "gentle giants" to craft your dimensional masterpiece.
A six-inch trapunto needle, lightweight cotton fabric, high-loft batting, tapestry needle, sharp scissors, and soft acrylic yarn for stuffing those beautiful raised designs are required.
How do I choose a fabric for trapunto quilting?
Choose lightweight cotton or linen fabric for trapunto quilting.
These materials offer excellent drape and flexibility, making it easier to create those beautiful raised designs you’re after.
Avoid heavy fabrics that’ll fight you!
What is the oldest trapunto quilt?
The oldest surviving trapunto quilt is the Tristan Quilt, created in Sicily during the 14th century.
You’ll find this remarkable piece represents the earliest known example of this dimensional quilting technique from Italy.
What is trapunto embroidery?
Dating back to 14th-century Italy, trapunto embroidery isn’t actually embroidery—it’s a quilting technique that creates raised, three-dimensional designs by stuffing batting between fabric layers for textured effects.
What is the Trapunto method of quilting?
Trapunto quilting creates raised, three-dimensional designs by stuffing quilted shapes from the back.
You’ll stitch outlines, cut small slits in backing fabric, insert batting or yarn through openings, then seal areas shut for beautiful textured effects.
What are the disadvantages of hand quilting?
Like trying to thread a needle in dim light, hand quilting demands patience you mightn’t have. You’ll face slower progress, finger fatigue, and inconsistent stitches that test your dedication.
Do you double the thread when hand quilting?
You don’t need to double your thread when hand quilting—one strand does the trick!
Doubling up can make your stitches bulky or cause puckering.
Keep it simple, and your quilt will thank you with smooth, neat lines.
What is the Italian quilting technique?
You’ll discover trapunto, Italy’s stunning 14th-century quilting technique that creates raised, three-dimensional designs by stuffing outlined motifs with yarn or batting from the quilt’s back side.
Conclusion
Mastering this trapunto quilting by hand guide proves that patience truly creates art worth treasuring.
You’ve learned techniques that transform ordinary fabric into stunning dimensional masterpieces through strategic stuffing and precise stitching.
Your trapunto quilting by hand skills will produce heirloom-quality quilts that beautifully showcase light and shadow.
Practice makes perfect, so start with simple designs before tackling complex patterns, and soon, you’ll create quilts that guests can’t resist touching, which will be a true testament to your artistic skills.
- https://ohmycrafty.com/blogs/crafty-chronicles/the-intricate-art-of-trapunto-quilting
- https://www.museum.state.il.us/muslink/art/htmls/ks_tech_t.html
- https://nancysnotions.com/designing-artistic-trapunto-quilts-with-a-modern-twist/
- https://www.quiltingboard.com/main-f1/advice-doing-trapunto-panel-t262157.html
- http://quiltsalott.blogspot.com/2011/03/trapunto-by-hand.html

