This site is supported by our readers. We may earn a commission, at no cost to you, if you purchase through links.
 To sew consistent stitches, focus on steady hands and good habits.
Use a sharp needle and thread that fits your fabric—no wrestling a thick thread through fine material!
Hold your needle like a pencil, and aim for smooth, even movements.
Keep your thread tension snug but not tight, like tying a shoelace just right.
Mark your fabric with a seam guide or removable tape to stay on track, and practice your speed—slow and steady wins the stitching race.
Don’t stress about perfection; even pros started with wobbly lines.
Want to add flair? Decorative stitches can make your sewing stand out!
Table Of Contents
- Key Takeaways
- Essential Hand Stitches for Consistency
- Choosing The Right Needle and Thread
- Mastering Basic Hand Sewing Techniques
- Essential Tools for Hand Sewing Consistency
- Preparing Fabric for Hand Sewing
- Troubleshooting Common Hand Sewing Issues
- Advanced Techniques for Professional-Looking Stitches
- Tips for Maintaining Steady Hand Sewing Speed
- Guiding Fabric Effectively for Straight Stitches
- Practice Exercises to Improve Hand Sewing Consistency
- Frequently Asked Questions (FAQs)
- Conclusion
Key Takeaways
- Practice your stitching on scrap fabric or lined paper to build muscle memory and improve consistency.
- Use tools like seam guides or removable tape to keep your stitches straight and evenly spaced.
- Match your needle and thread to the fabric type and ensure proper tension to avoid puckering or loose stitches.
- Focus on a steady rhythm and avoid rushing or jerky movements for better stitch control.
Essential Hand Stitches for Consistency
Keeping your hand stitches neat and consistent is easier when you know which ones to use and how to work them.
Neat, consistent stitches happen when you choose the right technique, practice patiently, and let your hands find their rhythm.
Whether you’re running a quick stitch, reinforcing a seam, or tidying up raw edges, a little practice (and maybe some patience) goes a long way to make your stitches neat and consistent.
Running Stitch for Straight Lines
The running stitch is your first step toward sewing straight lines like a pro. It’s all about stitch consistency! Start by marking your line with chalk or pins for a clear path.
Keep your fabric gently taut—too loose, and it’s wavy; too tight, and it puckers.
- Visualize small, even dashes to guide your needle entry and stitch length.
Work at a consistent rhythm, letting muscle memory improve over time. Finish with a knot underneath, snipping excess thread for a clean look, ensuring a professional finish with clean lines!
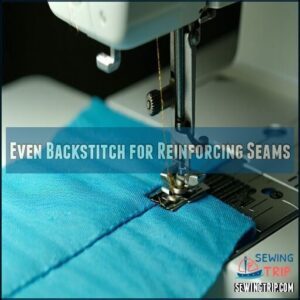
Even Backstitch for Reinforcing Seams
Backstitch durability is unmatched—it’s like giving your seams a superhero’s shield.
To do it, bring the needle up, stitch backward slightly, then leap forward twice that distance. This overlap creates a tough, seamless line perfect for seam stress.
Practice stitch consistency by focusing on spacing.
Use these quick tips:
| Technique | Why It Works | Pro Tip |
|---|---|---|
| Backward anchoring | Strengthens seam stress points | Use small, even stitch lengths. |
| Balanced tension | Prevents puckering or gaping seams | Match thread to fabric type. |
| Clean thread knotting | Keeps seams intact | Double knot to finish strong. |
| Pre-drawn guidelines | Guides sewing straight stitches | Improve accuracy effortlessly. |
Perfecting this backstitch boosts your sewing techniques and helps guarantee sewing consistency with durable, professional seams!
Overcast Stitch for Finishing Edges
Finishing raw edges doesn’t have to be a headache—just try the trusty overcast stitch! This simple sewing technique works wonders for keeping fabric neat and fray-free.
- Edge Fray Prevention: Stops unraveling, even with heavy wear.
- Decorative Overcasting: Adds stylish detail to visible seams.
- Tension Control: Keeps stitches smooth without puckering.
Aim for stitches 1/8 inch apart, working right to left. Relax your tension—too tight, and you’ll crinkle your fabric!
Choosing The Right Needle and Thread
Picking the right needle and thread isn’t just a small detail—it’s the backbone of smooth, consistent stitches.
Think of it like matching shoes to an outfit; when they’re not right, things just don’t work.
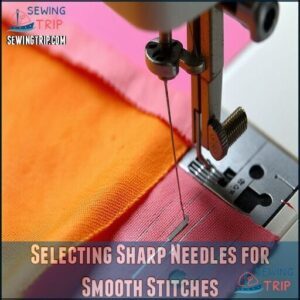
Selecting Sharp Needles for Smooth Stitches
Think of a sharp needle as your sewing sidekick—it makes every stitch smoother.
Needle sharpness isn’t just a fancy term; dull needles can snag fabric or skip stitches. Listen closely—a sharp needle pops through fabric, while a dull one sounds like a tiny punch.
For consistent results, match your needle size and type to the fabric. Use smaller needles (size 9) for silks, medium ones (11-14) for cotton, and larger ones (16) for sturdy fabrics like denim.
Opt for high-quality needles made from durable materials, and always replace them after 8 hours of sewing. You can find reliable needle options online.
A sharp needle equals flawless stitching!
Choosing The Right Thread Type and Color
Choosing the right thread might seem small, but it’s the backbone of good sewing. If you’ve ever noticed seams pulling apart or looking mismatched, it’s likely because the wrong thread was used.
- Match Fiber Properties: Cotton thread pairs beautifully with natural fibers like linen or cotton. For synthetic fabrics? Polyester thread’s stronger and stretches slightly. It’ll hold up better.
- Thread Weight Matters: Finer threads (50-60 weight) are perfect for delicate silks, while heavier ones (30-40 weight) handle sturdy fabrics like denim or canvas without struggling.
- Color Match Tips: Always pick a thread one shade darker. Oddly enough, it blends better than a perfect match! For decorative projects, explore specialty threads like silk for extra shine. A key aspect is needle and thread compatibility for seamless stitching.
Feeling overwhelmed? Relax—start with all-purpose thread! It’s reliable for most tasks.
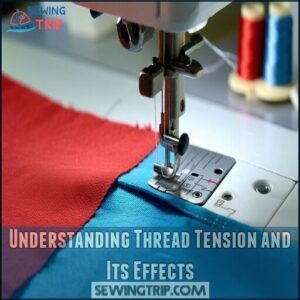
Understanding Thread Tension and Its Effects
When thread tension’s just right, your stitches will lie flat, stay strong, and look professional.
But if it’s off, expect fabric puckering or gappy, weak seams. Thread tension is like a tug-of-war between your top and bobbin threads, and keeping them balanced transforms your sewing.
Here’s how to troubleshoot:
- **Too tight?
** Stitches pucker or vanish into the fabric—lower your tension settings.
- **Too loose?
** Stitches look floppy, or thread bunching occurs—tighten the dial slightly.
- Check thread compatibility: Match thread to your fabric to avoid tension issues.
- Practice makes perfect: Test tension adjustments on scraps first.
To guarantee accurate tension, consider using a precise measuring tool. Master balance, and you’ll conquer perfect seam control!
Mastering Basic Hand Sewing Techniques
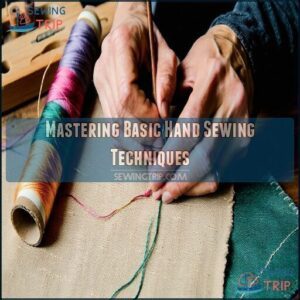
In the context of hand sewing, holding the needle just right and keeping an even rhythm can make or break your stitches.
Don’t worry if it feels tricky at first—practice and a trusty thimble will have your stitches looking neat and even in no time!
Holding The Needle and Thread Correctly
How do you master needle grip for perfect stitches? Hold the needle midway up the shaft; think of it as a dance partner—not too tight, not too loose.
Relax your wrist to avoid cramps, and keep your thread positioned for smooth control. Balance is key; let your hand-eye coordination guide you.
Many sewers find success with a specific needle grip technique. Keep it natural—sewing’s more tango than tug-of-war!
| Technique | Outcome |
|---|---|
| Midway needle grip | Prevents slipping |
| Gentle pressure | Reduces hand fatigue |
| Supported thread | Controls tension |
| Relaxed wrist | Improves sewing control |
The key to mastering the needle grip is finding a comfortable position that allows for smooth control and reduces fatigue. By following these tips, you can improve your sewing skills and achieve perfect stitches.
Find your perfect needle grip—it’s the secret to relaxed sewing and achieving flawless, consistent stitches every time!
Creating Even Stitches With The Thimble
An essential tool like a thimble can change your sewing game by improving stitch consistency and accuracy. The trick is using it right! Here’s how:
- **Find the perfect thimble size.
** It should sit snug on your middle finger, not slipping or pinching.
- **Position matters.
** Keep the dimpled surface against the needle’s eye for consistent push-through control.
- **Adjust for thickness.
** Tilt your finger slightly forward when working with heavier fabrics.
- **Don’t overdo the pressure.
** Relax your grip to avoid fatigue while guiding that needle.
- **Pick your material.
** Metal, leather, or silicone thimbles each offer unique feels—choose comfort for long projects!
Perfect stitches aren’t far with the right thimble!
Maintaining Consistent Tension and Speed
You’ve got the thimble down—now let’s tackle the heartbeat of sewing: consistent tension and speed. Think of your stitches like stepping stones on a path—steady and even is the goal.
Thread tension shouldn’t frustrate; it should cooperate. Wrap the thread around your middle finger for control, snug but not strangling. Keep your movements fluid, like your sewing’s keeping time with a favorite song. And remember, sewing isn’t a drag race—rhythmic stitching beats speed every time.
Here are quick tips:
- Tension troubleshooting: Avoid puckering by gently guiding, not tugging, your thread.
- Ergonomics impact: Keep your shoulders relaxed and grip the needle mid-shaft—comfort equals control.
- Practice drills: Sew lines on scraps to train your hands for stitch consistency.
Patience beats rushing every time!
Essential Tools for Hand Sewing Consistency
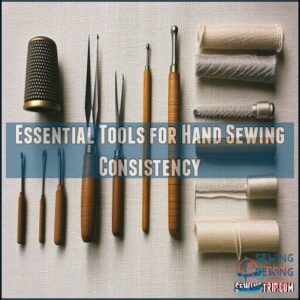
You can’t sew perfect stitches without the right tools by your side.
From a trusty thimble to seam guides and fabric stabilizers, these essentials make your sewing smoother, more precise, and a lot less frustrating, with the use of right tools.
Using Seam Guides and Measuring Tools
In the context of sewing accuracy, seam guides and measuring tools can be your best friends.
They act like a GPS for your stitches, helping you stay on track. For consistent seam allowances, try marking seam lines with fabric-friendly tools like rulers or flexible curve rulers—they’re a game changer for tricky edges.
Want precise sewing precision? Magnetic seam guides hold steady, guiding you for perfectly straight stitches. Painter’s tape is quick and versatile, letting you mark temporary, removable stitch guides without damaging the fabric.
- Magnetic seam guides: Hands-free and accurate.
- Flexible rulers: Seam allowance hero.
- Painter’s tape: Perfect for straight lines.
Investing in a Good Quality Thimble
A good thimble isn’t just an accessory—it’s your secret weapon against needle pricks and fatigue during hand sewing.
Choosing the right one can make all the difference in your sewing comfort and control.
Explore these thimble materials and styles:
- Metal thimbles: Durable classics with dimpled surfaces for precise needle handling.
- Leather options: Fit snugly, provide flexibility, and soften with use.
- Silicone styles: Lightweight with an ergonomic grip that’s perfect for long sessions.
- Adjustable versions: Great for fluctuating finger sizes or sharing tools.
Pick a thimble that fits securely without pinching—your fingers will thank you.
Keep it clean and in good condition for years of reliable stitching.
Utilizing Fabric Stabilizers and Interfacing
Tired of uneven stitches? Fabric stabilizers and interfacing make all the difference.
Match interfacing weights to your fabric—light for silks, medium for cottons.
Fusible options are perfect for structured seams, while tear-away stabilizers work wonders on stretchy fabrics.
To use, simply iron fusible interfacing onto the fabric’s wrong side or place stabilizers underneath while sewing.
These tools prevent puckering, support stitch consistency, and keep your projects looking polished.
Think of them as comfy training wheels for your sewing adventure!
Preparing Fabric for Hand Sewing
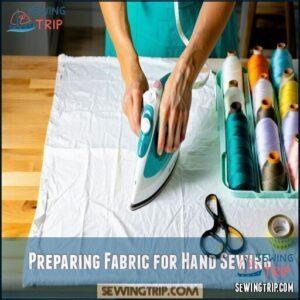
Getting your fabric ready is just as important as the sewing itself—it’s like giving your canvas a fresh start before painting.
Wash, iron, and mark it properly, and you’ll save yourself from puckered seams or uneven stitches later, which is crucial for a successful sewing project, making fresh start a key concept in this process.
Pre-washing and Ironing Techniques
Before you sew, think of prewashing and ironing as setting the stage for success. Prewashing isn’t just about preventing shrinkage—it removes chemicals that can mess with your stitches.
Trust me, you don’t want your hard work ruined by wrinkles or puckering later. When your fabric’s clean, grab your iron! Match the iron temperature to your fabric type—cotton loves high heat, but synthetics like it cooler.
Use steam for wrinkle removal and keep the iron moving to avoid scorch marks. Your stitches will thank you when the fabric lies soft and smooth. Ready to prep like a pro?
Here’s your checklist:
- Always prewash to avoid shrinkage surprises.
- Test the iron temperature on a scrap piece.
- Use steam for stubborn wrinkles.
- Keep movements smooth while ironing.
- Iron seams for perfect fabric handling.
Cutting Fabric Accurately and Marking Seam Allowances
Before stitching magic happens, cutting your fabric precisely is step one.
Sharp fabric shears or rotary cutters slice through fabric like a dream, ensuring clean, snag-free edges.
Start by checking the grain alignment—it’s like giving your project a sturdy backbone.
Ignore it, and your work might warp like a wobbly stack of pancakes.
Next, grab marking tools like chalk or washable pens to outline the seam allowance.
Let those lines be clear but not too bold—no one likes pesky leftover marks.
Pro tip: use a ruler or tape for straight edges and smooth curves.
Here’s a quick guide:
| Tool | Purpose |
|---|---|
| Fabric Shears | Clean cutting edges |
| Rotary Cutter | Precision on long cuts |
| Chalk/Marking Pen | Seam allowance marking |
| Ruler | Straight, consistent lines |
| Pattern Weights | Steady curved edges |
Cutting right saves repair headaches later—trust me, it’s a step one action that ensures clean cutting edges and precision on long cuts, making it easier to achieve straight, consistent lines and avoid pesky leftover marks.
Using Stabilizers for Delicate Fabrics
Slippery fabrics giving you headaches? Fabric stabilizers can save the day! They prevent stretch, slide, and puckering, making sewing smoother.
Here’s how to handle stabilizers like a pro:
- Use tear-away stabilizers for cottons.
- Fusible types work wonders on sheer fabrics.
- For silk, pin wash-away stabilizers.
- Match needle size for balanced tension.
- Remove every bit of residue to keep seams flawless.
Troubleshooting Common Hand Sewing Issues
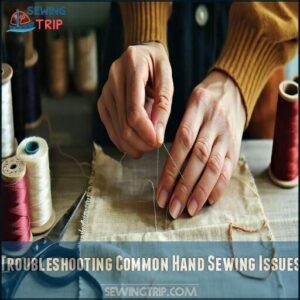
When your stitches start looking wonky or your thread keeps breaking, it can feel like the fabric is winning the battle.
Don’t worry—there’s always a fix, and with a few tweaks, you’ll be back to sewing smooth, even seams in no time!
Addressing Inconsistent Stitch Lengths
Struggling with uneven stitches? Try this: mark your stitch line with dots using a ruler or disappearing ink pen for better stitch consistency. Keep your fabric tension steady, as tension adjustments can make all the difference.
Use practice drills like sewing on lined paper to build muscle memory, then move to scrap fabric. Choose the right needle size for your fabric type—it’s a game changer.
Even pros rely on seam guides to perfect that consistent stitch length. With patience, you’ll nail it!
Fixing Uneven Tension and Thread Breakage
Uneven stitches and snapped threads can be annoying, right? It all boils down to tension control. Think of it like tuning a guitar: tight strings sound sharp; loose ones? Out of tune. The same goes for thread tension—it needs balance!
When stitches misbehave, inspect the usual suspects:
- Thread Quality: Low-grade threads fray easily. Go for stronger, smoother threads.
- Needle Issues: A dull or wrong-sized needle fights the fabric. Switch it out!
- Tension Adjustment: Test on scrap fabric before sewing your main project.
- Machine Maintenance: Clean lint buildup and double-check threading paths.
Quick tip: if your thread breaks, check the needle hole size—or wax your thread for smoother glide. Stay calm and adjust—you’ve got this!
Correcting Puckered or Wavy Seams
Puckered or wavy seams can be a real headache, but with a few tricks, you’ll smooth them out in no time.
Here’s how:
- Let fabric rest naturally—don’t tug; it messes with tension adjustment and stitch consistency.
- Use pressing techniques with steam to relax ripples. Think of it as ironing out the drama.
- Match stitch length and fabric grain correctly, or add stabilizer use for slippery materials.
Advanced Techniques for Professional-Looking Stitches
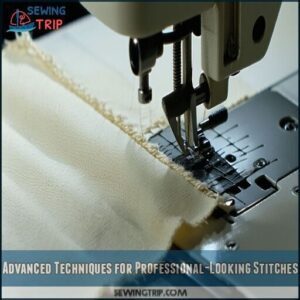
If you’re ready to take your stitching to the next level, advanced techniques like blind hems and decorative stitches can make your work look polished and professional.
With a little focus and the right approach, you’ll be creating flawless seams that even your sewing machine would envy!
Utilizing Specialty Stitches Effectively
When you’re tired of regular stitches, specialty stitches are your secret weapon for standout projects.
Decorative stitches like zigzag stitches or heirloom techniques, such as the ladder stitch, add charm and durability.
For precise stitch density, practice first on scrap fabric—it’s the stress-free way to perfect your skills.
Buttonhole stitches create strong, fray-resistant edges, while surface design techniques like quilting stitches can turn plain fabric into art.
Your thread control matters, so adjust tension carefully, and remember, sewing stitch selection isn’t just functional, it’s an embellishment focus that takes your handmade treasures to the next level!
Mastering Decorative Stitch Consistency
Adding decorative stitches can make any project look stunning, but keeping them consistent takes a bit of finesse. Think of it as painting with thread—you want every line smooth and every detail perfect.
To nail stitch quality, focus on these key steps:
- Steady rhythm: Picture your sewing machine as a drummer, keeping a smooth beat. You’re the conductor!
- Fabric tension: Let a hoop work its magic, holding fabric tight like a canvas for a painter.
- Visual aids: Mark patterns with washable pens for clean, precise lines.
- Thread control: Avoid tug-of-war; gentle, even pulling guarantees tidy embellishment integration.
Practice complex patterns on scraps first to tackle color combinations, stitch density, and thread weight confidently.
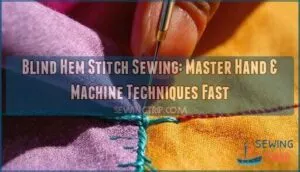
Implementing Blind Hems for Neat Finishes
Blind hems are the unsung heroes of professional-looking projects. To master this, fold and press your fabric, then use tiny, invisible stitches to secure hems neatly.
Pick a narrow "bite" with your sewing machine’s presser foot for subtle results. Mastering presser feet enhances efficiency and precision, as seen in the guide Mastering presser feet.
Here’s a quick reference:
| Fabric Type | Recommended Hem Width | Pro Tip |
|---|---|---|
| Lightweight Cotton | 1 inch | Use matching threads for invisibility. |
| Denim | 1.5 inches | Press hard for crisp folds. |
| Knit Fabrics | 0.5 inch | Keep the tension loose. |
| Satin | 0.75 inch | Work gently to avoid snags. |
| Linen | 1 inch | Practice slow, consistent stitch length. |
Practice makes perfect, so don’t rush! This approach will help you achieve professional-looking results with your blind hems, making them nearly invisible and ensuring your projects look polished and efficiently made.
Tips for Maintaining Steady Hand Sewing Speed
Keeping a steady sewing speed isn’t about rushing—it’s about finding a rhythm that feels natural and repeatable.
With a little practice and some tricks to avoid stopping and starting too much, you’ll sew like a pro in no time (and maybe even surprise yourself!).
Practicing Hand-Eye Coordination and Fine Motor Skills
Fine-tuning your hand-eye coordination is like tuning an instrument—it improves precision and boosts your sewing speed.
Start with simple, fun practice exercises to build muscle memory and strengthen your hands.
- Threading Challenge: Thread needles of different sizes every day. It’s like leveling up in a game—start with larger needles and work toward smaller ones.
- Button Tweezing Drill: Scatter buttons on the table and use tweezers to pick them up. It’s a playful way to develop fine motor skills and dexterity.
- Controlled Stitching: Draw straight lines on scrap fabric and practice stitching directly over them. Stay steady, focus on sensory integration, and gradually increase your speed.
With consistent effort, you’ll enhance focus and build a natural sewing rhythm to ace those perfect stitches!
Developing a Rhythmic Sewing Pattern
Finding your groove while sewing feels like finding the beat in your favorite song—it’s all about rhythm. A steady sewing rhythm helps you achieve evenly spaced stitches and makes the process more enjoyable.
Try these to build muscle memory and improve consistent stitch length:
- Count your stitches with a soft “one, two” as the needle moves in and out.
- Sync your hand movements to calming music with a steady beat.
- Practice repetitive motions until sewing becomes second nature.
With consistent motion, you’ll sew with confidence and precision. Plus, it reduces fatigue—because who doesn’t love sewing without constant stops and starts?
Avoiding Sudden Starts and Stops
Avoid jerky movements—it’s like driving and slamming the brakes! Focus on consistent momentum, especially during starts and stops. Controlled stops keep your stitches smooth and professional.
Practice rhythmic stitching by sewing in steady, even motions. Gradual deceleration helps maintain sewing speed without losing control.
| Do | Don’t | Why |
|---|---|---|
| Sew steadily | Rush or jerk stitches | Prevents uneven or sloppy stitch lengths |
| Finish each stitch | Pause mid-stitch | Secures smooth connections and a polished seam |
| Use guiding tools | Eyeball everything | Strengthens sewing machine consistency and ease |
| Practice slow stitching | Sprint through fabric | Builds hand-eye coordination and consistency |
| Focus on rhythm | Forget the basics | Encourages intuitive, muscle-memory sewing |
Guiding Fabric Effectively for Straight Stitches
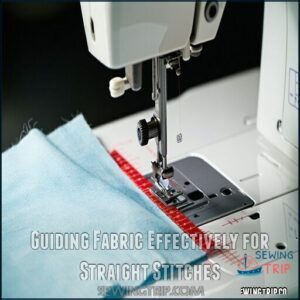
Keeping your fabric straight while sewing is like steering a car—you’ve got to stay on course.
Using tools like seam guides or tape can make it easier, so you won’t feel like you’re driving on a bumpy road!
Using Seam Guides and Removable Guideline Tape
Keeping your stitches straight can feel as satisfying as finishing a puzzle.
Use removable guide tape types to mark seam lines—it’s a game-changer for sewing straight stitches. Place tape accurately for consistent stitch length, and for curves, snip lightly so it flexes perfectly.
Seam guides or alternatives like masking tape are lifesavers for consistent guide usage. Understanding how to adjust stitch length adjustments is also vital for different fabric thicknesses.
Maintain guide maintenance by keeping surfaces clean. They don’t just help—they make your sewing machine control feel effortless and professional!
Employing Magnetic Seam Guides and Presser Foot Edge
Magnetic seam guides are like having a steady sewing assistant by your side. These handy tools attach to your machine’s stitch plate, helping you nail a consistent stitch length with ease. They create a physical barrier, making sure your fabric stays on track—perfect for achieving consistent width with every seam.
Your presser foot is another great ally. Its edge can act as a built-in guide for narrow seams. Want game-changing precision? Try combining both tools for impressive sewing machine control.
-
Key Tips:
- Adjust guide placement for desired seam allowance.
- Use gently when aligning delicate fabrics.
- Wipe magnets clean regularly.
- Practice slow stitching for smooth results.
Consistent stitches? Consider them mastered!
Practice Exercises to Improve Hand Sewing Consistency
If you want to sew straight, even stitches every time, practice is your best friend.
Try a few fun exercises, like sewing on paper or stitching scraps, and watch your skills grow faster than you’d expect!
Sewing on Paper for Muscle Memory
Sewing on paper is like "training wheels" for your stitches! Grab lined paper and practice exercises without thread—just poke your needle through the lines. It’s perfect for building muscle memory and achieving consistent hole spacing.
Try fun drill pattern ideas like zigzags! Needle size matters, too—smaller needles create precise punctures. To master this, repeat sewing exercises to build muscle memory.
Once confident, transfer your skills to fabric. Bonus: no wasted fabric, just lots of consistent stitches!
| Drill Pattern Ideas | Paper Type | Needle Size |
|---|---|---|
| Straight Lines | Notebook Paper | Small Needle (Size 10) |
| Zigzags | Grid Paper | Medium Needle (Size 8) |
| Curves | Plain Printer Paper | Small Needle (Size 9) |
| Shapes | Graph Paper | Medium Needle (Size 7) |
Creating Sample Stitch Books and Practicing With Scrap Fabric
A stitch book is your ultimate sewing cheat sheet.
Grab scrap fabrics—old shirts, quilting leftovers, or any bits you’ve got lying around. Test out different stitches, documenting details like thread type, needle size, and tension. It’s a fun way to turn random practice into skill-building!
- Track your progress with neat labels.
- Experiment with stitch variations to master consistent stitch length.
- Test stitch lengths on scrap fabric.
- Create a schedule for sewing practice.
Participating in Hand Sewing Challenges and Projects
Immerse yourself in sewing challenges to boost your sewing skills and confidence!
Participate in online contests featuring fun themes—they’ll sharpen your hand sewing and consistent stitch length.
Join collaborative quilt projects where feedback fosters growth while creating something meaningful.
Explore forums for custom project inspiration and creative exploration with like-minded stitchers.
Share your progress and enjoy skill-building through friendly competition.
Sewing challenges make every stitch a step toward refined sewing skills and unforgettable designs!
Frequently Asked Questions (FAQs)
How do you finish a stitch?
Ever tie a balloon’s end?
Finishing a stitch is similar!
Loop your needle through the last stitch, pull tightly to knot, and trim the thread tail to about ¼ inch.
Clean, neat, done!
How long does it take for Monocryl stitches to dissolve?
Monocryl stitches typically dissolve within 7 to 10 days.
Your body will gradually break them down, so you won’t need to worry about manual removal, as complete absorption takes about 90 to 120 days.
How do you use a straight stitch in hand sewing?
It’s like drawing with thread—just glide the needle up and down evenly along the marked line.
Keep stitches between ⅛” and ¼”, hold steady tension, and practice rhythm for perfectly neat, consistent results!
How do I learn a stitch?
Start by practicing on scrap fabric.
Choose the right needle and thread for your project.
Mark your stitch line if needed, and focus on rhythm and tension.
Don’t worry—messy stitches teach you too!
How do I know if my stitches are good?
Good stitches look even, snug, and lie flat.
If they’re uneven or puckered, adjust your tension or practice consistent spacing.
Think of stitches as soldiers—lined up evenly, they’re strong; scattered, they’re weak.
How long should a stitch be?
Aim for stitch lengths around ⅛” to ¼” for secure, neat seams.
Shorter stitches can make fabric too tight, while longer ones might snag.
Think Goldilocks—find that "just right" balance for smooth results!
Why are my stitches inconsistent?
Imagine this scenario: your stitches wobble like a toddler learning to walk.
It’s likely uneven tension, rushed speed, or poor fabric prep.
Breathe, practice rhythm, mark fabric, and let muscle memory guide you.
How do you stitch a fabric?
Pull your threaded needle through the fabric, following a marked line or guide.
Use small, even movements, maintain consistent tension, and hold the fabric steady.
Take your time—it’s sewing, not a race!
How do you sew a straight stitch on a sewing machine?
Align your fabric under the needle, lower the presser foot, and set your stitch length.
Guide the fabric steadily, letting the feed dogs do the work—no pushing!
Relax, practice, and you’ll nail it.
How do you stitch a pattern?
Did you know 75% of sewing beginners struggle with patterns?
To stitch one, trace your design on fabric, pin layers, and sew slowly along the lines.
Stay precise but don’t sweat perfection—practice makes patterns perfect!
Conclusion
Ready to master how to sew consistent stitches? Start by focusing on steady hands, the right tools, and good habits.
Practice keeping your stitch length even, your thread tension balanced, and your speed smooth—kind of like finding your rhythm in a favorite song.
Don’t stress about perfection; you’ll improve stitch by stitch. Use seam guides, try decorative stitches for fun, and keep experimenting.
With patience and practice, your sewing will soon look like a pro’s.


