This site is supported by our readers. We may earn a commission, at no cost to you, if you purchase through links.

First, thread your needle and tie a knot at the end. Smooth out the fabric and turn it inside out if possible.
Start stitching from the back side, working across the hole with small, even stitches. Pull the thread snug but don’t yank it tight—you’ll create puckering that looks worse than the original hole.
For tiny holes, simple running stitches work fine. Larger tears need patches or more advanced techniques. The key is matching your thread color and taking your time for invisible results.
Table Of Contents
Key Takeaways
- You’ll get professional results by starting your stitches on the fabric’s back side, which keeps knots hidden and prevents visible thread marks on the front of your garment.
- You must match your needle size to your fabric weight—use fine needles for delicate materials like silk and heavy-duty needles for thick fabrics like denim to prevent damage and ensure smooth stitching.
- You should maintain gentle, consistent thread tension while sewing across the hole, pulling snug but not tight to avoid puckering that’ll make your repair look worse than the original damage.
- You can choose between simple running stitches for small holes or patch repairs for larger tears with missing fabric, depending on the size and type of damage you’re dealing with.
Assessing and Preparing The Hole
Before you start stitching, you’ll need to examine the hole’s size and shape to choose the right repair method.
Clean up the area by smoothing wrinkles, trimming loose threads, and turning the fabric inside out for the best results.
Determining Hole Size and Shape
When evaluating damage type, grab a ruler and measure your hole’s dimensions carefully.
Round holes from snags need simple stitching, while L-shaped tears require corner attention during repair method choice.
Check fabric integrity around edges – frayed or missing material signals you’ll need a patch. Holes larger than an inch typically require patching rather than basic stitching.
This edge condition analysis determines whether you’re dealing with a quick fix or a more involved fabric repair project.
Consider the stitch strength evaluation to guarantee a lasting repair.
Smoothing Out Wrinkles
Once you’ve sized up your hole, getting wrinkles out sets you up for success.
Wrinkled fabric fights against your needle and creates uneven stitches that’ll make your repair look amateur.
Here’s how to get that smooth surface for mend torn fabric projects:
- Iron on medium heat – Match heat settings to your fabric types to avoid damage
- Steam from your iron – Hold it slightly above delicate materials for gentle wrinkle prevention
- Hand-stretch small areas – Gently pull fabric taut around the hole to eliminate minor creases
Smooth fabric means your stitches lay flat and your sewing hole repair looks professional, not puckered.
Trimming Loose Threads
After smoothing your fabric, carefully trim those loose threads around the hole’s edge.
Use Sharp Scissors to cut away frayed bits, creating a Clean Rectangle when possible.
Make precise Corner Cuts at 45-degree angles to prevent bunching.
This step is essential for Preventing Fraying during your sewing process.
Clean edges make stitches hold better and look more professional.
Take your time here – rushing leads to uneven cuts that’ll haunt your hole repair later.
Once trimmed, you’ll have Ironed Edges ready for proper fabric work ahead.
Tool Type Best For Cost Range
Turning The Item Inside Out
Flipping your garment inside out transforms your sew a hole project from frustrating fumble to smooth success.
This inside out sewing technique provides seam access and fabric protection while keeping your hidden repairs invisible from the front.
The inverted view gives you better control for easier stitching and helps prevent fabric stretching during your hole patching work.
Fabric hole repair becomes manageable when you can see exactly what you’re doing:
- You’ll avoid accidentally catching the front fabric layer
- Your stitches stay hidden for professional-looking results
- Thread tension becomes easier to control
- You can repair hole in seam areas with precision
Choosing The Right Tools
You’ll need the right needle, thread, and scissors to make your hole repair look professional and last longer.
Choose a needle that matches your fabric’s weight, thread that matches the color, and sharp fabric scissors to cut clean edges without fraying, which will help the repair last longer.
Needle and Thread Selection
Your needle selection makes or breaks the repair.
Match needle size to fabric weight – heavy denim needs thick needles, while silk demands fine ones.
Thread material matters too: polyester resists UV damage outdoors, nylon stretches for upholstery.
Color matching hides your handiwork perfectly.
Understanding the fabric needle compatibility is essential for achieving professional results.
| Fabric Type | Needle Size | Thread Material |
|---|---|---|
| Delicate (silk, chiffon) | Fine (16-gauge) | Polyester or silk |
| Medium (cotton, linen) | Universal (14-gauge) | Polyester or cotton |
| Heavy (denim, canvas) | Heavy-duty (12-gauge) | Heavy polyester or nylon |
Scissor Selection
Quality scissors make clean cuts that won’t fray your fabric edges or create messy tears.
You’ll want dedicated fabric shears with sharp stainless steel blades that slice through material like butter.
Here’s what separates good sewing scissors from great ones:
- Blade Material – Stainless steel stays sharp longer and resists rust
- Handle Comfort – Ergonomic grips reduce hand fatigue during longer repairs
- Scissor Size – 8-10 inch length handles most fabric thicknesses perfectly
- Cutting Purpose – Dedicated fabric shears outperform household scissors every time
High quality options have stainless steel blades.
Needle Threader Options
Once you’ve selected your scissors, threading your needle becomes the next challenge. When your eyes strain or fingers fumble, needle threader options save the day.
Manual threaders work great for everyday sewing projects, handling different thread weights with their simple wire loop design. Automatic options help people with arthritis or shaky hands thread needles effortlessly. LED threaders illuminate dark needle eyes, making threading easier in poor lighting conditions.
Beyond simple tools, consider where to purchase a threader for the best selection.
Threader Type
Ergonomic designs reduce hand strain during lengthy sewing tutorial sessions. For threader maintenance, simply wipe clean after use. No threader? Try folded paper.
Threading The Needle and Knotting
You’ll need to thread your needle properly and create a secure knot before starting any repair work.
Double your thread through the needle’s eye, then tie a firm overhand knot at the end to prevent it from pulling through the fabric, ensuring a firm hold.
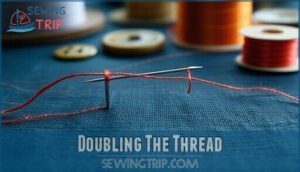
Doubling The Thread
Most seamstresses know that doubling your thread creates superior thread strength for any sewing tutorial. Pull 24 inches through your needle’s eye, then align both ends perfectly.
Most pros double their thread for repairs that actually last – it’s the difference between a quick fix and a permanent solution.
Here’s why this sewing for beginners** technique works:
- Prevents thread breakage during repair work
- Matches thread thickness to your fabric type requirements
- Guarantees stitch durability when you sew a hole
You’ll have a sturdy 12-inch working length.
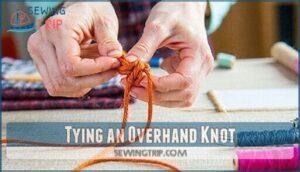
Tying an Overhand Knot
With your doubled thread ready, you’ll create a rock-solid overhand knot for knot security.
Hold both thread ends together, then form a simple loop by crossing one end over the other.
Pull the loose ends through this loop and tighten gently.
This basic sewing knot prevents slippage and guarantees your stitches stay put throughout your entire sewing tutorial, providing a secure foundation.
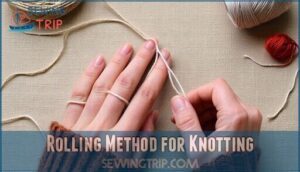
Rolling Method for Knotting
Master this reliable technique when standard knots slip through your fingers.
Position your thread against your index finger, then roll it forward 2-3 times using your thumb. This finger positioning creates the perfect loop size for knot security.
Slide the coiled thread off while maintaining tension, then pull the loose end through. You’ll achieve superior knot tightness for mending clothes and hand sewing techniques, ensuring knot security.
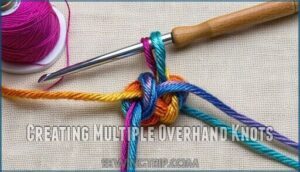
Creating Multiple Overhand Knots
Beyond your basic overhand knot, knot strength becomes your safety net when mending clothes. Think of it like insurance – you wouldn’t settle for bare minimum coverage.
Multiple overhand knots boost knot security dramatically. Here’s your step-by-step approach:
- Create your first overhand knot with proper knot placement near the fabric
- Pass the needle through that same loop again for double knot size
- Repeat 2-3 times until you feel firm resistance
These knot alternatives prevent your hand sewing techniques from unraveling mid-repair when you sew a hole.
Positioning The First Stitch
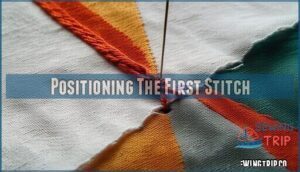
You’ll start your first stitch on the back side of the fabric, about ⅛ inch from the hole’s edge, to keep the knot hidden from view.
Insert your needle through the fabric just below the hole, then pull the thread tight to create a secure anchor point that won’t slip or come undone.
Starting on The Back Side
The back side serves as your secret weapon for hiding knots and achieving a professional look. Start your first stitch on the fabric’s wrong side, about one-eighth inch from the hole’s edge.
This stitch anchoring technique guarantees thread security while maintaining a clean finish. A secure knot prevents unraveling, and proper thread knotting is essential for this.
Here’s your roadmap for perfect positioning:
- Insert needle through back fabric layers first
- Keep knot pressed against wrong side surface
- Position entry point strategically near hole edge
- Check front side stays completely smooth
Placing The First Stitch
Place your first stitch precisely ⅛ inch from the hole’s edge, ensuring your Backside Start keeps the knot hidden. Push the needle through at a slight Stitch Angle for better Fabric Entry. This Initial Anchor point determines your entire repair’s success.
| Hole Type | Starting Position | Best Approach |
|---|---|---|
| Round holes | Any edge point | Work clockwise |
| Linear tears | Either end | Follow tear direction |
| L-shaped rips | Corner intersection | Secure corners first |
Your Knot Concealment stays perfect when you sew a hole using this method.
Maintaining Alignment
Consistent edges make the difference between a professional repair and an obvious patch job.
When fabric creep occurs during stitching, your repair becomes visible and lumpy.
Keep these alignment tips in mind:
- Match seam lines – Line up existing stitching patterns with your new thread
- Pin strategically – Use small pins to prevent fabric distortion while working
- Check frequently – Stop every few stitches to verify patch placement stays centered
This mending clothes tutorial technique prevents bunching and creates seamless clothing repair results.
Sewing The Hole Closed
Now you’ll work straight stitches across the hole, creating a bridge of thread that closes the gap.
Keep your stitches even and pull the thread snug, but don’t yank too hard or you’ll create puckering that looks worse than the original hole, and ensure you maintain a consistent tension to avoid puckering.
Sewing Across The Hole
Now you’re ready to work across the hole with purpose. Use straight stitching to create back-and-forth lines that bridge the gap. Keep your small stitches close together while avoiding tension that might pucker the fabric.
| Stitch Type | Best For | Pro Tip |
|---|---|---|
| Straight lines | Clean tears | Work end to end |
| Circular pattern | Round holes | Start and finish at same spot |
| Cross-hatch | Large gaps | Layer perpendicular lines |
| Running stitch | Quick fixes | Maintain rhythm |
Consistent spacing makes your patch clothing hole repair look professional.
Maintaining Even Stitches
Now that you’ve started sewing across the hole, consistent spacing becomes your best friend for a professional-looking repair. Think of your stitches as tiny soldiers marching in formation – each one should mirror the last in both stitch length and needle angle.
Here’s how to nail tension control and spacing every time:
- Keep stitches about ⅛ inch apart, like marking ruler lines
- Maintain the same needle angle with each pass through fabric
- Use your thumb as a spacing guide – it’s roughly ⅛ inch wide
- Count "one-Mississippi" between stitches for steady rhythm
- Check your work every few stitches to catch spacing mistakes early
These practice techniques from any sewing tutorial will make your repair tutorial skills shine. Remember, even stitches distribute stress evenly across the mend, preventing future tears in the same spot.
Pulling Thread Taut
Two fingers of tension control makes all the difference when pulling thread through your repair fabric tear.
Think gentle but firm – like shaking hands with someone you respect. This stitch evenness prevents fabric distortion while maintaining seam strength.
Too loose won’t close the gap; too tight risks preventing breaks in your thread. Let each pull settle naturally for ideal tear repair results in your clothing repair tips routine, ensuring gentle and firm control.
Avoiding Puckering or Bunching
Maintaining proper tension control prevents your fabric from puckering like a worried forehead.
When sewing across any tear, gentle pressure keeps everything smooth and professional-looking. A key factor is to adjust thread tension for ideal results.
Follow these fabric relaxation techniques:
- Check stitch spacing – keep stitches evenly spaced to distribute tension
- Use appropriate needle size – wrong needles create unwanted bunching
- Apply gentle pressing techniques – smooth fabric between stitches for best results
Patching a Hole With Missing Fabric
When you’ve got a hole with missing fabric, you’ll need to add a patch instead of just stitching the edges together.
This method works perfectly for tears larger than an inch or when the fabric has completely worn away, giving your garment a strong, lasting repair.
Selecting a Patching Material
Three key factors determine your patch’s success: fabric matching, material type, and fabric weight.
Choose identical or similar fabric for invisible repairs. Consider texture blending and color matching for seamless results. Pattern considerations matter for prints and stripes.
| Material Type | Best Used For |
|---|---|
| Same Fabric | Invisible repairs |
| Denim Patches | Patching jeans hole repairs |
| Iron-on Patches | Quick fabric repair fixes |
| Decorative Fabric | Visible style statements |
Cutting The Patch
When cutting your patch fabric selection, measure twice and cut once to avoid waste.
Start by adding 1 inch to each side of your accurate hole measurement for proper seam allowance needed. This extra fabric gives you wiggle room during the sewing process.
- Round corners to prevent fraying and create smoother edges
- Cut straight lines using fabric shears for clean, professional results
- Match fabric grain direction to maintain garment’s natural drape
- Consider patch shape considerations like bias cuts for stretchy materials
Placing The Patch
Now you’ll want to flip your garment inside out for proper patch placement.
Center your patch over the hole, ensuring fabric alignment with at least half an inch extending beyond all edges.
Pinning techniques matter here – place straight pins perpendicular to the hole’s perimeter for stability.
This creates basting security before sewing begins.
Edge folding comes later, so focus on getting your patch centered and pinned securely for a professional mending and repair job.
Sewing The Patch in Place
With your patch positioned perfectly, secure it using a running stitch around the perimeter.
Keep stitches roughly 0.25 inches apart for maximum hold. Work from the fabric’s wrong side, catching both the patch material and original fabric with each pass.
Apply gentle, consistent tension—too tight creates puckers, too loose won’t hold. This stitching technique guarantees your invisible patching repair stays put through countless washes, providing a long-lasting and reliable fix.
Finishing and Tying Off
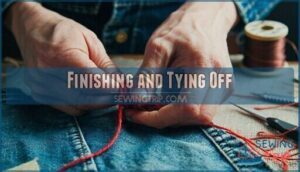
Once you’ve completed your stitching, you’ll need to secure your work properly to prevent the thread from unraveling.
The finishing process involves ending your final stitch on the fabric’s back side, creating a secure knot, and trimming excess thread to complete your repair.
Ending on The Back Side
The magic happens on the fabric’s hidden side when you’re finishing your clothing repair.
Working from the back guarantees professional results by hiding knots and securing stitches properly.
Here’s your finishing checklist:
- Flip fabric to access the wrong side completely
- Position final stitch away from visible areas
- Prepare thread for secure loop security and neat finish.
For knit fabrics, consider how seam finishes prevent fraying to guarantee a durable repair.
Tying Off The Thread
With your needle on the back side, you’re ready to create knot security that’ll last.
Pull your thread through to leave about three inches of working material.
Now comes the magic of loop techniques – form a small circle with your thread near the fabric surface, then pass your needle through it.
Think of it like making a tiny lasso that hugs your stitches.
Pull gently but firmly to snug the loop against the fabric.
This knot tying method creates hidden knots that won’t show on the front, keeping your repair looking professional and clean.
Securing The Knot
Once you’ve tied off your thread, securing the knot properly guarantees your repair won’t unravel after the first wash. Think of it as the anchor that keeps your hard work intact.
Here’s how to create bulletproof sewing knots:
- Double-loop technique: Thread your needle back through the final stitch loop twice for maximum knot strength
- Finger-wrap method: Roll thread around your finger, slide off, and pull tight for compact knot placement
- Multiple mini-knots: Create 2-3 small overhand knots stacked together to prevent slippage during wear
- Fabric sandwich: Position your knot between fabric layers where it won’t catch on anything, ensuring knot durability
- Tension test: Gently tug the finished knot to verify it won’t budge when you repair holes in jeans or other garments
This clothing repair tutorial step transforms a simple sew a hole project into a lasting fix.
Cutting Excess Thread
Now you’re ready to clean up your work with proper trimming techniques.
Grab your scissors or dedicated trimming tools and cut the thread about 1/4 inch above your secure knot – this seam allowance prevents fraying while keeping things tidy.
Sharp snipping techniques make all the difference here.
Don’t cut too close or you’ll risk your stitches coming undone.
The right thread length keeps your repair looking professional and lasting longer.
Special Considerations for Different Fabrics
Different fabrics require specific techniques to prevent damage during hole repair.
You’ll need to adjust your needle choice, thread tension, and stitching approach based on whether you’re working with delicate silk, heavy denim, or stretchy knits.
Sewing Holes in Delicate Fabrics
Delicate fabrics like silk, lace, and chiffon demand your gentlest touch.
Handle delicate fabrics like precious treasures – one wrong move and your silk becomes a casualty of overeager needlework.
Apply fusible interfacing to the back for stability during Silk Stitching and Lace Repair.
Your invisible stitch technique prevents visible damage:
- Use fine needles (size 60/8) with matching lightweight thread
- Work slowly with minimal tension to avoid puckering
- Apply ladder or whip stitches evenly for Chiffon Mending
This fabric repair guide guarantees Sheer Stabilizing success.
Sewing Holes in Thick or Heavy Fabrics
Tackle tough materials like denim, canvas, or leather with confidence using the right approach.
You’ll need a thicker needle (size 14-16) and heavy-duty thread designed for demanding fabric repairs.
For denim repair and canvas stitching, consider upholstery repair techniques with reinforced stitching patterns.
Press the fabric first and use a thimble to protect your fingers from thick needles.
When mending a tear, try a running stitch with double-threaded reinforcement.
Heavy threads guarantee your repair withstands daily wear on these sturdy heavy fabrics.
Sewing Holes in Stretchy or Spandex Fabrics
Stretchy fabrics require a gentle touch when mending. Choose ballpoint needles designed for knits – they slip between fibers instead of piercing them.
Use zigzag stitch techniques to maintain fabric flexibility. Control tension carefully; loose stitches allow natural movement while preventing tears.
Stabilize the fabric by gently stretching it as you sew. For spandex hole repairs, match your thread to the fabric’s stretch. These seam finishes guarantee your mending moves naturally with the garment, using techniques that maintain fabric flexibility.
Frequently Asked Questions (FAQs)
How do you sew a hole?
Thread your needle and tie a knot.
Start stitching from the fabric’s back side, creating small, even stitches across the hole.
Keep tension gentle to avoid puckering, then secure with a final knot.
Why is it important to learn to sew a hole?
Imagine this scenario: your favorite shirt develops a tear right before an important meeting.
Learning to sew holes saves money, extends clothing life, reduces waste, and gives you confidence to handle wardrobe emergencies independently.
How do you close a hole in a sewing machine?
You can’t actually "close" a hole in your sewing machine itself.
However, you’ll use your machine to close fabric holes by selecting a zigzag or darning stitch, then carefully guiding the torn material under the needle.
How do you stitch a hole in fabric?
Like mending a broken bridge, you’ll thread your needle, tie a secure knot, then start stitching from the fabric’s back side.
Work across the hole with small, even stitches, maintaining gentle tension throughout.
How do you fix a hole in a sewing machine?
First, unplug your machine and remove the needle plate. Clean out lint, thread bits, and debris using tweezers or a small brush. Replace damaged parts if needed, then reassemble carefully.
How do you fix a hole in a fabric?
Thread your needle with matching thread and tie a knot.
Start stitching from the fabric’s back side, working across the hole with small, even stitches.
Pull gently to close the gap, then tie off securely.
How do I pick the right needle for the material I’m sewing?
Check your fabric’s weight and texture first.
Use thicker needles for heavy materials like denim, thinner ones for delicate fabrics like silk.
Match the needle size to your thread weight for smooth, professional stitching results, ensuring complete concepts are applied for optimal outcomes.
How to sew a hole for beginners?
Ironically, creating holes is easier than fixing them!
Start by threading your needle with matching thread, tie a knot, then stitch back and forth across the hole’s edges.
Until it’s completely closed.
What is the best stitch for repairing a hole?
Running stitch works best for most holes – it’s simple, strong, and forgiving.
Start from the fabric’s back side, keep stitches small and even, then weave across the hole systematically for durability.
How to sew a rip by hand?
Start stitching on the fabric’s back side, about 1/8 inch from the rip’s edge.
Use small, even running stitches across the tear, maintaining gentle tension.
Finish on the back and secure with knots.
Conclusion
Practice makes perfect when you learn how to sew a hole.
You’ve now got the skills to tackle any tear, from tiny punctures to larger rips.
Remember to match your thread, take your time, and work from the back side for invisible results.
Whether you’re fixing a favorite shirt or mending work pants, these techniques will extend your clothing’s life.
Keep your sewing kit handy—you’ll be surprised how often these repair skills come in handy around the house.


