This site is supported by our readers. We may earn a commission, at no cost to you, if you purchase through links.

When sewing, attach the lining to your garment’s facing first, then join at the hem with a 1/2" overlap. Press all seams carefully to prevent puckering.
For skirts and pants, secure the lining at key points like the waistband and side seams to prevent shifting. The right lining both improves comfort and helps your garment drape beautifully—something professionals know makes all the difference between homemade and haute couture.
Table Of Contents
Key Takeaways
- You’ll achieve professional-looking garments by selecting lining fabric that complements your outer fabric’s weight and stretch, while cutting it slightly smaller (1/8" from seam allowances) for a smooth fit.
- You’ll improve garment functionality when you add lining, as it enhances drape and movement, reduces creasing, prevents see-through issues, and extends the life of your clothes by reducing wear at stress points.
- You’ll master different lining techniques based on your project needs, including interlining for skirts, slip-lining for dresses, flat-lining for structure, and specialized methods for armholes.
- You’ll need to modify your lining pattern by adding ease at key points (like ½" at the underarm), removing portions that overlap with facings, and making the lining ½-1" shorter than the main fabric for proper movement.
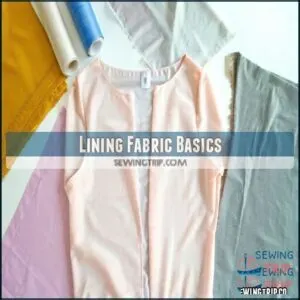
Lining Fabric Basics
You’ll find that lining fabric adds structure and improves how your garments hang, while preventing see-through issues and extending the life of your clothes.
Choosing the right lining material, whether lightweight polyester for everyday wear or breathable cotton lawn for summer pieces, will make your handmade garments look and feel more professional.
Benefits of Lining Fabric
Every garment benefits from proper lining fabric. Adding lining transforms your creations from homemade to professional-looking while improving function.
- Drape Enhancement: Creates beautiful hang and flow
- Crease Reduction: Minimizes wrinkles and maintains shape
- Bagging Prevention: Stops stretching in high-wear areas
- Show-through Avoidance: Provides necessary opacity
- Wearability Improvement: Adds comfort and extends garment life
Types of Lining Fabric
Now that you know why linings matter, let’s look at what’s available.
Choosing the right lining fabric can make or break your garment project.
You can explore options for purchasing silk linings online.
| Lining Type | Best For | Feel | Care |
|---|---|---|---|
| Silk Linings | Luxury garments | Soft, smooth | Delicate |
| Polyester Linings | Everyday wear | Slippery, anti-static | Easy |
| Cotton Lawns | Summer clothing | Breathable, natural | Machine washable |
| Rayon/Satin | Formal pieces | Glossy, flowing | Moderate |
Properties of Lining Fabric
Now that you’ve explored lining fabric types, let’s look at what makes them special.
Good lining fabrics have specific properties that affect how your finished garment feels and wears.
- Fabric Weight should be lighter than your main fabric to maintain proper drape quality
- Fiber Content affects breathability – silk breathes, polyester doesn’t
- Weave Type determines durability – tighter weaves last longer
Static Resistance is essential when choosing linings for synthetic outer fabrics.
Choosing Lining Fabric
Selecting the right lining fabric is essential for your garment’s comfort, look, and function, so you’ll need to match it with your main fabric’s stretch and thickness.
You’ll want to keep in mind natural fibers like cotton or silk for breathability when working with temperature-sensitive garments, or choose anti-static polyester for everyday wear that prevents clinging.
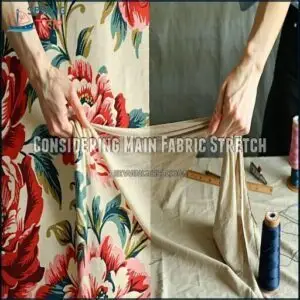
Considering Main Fabric Stretch
Understanding your fabric’s stretch is critical when selecting a lining.
When your outer fabric stretches, your lining must accommodate that movement too.
If your stretchy main fabric is paired with a non-stretch lining, you’ll create tension issues where the lining restricts movement and might even tear.
Always check stretch compatibility by testing both fabrics together, paying attention to grain alignment.
For knit linings, make certain they match the recovery rate of your fashion fabric.
Consider using linings with good recovery fabrics like elastane blends.
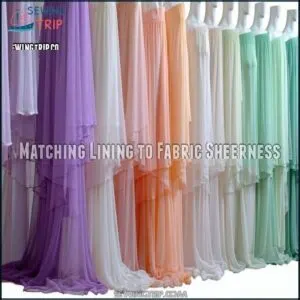
Matching Lining to Fabric Sheerness
While selecting lining for stretch fabrics is important, don’t overlook how your lining addresses fabric sheerness. When working with sheer fabrics, your lining choice determines how much shows through.
The right lining for sheer fabrics enhances opacity, adds comfort, and transforms delicate materials into wearable, everyday garments.
- Match opacity levels – silk organza offers slight coverage while cotton batiste provides full opacity
- Consider color coordination – flesh tones disappear under whites while contrasting colors create layering effects
- Select similar textures – pairing smooth linings with smooth sheers maintains the garment’s intended drape
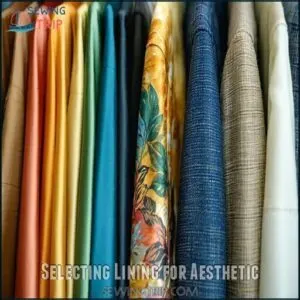
Selecting Lining for Aesthetic
The artistic touch of your lining fabric can transform a simple garment into something extraordinary.
When selecting lining for aesthetic appeal, consider color coordination with your main fabric—whether you want it to match perfectly or create a fun contrast.
Print linings add personality to solid garments, while texture contrast between smooth and textured fabrics creates visual interest.
Different opacity levels can subtly show through, enhancing the drape and overall design impact.
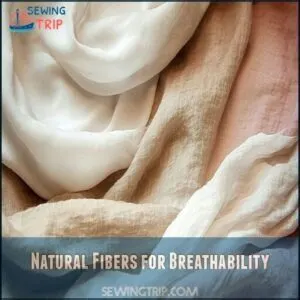
Natural Fibers for Breathability
The breathability of natural fibers in your lining fabric can make or break comfort in your finished garment.
Cotton lawn provides excellent airflow while maintaining structure in summer-weight clothing.
Silk linings feel luxurious against skin and regulate temperature effectively.
Linen benefits include moisture-wicking properties that keep you cool.
Rayon offers natural durability with comfort similar to silk, but at a lower price point.
Lining Techniques Methods
You’ll learn four practical methods to line your garments, including interlining for skirts, slip-lining for dresses, flat-lining for structure, and special techniques for armholes.
Each method serves a specific purpose, helping you create professional-looking clothing that hangs better, feels comfortable, and lasts longer.
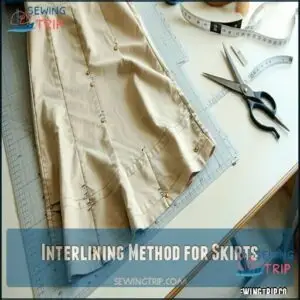
Interlining Method for Skirts
Now that you’ve got your fabrics ready, let’s master the interlining method for skirts—a game-changer for adding structure without bulk.
This technique creates a professional finish by treating two fabric layers as one: Consider how lining fabric choice impacts the drape of the finished garment.
- Cut lining from your skirt pattern (skip the waistband and facings)
- Transfer all pattern markings for centers, notches, and darts
- Place interlining slightly smaller than main fabric for slim skirts to prevent unwanted crumpling
Slip Lining Method for Dresses
While interlining integrates lining during construction, slip-lining offers a different approach for dresses.
This method requires thin, lightweight lining fabric that matches your dress’s stretch. You’ll sew the lining to the inside edges, including neckline and arms.
For dress skirts, attach lining at the hemline too. Slip-lining benefits include improved fabric drape, less creasing, and easier wear without adding bulk.
For those seeking materials, you can shop for lining online. Simply cut lining from your original pattern pieces, omitting facings and waistbands.
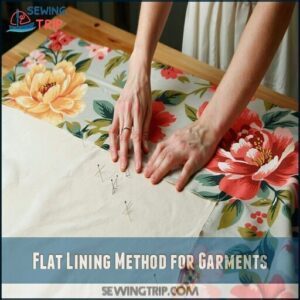
Flat Lining Method for Garments
While slip lining attaches at the waistband, flat lining offers a different approach for fabric stability.
You’ll treat two fabric layers as one, giving your garment structure and improved drape.
Here’s your flat lining game plan:
- Cut your main fabric and lining separately
- Baste them together within the seam allowance
- Press both layers flat to prevent bubbles or puckering
- Use narrower seam allowances to conceal stitching
Selecting the right lining material is essential for achieving the desired effect.
Armhole Lining Technique
While flat lining joins fabrics before construction, armhole lining requires precision for seamless armholes.
First, trim and grade seam allowances, then clip curves around the armhole to prevent bulk.
Pull the bodice through the shoulder area to turn it right side out. For proper armhole ease, press seams after sewing.
When attaching lining, pin side seams with right sides together, then stitch continuously through the underarm seam for a seamless finish.
Lining Pattern Drafting
You’ll need to trace your original pattern onto fresh paper and mark where to adjust for the lining fabric.
You can then modify this lining pattern by removing portions that overlap with facings and adding small amounts of ease at key points for better movement.
Drafting Lining Patterns From Existing
Learning to draft your own lining patterns is simpler than you think.
To create a lining from an existing pattern, trace the pattern pieces onto fresh paper and transfer all essential marks like grainlines, notches, and darts.
Remember to add ½" ease at the underarm armscye, remove 1" from sleeve hems, and account for facing overlays.
Understanding how to create accurate body measurements is also essential for a well-fitted lining.
This pattern tracing technique saves money while giving you complete control over your sewing projects.
Front and Back Lining Adjustments
Now that you have traced your pattern pieces, it’s time to adjust your front and back lining.
To modify your lining pattern properly:
- Position the facing overlay precisely at the neckline and edges for perfect alignment
- Add a 1/2" ease allowance at center back for comfortable movement
- Perform dart manipulation where needed to improve drape
- Use pattern blending techniques at seamlines for a professional finish
When sewing lining fabric, remember that these fit refinements make all the difference in your final garment.
Sleeve and Shell Pattern Preparation
To kick off your sleeve and shell pattern preparation, trace your sleeve pattern onto fresh paper, carefully transferring all markings.
Add ½" of ease to the underarm portion of the armscye for comfortable movement in your lining.
| Step | Sleeve Action | Shell Action |
|---|---|---|
| 1 | Trace sleeve pattern | Trace shell pieces |
| 2 | Transfer notches | Mark center points |
| 3 | Add underarm ease | Adjust for facings |
| 4 | Mark sewing lines | Transfer darts |
| 5 | Verify measurements | Check pattern alignment |
Cutting Lining From Same Pattern
Everyone can master cutting lining fabric using your garment’s original pattern pieces.
Simply transfer all pattern marks, including darts and grainline matching indicators, to your lining fabric.
Remember to exclude waistbands and facings when cutting.
Facing adjustments may be necessary to guarantee proper fit.
This lining fabric technique saves time while maintaining consistency across your garment pieces.
For best results, always align pattern pieces with the lining fabric’s grain.
Lining Benefits Applications
You’ll transform your handmade garments from basic to professional with the right lining, adding structure while preventing see-through fabrics and extending wear life.
A well-chosen lining also makes sheer dresses and skirts more wearable and creates a smoother fit against your skin, elevating your sewing projects to true couture quality.
Enhancing Garment Functionality
Now we’ll see how lining transforms your garment’s functionality.
Beyond just looking nice, lining fabric improves drape, reduces creasing, and prevents bagging.
You won’t have to worry about show-through with sheer fabrics anymore!
Linings also make clothes easier to wear, sliding smoothly over undergarments without catching.
For structured pieces like jackets, proper lining supports the shape while allowing comfortable movement throughout the day, which improves the overall wear and functionality.
Elevating Garment to Couture Finish
While lining adds functionality, it also transforms your garments into high-end pieces.
Adding underlining with natural fibers like cotton or silk gives your fabric better body and drape—a true couture lining detail.
The burrito method creates smooth, professional finish quality around necklines and armholes.
Hand-sewn linings and techniques like Hong Kong seams elevate your project’s look.
Underlining importance can’t be overstated; it creates that custom lining fabric effect professionals achieve, with layers that move independently within your garment, achieving a professional finish.
Benefits of Lining Sheer Fabrics
Sheer fabrics transform into practical everyday pieces with the right lining fabric.
You’ll enjoy significant opacity enhancement while maintaining the delicate appearance of your sheer materials.
Benefits of adding lining to sheer fabrics include:
- Creates a comfort layer between skin and potentially scratchy sheers
- Provides structure improvement for better silhouette definition
- Increases sheer durability, extending your garment’s life
Improving Garment Durability Longevity
Beyond protection for sheer materials, adding lining fabric substantially extends your garment’s life.
Lining prevents stretching at stress points, reduces friction against your body, and protects delicate outer fabrics from sweat damage.
Seam reinforcement happens naturally with proper lining, supporting areas that typically wear first.
For maximum durability, choose fabric stabilizers that complement your main material’s properties and consider professional alterations for heirloom pieces you’ll treasure for years.
For enhanced strength, consider options with tight weaves, which provide maximum durability and support the garment’s overall longevity.
Frequently Asked Questions (FAQs)
What is a lining fabric?
You’ll find that lining fabric serves as an inner layer in garments, improving drape, reducing wrinkles, preventing show-through, and adding comfort.
It’s typically lightweight and can be made from polyester or natural fibers.
How do I choose a fabric lining?
Like matching perfect dance partners, choose lining fabric that complements your main fabric’s weight and stretch.
Pick breathable natural fibers for comfort, match colors appropriately, and make certain it supports your garment’s intended drape.
Ensure the lining fabric complements your main fabric in a way that enhances the overall garment.
How do I choose a lining?
Select lining fabrics that match your garment’s stretch, weight, and purpose.
Choose breathable natural fibers like silk or cotton for comfort, or anti-static polyester for durability.
Consider the garment’s drape and opacity needs.
How do you make a couture lining look better?
Professional couturiers spend 40% more time on lining details.
Attach your lining to facings for a clean look, add back pleats for movement, press all seams painstakingly, and understitch edges to prevent rolling outward, focusing on complete concepts like these to ensure a polished finish.
How do I install a lining?
Cut your lining using your garment pattern (minus facings), then sew it separately from your main fabric.
Attach at facings, turn everything right side out, and hand-stitch the hem with a pleat for movement.
How do you make a jacket lining?
When I finished my wool blazer, the lining made all the difference.
First, trace your jacket pattern, adjust for facings, add ease in the back, cut your lightweight fabric, then sew and attach at the hems.
What is the best stitch for lining fabric?
A medium-length straight stitch (5-3mm) works best for lining fabric.
You’ll want to use a fine needle and reduce your machine’s tension slightly to prevent puckering on slippery materials like silk or polyester.
What is the best fabric to use for lining?
Like selecting the perfect dance partner, your lining fabric should complement your main fabric.
You’ll want anti-static polyester for everyday wear or fine cotton lawn for breathable summer garments that match your fashion fabric’s stretch.
How to make lining cloth?
To make lining cloth, you’ll need to cut fabric pieces from your garment pattern, omitting facings and waistbands.
Sew pieces together, press seams open, and attach to your main fabric using interlining or slip-lining methods.
How much shorter should the lining be?
When Sarah hemmed her silk dress, she made the lining 1 inch shorter than the outer fabric. For most garments, you’ll want your lining 1/2 to 1 inch shorter than the main fabric.
Conclusion
Finally, you’ve hit the nail on the head with mastering fabric lining tutorials!
By following these five straightforward steps, you’ll transform ordinary garments into professional creations.
Remember, proper lining isn’t just about aesthetics—it improves comfort, durability, and drape.
Whether you’re lining a simple skirt or complex jacket, these techniques work across all projects.
With practice, your lining fabric skills will become second nature, elevating your sewing from homemade to impressively polished.
Happy sewing!

