This site is supported by our readers. We may earn a commission, at no cost to you, if you purchase through links.
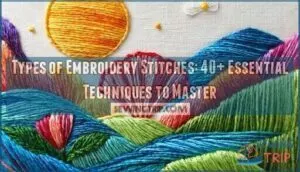 You’ll master most embroidery projects with just six fundamental types of embroidery stitches: running, backstitch, chain, blanket, French knots, and satin stitch.
These core techniques form the foundation for countless variations you’ll encounter.
Running stitches create simple lines, while backstitches offer stronger outlines.
Chain stitches work perfectly for curves and filling areas, blanket stitches edge fabric beautifully, French knots add texture, and satin stitches fill shapes with smooth coverage.
Each stitch family branches into dozens of creative variations that’ll transform your needlework from basic to breathtaking once you understand their underlying mechanics.
You can create countless variations with these stitches.
Table Of Contents
Key Takeaways
- You’ll master most embroidery projects with just six fundamental stitches: running, backstitch, chain, blanket, French knots, and satin stitch, which form the foundation for countless variations.
- You can create stunning textures and effects by combining basic stitches – running stitch for simple lines, backstitch for strong outlines, chain stitch for curves, and French knots for dimensional accents.
- You’ll develop muscle memory faster than expected through consistent practice with proper spacing and tension, transforming these fundamental techniques into second nature.
- You can elevate your embroidery from basic to breathtaking by understanding the underlying mechanics of each stitch family and experimenting with their creative variations.
Basic Embroidery Stitches
You’ll start your embroidery journey with four fundamental stitches that form the backbone of hand embroidery.
These basic stitches—running stitch, backstitch, stem stitch, and straight stitch—provide the foundation you need to create outlines, fill areas, and add decorative elements to any project.
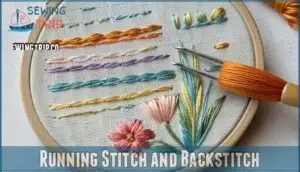
Running Stitch and Backstitch
When you’re starting your embroidery journey, the running stitch serves as your foundation stone. This simple technique creates evenly spaced straight stitches that work beautifully for outline stitch applications and basic embroidery techniques. Thread types like cotton or silk complement its straightforward nature perfectly.
Every embroidery masterpiece begins with that first perfect running stitch.
The backstitch takes things up a notch, creating solid, continuous lines by "walking backwards" through your fabric. It’s your go-to for precise detailing and lettering. Both stitches adapt well to modern adaptations while honoring their historical usage in traditional needlework.
Many artisans find inspiration in running stitch supplies for their projects. Stitch combinations using these basics create stunning results across different fabric suitability options.
- Practice consistent spacing and tension—muscle memory develops faster than you’d expect, transforming these fundamental embroidery stitches into second nature.
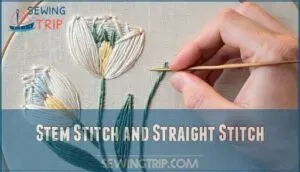
Stem Stitch and Straight Stitch
Beyond running and backstitches, stem stitch and straight stitch open new creative possibilities.
The stem stitch creates flowing curved lines perfect for botanical designs like flower stems and vines. This outline stitch produces a rope-like texture that’s ideal for modern applications.
Meanwhile, the straight stitch offers maximum versatility for texture creation.
Master these embroidery techniques through:
- Stitch variations: Adjust lengths for different effects
- Thread tension: Keep consistent pressure throughout
- Fabric selection: Choose smooth weaves for clean lines
- Combined methods: Mix both stitches for dynamic embroidery stitches
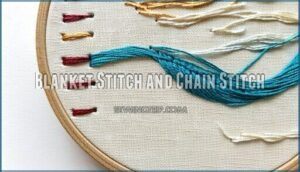
Blanket Stitch and Chain Stitch
The blanket stitch creates clean edges for appliqués and decorative borders.
You’ll bring your needle up through the fabric, then down to the right while keeping the thread under the needle point.
This creates an L-shaped stitch perfect for border applications and fabric compatibility across various materials.
The chain stitch forms connected loops resembling a chain.
Modern adaptations include using it for outlining designs or creating textured fills.
These stitch variations work well for decorative uses – blanket stitch for structured edges, chain stitch for flowing lines.
Both embroidery stitches appear frequently in embroidery tutorials as foundational decorative stitches.
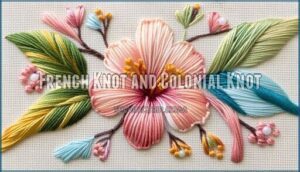
French Knot and Colonial Knot
When mastering French knot and colonial knot variations, you’ll discover these fundamental embroidery stitches offer distinct knot texture and applications.
The French knot creates delicate raised dots by wrapping thread twice around your needle—perfect for flower centers and textural accents in hand embroidery projects.
The colonial knot provides superior knot difficulty but delivers a rounder, more secure finish that won’t unravel easily.
Both knots have rich knot history dating back centuries.
Essential tools include items like embroidery floss for beginners.
Choose French knots for fine detail work and colonial knots when durability matters.
These embroidery tutorials will help you master essential knot applications for professional-looking results.
Fill and Outline Stitches
Once you’ve mastered the basics, you’ll want to explore fill and outline stitches that give your embroidery depth and definition.
These techniques let you create solid areas of color and crisp edges that make your designs pop off the fabric, utilizing outline stitches to achieve a professional look.
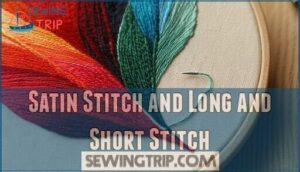
Satin Stitch and Long and Short Stitch
Precision makes the difference between amateur and professional embroidery. The satin stitch creates smooth, solid fills by placing parallel stitches close together.
Perfect stitches don’t happen by accident—they’re built through consistent practice and attention to detail.
Master Satin Stitch Shading by maintaining consistent Stitch Directionality and even spacing. The long and short stitch excels at Long Short Blending for realistic Needle Painting effects.
This technique varies stitch lengths to create seamless color shifts in Pattern Filling. For quality results, consider using specific satin stitch thread.
- Keep stitches close but not overlapping for smooth coverage
- Use a hoop to maintain fabric tension during fill stitching
- Practice consistent angles before starting your surface embroidery project
- Choose appropriate thread weight for your fabric type
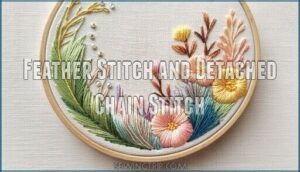
Feather Stitch and Detached Chain Stitch
You’ll find these two embroidery stitch types incredibly versatile for different project needs.
The feather stitch creates flowing, organic lines perfect for border embellishments and natural designs like seaweed or vine patterns.
Its alternating diagonal structure adds visual movement to any piece.
The detached chain stitch forms individual petal-like loops, making it essential for floral designs and texture creation.
Master feather variations by adjusting loop sizes, while chain detachment techniques let you create scattered textures.
These embroidery stitches work beautifully together for dimensional effects.
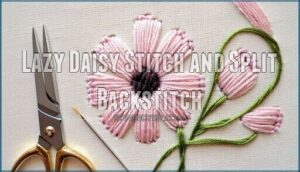
Lazy Daisy Stitch and Split Backstitch
Lazy daisy stitch creates charming floral motifs with simple looped petals. Form each petal by bringing your needle up, creating a loop, then anchoring it with a small stitch.
Split backstitch enhances leaf detailing by piercing through previous stitches, creating smooth backstitch borders with refined texture for combined effects.
- Practice daisy variations by adjusting loop sizes for different flower types
- Use split stitch for curved stems and delicate botanical outlines
- Combine both techniques in lazy daisy flowers for dimensional floral embroidery
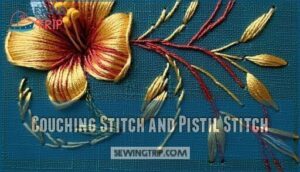
Couching Stitch and Pistil Stitch
Couching stitch opens up endless creative possibilities by securing decorative threads with small stitches. You’ll lay thick threads on fabric and tack them down with contrasting colors.
Pistil stitch creates perfect flower centers with its knotted base and trailing tail. Stem stitch is ideal for curves.
| Technique | Best Applications |
|---|---|
| Couching Stitch | Bold outlines, metallic threads |
| Creative Couching | Textured fills, ribbon work |
| Pistil Stitch | Flower stamens, botanical details |
| Combined Techniques | Mixed media embroidery projects |
These embroidery stitch techniques offer versatile options for securing threads creatively.
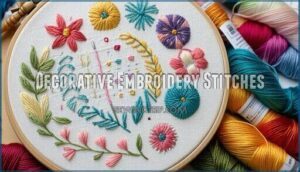
Decorative Embroidery Stitches
You’ll love working with decorative embroidery stitches because they transform basic designs into stunning works of art.
These ornamental techniques add texture, dimension, and visual interest that make your embroidery projects stand out from simple outline work.
Bullion Knot and Fly Stitch
Bullion knot creates dimensional roses and spirals through multiple thread wraps around your needle.
Master consistent tension for uniform knotty textures.
Fly stitch forms V-shaped anchored loops perfect for leaves and scattered fly stitch fills.
These bullion variations and stitch combinations add sculptural depth to your embroidery stitch techniques, transforming flat fabric into textured masterpieces.
Seed Stitch and Blanket Stitch Variation
Moving beyond complex wrapped stitches, seed stitch creates delightful texture through small, randomly placed straight stitches. Perfect for seed stitch fills, this technique adds organic charm to backgrounds and shading.
Blanket stitch variations transform basic blanket stitch edging into decorative blanket stitch borders by adjusting spacing and height. The stitch is quite versatile, even for securing raw edges.
- Vary seed density for light texture or heavy filling effects
- Combine blanket variations like double or closed for dimensional borders
- Layer seed stitch fills under satin stitch for added body and depth
Woven Wheel Stitch and Whipped Backstitch
Master-level embroidery techniques flourish when you combine the woven wheel stitch and whipped back stitch for stunning design impact.
The woven wheel stitch creates dimensional flowers by weaving thread over five or seven spokes, producing raised circular motifs. Meanwhile, whipped backstitch transforms basic lines into rope-like textures by wrapping thread around existing stitches.
These embroidery stitch combinations offer endless wheel variations and whipped texture possibilities. Modern applications include botanical designs where stitch effects create visual depth and tactile interest in your work.
The stitch is also useful for creating raised lines on delicate fabrics.
Whipped Spider Web and Coral Stitch
Creating decorative dimension goes beyond traditional techniques. The whipped spider web stitch transforms simple spokes into textured circular elements perfect for flower centers or geometric patterns. Start with five straight stitches radiating from a center point, then weave thread over and under each spoke.
The coral stitch creates beaded lines through small loops caught with tiny stitches, ideal for organic textures.
These Web Stitch Variations and Coral Texture Effects offer endless creative possibilities:
- Flower power: Use whipped spider webs for stunning rose centers
- Ocean vibes: Coral stitch mimics underwater textures beautifully
- Mixed magic: Combining Stitches creates unique dimensional effects
- Fresh twist: Modern Interpretations blend traditional with contemporary designs
Master these whipped back stitch applications and coral stitch techniques to elevate your embroidery from ordinary to extraordinary.
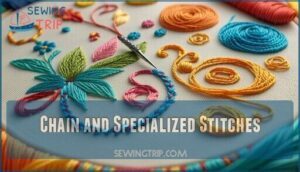
Chain and Specialized Stitches
Chain stitches form the backbone of many specialized embroidery techniques, offering endless possibilities for creative expression in your needlework projects.
You’ll discover how these interconnected loops can create everything from delicate outlines to bold decorative elements that add professional finishing touches to your embroidery, with endless possibilities for expression.
Chain Stitch and Zigzag Chain Stitch
Throughout history, the chain stitch has woven its way into countless embroidery traditions, creating beautiful linked loops that form continuous lines.
You’ll find this fundamental technique perfect for outlining designs and creating flowing borders.
Chain Origins trace back to ancient civilizations, making it one of the oldest embroidery stitches.
The zigzag chain stitch adds dynamic movement through alternating angles, creating eye-catching Texture Creation effects.
Both Stitch Variations offer excellent Design Impact for Modern Applications, from contemporary art pieces to fashion details, proving more versatile than basic satin stitch fills.
Twisted Chain Stitch and Square Chain Stitch
Twisted Chain Stitch creates loops with deliberate twists, producing textured lines perfect for stems and vines in embroidery stitches.
Square Chain Stitch forms ladder-like patterns between parallel lines, ideal for geometric borders and architectural effects.
Both stitch variations offer unique texture effects:
- Twisted chains work best with varying thread weights for different embroidery stitch textures
- Square formations require consistent spacing between parallel guidelines for clean design applications
- Creative combinations blend both techniques for modern uses in contemporary embroidery projects
These chain stitch adaptations transform basic loops into distinctive decorative elements; for mending clothes, a running stitch works well for tear repair.
Buttonhole Wheel and Chevron Stitch
Buttonhole wheels transform ordinary buttonhole stitches into stunning circular motifs.
These buttonhole variations create dimensional wheel texture perfect for flower centers and decorative elements.
Chevron patterns bring dynamic zigzag energy to borders through angular stitch combinations.
| Aspect | Buttonhole Wheel | Chevron Stitch |
|---|---|---|
| Technique | Circular buttonhole stitches | Alternating diagonal lines |
| Best Use | Flower centers, wheels | Borders, geometric patterns |
| Spacing | Even radial placement | Consistent angle shifts |
| Difficulty | Intermediate | Beginner-friendly |
| Modern Applications | Contemporary florals | Tribal-inspired designs |
Both embroidery stitches offer versatility in modern applications, from traditional samplers to contemporary textile art projects.
Herringbone Stitch and Double Threaded Back Stitch
Why settle for ordinary when you can master two powerhouse embroidery stitches?
The herringbone stitch creates stunning zigzag patterns perfect for borders, while textured herringbone variations add dimensional flair.
Double threaded back stitch transforms basic backstitch into bold, layered lines.
These backstitch embellishments and stitch combinations deliver impressive embroidery stitch effects that elevate any project beautifully.
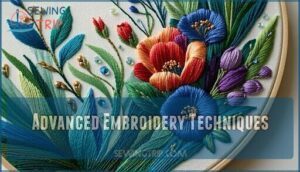
Advanced Embroidery Techniques
You’ve mastered the basics and decorative stitches, but advanced techniques will transform your embroidery into true artistry.
These sophisticated stitches combine multiple elements, create complex textures, and require precise execution to achieve professional results.
Interlaced Back Stitch and Pekinese Stitch
Moving beyond chain stitches, you’ll discover interlaced back stitch and Pekinese stitch create stunning textured effects.
The interlaced back stitch weaves thread through parallel backstitch lines, forming decorative bands. Pekinese stitch loops thread over single backstitch rows, creating scalloped edges perfect for borders. Proper needle selection guarantees smooth stitching.
- Thread choices: Use contrasting colors between backstitch foundation and weaving thread for maximum visual impact
- Stitch combinations: Layer these techniques with satin stitch fills for dimensional floral designs
- Modern applications: Apply Pekinese variations on contemporary garments and home décor for unique interlaced texture
Algerian Eye Stitch and Knotted Cross Stitch
You’ll discover the Algerian Eye Stitch creates stunning geometric patterns with radiating spokes from a central eyelet.
This technique forms star-shaped motifs perfect for counted thread embroidery on even-weave fabrics.
The Knotted Cross Stitch adds textured embroidery dimension by combining traditional crosses with raised knots.
These stitch combinations offer endless creative possibilities for both borders and accent work.
| Stitch Feature | Algerian Eye | Knotted Cross |
|---|---|---|
| Primary Use | Geometric patterns, eyelets | Textured borders, accents |
| Fabric Type | Even-weave preferred | Any suitable embroidery fabric |
| Visual Effect | Open, lacy appearance | Raised, dimensional texture |
These advanced embroidery techniques showcase Eye Stitch Variations and Knotted Cross Uses that elevate your embroidery stitch guide repertoire substantially.
Fern Stitch and Encroaching Stem Stitch
Fern stitch creates natural botanical designs with three diagonal stitches forming leaf-like patterns.
Encroaching stem stitch overlaps previous stitches for rich texture.
These embroidery techniques excel in:
- Fern variations – Adjust stitch angles for realistic foliage effects
- Encroaching texture – Layer stitches for dimensional surfaces
- Stitch combinations – Blend with other embroidery stitches for modern applications
Braid Stitches and Open Cretan Stitch
Two powerful embroidery techniques elevate your projects with rich texture and visual depth. Braid stitches create looped, anchored patterns that form thick, decorative lines perfect for bold borders and raised outlines. You’ll work by drawing parallel guidelines, passing your needle under the working thread, then bringing it through the fabric repeatedly for that signature braided appearance.
The open Cretan stitch offers airy, lace-like fills with well-spaced "legs." You’ll mark three to four parallel lines and alternate stitch placement in a zigzag motion, creating semi-transparent coverage that lets fabric show through beautifully.
- Braid Variations: Master cable plait and Gordian knot techniques for stunning dimensional effects
- Cretan Fill: Perfect your open fills for leaves, borders, and botanical designs
- Open Effects: Create ladder-like textures that add movement and visual interest
- Stitch Combinations: Blend these embroidery stitches with French knots for enhanced dimension
- Texture Creation: Transform flat designs into tactile masterpieces using these embroidery techniques
Frequently Asked Questions (FAQs)
What are the 10 basic stitches?
Like building blocks stacked to create a masterpiece, you’ll master these ten fundamental stitches: running, backstitch, split, stem, satin, French knot, chain, lazy daisy, blanket, and straight stitch.
What are the 5 types of embroidery?
You’ll encounter five main embroidery types: surface embroidery (decorative stitches on fabric), counted thread embroidery (cross-stitch patterns), whitework (white thread on white fabric), goldwork (metallic threads), and crewelwork (wool embroidery).
What is the neatest embroidery stitch?
Backstitch stands as embroidery’s gold standard for precision.
You’ll create perfectly uniform lines with this reliable technique, making it ideal for detailed outlines, lettering, and crisp borders where neatness matters most.
How many basic embroidery stitches are there?
You’ll find six fundamental embroidery stitches that form the foundation: running stitch, backstitch, split stitch, stem stitch, satin stitch, and French knot.
These basic stitches give you everything needed to start creating beautiful embroidered designs.
What are the 7 types of stitches?
Embroidery’s building blocks are your toolkit for creativity: running stitch for basic lines, backstitch for precise outlines, stem stitch for curves, satin stitch for filling, chain stitch for decorative borders, French knots for texture, and lazy daisy for petals.
How many types of stitches are there in embroidery?
You’ll discover over 300 different embroidery stitches exist worldwide, though most projects use just the six basic foundational stitches: running, backstitch, split, stem, satin, and French knot effectively.
What is the most popular embroidery stitch?
Which stitch reigns supreme in needlework? You’ll find backstitch takes the crown, beloved for its versatility in outlining, lettering, and creating crisp lines that bring designs to life.
What are 5 embroidery stitches?
You’ll master these five essential stitches quickly.
Running stitch for basic lines, backstitch for precise outlines, satin stitch for filling areas, French knots for texture, and chain stitch for decorative borders.
What are the different types of embroidery?
You’ll find several main embroidery types: surface embroidery (decorative stitches on fabric), counted thread work (cross-stitch, blackwork), crewelwork (wool threads), whitework (white-on-white), goldwork (metallic threads), and specialty techniques like sashiko.
How many different embroidery stitches are there?
Like a vast ocean holds countless drops of water, embroidery contains approximately 300 different stitches worldwide. You’ll find six basic foundation stitches that form the backbone of hand embroidery techniques.
Conclusion
Master embroiderers know that practice makes permanent, not perfect.
Once you’ve learned these types of embroidery stitches, you’ll discover endless creative possibilities.
Each technique builds on the others, creating a foundation for stunning needlework.
Start with basic stitches, then experiment with variations.
Your muscle memory will develop naturally through repetition.
Soon you’ll combine different types of embroidery stitches instinctively, creating unique textures and designs that reflect your personal style and artistic vision.
- https://www.youtube.com/watch?v=QBQ_a0WrE3Y
- https://members.asicentral.com/news/strategy/june-2025/chain-stitch-embroidery-reflects-rising-demand-for-retro-vintage-products/
- https://stitchedstories.com/12-essential-embroidery-stitches/
- https://virtuemarketresearch.com/report/embroidery-market
- https://www.mcreativej.com/post/9-hand-embroidery-stitches-for-filling-spaces

