This site is supported by our readers. We may earn a commission, at no cost to you, if you purchase through links.
You’ll use loose, long stitches that are easy to remove later.
This technique prevents fabric from shifting while you sew, helps you test garment fit, and guarantees accurate placement of zippers, pockets, and other details.
You can hand baste with simple running stitches, machine baste using your longest stitch setting, or try alternatives like pins, clips, or spray basting.
Think of basting as your sewing safety net – it catches mistakes before they become permanent headaches.
The right basting method depends on your fabric type and project complexity.
Table Of Contents
Key Takeaways
- You’ll save time and prevent costly mistakes by using basting to test garment fit and seam alignment before committing to permanent stitches
- Choose the right basting method for your project – hand basting for precision work, machine basting for speed, or alternatives like spray basting for quilts and delicate fabrics
- Basting acts as your sewing safety net by holding fabric pieces exactly where they need to be, preventing shifting during construction and ensuring professional results
- You can easily remove basting stitches when you’re ready for permanent sewing, making it perfect for complex projects like zipper installation, curved seams, and pattern matching
The Importance of Basting
Basting helps you achieve professional-looking results by holding fabric pieces exactly where they need to be during construction.
You’ll find this temporary stitching technique prevents costly mistakes and saves time when working with tricky fabrics or complex seams, which is a key benefit of using basting.
Securing Seams
Why does your fabric shift just when you need perfect alignment?
Basting stitch creates a temporary foundation that prevents seam slippage during construction.
This technique excels with curve control and bulky fabrics where securing layers matters most.
Hand-baste matching points with contrasting thread for precise fabric alignment.
Machine basting works well for straight seams requiring bias stabilization.
The temporary stitch holds everything in place while you sew the final seam with confidence.
Transferring Pattern Markings
Pattern markings won’t play hide-and-seek when you master basting techniques. This temporary stitch method transforms tricky pattern transfers into precise guides for your sewing project.
- Use marking tools like tailors chalk or tracing wheel to mark pattern pieces clearly
- Select contrasting thread colors that stand out against your fabric for easy visibility
- Keep basting stitches small and consistent when following marked lines
Hand basting works perfectly for transferring notches and alignment marks. Thread your needle with contrasting cotton thread. Sew directly on marked lines using small, tight stitches. Pattern weights help hold pieces steady while you work.
The temporary stitch creates a visible guide that mirrors your original pattern design perfectly. It is essential to follow the marked lines carefully to achieve accurate results, making the sewing project easier to manage with precise guides and clear visibility.
Fabric Alignment
Proper alignment keeps your fabric layers from becoming a tangled mess.
Start by matching grain direction and seam lines across all fabric layers.
Pin the pieces together, paying attention to pattern matching and curve alignment.
Use a temporary stitch to secure everything in place.
This layer stabilization prevents slipping during final sewing.
Your basting stitch acts as a safety net, holding fabric steady while you work on complex seams, ensuring proper alignment and layer stabilization.
Precise Zipper Placement
Installing a zipper requires steady hands and sharp eyes.
Basting stitch acts as your safety net before committing to permanent placement.
Run temporary stitches along seam lines to check zipper length and alignment.
Test different zipper types – invisible zippers need different positioning than regular ones.
Centering zippers becomes simple when you baste first.
Use alignment tools like rulers for stitch placement precision.
Remove basting after achieving perfect sewing precision.
Time-saving and Delicate Fabrics
Smart sewers know that basting saves precious time with delicate fabrics.
This temporary hold prevents silk handling disasters and keeps slippery fabrics from shifting during quick sewing.
Speed basting with efficient tacking eliminates pinless sewing headaches.
You’ll avoid knit control problems and fabric damage.
Easy removal means no torn seams or wasted materials.
Methods of Basting
You can choose from six main basting methods to hold your fabric pieces together before final sewing.
Each method works best for different projects and fabric types, so picking the right one makes your sewing smoother and more accurate.
You can then proceed with your sewing project, knowing that the chosen method will contribute to a better outcome.
Hand Basting
Hand basting gives you complete control over your sewing project. This sewing technique uses simple running stitches to create a temporary hold between fabric layers.
- Select your Thread Choice – use contrasting colors for easy removal and strong polyester thread
- Choose the right Needle Type – all-purpose needles work best for most fabrics
- Master your Knotting Technique – secure thread ends with small knots or backstitches
Start by pinning fabric layers together for proper Fabric Handling. Thread your needle and create running stitches with consistent Stitch Length of 1/4 to 1/2 inch apart.
This hand basting method allows adjustments until your alignment is perfect, making easy removal simple when you’re ready for permanent stitching.
Machine Basting
Machine basting gives you speed and consistency that hand stitching can’t match.
Set your sewing machine to the longest stitch length and loosen the tension adjustment slightly. Choose contrasting thread type for easy visibility during removal.
Use your standard presser foot choice for most fabrics. The machine feeds fabric smoothly while creating temporary hold stitches.
This method works well for straight seams but struggles with curve basting. For specialized tasks, consider using specific basting options.
Skip backstitching at seam ends so threads pull out easily when you’re ready for permanent sewing.
Pin Basting
Pin basting offers precise fabric control without machine stitching.
Insert straight pins perpendicular through fabric layers every few inches. This method works best for curved seams where pins follow fabric contours naturally.
Choose thin pins for delicate fabric types to prevent snags. Pin placement should avoid future stitching lines.
While slower than other basting methods, pins provide excellent temporary hold and slipping prevention during complex sewing projects, ensuring a smooth process with minimal errors.
Spray Basting
Spray basting uses temporary adhesive to bond fabric layers without stitching. This method works well for quilting basting where you need secure fabric layers.
- Application techniques: Spray light, even coats 6-8 inches from fabric
- Fabric compatibility: Works on most materials but test delicate fabrics first
- Removal challenges: Water-soluble formulas rinse clean after sewing
Basting spray offers quick temporary hold but costs more than thread methods. For enhanced stability, consider securing the quilt sandwich before spraying.
Gun Basting
Gun basting replaces needles and thread with a handheld tool that shoots plastic tags through fabric layers. You’ll find this method particularly useful for quilting applications where speed matters most.
Gun basting shoots through layers at lightning speed—perfect when quilting deadlines loom large.
The tool creates temporary hold by inserting small plastic tacks that secure layers until permanent stitching is complete. Unlike basting spray or fusible basting methods, gun basting offers precise placement without chemical residues.
Tag removal ease makes this technique attractive – simply snip the plastic tacks with scissors after sewing. However, fabric damage risk exists if you position the gun incorrectly or use it on delicate materials.
Gun basting uses work best on medium-weight fabrics for large projects like quilts or Roman shades. The fine needle creates pin-sized holes that typically disappear after washing. While faster than hand basting, this method requires purchasing the gun and replacement tags, making it more expensive than fabric glue or other gun basting alternatives for occasional sewers.
Some quilters prefer this method because it’s a chemical-free alternative to basting sprays.
Glue Basting
Washable fabric glue offers a pin-free basting alternative that’s perfect for precision work.
You’ll apply thin lines within seam allowances, then heat-set with a dry iron for stability.
Glue basting excels in these areas:
- Project suitability: Quilting, applique, and zipper installation
- Application methods: Dots, squiggles, or thin lines using fine-tip applicators
- Glue types: Elmer’s washable glue, Roxanne’s Glue Baste It, or specialized fabric glue.
Choose acid-free, water-soluble options for easy removal.
This fusible basting method eliminates fabric shifting while maintaining smooth seams.
It also helps achieve precise seams in your quilting projects.
How to Hand Baste
Hand basting gives you complete control over your stitches and works perfectly for curved seams or delicate fabrics.
You’ll create temporary running stitches by hand using a needle and thread, then secure the ends with small knots.
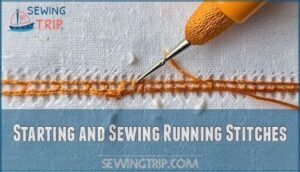
Starting and Sewing Running Stitches
Begin your hand basting stitch by threading a sharp needle with contrasting cotton or polyester thread. Knotting thread securely at one end prevents it from pulling through the fabric.
Insert your needle selection through both fabric layers from front to back. Create running stitch patterns with long stitches about quarter-inch apart for consistent spacing.
These temporary stitches require steady fabric tension as you work along the seam line. Adjust stitch length based on your project needs—longer for quick removal, shorter for stability during complex hand basting work.
Securing Ends
Securing your hand basting threads properly prevents unraveling and maintains neat work. You’ll want to tie firm knots at both ends of your temporary stitches. This creates reliable backstitch security that won’t fail during handling.
Here are essential knotting techniques for secure basting:
- Tie double knots – Single knots slip out too easily during fabric manipulation
- Trim thread tails to quarter-inch length – Prevents tangling while keeping knots intact
- Test knot tension – Pull gently to confirm knots won’t loosen during basting removal
- Position knots strategically – Place them where they won’t interfere with machine basting later
Alternative methods include taking small backstitches at start and end points for extra security. When tying off, consider using the backstitch tying method for extra hold.
How to Machine Baste
Machine basting gives you the speed of your sewing machine with the temporary hold you need for tricky projects.
You’ll set your machine to the longest stitch length and skip the backstitching to make removal quick and easy, utilizing the speed of your sewing machine for efficient work.
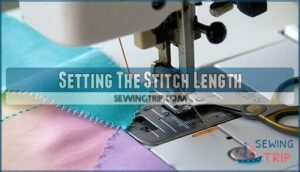
Setting The Stitch Length
To machine baste, set your stitch length to its longest setting. Most machines offer settings between 4.0 and 9.0.
Longer stitches create loose temporary seams that remove easily later. The extended stitch length serves the basting purpose perfectly.
Hand basting uses similar long stitches but requires manual control. Machine basting speeds up the process while maintaining stitch removal ease when you’re ready for permanent seaming, which is a key aspect of machine basting.
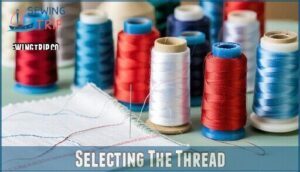
Selecting The Thread
Thread choice can make or break your machine basting stitch. You’ll want lightweight thread that won’t leave marks on delicate fabrics. Cotton or polyester thread works well for most projects.
Contrasting thread colors help you spot the basting stitch later for easy removal.
- Thread Weight: Choose lighter weight threads (50-60 weight) to minimize fabric damage
- Fiber Content: Cotton thread breaks easily for removal, while polyester offers strength during construction
- Color Choice: Pick contrasting thread colors to easily identify basting stitches for removal
- Thread Type: Avoid heavy-duty or specialty threads that might leave permanent marks on fabric
Sewing The Seam
Sew your seam straight through all fabric layers using your adjusted stitch length and tension settings.
Keep fabric handling steady as you guide the material through the machine.
Don’t backstitch at the beginning or end since you’ll remove these basting stitches later.
For curved seams, maintain control while following the seam allowances carefully.
One key is to remember that machine basting avoids backstitching.
The temporary basting stitch creates perfect garment seams.
Alternatives to Basting
While basting remains the gold standard for temporary fabric control, you don’t always need needle and thread to achieve similar results.
These modern alternatives can save time and offer convenience when traditional basting isn’t practical or necessary.
Double-sided Tape
Double-sided tape offers a quick alternative when hand basting feels tedious. This adhesive solution holds fabric layers without creating holes or requiring needle threading.
Key considerations for tape basting:
- Tape Strength – Choose lightweight adhesive specifically designed for fabric rather than heavy-duty packaging tape
- Fabric Types – Works exceptionally well on leather, vinyl, and materials where pins would leave permanent marks
- Application Tips – Place tape within seam allowances to avoid sewing through adhesive during final stitching
- Residue Removal – Remove tape slowly after sewing to prevent fabric damage or sticky remnants
Narrow 1/8-inch tapes provide precision placement along seam lines. For various projects, consider options for basting with specialized tape. Some brands offer wash-away or repositionable options that reduce adhesive buildup concerns.
This method proves invaluable for zipper installation and trim attachment where traditional basting techniques fall short. Cost comparison shows tape basting initially costs more than thread but saves significant time on complex projects.
Wonder Clips
Wonder clips offer a pin-free solution for securing fabric layers during basting and sewing projects.
These spring-loaded tools grip multiple fabric thicknesses without creating holes or leaving residue.
| Feature | Small Clips | Large Clips |
|---|---|---|
| Clip Size | 1-2 inches | 3-4 inches |
| Clip Capacity | 2-4 layers | 6-10 layers |
| Fabric Types | Delicate, thin materials | Heavy, bulky fabrics |
| Clip Alternatives | Safety pins, basting clips | Bulldog clips, clothespins |
| Clip Storage | Small containers | Magnetic strips |
Wonder clips excel with leather, vinyl, and thick quilting layers where pins would damage material.
Their wide opening accommodates binding and multiple fabric layers better than traditional basting methods.
You can find a variety of sewing wonder clips for different projects.
Improvised Methods
Creative solutions emerge when standard basting tools aren’t available.
Paper clips, binder clips, and hair clips grip fabric layers effectively. Dental floss works for strong temporary basting on heavy materials.
Chopstick basting involves threading fabric onto thin sticks for alignment. Fork basting uses fork tines to hold small sections.
Paper basting places tissue paper between layers, then tears away after sewing. These improvised methods substitute traditional basting clips and double-sided tape when needed, providing creative solutions and using items like dental floss.
Basting Spray
Spray basting creates instant fabric hold through light adhesive mist.
You’ll find top brands like Sulky KK2000 perfect for quilting and appliqué work.
Apply in short bursts from six inches away, letting each layer dry completely.
These sprays work brilliantly with delicate fabrics that resist pinning.
As an alternative, Elmer’s glue is usable for temporary fabric adhesion.
The adhesive washes out completely after your project’s finished.
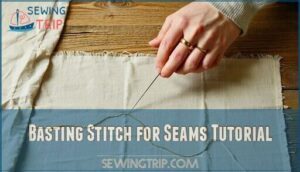
Basting Stitch for Seams Tutorial
Now you’ll learn the exact steps to create perfect basting stitches for your seams.
This tutorial covers both hand and machine methods to help you choose the right technique for each project.
Hand Basting Stitch
Hand basting gives you complete control over fabric placement. Pin your fabric layers together first. Thread your needle with contrasting thread for easy visibility. Make running stitches about quarter-inch apart along your seam line. Keep stitches loose enough for simple removal later.
Even Basting works well for straight seams. Uneven Basting suits curves better. Diagonal Basting holds large fabric areas. Slip Basting joins printed patterns perfectly. Tailors Tacks mark important spots.
- Feel the satisfaction of creating perfectly aligned seams with your own hands
- Experience the peace that comes from taking your time with delicate fabrics
- Enjoy the confidence of knowing your seams will turn out exactly right
Machine Basting Stitch
Machine basting transforms your sewing machine into a temporary fastening tool.
Set your stitch length to maximum and choose contrasting thread weight for visibility. Adjust tension slightly looser than normal settings.
Select an all-purpose needle and maintain standard foot pressure. Sew without backstitching along your seam line.
This basting stitch works perfectly for curved seams and straight edges alike.
Remove these temporary stitches easily with a seam ripper when ready for permanent sewing techniques.
Finishing The Basting Stitch
Once you’ve completed your basting stitch, you’ll need to finish it properly.
Avoid knotting thread at the end since this makes stitch removal harder later. Instead, leave loose thread tails for easy removal.
When you’re ready to sew the permanent seam, carefully remove the basting stitches by pulling them out gently.
Press the seam flat afterward for professional results.
When to Use a Basting Stitch?
You’ll use basting stitches in specific situations where precision and accuracy matter most.
These temporary stitches become essential when working with challenging fabrics, complex construction steps, or when you need to test fit before making permanent seams.
Garment Fitting
Garment fitting becomes easier when you use basting adjustments to test how your project sits on your body. This technique prevents costly mistakes with expensive fabric.
You can make fitting adjustments before committing to permanent seams. Here’s how to handle fitting challenges with hand basting:
- Create fitting muslins from cheap fabric to test pattern adjustments
- Mark alteration ease points while wearing the basted garment
- Consider posture considerations that affect how the garment hangs
The basting stitch holds fabric temporarily while you check the fit and make sewing modifications. This allows for easy adjustments to be made before finalizing the garment.
Zippers
Basting prevents zipper disasters before they happen. Pin your zipper in place, then machine baste along both sides using long stitches. This holds everything steady while you attach the zipper foot and sew the final seam.
| Zipper Types | Basting Benefits | Common Mistakes |
|---|---|---|
| Invisible zippers | Aligns teeth perfectly | Skipping basting step |
| Centered zippers | Maintains even spacing | Rushing installation |
| Exposed zippers | Secures zipper tape | Misaligned placement |
Different zipper lengths require careful positioning. Your basting stitch acts like training wheels. Remove it after installing your zipper feet and completing the permanent stitching.
Home Décor
Home décor projects benefit from careful fabric positioning before permanent attachment.
Curtain basting guarantees precise fringe placement along window treatments. You’ll achieve professional results when working with multiple fabric layers in pillow assembly and furniture covers.
- Curtain basting secures decorative trim positioning before final stitching
- Hand basting holds textile art pieces steady during complex construction
- Machine basting speeds up wall hangings assembly with consistent stitch placement
Quilting
Quilting projects involve multiple fabric layers that can shift and cause problems.
You’ll need basting to hold quilt layers together before final stitching. Use large running stitches across the entire quilt surface.
This prevents fabric layers from bunching or sliding during quilting. Basting works well for curved quilting patterns and bias binding attachment.
Choose contrasting thread colors for easy removal after completing your quilt.
Serging
Smart sewers know when to baste before serging.
Serger basting prevents costly mistakes on delicate fabrics where serged seams can’t be easily undone.
Use hand basting or machine basting to secure seams before running them through your serger.
This tacking method guarantees proper alignment for rolled hem edges and complex serging seams.
Basting replaces pins that could damage your serger’s blade.
Test fit and positioning first, then serge with confidence.
Other Uses
Beyond traditional sewing projects, you’ll discover countless creative applications for the basting stitch technique.
Consider these versatile uses:
- Home décor projects – Secure curtain pleats before hemming or attach interfacing to window treatments
- Upholstery work – Hold slippery fabrics in place when covering furniture or creating custom cushions
- Costume design – Test garment fit during fittings before committing to permanent seams
Quilting enthusiasts use tacking for applique work and pattern matching across fabric pieces.
The temporary hold helps manage bulky fabrics and curved seams.
Basting spray offers quick adhesion for hemming assistance on large projects.
Frequently Asked Questions (FAQs)
What is a basting stitch?
A basting stitch creates temporary hold between fabric layers before permanent sewing. You’ll use long, loose stitches that remove easily, preventing fabric shift and ensuring accurate seam alignment.
How do you sew basting on a sewing machine?
Set your machine to the longest stitch length (4-5 setting). Pin fabric pieces together, then sew just inside the seam allowance without backstitching. Use contrasting thread for easy removal later.
What is Basting in sewing?
You’ll use long, temporary stitches to hold fabric layers together before final sewing. It prevents shifting and guarantees accurate alignment, especially for tricky seams, zippers, and delicate fabrics.
Is basting a good sewing technique?
Yes, basting’s an excellent sewing technique.
Imagine this scenario: you’re about to sew a tricky zipper when suddenly your fabric shifts.
That’s where basting saves the day. It prevents mistakes, guarantees perfect alignment, and lets you test fit before permanent stitching.
What is basting & how does it work?
You’ll sew long, loose temporary stitches to hold fabric layers together before making permanent seams. It prevents shifting and guarantees accurate alignment, then you’ll easily remove these practice stitches afterward.
What is a basting stitch sewing machine?
A basting stitch sewing machine isn’t a specific machine type.
You’ll use your regular sewing machine’s longest stitch setting (4-5) without backstitching to create temporary basting stitches for holding fabric layers together.
What is basting in sewing terms?
Nearly 90% of professional seamstresses rely on temporary stitches daily.
Basting creates temporary hold between fabric layers before final sewing.
You’ll use long, loose stitches that prevent shifting during construction.
It’s removable guidance ensuring accurate seams and professional results.
What is the difference between stitch and baste?
Regular stitches are permanent and secure fabric pieces together for the finished garment. Basting creates temporary, loose stitches you’ll remove after completing the final seam, serving as a practice run.
Can basting stitches be left in permanently?
Picture delicate fabric fibers held captive by temporary threads – you shouldn’t leave basting stitches permanently.
They’re designed for easy removal and can weaken over time, creating unsightly bumps or puckering in your finished garment.
What thread colors work best for basting?
Choose contrasting thread colors that stand out against your fabric for easy removal.
Bright colors like red, yellow, or blue work well on neutral fabrics.
White thread shows clearly on dark materials, and choosing contrasting thread colors is key to easy removal.
Conclusion
Like a trusty anchor keeps a ship steady in rough waters, basting keeps your fabric pieces secure during sewing.
Now you understand what’s basting in sewing and why it matters.
You can choose hand basting for precision work or machine basting for speed. Pin basting works great for quick projects.
Spray basting helps with quilts and delicate fabrics. Pick the method that fits your project needs and skill level.
- https://www.doinaalexei.com/beginnersewingtutorialblog/sewing-basics-what-is-basting-how-and-when-to-use-it
- https://mypacklove.com/blog/label/basting-stitch-improve-apparel-quality-and-fit/
- https://www.pixiefaire.com/blogs/sewing-tips-resources/the-top-36-surprising-reasons-to-use-a-basting-stitch
- https://coppercreekpatterns.com/blogs/sewing-tools/what-is-a-basting-stitch-and-how-to-sew-one
- https://thedailysew.com/blog/2018/04/sewing-by-hand-even-basting-uneven-basting-tailor-basting/

