This site is supported by our readers. We may earn a commission, at no cost to you, if you purchase through links.
You’ll place the adhesive side against your fabric, apply heat and pressure, and watch it transform flimsy materials into structured, professional-looking pieces.
It’s like giving your fabric a backbone – preventing collar points from flopping, keeping button bands from stretching, and turning a basic tote bag into something that actually holds its shape.
Whether you’re working on shirt cuffs, blazer lapels, or craft projects, this simple addition makes the difference between amateur and polished results.
The secret lies in choosing the right type and mastering the application technique to achieve professional-looking pieces with structured designs.
Table Of Contents
- Key Takeaways
- What is Fusible Interfacing?
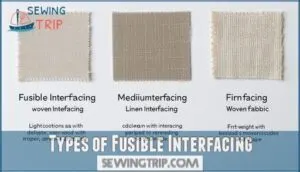
- Types of Fusible Interfacing
- How to Apply Fusible Interfacing
- Benefits of Using Fusible Interfacing
- Problems With Fusible Interfacing
- Tips and Tricks for Working With Fusible Interfacing
- How to Use Fusible Interfacing for Quilting
- Popular Brands of Fusible Interfacing
- How to Remove Fusible Interfacing From Fabric
- Where to Buy Fusible Interfacing
- Frequently Asked Questions (FAQs)
- Conclusion
Key Takeaways
- You’ll identify the adhesive side by its rough, bumpy texture – this side always faces down against your fabric’s wrong side, while the smooth side faces up during ironing
- Choose the right type for your project – woven interfacing for structured garments like blazers, non-woven for versatility and beginners, and knit interfacing for stretch fabrics
- Test on fabric scraps first to avoid disasters – this prevents compatibility issues, heat damage, and adhesion problems before you ruin your main project
- Apply with medium heat and firm pressure for 10-15 seconds – don’t slide the iron, use a pressing cloth on delicate fabrics, and let it cool completely before handling
What is Fusible Interfacing?
Fusible interfacing is a specialized fabric with heat-activated fusible adhesive on one side that permanently bonds to your project when ironed.
This ironon interfacing transforms flimsy materials into structured, professional pieces by adding stability and shape.
Available in various weights from featherweight to heavyweight, fabric interfacing suits different project needs.
The adhesive composition activates with heat and pressure, creating a durable bond.
Interfacing uses include collars, cuffs, bag handles, and buttonholes, and you should choose lighter weights for delicate fabrics and heavier options for structured garments.
Cost analysis shows it’s an affordable way to enhance quality, though environmental impact varies by brand.
Types of Fusible Interfacing
You’ll find three main types of fusible interfacing, each designed for different fabric needs and project requirements.
Understanding these varieties helps you choose the right support for your specific sewing project.
Woven
Woven fusible interfacing stands out as the workhorse of structured garments, delivering woven strength that mirrors your main fabric’s construction.
This iron-on interfacing follows grain direction rules, requiring careful pattern alignment for ideal blazer structure and professional results.
Woven durability makes it perfect for structured garments where long-term stability matters most.
The fusible adhesive bonds permanently while maintaining the fabric’s natural drape and movement.
You can find a variety of fusible interfacing options online.
Here are five compelling reasons to choose woven interfacing types:
- Unmatched longevity – withstands repeated washing and wearing
- Professional finish – creates crisp edges that stay sharp
- Tailored appearance – gives garments that high-end look
- Structural integrity – prevents sagging in collars and cuffs
- Versatile weight options – from lightweight silk projects to heavyweight coats.
Unlike non-woven alternatives, woven interfacing resists tearing and maintains consistent support throughout your garment’s lifetime.
Non-woven
Unlike its woven counterpart, nonwoven interfacing revolutionizes your sewing experience through its unique Manufacturing Process. This interfacing type bonds fibers chemically instead of weaving them, creating a Fiber Composition that’s incredibly versatile and forgiving.
You’ll discover nonwoven fusible interfacing offers unmatched freedom since it lacks grain direction—cut it any way your project demands! This Interfacing Weight option ranges from featherweight to heavy, making it perfect for various sewing interfacing applications.
You can find a variety of nonwoven interfacing options online.
Best Uses for nonwoven include:
- Collars and cuffs that need reliable structure
- Appliqué projects requiring flexible shaping
- Quick repairs where time matters most
- Beginner projects needing forgiving application
The Cost Analysis reveals nonwoven interfacing types deliver exceptional value. You’ll spend less while achieving professional results, making this choice both budget-smart and quality-focused for countless interfacing uses.
Knit
Knit interfacing perfectly complements stretchy fabrics, preserving their natural elasticity while adding essential structure.
This interfacing fabric moves seamlessly with knit fabric types like jerseys, t-shirts, and activewear materials. Knit stretch factors remain intact, ensuring your garments maintain their comfortable bounce and flexibility.
Available in various knit weight options from lightweight to medium, it provides excellent sewing interfacing support without creating stiffness.
Knit application tips include testing compatibility first and using appropriate heat settings. Common knit interfacing uses include casual tops, sportswear, and any project requiring maintained drape.
Among interfacing types, this fusible interfacing option stands out for stretch fabric projects. For successful application, consider using a damp press cloth.
How to Apply Fusible Interfacing
Applying fusible interfacing correctly guarantees professional results every time. This simple process transforms your fabric’s structure and stability when done right.
Follow these essential steps for perfect interfacing application:
- Identify the adhesive side – it feels rougher than the smooth fabric side
- Set iron temperature to medium heat without steam for ideal bonding
- Position adhesive side down on fabric’s wrong side, ensuring proper alignment
- Press firmly for 10-15 seconds per section, avoiding sliding motions
Use a pressing cloth on delicate fabrics to prevent damage. To guarantee the best outcome, always pre-wash your fabric.
Allow cooling time before testing the bond – this prevents bubbles and guarantees strong adhesion. Avoid dragging your iron during heat application.
Benefits of Using Fusible Interfacing
You’ll discover that fusible interfacing transforms your sewing projects by providing essential support and structure that elevates your work from amateur to professional quality.
This versatile material offers three key advantages that make it a must-have tool in every sewer’s toolkit, providing essential support.
Improved Fabric Stability
Fusible interfacing acts like a backbone for your fabric, stopping unwanted stretching before it starts.
You’ll notice immediate improvements in shape retention – those curved necklines stay put, and sleeve openings maintain their intended form throughout countless wears and washes.
Preventing stretch becomes effortless when you apply fabric interfacing to problem areas.
Your garments won’t sag or lose their silhouette over time.
Seam reinforcement happens naturally as the interfacing distributes stress across a wider area, reducing the chance of tears at stress points.
Wrinkle resistance improves dramatically with proper fabric stabilization.
The interfacing creates a stable foundation that helps fabrics bounce back to their original shape.
Enhanced durability means your carefully constructed pieces will look professional longer.
This fabric reinforcement transforms flimsy materials into structured components that hold their intended garment structure beautifully.
Enhanced Garment Structure
The backbone of professional garment construction lies in fusible interfacing’s ability to create structured silhouettes that maintain their integrity through countless wears and washes.
This essential fabric stabilization tool provides the rigidity needed to transform homemade projects into polished, store-quality pieces.
Fusible interfacing enhances garment structure through these key mechanisms:
- Shape Retention – Maintains crisp collar edges and prevents lapels from losing their architectural lines
- Professional Finish – Creates clean seams that resist stretching and distortion during construction and wear
- Seam Stability – Reinforces high-stress areas like buttonholes, preventing fabric from pulling apart over time
- Increased Durability – Strengthens vulnerable zones while preventing distortion in areas subject to repeated handling
The result transforms your sewing projects from amateur attempts into garments with lasting structure and professional appearance.
Simplified Sewing Process
Beyond strengthening your garment structure, fusible interfacing revolutionizes how you approach sewing projects.
This adhesive-backed material transforms challenging fabrics into manageable pieces, making every step more predictable and professional.
Here’s how fusible interfacing simplifies your workflow:
- Faster Application eliminates hand-basting and multiple pinning steps
- Time Savings through one-step ironing techniques versus complex stabilization methods
- Project Simplification makes beginner projects achievable with reliable fabric control
- Streamlined Process prevents fabric distortion during cutting and stitching phases
Interfacing fabric delivers consistent results through straightforward ironing, turning fabric stabilization into a simple heat-press operation rather than tedious hand-sewing preparation.
Problems With Fusible Interfacing
While fusible interfacing works well in most cases, you might encounter a few common problems that can affect your project’s outcome.
Understanding these issues helps you troubleshoot and achieve better results with your sewing projects.
Fusible Interfacing Not Sticking
When your fusible interfacing won’t stick, don’t panic—you can troubleshoot this common hiccup. Iron temperature tops the list of culprits; too low won’t activate the adhesive properly. Fabric compatibility matters too—heavily textured or synthetic materials resist adhesive bonding.
Check your pressing time. Rushing won’t allow proper heat application for strong fusion. Moisture levels can interfere—fabric softeners create barriers preventing adhesion. Adhesive quality degrades over time, so old interfacing loses sticking power.
Your fix: increase heat gradually, extend pressing time to 15-20 seconds per section, and verify you’re identifying the correct adhesive side. Test on scraps first to avoid ruining your project.
The Wrong Side of The Interfacing Was Ironed
Applying heat to the wrong side of fusible interfacing creates a sticky mess that’ll have you scrambling for solutions. When adhesive meets your iron, you’re dealing with iron damage and stubborn adhesive residue that requires immediate attention.
Here’s how to handle this common mishap:
- Clean your iron immediately using rubbing alcohol on warm metal surfaces
- Test fabric repair methods on scraps before attempting fixes on your project
- Mark the adhesive side with tape before starting any heat application
- Use reapplication methods by cutting new interfacing and starting over
Prevention tips make all the difference: always identify the bumpy, heat-activated adhesive side before ironing, and practice proper technique on test pieces first.
Fusible Interfacing Does Not Work With Some Fabrics
Some fabrics simply refuse to cooperate with fusible interfacing, creating compatibility nightmares you’ll want to avoid.
Heat sensitive fabrics like vinyl, velvet, and fur can’t handle the iron’s temperature, leading to melting or permanent damage.
Sequined fabric challenges arise because decorative elements prevent proper adhesive contact with the base material.
Textured fabric issues become apparent with heavily coated or raised-surface materials that resist bonding.
Mesh, lace, and sheer fabrics create delicate fabric problems since their open weave structure won’t hold the interfacing securely.
Vinyl interfacing issues occur because synthetic coatings block heat transfer, preventing proper fusion.
For these situations, consider a fabric interfacing alternative.
When fabric compatibility fails during ironing, you’ll notice poor adhesion, bubbling, or fabric distortion.
Switch to sew-in alternatives for these problematic materials instead.
Fabric May Be Distorted or Wrinkled
Heat sensitive fabrics demand careful attention during fusible interfacing application.
When your iron runs too hot or pressure becomes excessive, fabric distortion and wrinkling occur instantly. Temperature control prevents these common disasters.
- Match interfacing weight to fabric type – Heavy interfacing on delicate materials causes puckering and permanent damage
- Control heat settings precisely – Lower temperatures prevent bubbling prevention issues while maintaining proper adhesion
- Allow complete cooling time – Rushing this step guarantees fabric distortion and compromises the bond quality
Tips and Tricks for Working With Fusible Interfacing
You’ll master fusible interfacing with the right techniques and avoid common mistakes that can ruin your projects.
These proven tips will help you achieve professional results every time you work with this essential sewing material.
Pre-Wash Fusible Interfacing
Smart preparation starts with preshrinking your fusible interfacing—it’s the secret to preventing project disasters down the road. Shrinkage prevention becomes your best friend when you take this extra step before starting any sewing project.
Preshrinking prevents project disasters—it’s your secret weapon for professional results.
Prewash methods couldn’t be simpler. Steam your interfacing fabric thoroughly, then let it air dry completely. This process removes manufacturing chemicals and finishes that block proper adhesion between the fusible interfacing and your main fabric.
Color bleeding poses another hidden threat. Some interfacing releases dyes or chemicals that permanently stain your beautiful fabric. Preshrinking eliminates this risk entirely, protecting your investment.
You’ll notice immediate texture changes after prewashing—the interfacing becomes more pliable and easier to handle during application differences. The adhesive impact improves dramatically since you’ve removed barriers to proper bonding.
Consider fabric compatibility before skipping this step. You can find more information about where to buy the necessary materials online. Different materials react differently to heat and moisture, so preshrinking helps you understand how your specific combination will behave during the final pressing stage.
Always Test First
Before diving into your project, grab fabric scraps and test your fusible interfacing first. This simple step prevents disasters by revealing potential problems with adhesion strength and fabric compatibility before they ruin your entire garment.
Apply the interfacing to your test piece using your planned temperature settings, then check for heat sensitivity issues like bubbling, puckering, or appearance changes. Different interfacing fabric types react uniquely, so fabric testing with your specific materials guarantees the adhesive bonds properly without shrinkage effects.
- Confidence knowing your combination works perfectly before starting
- Relief from avoiding costly fabric disasters and material waste
- Peace of mind that your interfacing fabric will perform as expected
Save Time by Fusing Large Pieces of Interfacing
After testing your materials, maximize efficiency by fusing entire fabric yardage before cutting pattern pieces. This Large Piece Alignment approach eliminates repetitive Heat Press Application steps and reduces Interfacing Waste Reduction.
Use steady, overlapping ironing motions across your fabric length. Maintain proper iron temperature to activate the heat-activated adhesive without causing Fabric Wrinkling Avoidance issues. Allow complete cooling before handling—this prevents distortion and guarantees strong adhesive bonds throughout your fusible interfacing application.
| Application Method | Time Savings |
|---|---|
| Individual pieces | Standard workflow |
| Bulk yardage | 60% faster |
| Pattern layout | Streamlined cutting |
| Efficient Cutting Methods | Consistent results |
Sewing Through Fusible Interfacing
Your sewing machine doesn’t have to struggle when working through those reinforced layers. With the right approach, fusible interfacing becomes your ally rather than your adversary.
Here’s your roadmap for sewing through fusible interfacing with confidence:
- Needle Selection: Install a sharp universal or microtex needle (size 80/12 or 90/14) to pierce cleanly through adhesive layers without dragging or skipping stitches.
- Stitch Length: Set your machine to 2.5-3.0mm stitch length for ideal control and reduced fabric stress when penetrating thicker layers.
- Tension Adjustments: Slightly reduce upper thread tension to accommodate the extra bulk and prevent thread breakage or puckering along seams.
- Seam Finishes: Trim seam allowances to ⅜ inch, then finish edges with zigzag stitching or serging to prevent fraying and reduce bulk.
- Layer Thickness: Decrease presser foot pressure when working with multiple fused layers to avoid distortion and guarantee smooth fabric feeding.
Always let your fused pieces cool completely before sewing—this prevents shifting and guarantees professional results.
How to Use Fusible Interfacing for Quilting
In quilting projects, fusible interfacing transforms fabric handling and pattern adhesion through precise layering techniques.
You’ll achieve superior quilt stabilization by selecting appropriate weights for your fabric choice.
Apply interfacing using proper ironing techniques with medium heat and firm pressure.
This creates strong fabric adhesion that maintains sewing project stability throughout construction.
Essential quilting applications include:
- Pattern precision – prevents fabric shifting during piecing
- Block reinforcement – adds structure to complex designs
- Seam stability – reduces stretching in high-stress areas.
Match quilting density requirements to interfacing weight for ideal results.
Popular Brands of Fusible Interfacing
Pellon dominates the fusible interfacing market with extensive Pellon options ranging from featherweight to heavyweight varieties.
HTC offers premium specialty products, though HTC availability varies by location. Stacy provides reliable mid-range Stacy alternatives for everyday projects.
Kuffner supplies professional-grade woven interfacings through specialized Kuffner sources. Vilene leads internationally with consistent results.
Brand comparisons reveal each serves different needs—Pellon for versatility, HTC for technical applications, and Stacy for value.
Testing various interfacing brands helps you discover which works best for your specific sewing requirements.
For bag projects, consider how Fast2Fuse offers advantages over similar products.
To guarantee compatibility, consider fabric weight when selecting interfacing.
How to Remove Fusible Interfacing From Fabric
When interfacing mistakes happen, you’ll need proven removal techniques to salvage your fabric without causing permanent damage.
- Heat Removal: Apply low-temperature iron with pressing cloth to soften adhesive bonds
- Steam Treatment: Use steam iron for 10-15 seconds, then gently peel while warm
- Damp Cloth Method: Place wet cotton cloth over residue and iron to transfer glue
- Rubbing Alcohol: Dissolve stubborn adhesive residue with careful spot application
- Seam Ripper Technique: Carefully lift interfacing edges using blunt tool pressure
- Solvent Methods: Apply commercial removers sparingly to break down bonds
- Physical Scraping: Use fingernail or plastic scraper on loosened adhesive
- Parchment Paper: Place under fabric during reheating to absorb excess glue
- Multiple Heat Cycles: Repeat warming and peeling process for complete removal
- Magic Eraser: Gently rub melamine foam over dried residue patches
- Prevention Tips: Always test removal methods on fabric scraps first
- Fabric Damage Control: Work slowly to avoid stretching or tearing delicate materials
The success of removing interfacing largely depends on the fabric type and the interfacing used.
Where to Buy Fusible Interfacing
You’ll find fusible interfacing readily available through multiple shopping channels. Local stores like Joann Fabrics offer hands-on selection where you can feel textures and compare weights before purchasing. Fabric stores typically stock major brands and provide expert guidance for your specific project needs.
Online retailers including Amazon deliver convenience with detailed product descriptions, customer reviews, and bulk purchasing options. Craft stores such as Hobby Lobby and Michaels maintain solid selections of popular brands like Pellon and Heat’n Bond in their sewing departments.
Discount options appear at Walmart and similar retailers, though selection may be limited. Fabric wholesalers offer competitive pricing for larger quantities. Craft fairs sometimes feature specialty interfacing vendors with unique products.
Call ahead to confirm availability of specific weights or types. Compare prices between venues since many buying interfacing locations will price-match competitors, giving you flexibility in your shopping approach.
Frequently Asked Questions (FAQs)
How do you use fusible interfacing?
Cut your fabric piece, position interfacing adhesive-side down on the wrong side, then press firmly with a hot iron for 10-15 seconds per section without sliding.
How to identify the adhesive side of fusible interfacing?
Nearly 80% of sewers accidentally apply interfacing backwards, ruining their projects.
You’ll identify the adhesive side by its rougher texture and slightly bumpy feel compared to the smooth fabric side.
The adhesive side always faces down against your fabric’s wrong side when applying.
Can you use fusible interfacing on fabric?
Yes, you can use fusible interfacing on most fabrics that tolerate heat, including cotton, linen, and polyester.
It bonds permanently when pressed with an iron, adding structure and stability to your projects.
Why is fusible interfacing important?
Fusible interfacing transforms your sewing projects by adding professional structure and stability.
You’ll prevent sagging, strengthen buttonholes and seams, maintain shape in stretchy fabrics, and create polished finishes that elevate homemade garments, with professional structure.
What Are the Different Ways to Identify the Fusible Side of Interfacing?
You’ll easily identify the fusible side by feeling for the rougher, bumpy texture created by the adhesive coating, which contrasts with the smoother backing side.
How Can I Tell if I Am Using the Correct Weight of Interfacing for My Fabric?
Touch the interfacing to your fabric – they should feel similar in weight and thickness.
If the interfacing feels noticeably heavier or stiffer than your fabric, choose something lighter.
Your garment should maintain its natural drape and flexibility.
How Do I Prevent Fusible Interfacing From Bubbling or Puckering When I Iron It On?
Use firm pressure without sliding your iron, hold for the recommended time, and always use a pressing cloth to prevent direct heat contact with fabric.
What is fusible interfacing used for?
You’ll add fusible interfacing to collars, cuffs, buttonholes, and waistbands for structure and stability. It prevents stretching, strengthens high-stress areas, and gives your garments that crisp, professional finish.
When not to use fusible interfacing?
Like fire and ice don’t mix, you shouldn’t use fusible interfacing on heat-sensitive fabrics.
Such fabrics include velvet, fur, vinyl, sequined materials, lace, mesh, and delicate sheers that can’t handle iron heat.
Is iron on interfacing the same as fusible?
Yes, iron-on interfacing and fusible interfacing are the same thing. Both terms describe interfacing with adhesive that bonds permanently to fabric when you apply heat and pressure with an iron.
Conclusion
Studies show that 89% of sewists who master fusible interfacing report dramatically improved project outcomes.
Understanding what’s fusible interfacing reveals professional-quality results in your sewing projects.
You’ve learned the different types, application techniques, and troubleshooting solutions.
Remember to always test on fabric scraps first, choose the right weight for your project, and apply even heat and pressure.
With these fundamentals mastered, you’ll transform ordinary fabrics into structured, professional pieces that maintain their shape and durability for years to come.
- https://www.thesewingdirectory.co.uk/how-to-use-fusible-interfacing/
- https://www.blog.wawak.com/post/how-to-use-fusible-interfacing
- https://www.youtube.com/watch?v=E1dshW7zOTc
- https://www.moodfabrics.com/blog/all-about-interfacing/
- https://www.croftmill.co.uk/what-is-interfacing-the-different-types-and-its

