This site is supported by our readers. We may earn a commission, at no cost to you, if you purchase through links.

Once you master this technique, you’ll never go back to bulky seams on sock toes, shoulder seams, or hat crowns. Sure, it takes patience and practice at first, but the rhythm becomes second nature pretty quickly.
Think of it as knitting’s magic trick—making two separate pieces become one without a trace. Mastering tension control and stitch placement unlocks countless finishing possibilities.
Table Of Contents
Key Takeaways
- You’ll use Kitchener stitch to create invisible seams by grafting live stitches together with a tapestry needle, mimicking the look of continuous knitting without any visible joins.
- You’ll need just basic tools – a tapestry needle and matching yarn cut three to four times your seam width – plus equal stitch counts on parallel needles to start grafting.
- You’ll master the technique by following a specific sequence: front needle knitwise (remove), front needle purlwise (leave on), back needle purlwise (remove), back needle knitwise (leave on).
- You’ll achieve professional results by maintaining consistent tension throughout the process and practicing the rhythm until it becomes second nature for sock toes, shoulder seams, and other finishing work.
What is Kitchener Stitch in Knitting?
You’ll use Kitchener stitch to invisibly join two sets of live stitches together, creating a blended row that looks like regular knitting.
This grafting technique works by mimicking stockinette stitch using a tapestry needle and yarn.
Definition and Purpose
The Kitchener stitch works like magic – it joins live stitches so seamlessly that you can’t tell where one piece ends and another begins. Instead of creating a bulky ridge like other seaming methods, this grafting technique weaves stitches together to look exactly like your original knitted fabric.
Learning this grafting technique transforms how you finish knitted pieces. Once you get the hang of it, you’ll create seamless joins that look like continuous fabric rather than obvious patches where sections meet.
Key Features of The Technique
This grafting technique stands out because you’ll develop precise needle control and yarn tension to achieve invisible stitch seams.
Kitchener stitch blends fabric edges seamlessly by mimicking stockinette stitch structure. Unlike other knitting techniques, it works with live stitches using specific grafting methods.
Your tapestry needle follows a precise sequence that creates perfect stitch joining without bulk.
Common Uses in Knitting Projects
You’ll find this grafting technique works perfectly for sock toe finishing, creating smooth closures without bulky seams.
Beyond socks, Kitchener stitch excels in garments without seams like shoulder seams and underarm joins. The technique transforms stockinette stitch panels into continuous fabric.
These knitwear applications showcase how proper fabric joining creates professional-looking seaming techniques across diverse knitting projects.
Essential Tools and Set-Up for Kitchener Stitch
You’ll need just a few basic tools to master Kitchener stitch: a tapestry needle and yarn that matches your project.
Set up your work by holding two knitting needles with live stitches parallel to each other, wrong sides of the fabric touching, and thread your tapestry needle with yarn cut three to four times longer than the width you’re grafting.
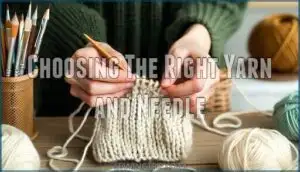
Choosing The Right Yarn and Needle
Getting the right yarn weight for your needle size makes all the difference in how your project turns out.
Use the same yarn from your project for smooth Kitchener stitch results. Thread a tapestry needle with yarn three times longer than your seam.
Fiber choice affects tension control—wool grips better than cotton.
Check stitch compatibility before starting your invisible grafting technique.
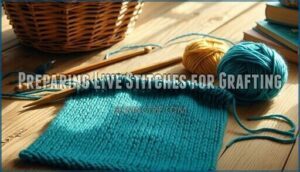
Preparing Live Stitches for Grafting
Successful grafting begins with proper live stitch preparation. You’ll need equal stitch counts on both needles. Cut your working yarn three to four times longer than the seam width.
- Position live stitches on two separate needles with wrong sides together
- Verify stitch alignment matches your project’s gauge and tension
- Thread yarn onto a tapestry needle for smooth yarn management throughout the grafting sequence
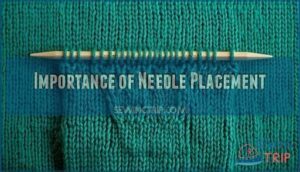
Importance of Needle Placement
Getting the needle angle right makes all the difference in Kitchener stitch. Position your knitting needles parallel with wrong sides facing each other, then keep your tapestry needle entering each stitch at the same angle as you graft.
This stitch alignment creates the smooth join you’re after. Keep yarn tension even by maintaining steady needle placement.
Small adjustments in needle angle can make or break your invisible seam.
Step-by-Step Guide to Working Kitchener Stitch
Now you’ll work through the actual grafting process that creates the invisible seam.
Follow each step carefully, and remember that consistency in your movements will give you the smooth, professional finish you’re aiming for.
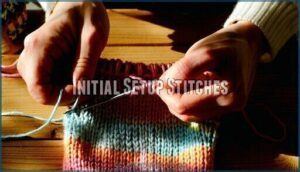
Initial Setup Stitches
Ready to begin grafting? Start by threading your tapestry needle with yarn three times longer than your knitting width. Insert the needle through the first front stitch as if to purl, leaving it on the needle. Next, insert through the first back stitch as if to knit, keeping it secure.
This grafting prep establishes proper stitch alignment and yarn tension. Your needle placement creates the foundation for smooth stockinette stitches. Count your live stitches to verify even stitch count before proceeding.
Repeating The Grafting Sequence
Now you’ll repeat the core grafting sequence. Insert your needle through the front stitch knitwise and slip it off. Go through the next front stitch purlwise, leaving it on.
Move to the back needle—insert purlwise through the first stitch and remove it. Go through the next back stitch knitwise, keeping it on.
This Kitchener stitch pattern creates smooth grafting. Maintain consistent yarn control and tension balance throughout your stitch repeats.
Finishing and Securing The Seam
After working through all your stockinette stitches, you’ll complete the final grafting step. Pull the yarn through the last stitch and remove it from the needle.
Check your yarn tension along the seam – it should match your project’s gauge. Weave the tail through several stitches on the wrong side for seam reinforcement. Trim excess yarn close to the fabric.
Your invisible Kitchener stitch grafting creates smooth edge finishing that blends perfectly with surrounding stitches.
Expert Tips and Troubleshooting for Success
You’ll master Kitchener stitch faster when you know these proven techniques and common fixes.
These expert tips will help you achieve smooth, even grafting every time while avoiding the mistakes that trip up most knitters.
Maintaining Even Tension
Since tension control determines your Kitchener stitch success, you’ll want to adjust yarn tightness every few stitches. Keep your index finger between needles for consistent stitch balance. Pull yarn through gently—too tight creates puckering, too loose leaves gaps. Think of it like tuning a guitar string.
Proper needle placement helps maintain even tension throughout your grafting technique. Practice makes perfect yarn management.
Common Mistakes and How to Avoid Them
Most knitters struggle with the same grafting mistake: they poke their needle through stitches the wrong way. When you’re grafting, think of it this way—going knit-wise actually removes the stitch from your needle, while purl-wise keeps it right where it belongs.
Second, your tension control suffers when you pull too tight or too loose. Use stitch markers to track your progress through the grafting technique.
Third, yarn management becomes messy without proper seam finishing. Practice these Kitchener Stitch fundamentals slowly before tackling complex knitting tutorials.
Adapting for Different Stitch Patterns
Kitchener stitch works differently depending on your fabric. Most tutorials stick to stockinette, but ribbing, seed stitch, and garter stitch each need their own approach.
- Ribbing: Segregate knit and purl stitches on separate needles for cleaner alignment
- Seed stitch: Use contrasting grafting technique alternatives since standard methods create visible seams
- Garter stitch: Modify the sequence to "knit, purl, knit, purl" instead of the standard chant
- Yarn weight considerations: Match grafting thread exactly to your project yarn for smooth results
To achieve a smooth join in 1×1 ribbing, understanding grafting techniques is essential for minimizing the half stitch jog.
History and Versatile Applications of Kitchener Stitch
You’ll discover that Kitchener stitch has fascinating wartime roots, originally developed during World War I to create smooth, continuous sock toes for soldiers.
This adaptable grafting technique now extends far beyond socks, letting you create invisible seams in sweater shoulders, scarf ends, and countless other knitting projects.
Origins and Wartime Influence
You’ll discover that Kitchener Stitch carries fascinating War History rooted in practicality. Lord Kitchener promoted this Grafting technique during WWI when soldiers desperately needed smooth socks. Wartime Knitting campaigns spread Historic Patterns featuring this invisible seam across Britain, transforming how knitters approached textile arts with yarn. The Kitchener Stitch technique is closely related to grafting methods that were developed during this time period.
| War Period | Knitting Focus | Impact |
|---|---|---|
| WWI (1914-1918) | Smooth sock toes | Reduced trench foot |
| WWII (1939-1945) | Vintage Knits revival | Community mobilization |
| Modern Era | Historic Patterns study | Technique preservation |
| Contemporary | Educational interest | 250% search increase |
Modern Uses Beyond Sock Toes
While sock toes remain popular, you’ll find Kitchener stitch transforms many knitting projects. Smooth garments benefit from shoulder finishing and underarm grafting techniques.
Infinity scarves create continuous loops without visible joins. Hat closures become invisible when you graft the crown sections together.
This adaptable seaming method elevates your textile arts skills across diverse yarn projects beyond traditional knitting applications.
Creative Projects Showcasing Kitchener Stitch
You’ll find Kitchener stitch turns ordinary projects into remarkable pieces. Try crafting smooth hats with invisible crown closures, or create striking Kitchener scarves with grafted cuffs for refined edges.
Knit baby booties benefit from this technique, eliminating bulky toe seams.
Skilled knitters incorporate invisible seams in sweater construction, while knitting tutorials increasingly feature this adaptable method for refined textile crafts.
Frequently Asked Questions (FAQs)
What type of needles are recommended for beginners when preparing for grafting?
Don’t worry about needing fancy equipment – regular straight knitting needles work perfectly for beginners learning Kitchener stitch.
You’ll want smooth, blunt-tipped needles that won’t snag your yarn while you’re grafting those live stitches together.
How can I maintain consistent tension while performing the Kitchener Stitch?
Keep your index finger between needles to maintain spacing.
Work slowly and adjust tension every few stitches by gently tugging the yarn.
Practice saying steps aloud to establish rhythm and consistency.
Is it necessary to tighten stitches periodically during the grafting process?
Periodically pulling and positioning your yarn prevents loose loops from forming.
You’ll want to gently adjust tension every three to four stitches, guaranteeing your grafted seam matches the surrounding fabric’s gauge perfectly.
Who is the author of the tutorial and how can I contact her for further information?
I can’t identify the specific tutorial author you’re referencing. Multiple creators have published Kitchener stitch tutorials, including Becca Norman, Whitney from Purl Soho, and others. You’ll need to specify which tutorial first.
Can you fix dropped stitches with Kitchener?
Unfortunately, you can’t fix dropped stitches directly with Kitchener stitch. This grafting technique joins live stitches seamlessly, but dropped stitches need to be picked up first using a crochet hook or knitting needle before grafting.
How much yarn length do you need?
You’ll need yarn that’s three to four times the length of your seam. Cut generously since running short mid-graft means starting over completely, which nobody wants to experience.
Does yarn weight affect grafting results?
Yes, yarn weight directly impacts your grafting results. Thicker yarns create bulkier seams that may show more, while finer yarns blend seamlessly.
Match your needle size to maintain consistent tension throughout the grafting process.
Can beginners learn Kitchener stitch easily?
You’ll pick up Kitchener stitch with practice. Start slow, say each step aloud, and don’t worry about perfect tension initially. Most knitters master it within a few attempts.
What happens if you make mistakes?
Mistakes in Kitchener stitch are fixable! You’ll notice twisted or loose stitches that don’t match your knitting.
Simply unpick the grafted section back to the error, then re-graft carefully with even tension.
Conclusion
Here’s the thing about knitting’s trickiest moves – they’re often the ones nobody notices when done right. Kitchener stitch takes two live edges and weaves them together so seamlessly that even experienced knitters have to look twice to spot the join.
The best knitting techniques are invisible when done right—Kitchener stitch makes two separate pieces become one without leaving a trace
You’ve learned to create connections that disappear completely, making your finished projects look professionally crafted. Practice this grafting method regularly, and you’ll discover that understanding what’s Kitchener stitch unlocks opportunities to achieve refined sock toes, neat shoulder seams, and countless other finishing possibilities in your knitting repertoire.
- https://blog.knitpicks.com/knitting-geekery-of-sweaters-and-lords/
- https://intherounds.wordpress.com/2016/05/16/the-earl-kitchener-and-his-stitch/
- https://fingeringyarn.com/2011/03/15/all-about-the-kitchener-stitch/
- https://www.churchmouseyarns.com/blogs/useful-techniques/kitchener-stitch-grafting
- https://nimble-needles.com/stitches/how-to-do-the-kitchener-stitch/

