This site is supported by our readers. We may earn a commission, at no cost to you, if you purchase through links.
You’ll create a raised, rope-like edge that adds professional polish to clothing, pillows, and upholstery. The technique prevents seams from stretching while giving your projects that custom, high-end look.
You can use matching fabric for subtle elegance or contrasting colors for bold definition. It’s like adding jewelry to your sewing – the small detail that makes everything look intentional and finished.
Once you master the basics of cutting bias strips and using the right presser foot, you’ll discover countless creative possibilities.
Table Of Contents
Key Takeaways
- You’ll create professional-looking edges by wrapping fabric around cord and sewing it between seam layers – this technique transforms ordinary projects into custom, high-end pieces that look store-bought rather than homemade.
- You can choose between self-fabric piping for subtle elegance or contrasting colors for bold definition, giving you complete control over your project’s visual impact and allowing endless creative possibilities.
- You’ll need to cut bias strips (usually 2.25 inches wide) and use a piping or zipper foot for best results – the bias cut allows smooth curves without puckering while proper foot attachments ensure precise stitching.
- You’ll get both decorative appeal and functional benefits since piping reinforces high-stress seams, prevents stretching, and adds durability to clothing, pillows, and upholstery projects.
Piping Sewing Basics
Before you start creating piping, you’ll need to understand its three essential components: the cord, the fabric strip, and how they work together.
Think of piping as a fabric sandwich with cord as the filling—once you grasp this basic structure, you’ll be ready to tackle any piping project with confidence.
Components of Piping
Understanding piping’s anatomy helps you create professional-looking sewing projects.
This trim consists of four essential components that work together seamlessly:
- Piping cord – cotton or polyester core providing structure
- Fabric strip – bias-cut material wrapping the cord
- Seam allowance – standard ½-inch edges for attachment
- Folded edge – creates the finished piping trim
Ready-made piping offers convenience, while custom fabric piping guarantees perfect color matching for your sewing projects.
Types of Piping Cords
Now that you know what makes up piping, let’s explore your cord options.
Cotton piping cord offers softness and flexibility, perfect for clothing and washable items. Polyester cord stays firmer with better shape retention, ideal for upholstery.
Decorative cords like twisted or braided varieties add texture when exposed.
For outdoor projects, consider using plastic piping options for moisture resistance.
Consider cord thickness for your project’s scale and pre-shrinking cords before use to prevent puckering later.
Fabric Strip Preparation
Before you cut your fabric strip, wash your fabric on a gentle cycle to prevent future puckering.
Cut bias strips 2.25 inches wide for most projects, ensuring they match your seam allowance perfectly.
Press the fabric strip carefully around the piping cord, creating clean edges.
When bias cutting fabric, align the diagonal grain for maximum flexibility around curves, and ensure to handle the fabric with care to achieve clean edges.
What is Piping
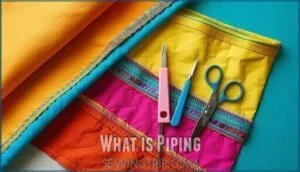
You’ll discover that piping is a fabric-wrapped cord trim that creates clean, defined edges on your sewing projects while adding both style and strength.
This decorative technique transforms ordinary seams into professional-looking finishes that make your work look like it came from a high-end boutique, utilizing style to elevate the overall appearance.
Definition and Purpose
Piping is a trim that wraps fabric around cord, then gets sewn into seams for decorative piping and edge reinforcement.
This sewing technique creates visual interest while adding design effects to your projects.
Throughout piping history, it’s indicated rank in religious garments and military uniforms.
Today, you’ll use fabric piping to define edges and strengthen high-wear areas in both clothing and home décor items.
It’s important to use specialized piping feet for flawless stitching to achieve professional results.
Visual Impact and Structural Benefit
Adding sewing piping instantly transforms your projects from homemade to professionally finished.
You’ll notice how it creates sharp edge definition and provides essential seam reinforcement that prevents fabric from stretching over time.
- Design accent that adds visual interest without overwhelming your project’s overall aesthetic
- Shape enhancement that helps curved seams maintain their intended form and structure
- Professional finish that elevates basic sewing techniques into polished, store-bought quality results
Self-Fabric Piping Vs Contrast Piping
You’ll choose between self-fabric piping and contrast piping based on your design goals.
Self-fabric piping creates subtle definition using matching fabric texture, perfect when you want elegant visual impact without bold statements.
Contrast piping offers design versatility through color coordination with different fabrics, making custom piping pop for dramatic project suitability across various sewing piping applications.
Piping Applications
You can transform almost any sewing project with piping, from sharp collars on blouses to elegant pillow covers that look professionally made.
This versatile trim works equally well on clothing accessories like bags and home decor items such as cushions and upholstery.
Clothing and Accessories
Clothing transforms when you add fabric piping to seams and edges. This technique creates sharp lines that make garments look professionally crafted while reinforcing high-stress areas.
Here are three popular piping placement options:
- Collar and cuff edges – Creates crisp definition around necklines and sleeves
- Pocket flaps and seams – Adds custom details to jackets and shirts
- Waistbands and hems – Provides clean finishing with color coordination possibilities
Historical significance shows piping indicated rank in military uniforms, proving its lasting impact on clothing design.
Home Decor and Upholstery
Home decor transforms when you add professional touches like cushion piping and upholstery welting.
Pillow cording creates crisp edges that elevate ordinary cushions into designer pieces. This seam reinforcement technique boosts fabric durability while adding sophisticated style to your living spaces.
The technique’s evolution showcases its decorative design element status over time.
| Item Type | Piping Benefits | Popular Cord Size |
|---|---|---|
| Cushions | Clean edges, reinforcement | 4mm braided |
| Pillows | Professional finish | 4mm cotton |
| Upholstery | Increased durability | 6mm soft filler |
The use of professional touches and decorative design element can greatly enhance the overall aesthetic of a room, making it look more polished and refined with the addition of cushion piping and upholstery welting.
Benefits of Added Durability and Style
Beyond aesthetic appeal, piping delivers serious seam reinforcement that prevents fabric stress at high-wear areas.
You’ll notice how professional finish transforms ordinary projects into polished pieces. This decorative accent strengthens edges while adding visual appeal through edge definition.
Your sewing gains both durability and style—it’s like having your cake and eating it too, creating items that look great and last longer, which is a result of the professional finish.
Making Custom Piping
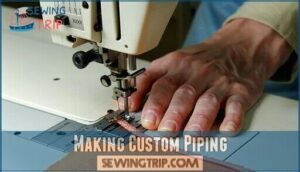
Making your own custom piping gives you complete control over color and fabric choice, ensuring a perfect match for your project.
You’ll need piping cord, bias-cut fabric strips, and basic sewing skills to create professional-looking trim that’s often better than store-bought options.
Materials Needed
To create professional-looking piping, you’ll need three essential piping materials: piping cord, fabric, and matching thread.
Choose from various piping cord sizes depending on your project—thinner cords work best for delicate garments, while thicker ones suit upholstery.
You can use bias tape for quick results or cut your own fabric bias options for perfect color matching.
Ready-made piping saves time, but specialty piping materials offer unique textures and finishes.
For best results, remember to use bias tape strips cut at a 45° angle to achieve a professional-looking finish.
Cutting and Folding Fabric Strips
Why stress over perfect strips when proper preparation makes all the difference? Bias cutting guarantees your fabric stretches smoothly around curves without puckering.
- Cut bias strips 2.5 inches wide for standard piping
- Pre-washing prevents shrinkage disasters later
- Accurate measuring saves fabric and frustration
Fold your strip in half lengthwise, wrong sides together, creating a clean crease for your piping tutorial success.
Attaching Piping to Fabric
Now you’ll place your prepared piping along the fabric edge, matching seam allowances perfectly.
Position the piping so its raw edges align with your fabric’s edge.
Use a piping foot or zipper foot to stitch close to the cord, maintaining consistent fabric tension.
A specialized foot simplifies sewing.
When tackling piping corners, clip the seam allowance at angles for smooth turns.
This piping insertion technique creates professional-looking piping seams every time.
Piping Sewing Techniques
Now you’re ready to tackle the actual sewing part, which is where your piping really comes to life.
Once you’ve got your piping prepared, the right foot attachment and some basic techniques will help you create those crisp, professional-looking seams that make all the difference.
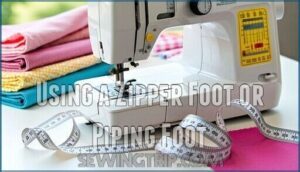
Using a Zipper Foot or Piping Foot
Your choice between these foot attachments shapes your piping game.
A zipper foot gets you close to the cord, while a piping foot’s grooves cradle it perfectly.
Both handle piping insertion well, but needle position adjustment matters most.
The piping foot delivers superior fabric feed and tension adjustment around curves.
For foot comparison, beginners often start with zipper feet before upgrading.
Many sewers find specialty piping tools indispensable.
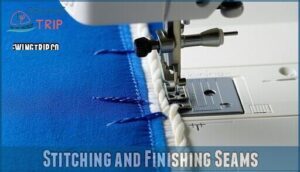
Stitching and Finishing Seams
Once you’ve got your piping foot in position, stitch slowly along the cord for precise seam reinforcement.
Keep your needle close to the cord without piercing it—this creates invisible stitching that maintains clean cord concealment.
After sewing, trim excess seam allowances to reduce bulk.
Press seams toward the main fabric for professional edge finishing that’ll make your piping pop beautifully.
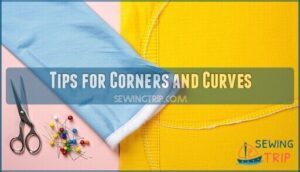
Tips for Corners and Curves
Manipulating corners and curved seams with piping requires finesse, but these tricks’ll help you nail it every time:
- Clipping seam allowance at curves prevents puckering and allows fabric to lie flat
- Mitering corners creates sharp, professional angles without excess bulk
- Accurate pivoting with needle down makes smooth directional changes
When working curved seams, ease the piping gently around bends.
Avoid bulk by trimming seam allowances strategically, and remember—practice makes perfect with these piping techniques!
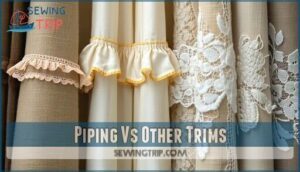
Piping Vs Other Trims
When you’re choosing trims for your sewing projects, you’ve got plenty of options beyond piping—but each one serves a different purpose.
Piping creates a clean, structured edge that’s perfect when you want definition without bulk, while ruffles add soft volume and lace brings delicate charm to your finished piece, with ruffles adding a unique texture.
Comparison With Ruffles and Lace
Unlike ruffles and lace that add volume and texture, piping creates clean, defined lines.
Ruffles construction requires gathering fabric, while lace application involves delicate stitching.
Piping offers superior durability differences and cost comparison advantages over these decorative accents.
For projects needing a softer touch, consider fabrics with graceful, romantic flow.
| Feature | Piping | Ruffles | Lace |
|---|---|---|---|
| Durability | Reinforces seams | Fragile edges | Delicate fibers |
| Cost | Budget-friendly | Moderate expense | Premium pricing |
| Design Impact | Crisp definition | Romantic volume | Elegant detail |
When to Use Piping Instead of Binding
While ruffles and lace add feminine charm, you’ll want piping when you need structure and durability.
Piping excels where binding falls short—it reinforces high-stress seams while creating visual impact.
Consider these factors when choosing between piping and binding for your project:
| Factor | Piping | Binding |
|---|---|---|
| Aesthetic Considerations | Creates raised, dimensional accent | Flat, clean edge finish |
| Durability Needs | Reinforces seams, handles wear | Basic edge protection only |
| Project Complexity | Hidden within seams, professional look | Visible stitching, simpler application |
Piping transforms ordinary upholstery into showpiece furniture, while binding simply tidies raw edges.
For decorative accents that’ll withstand daily use, piping wins every time.
Benefits of Piping Over Bias Tape
Piping offers several advantages over bias tape when you need that extra "wow factor" in your sewing projects.
While bias tape lies flat, piping creates a raised, dimensional edge that screams professional craftsmanship.
| Feature | Piping | Bias Tape |
|---|---|---|
| Visual Impact | Bold, raised edge with Enhanced Durability | Flat, subtle finish |
| Structural Integrity | Reinforces seams with decorative cord | Covers raw edges only |
| Design Versatility | Customization Options with any fabric | Limited to available colors |
Piping’s three-dimensional quality transforms ordinary seams into designer details.
You’ll get a Professional Finish that elevates everything from home decor pillows to garment collars, making your sewing look store-bought rather than homemade.
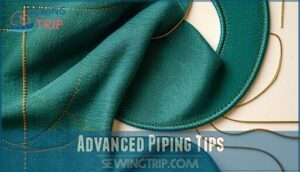
Advanced Piping Tips
Once you’ve mastered the basics of piping, it’s time to tackle the tricky stuff that separates amateur projects from professional-looking results.
These advanced techniques will help you handle curves without puckering, add stability where needed, and make creative choices that’ll have people asking where you learned to sew so well, utilizing professional-looking methods to achieve outstanding results.
Avoiding Puckering on Curves
Curves can make your piping look wonky if you’re not careful.
Clipping seam allowance every half-inch releases tension, letting fabric lay flat without bunching.
Choose thinner cord thickness for tighter curves—it bends easier.
Cut your bias strip with proper stretch direction, and don’t skip pre-shrinking your fabric.
Gentle curve easing while sewing prevents those annoying puckers that scream "amateur hour.
Using Interfacing for Stability
When working with lightweight or stretchy fabric, interfacing becomes your secret weapon for professional-looking piping.
Fusible interfacing bonds directly to your fabric strips, while sew-in interfacing offers more flexibility for delicate materials.
This added structure prevents fabric from stretching out of shape and helps maintain the piping’s crisp, rounded form throughout your sewing project.
Creative Color Choices and Fabric Selection
Color choice transforms your piping from basic trim to design statement.
Contrasting edge colors create bold visual impact, while self-fabric piping offers subtle elegance.
Consider fabric textures—smooth cotton against textured linen adds dimension.
Seasonal palettes work beautifully: jewel tones for fall projects, pastels for spring.
Pattern matching requires careful planning, but mixed prints can look stunning when done thoughtfully.
Fiber content affects durability and appearance.
To achieve harmonious designs, consider analogous color schemes, and note the importance of seasonal palettes and fabric textures for a design statement.
Frequently Asked Questions (FAQs)
What is the difference between piping and welting?
While you’ll often hear the terms used interchangeably, there’s actually a subtle difference worth knowing.
"Piping" typically refers to the general technique and finished trim, while "welting" is the professional upholstery term for the same thing when used in home decor projects, and this distinction can affect how one approaches a project, considering the difference.
How does piping work in sewing?
Nearly 80% of professional seamstresses use piping to elevate their projects from homemade to high-end.
You’ll wrap bias-cut fabric around cord, then sandwich it between seam layers.
This creates a raised, defined edge that’s both decorative and functional—like adding structure to a pillow’s personality.
How do you remove piping from existing seams?
To remove piping from existing seams, carefully cut the stitching that holds the piping in place using a seam ripper or small scissors, then gently pull the piping out.
Can piping be made without using bias strips?
Don’t put the cart before the horse—you can make piping without bias strips, but it won’t curve smoothly.
Straight-grain fabric works for straight seams only.
You’ll get puckering and pulling around curves, so bias-cut strips remain your best bet for professional results.
What happens if piping cord gets wet or damaged?
If piping cord gets wet, it’ll shrink and pucker your seams when it dries.
Damaged cord creates lumpy, uneven piping that looks messy.
Always pre-wash cord before using it in washable projects.
How do you calculate fabric yardage for piping projects?
Most sewers need about double their piping length in fabric yardage.
Measure your project’s total perimeter, then multiply by two for bias strips.
You’ll typically get 30-40 inches of piping per quarter-yard of fabric when cutting 5-inch bias strips.
Is it possible to dye piping cord different colors?
Yes, you can dye cotton and natural fiber piping cords using fabric dyes like Rit or Dylon.
However, synthetic cords won’t take dye well, so check your cord’s material first before diving in.
Conclusion
Like discovering the perfect accessory that transforms an ordinary outfit into something spectacular, mastering what’s piping in sewing opens up a world of professional-looking projects.
You’ve learned the fundamentals of creating this decorative trim, from cutting bias strips to managing tricky corners.
Whether you’re adding subtle elegance with matching fabric or making bold statements with contrasting colors, piping elevates every seam it touches.
With practice, you’ll confidently tackle clothing, pillows, and upholstery projects that look custom-made rather than homemade, and achieve a professional finish that makes your work stand out as truly elegant.

