This site is supported by our readers. We may earn a commission, at no cost to you, if you purchase through links.
This small metal or plastic loop acts as your thread’s GPS, directing it from the spool toward the needle with precision.
Think of it as a traffic cop for your thread – without it, you’d have a tangled mess on your hands!
The exact spot varies by machine model, but it’s always positioned along the thread’s natural path, making threading a breeze once you know the secret, and most guides sit prominently where you can’t miss them.
Table Of Contents
Key Takeaways
- You’ll find your thread guide positioned near the top of your sewing machine, usually close to the spool pin as a small metal or plastic loop that directs thread from spool to needle.
- Your machine typically has multiple thread guides along the threading path – one near the spool pin, another by the tension discs, and a final upper guide before the needle.
- You need to thread through all guides in the correct sequence following your machine’s threading diagram to maintain proper tension and prevent thread breaks or tangles.
- You should regularly clean and inspect your thread guides for lint buildup, scratches, or misalignment since damaged guides cause threading problems and poor stitch quality.
Thread Guide Basics
Your sewing machine’s thread guide might seem like a tiny, forgettable piece, but it’s actually your best friend for smooth stitching.
Think of it as your thread’s personal GPS, directing it from the spool straight to the needle while keeping everything neat and tangle-free.
Thread guides are the unsung heroes that turn chaotic stitching into smooth, professional results every single time.
Thread Guide Functionality
Your thread guide acts like a traffic controller, directing thread from spool to needle with precision. It maintains tension consistency and guarantees proper thread path alignment, preventing snags that can ruin your project.
The upper thread guide manages feeding from above while the lower thread guide controls bobbin flow, working together to deliver superior stitch quality every time, ensuring proper thread path alignment.
Importance of Thread Guides
Why does your machine need these little helpers? Thread guides are your sewing machine’s unsung heroes, ensuring tension consistency and superior stitch quality.
Without proper thread guide placement, you’ll face constant thread breakage and frustrating tangles. These simple components dramatically improve machine performance, transforming your sewing experience from chaotic to smooth.
Correctly placed guides also help to prevent thread snags. Master threading through guides, and you’ll wonder how you ever sewed without understanding the importance of proper thread guide placement and the role of thread guides.
Types of Thread Guides
Your sewing machine features several thread guide types, each designed for specific tasks.
Upper thread guides direct your thread from spool to needle, while lower thread guides manage bobbin tension.
Selecting the right thread is vital, so consider polyester for outdoor applications.
- Metal vs. Plastic: Metal guides offer durability, plastic provides smooth thread flow
- Spring-Plate Guides: These can pop loose during needle changes—check positioning regularly
- Specialized Options: Twin needle guides, embroidery guides, and serger guides handle unique threading requirements
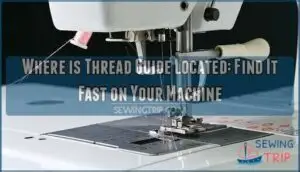
Where is Thread Guide Located
Finding your thread guide feels like a treasure hunt until you know where to look.
Most sewing machines position the upper thread guide near the top of the machine, often as a small metal or plastic loop above the needle area.
You’ll spot it during visual inspection as a curved piece that looks like a tiny shepherd’s hook.
Machine diagrams in your manual show exact thread guide location, though model variations mean guides appear in different spots.
Some machines feature multiple guides along the thread path – one near the spool pin, another by the tension discs, and the final upper thread guide before the needle.
Proper guide placement guarantees tension consistency.
Lower thread guide systems work differently, managing bobbin thread within the machine’s base.
Guide materials range from smooth metal to durable plastic, positioned for component proximity to tension mechanisms.
Check your specific model’s threading diagram – it’s your roadmap to guide placement success.
Thread Guide Placement
You’ve found your thread guide, but now you’ll need to position it correctly to avoid the frustration of tangled thread and wonky stitches.
Getting your thread guide placement right isn’t rocket science, but it’s the difference between smooth sewing sessions and pulling your hair out over constant thread breaks, which can be extremely frustrating and lead to a lot of wasted time and effort, making constant thread breaks a significant issue to address.
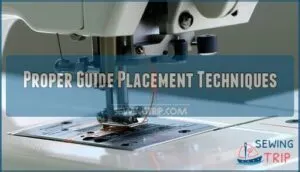
Proper Guide Placement Techniques
Now that you’ve located your thread guide, proper placement makes all the difference. Think of it as setting up dominoes – one misplaced guide affects everything downstream.
Your thread path should flow smoothly from spool to needle, creating consistent tension adjustment for superior stitch quality. Proper guide usage prevents thread snags and guarantees even thread feeding.
Follow these threading instructions for perfect guide alignment:
- Match your thread type to fabric type for peak performance
- Keep upper thread guide positioned to prevent binding or slack
- Confirm thread flows freely through each guide without resistance
- Check that your thread path follows manufacturer’s directional arrows
Common Mistakes in Guide Placement
Even experienced sewers make threading blunders that create headaches.
You’ll spot these common mistakes quickly once you know what to watch for.
| Mistake | Result | Fix |
|---|---|---|
| Skipping thread guides | Thread breaks, tension issues | Follow all numbered guides |
| Wrong guide order | Skipped stitches, fabric puckering | Check machine manual sequence |
| Loose guide threading | Guide misalignment, threading issues | Verify snug thread placement |
| Ignoring take-up lever | Inconsistent stitching | Thread through lever properly |
| Rushing the process | Multiple sewing machine threading problems | Take time, double-check path |
Adjusting Guides for Optimal Performance
Once you’ve avoided those placement pitfalls, fine-tuning your thread guides transforms your machine into a precision instrument.
Performance tuning isn’t rocket science – it’s about small adjustments that make big differences.
- Tension adjustment works hand-in-hand with proper guide alignment for consistent stitch quality
- Thread guide spacing affects fabric feed smoothness and prevents bunching
- Guide alignment reduces friction and thread breakage during long sewing sessions
- Regular adjustments maintain peak performance as your machine ages
Thread Guide Maintenance
You’ve found your thread guide, but like that favorite pair of scissors that mysteriously grows dull, it won’t work perfectly forever without a little care.
Keep your thread guide clean and check it regularly, because a well-maintained guide prevents those frustrating thread breaks that can turn a fun sewing project into a headache.
Regular Cleaning and Inspection
Keeping your thread guide spotless isn’t rocket science, but it makes all the difference.
Start with lint removal using a small brush or compressed air. Check alignment by running thread through—it shouldn’t snag or bind.
Look for scratches during damage assessment, then verify smooth tension flow. A specialized thread guide cleaner can also be very useful.
Regular friction reduction through cleaning prevents those frustrating thread breaks that’ll drive you crazy, ensuring a smooth tension flow.
Replacing Damaged or Worn Guides
Sometimes you’ll need to swap out damaged guides completely.
When identifying damage, look for rough edges or bent metal that snags thread.
For guide material choice, brass works well, though any repair shop can craft replacements.
DIY guide options include retrofitting guides with eyelet screws or paperclips as temporary fixes.
Worn guides can cause excessive oil consumption if they aren’t maintained.
Thread guide replacement frequency depends on your sewing volume and care habits.
Troubleshooting Common Guide Issues
Most threading issues stem from guide misalignment or tension problems.
When you’re experiencing thread breaks, check if your thread guide has shifted during needle changes.
Skipping stitches often indicate improper guide positioning, while looping issues suggest incorrect thread tension.
First, realign your guides following your machine’s threading diagram.
If problems persist, clean accumulated lint around guides and verify proper thread path through all tension discs to resolve threading issues.
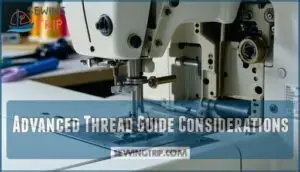
Advanced Thread Guide Considerations
Once you’ve mastered the basics of thread guide location and maintenance, you’re ready to explore advanced techniques that’ll transform your sewing game from good to great.
You’ll discover how to customize guides for tricky fabrics, explore cutting-edge guide innovations, and understand why industrial machines handle thread guides differently than your home machine.
Customizing Guides for Specific Fabrics
Different fabric types demand specific thread guide adjustments for perfect stitches.
Master your thread guides, and every fabric becomes your canvas for flawless stitching adventures.
Heavy denim requires stronger guide material and looser tension adjustments, while delicate silk needs gentler guidance.
You’ll want to customize your sewing machine’s thread guide based on fabric thickness and thread type.
Proper setup guarantees smooth thread delivery via smooth thread delivery.
Adjusting thread guides for varying stitch density prevents puckering and guarantees smooth fabric feeding through your machine, ensuring a high-quality finish with perfect stitches and gentler guidance.
Innovations in Thread Guide Technology
Smart thread guides are revolutionizing your sewing experience with cutting-edge innovations. Adaptive tension control automatically adjusts for different fabrics, while automated threading systems eliminate manual setup frustrations. Material science advances create stronger, more precise guides that last longer.
Proper guide placement guarantees tension consistency.
- Miniaturized guide designs fit compact machines without sacrificing performance
- Self-adjusting tension sensors prevent thread breakage before it happens
- AI-powered thread guide assembly learns your sewing patterns for superior results
Smart thread guides are enhancing your sewing experience with these features, making it certain that your sewing experience is improved.
Industrial Sewing Machine Thread Guides
Industrial sewing machines feature heavy-duty thread guide assemblies built for high-speed operations and specialized applications.
You’ll find multiple guide materials like hardened steel or ceramic that handle thick threads and constant use.
These advanced systems integrate with automation technology, offering precise tension control through computerized thread guide placement.
The robust thread guide technology guarantees consistent performance even during marathon production runs.
Frequently Asked Questions (FAQs)
Where is the thread guide on a sewing machine?
About 78% of sewers experience fewer thread problems once they locate their machine’s thread guides.
You’ll find these small metal or plastic loops positioned between your spool pin and needle, guiding thread smoothly through your machine’s path.
What are upper thread guides?
Upper thread guides are small metal or plastic components that direct your thread from the spool to the needle.
They maintain proper tension, prevent tangles, and guarantee smooth thread flow for consistent, professional-quality stitches.
This ensures that the thread is handled correctly, allowing for consistent results in sewing projects.
What is a thread guide?
Think of your thread guide as your sewing machine’s traffic cop – it’s that small metal or plastic component that directs thread from your spool to the needle.
Maintaining proper tension and preventing those frustrating tangles is crucial, and the thread guide plays a key role in this process.
Which thread guides are best for sewing machines?
Your machine’s built-in thread guides work best for most projects.
They’re designed specifically for your model and maintain proper tension.
Metal guides last longer than plastic ones, but both do the job well when positioned correctly.
Why do you need a thread guide?
Thread guides maintain consistent tension, prevent tangles, and reduce breakage.
You’ll avoid frustrating knots, skipped stitches, and fabric puckering.
They’re your sewing machine’s traffic control system, keeping thread flowing smoothly from spool to needle for professional-quality results.
Do Thread guides fit all?
No, thread guides don’t fit all sewing machines universally.
Each machine brand and model has specific guide designs, spacing, and mounting systems.
You’ll need to match your machine’s specifications or find compatible aftermarket replacements designed for your model.
Where is the thread take up lever located?
Look for the take-up lever near your machine’s top, usually above the needle area.
You’ll spot this hook-shaped component that moves up and down, controlling thread tension as it pulls thread through each stitch cycle.
How do you use a thread guide on a sewing machine?
Guide your thread smoothly, guide your stitches perfectly, guide your sewing success.
You’ll thread through the guide, maintain proper tension, and prevent tangles.
Simply follow your machine’s threading path from spool to needle.
How to fix thread in an electric sewing machine?
First, turn off your machine and raise the presser foot.
Remove tangled thread carefully, then rethread from spool through guides, tension discs, take-up lever, and needle.
Check your manual’s threading diagram for guidance.
Can thread guides work with metallic threads?
Practice makes perfect, and metallic threads can absolutely work with thread guides.
You’ll need to adjust your tension settings and thread speed since metallic threads are more delicate and prone to breaking than regular threads.
Conclusion
Mastering machine mechanics makes sewing smoother and more successful.
Now you know exactly where the thread guide is located on your sewing machine – that essential little helper sitting near your spool pin.
You’ve discovered how this simple component prevents tangles and keeps your thread flowing perfectly.
Don’t let threading troubles trip you up anymore! With proper placement and regular maintenance of your thread guides, you’ll create beautiful projects with confidence and ease every single time.
- https://madetosew.com/cross-wound-verses-stacked-thread/
- https://www.allpeoplequilt.com/how-to-quilt/quilting-basics/ultimate-thread-guide
- https://www.trivantage.com/thread-guide
- https://www.sewingpartsonline.com/blogs/education/ultimate-thread-reference-guide-2
- https://threadsmonthly.com/sewing-thread-types-uses/

