This site is supported by our readers. We may earn a commission, at no cost to you, if you purchase through links.
Never touch the flat, blunt side because it acts like a guide rail, keeping your cuts straight and true.
Think of it like sharpening a knife: you’re honing the cutting edge while preserving the support structure.
Most scissors have a 30-45 degree bevel angle that creates the sharp cutting surface.
Sharpening both sides is like trying to balance on two rounded logs – it destroys the precision that makes scissors work.
The secret lies in understanding how blade geometry affects cutting performance and material handling.
Table Of Contents
- Key Takeaways
- Scissor Anatomy Basics
- Which Side to Sharpen
- Scissor Blade Angles
- Sharpening Techniques Overview
- Sharpening Tools and Materials
- Step-by-Step Sharpening Process
- Maintaining Scissor Sharpness
- Signs of Dull Scissors
- Sharpening Methods Comparison
- Expert Sharpening Tips
- Frequently Asked Questions (FAQs)
- Conclusion
Key Takeaways
- You’ll sharpen only the beveled edge – the angled, curved side of the blade that does the actual cutting, never the flat blunt side that acts as a guide rail.
- You can identify the beveled edge by placing one blade flat against a surface – the side that doesn’t lie completely flat is your beveled edge that needs sharpening.
- You’ll maintain the original 30-45 degree bevel angle when sharpening, using methods like sharpening stones, sandpaper, or aluminum foil while keeping consistent pressure and angle.
- You’ll get the best results by disassembling your scissors first, sharpening each blade separately, and testing your work by cutting clean lines through paper without tearing or fraying.
Scissor Anatomy Basics
Before you can sharpen your scissors properly, you’ll need to understand their basic parts and how they work together.
Each scissor blade has two distinct sides: a beveled edge that’s slightly curved and ground down for cutting, and a flat blunt edge that helps guide materials during use.
Each blade tells a story—one side cuts with purpose, the other guides with gentle precision.
The understanding of scissor anatomy is crucial for proper sharpening, as it involves knowledge of how the blades interact and function as a unit.
This introductory information about scissor blades provides a foundation for further learning on the topic of scissor sharpening and maintenance, highlighting the importance of the flat blunt edge in guiding materials and the overall scissor anatomy.
Beveled Edge Identification
How do you spot the beveled edge that needs sharpening? Look for the blade’s subtle curve running from handle to tip.
This ground-down surface creates the essential edge angle for cutting.
Here’s your identification checklist:
- Blade Angle Measurement: Check if blades meet at more than 90 degrees
- Flat Blade Comparison: Place one blade flat against a surface to see differences
- Identifying Curved Edges: The more ground-down side shows bevel grinding differences
Cutting Edge Function
The cutting edge serves as your scissors’ workhorse, designed specifically for material separation through precise force application.
This sharp blade edge creates clean cuts by concentrating pressure at the sharpening angle. Edge sharpness directly impacts cutting precision – a well-maintained beveled edge slices through paper, fabric, or cardboard effortlessly.
When blade functionality diminishes, you’ll notice increased effort required for simple tasks, which highlights the importance of a well-maintained edge and the impact of edge sharpness on overall performance.
Blunt Edge Purpose
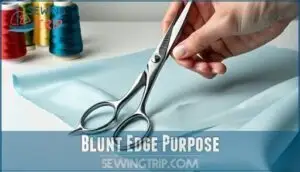
While one blade edge cuts through materials, the blunt edge serves a completely different purpose.
You’ll use this dull side for pushing fabric together during sewing applications or safely manipulating delicate materials.
The blunt edge won’t tear paper or snag threads, making it perfect for safe handling tasks. Understanding each blade edge helps you choose the correct sharpening angle for ideal scissor performance.
Which Side to Sharpen
Understanding scissor anatomy sets the stage for proper sharpening techniques. Now you need to identify which side requires attention. Always sharpen the beveled edge – the side with a ground-down curve that creates the cutting angle.
You’ll recognize this side by its slight curve running from handle to tip, where the metal appears more worn down. Here’s a simple test: place one blade flat against a solid surface. The side that doesn’t lie completely flat is your beveled edge.
This angle importance can’t be overstated – sharpening the wrong side damages your scissors permanently. Identifying the side correctly guarantees effective blade sharpening and prevents costly mistakes. Remember, only the beveled edge gets the sharpening treatment, while the flat side stays untouched for superior cutting performance.
Scissor Blade Angles
Understanding your scissors’ blade angles is just as important as knowing which side to sharpen, since the angle determines how well your scissors cut different materials.
You’ll find that most household scissors have angles between 5 to 15 degrees from square, with paper-cutting scissors on the sharper end and safety scissors closer to zero degrees for safer handling.
Measuring Scissor Angles
You’ll need angle measurement tools like digital clinometers or protractors to check your scissor blades properly.
Most household scissors sit between 25-35 degrees, while specialized shears can reach 45 degrees.
Angle consistency importance can’t be overstated – inconsistent angles ruin cutting performance.
Understanding the appropriate scissor sharpening angles is vital for achieving superior results.
Angle alteration effects include poor cuts and blade damage, so angle standardization methods help maintain effective sharpening scissors results.
Angle Types for Different Tasks
Different tasks demand specific blade angles for peak performance.
Household scissors work best with 25-35 degree angles for general cutting.
Dressmaking shears need acute angle uses up to 45 degrees on the beveled edge for fabric precision.
Safety scissors maintain straight edge tasks with nearly square angles.
Your ideal angle guide depends on material thickness and cutting angle precision requirements for each project.
Importance of Angle for Cutting Control
Blade angle precision directly impacts your cutting accuracy across different material thickness levels.
When sharpening scissors, maintaining proper sharpening angles gives you superior edge control over scissor blades.
The beveled edge geometry determines how cleanly you’ll cut through paper versus fabric.
Getting your blade angle right means the difference between clean cuts and frustrating tears that rip your materials, which is crucial for achieving proper sharpening angles.
Sharpening Techniques Overview
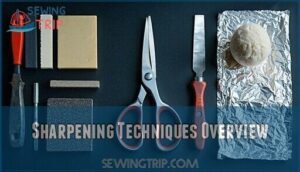
You can sharpen your scissors using several simple methods that don’t require expensive tools or professional services.
The three most effective techniques include sharpening stones for precision work, sandpaper for quick fixes, and aluminum foil for emergency touch-ups when you’re in a pinch.
Using Sharpening Stones
Sharpening stones deliver professional results when restoring scissor edges. These tools require proper technique and patience, but they’re worth mastering for consistently sharp blades.
Scissors with minor dullness can be improved by using <strong>aluminum foil methods</strong>.
Here’s your sharpening stone process:
- Choose appropriate stone grit – Start with 400-grit for dull blades, finish with 1000-grit
- Apply lubrication importance – Water or honing oil prevents overheating during sharpening
- Maintain angle consistency – Keep beveled edge flat against stone throughout each stroke
- Complete burr removal – Test cuts through paper after reassembling scissors
Sharpening With Sandpaper
You can sharpen scissors using 150-200 grit sandpaper through a simple folding technique.
Fold the sandpaper in half with rough sides facing outward, then make 10-20 full strokes cutting through it.
This DIY sharpening method smooths nicks effectively.
Wipe blades afterward to remove sandpaper residue that could interfere with your next cutting project, using this simple technique.
Sharpening With Aluminum Foil
When you’re in a pinch, aluminum foil becomes your scissors’ best friend.
This DIY sharpening method works by creating abrasion as you cut through folded foil layers. The technique restores basic sharpness quickly using household items.
Here’s what makes foil sharpening effective:
- Foil Thickness Matters – Multiple folds create the right resistance
- Best Foil Type – Heavy-duty foil works better than standard thickness
- Foil Folding Technique – Lengthwise folds maximize sharpening contact
Sharpening Tools and Materials
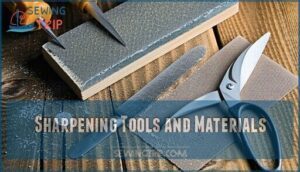
You don’t need expensive equipment to sharpen your scissors effectively at home, since common items like aluminum foil, sandpaper, and sharpening stones all work well.
Each tool offers different benefits, from quick touch-ups with household materials to precise sharpening with professional-grade stones that give you complete control over the blade’s edge, allowing for precise sharpening.
Sharpening Stone Types
You’ll find four main sharpening stone types for your scissors.
Oilstones offer versatile, traditional sharpening with consistent results.
Diamond stones provide the most durable surface that won’t wear down over time.
Ceramic stones deliver fine-grit precision for delicate blade work.
Arkansas stones give natural sharpening with excellent edge retention.
Each whetstone features coarse and fine sides for complete blade restoration.
Oilstones are readily available for scissor maintenance, offering a traditional sharpening method with consistent results and excellent edge retention.
Sandpaper Grit Options
The right grit sandpaper transforms dull scissors into sharp cutting tools.
Your grit selection determines how effectively you’ll smooth nicks and restore blade edges.
- 120-150 grit: Heavy restoration for damaged blades
- 400-600 grit: General sharpening and nick removal
- 800-1200 grit: Fine finishing and edge polishing
- Wet/dry varieties: Superior control and residue removal
- Glass backing: Creates ideal grit stability during sharpening steps
Consider specific sandpaper options for best results.
Aluminum Foil Sharpening Method
Aluminum foil serves as your kitchen drawer’s secret sharpening weapon.
This DIY sharpening method works through controlled abrasion as you cut through multiple foil layers. The key lies in foil thickness and proper cutting technique – fold standard foil into thick strips, then make full-blade cuts with steady pressure control to remove material buildup.
This method is related to products for sale.
| Foil Preparation | Cutting Technique |
|---|---|
| Fold 8-12 inch piece | Use full blade strokes |
| Create 1-inch wide strip | Apply steady pressure |
| Stack 6-8 layers thick | Cut 10-15 times |
| Verify tight folds | Wipe blade after cutting |
| Check foil thickness | Test sharpness on paper |
Step-by-Step Sharpening Process
You’ll need to disassemble your scissors first by removing the central screw, which gives you better control over each blade during sharpening.
Once you’ve got your sharpening stone ready with oil or water, you can work on each blade separately at its natural angle.
Disassembling Scissors
The central screw holds your household scissors together like a tiny hinge.
Use a screwdriver for screw removal, turning counterclockwise until loose.
Some scissors have spring mechanisms that’ll pop apart during blade separation.
Keep track of small parts during scissor disassembly.
Note blade alignment before taking them apart – you’ll need this for proper scissor reassembly later.
Applying Lubrication
You’ll want to apply a thin layer of honing oil or water to your sharpening stone before starting.
This lubrication prevents metal filings from clogging the stone’s surface and guarantees smooth blade movement.
A few drops work perfectly—too much creates a messy workspace.
Water works fine for basic scissor maintenance, though specialized sharpening oil provides better rust prevention and longer-lasting blade lubrication for superior scissor care.
Sharpening Each Blade
With blade disassembly complete, you’ll tackle each scissor blade individually.
Place the beveled edge flat against your sharpening stone, maintaining the original bevel angle. Pull each blade across the stone using consistent stroke direction from pivot to tip.
This honing scissors technique creates smooth, sharp edges.
After sharpening, focus on burr removal and edge smoothing for superior cutting performance.
Maintaining Scissor Sharpness
You can’t sharpen scissors once and expect them to stay sharp forever, just like your car needs regular oil changes to run smoothly.
Keep your scissors performing their best by following a simple maintenance routine that includes regular sharpening, proper cleaning, and correct storage methods, which will help maintain their effectiveness and performance.
Regular Sharpening Schedule
Once you’ve mastered the sharpening process, establishing a regular sharpening schedule keeps your scissors performing at their best.
Most household scissors need sharpening twice yearly with regular use, while heavy-duty or professional scissors require monthly attention.
Scissors showing signs of uneven cuts may need more frequent attention.
- Light household use: Annual sharpening maintains adequate cutting performance
- Moderate crafting or sewing: Every 6 months prevents noticeable dulling
- Daily professional use: Monthly sharpening stone sessions guarantee consistent results
- Heavy-duty tasks: Bi-weekly maintenance prevents blade damage and extends lifespan
Cleaning Scissors
Beyond scheduling regular touch-ups, proper blade cleaning keeps your scissors performing like new.
Debris buildup dulls edges faster than heavy use.
Remove sticky residue with rubbing alcohol, then dry thoroughly for rust prevention.
Lubrication importance can’t be overstated—apply a drop of oil to the pivot point monthly.
| Cleaning Method | Best For | Frequency |
|---|---|---|
| Rubbing alcohol wipe | Residue removal and disinfection | After each project |
| Warm soapy water | General blade debris removal | Weekly |
| Fine steel wool | Stubborn adhesive buildup | As needed |
The provided table outlines specific cleaning methods for different scenarios, ensuring your scissors remain in good condition.
Regular maintenance with these methods will help extend the life of your scissors, keeping them sharp and performing like new.
Storing Scissors Properly
Three simple storage rules protect your scissors from damage and maintain their sharp edges.
Keep them in organized drawers with blade protection covers or magnetic strips for safe storage.
Control humidity by avoiding damp areas that cause rust.
For kid safety, store sharp scissors in locked compartments.
Proper scissor storage solutions extend blade life substantially.
Signs of Dull Scissors
You’ll notice your scissors aren’t cutting cleanly when they start tearing paper instead of slicing through it, or when fabric frays rather than cuts with a smooth edge.
Watch for visible signs like nicks on the blade edges, uneven cuts that require multiple snips, or scissors that crush materials instead of separating them cleanly, which can be a clear indication that your scissors need maintenance or replacement, often due to uneven cuts.
Visible Signs of Wear
Your scissors tell their own story through visual clues that reveal their cutting edge condition.
Recognizing these warning signs helps you catch blade deterioration before it affects your projects.
- Edge Thinning: Look for rounded or flattened cutting surfaces where sharp scissors once had precise points
- Blade Nicks: Check for small chips, dents, or irregular gaps along the blade’s cutting line
- Uneven Blades: Notice gaps when blades close or visible misalignment between cutting surfaces
Dull scissors often exhibit frayed edges, indicating they need sharpening.
Performance Issues
When your sharp scissors transform into struggling tools, several performance issues signal it’s sharpening time. You’ll notice increased resistance during cuts, requiring extra pressure that leads to user fatigue.
Dull scissors create ragged edges instead of clean lines, while blade misalignment causes uneven cutting performance.
| Issue | Sharp Scissors | Dull Scissors |
|---|---|---|
| Cutting Efficiency | Clean, effortless cuts | Requires multiple passes |
| Edge Quality | Precise, smooth lines | Torn, frayed materials |
| Physical Effort | Minimal hand strain | Causes user fatigue |
Replacement Options
Sometimes your trusty scissors reach the end of their cutting journey, and it’s time to explore your options beyond sharpening.
- New Scissors: Replace every 3-5 years when blades show thinning edges or permanent nicks
- Repair Alternatives: Professional sharpening services cost $10-15, often reviving damaged blades
- Upgrade Considerations: Invest in higher-quality scissors for better longevity and performance
- Cost Analysis: Compare sharpening costs versus replacement prices for smart decisions
Sharpening Methods Comparison
You’ll find several ways to sharpen your scissors, from simple household items like aluminum foil to professional sharpening stones.
Each method works differently, so you’ll want to pick the right one based on how dull your scissors are and what tools you have available, considering complete concepts and the tools at hand to make an informed decision about the best approach to use for sharpening.
Sharpening Stone Vs Sandpaper
When choosing between sharpening tools, you’ll face a classic trade-off.
Sharpening stones deliver professional results but require more skill, while sandpaper offers beginner-friendly convenience.
Here’s how these scissor sharpening techniques compare:
| Feature | Sharpening Stone | Sandpaper |
|---|---|---|
| Stone Grit/Sandpaper Grit | 1000-3000 grit | 400-1000 grit |
| Lubrication Needs | Water/oil required | None needed |
| Edge Finish | Professional quality | Good for home use |
| Technique Difficulty | Requires practice | Beginner-friendly |
| Cost | Higher investment | Budget option |
The key differences between sharpening stones and sandpaper lie in their technique difficulty and cost, making them suitable for different users based on their experience and budget.
Aluminum Foil Vs Glass Jar
When you’re torn between aluminum foil and glass jar methods, both offer DIY sharpening solutions with distinct trade-offs.
Foil delivers quick results but limited longevity, while glass jars provide superior edge quality through consistent contact.
| Method | Foil Effectiveness | Jar Safety |
|---|---|---|
| Aluminum Foil | Quick realignment | Minimal risk |
| Glass Jar | Moderate sharpening | Handle carefully |
| Material Impact | Temporary fix | Lasting improvement |
The choice between these methods depends on your priorities, whether you need a temporary fix or a lasting improvement, and how you weigh the trade-offs between them.
Professional Sharpening Services
When you’re facing scissors that won’t cut butter, professional sharpening services offer the gold standard solution.
These experts use specialized equipment and sharpening stones to restore your blades to factory precision.
Most scissor sharpening services cost between $5-$20 per pair, depending on blade quality and complexity.
| Service Aspect | DIY Methods | Professional Service |
|---|---|---|
| Precision Level | Hit-or-miss results | Factory-grade accuracy |
| Tool Quality | Basic household items | Specialized equipment |
| Time Investment | 30+ minutes learning | Drop-off convenience |
| Cost Range | Free-$10 materials | $5-$20 per scissor |
| Guarantee | No warranty | Professional backing |
Professional scissor repair specialists understand blade geometry better than weekend warriors.
They’ll assess your sharpening frequency needs and recommend ideal maintenance schedules.
Finding experts in your area takes minimal effort – most knife shops offer scissor sharpening services.
For specialized tools, consider manufacturer sharpening services to maintain warranty protection.
The service benefits include extended tool life and consistent cutting performance that makes the investment worthwhile.
Expert Sharpening Tips
You’ll get better results when you match your sharpening method to your scissors’ condition and use the right angle.
Practice on old scissors first, since even experienced crafters can mess up their favorite pair when they rush through the sharpening process.
You’ll get better results when you match your sharpening method to your scissors’ condition and use the right angle.
Practice on old scissors first, since even experienced crafters can mess up their favorite pair when they rush through the sharpening process.
Expert Sharpening Tips Introduction
You’ll get better results when you match your sharpening method to your scissors’ condition and use the right angle.
Practice on old scissors first, since even experienced crafters can mess up their favorite pair when they rush through the sharpening process.
Using The Right Sharpening Tool
Your sharpening stone choice makes all the difference.
Think of stone grit like sandpaper – coarser numbers tackle duller blades while higher numbers polish edges.
A medium-length file works well for most scissors, but don’t overlook these options:
- 400-1000 grit sharpening stone for balanced results
- Triangular files for precise control
- V-sharpener use for quick touch-ups
- DIY options like aluminum foil strips
- Professional services when blades need expert care
Avoiding Common Sharpening Mistakes
Many scissor sharpening attempts fail due to preventable errors.
Angle inconsistencies ruin blade geometry, so maintain consistent contact with your sharpening stone.
Wrong lubricant choices damage surfaces—stick to water or honing oil.
Pressure control matters; excessive force creates nicks instead of smooth edges.
Over-sharpening weakens blades permanently.
Always perform proper burr removal after sharpening to prevent cutting issues.
Using fabric scissors on non-fabric materials can lead to dulling of blades.
Practicing Sharpening Techniques
Perfect your scissor sharpening techniques by starting with old practice scissors before tackling your favorites.
Stone lubrication and angle consistency become second nature with repetition, while pressure control develops through muscle memory.
- Use designated practice scissors to build confidence without risking good tools
- Master stone lubrication timing for smooth, consistent blade movement across surfaces
- Develop angle consistency by repeating the same motion until it feels natural
- Practice burr removal techniques on various blade materials and thicknesses
- Control pressure gradually, starting light and adjusting based on blade response
Frequently Asked Questions (FAQs)
Which side of scissors do you sharpen?
Think of a knife’s edge – you’d sharpen the angled side, not the flat back.
You’ll sharpen scissors on the beveled edge, which has a ground-down curve.
Check for the side that appears more angled or curved.
Are both sides of scissors sharp?
No, only one side of scissors is truly sharp. You’ll find the cutting edge on the beveled side, while the other side stays blunt to push materials together during cuts.
Do you sharpen both sides of shears?
Don’t put all your eggs in one basket—you’ll only sharpen the beveled side of shears.
The flat side stays untouched.
Sharpening both sides destroys the cutting angle and ruins your shears’ performance completely.
Do you sharpen both sides of a blade?
You’ll sharpen only the beveled side of each blade, not both sides. The beveled edge has a ground-down curve, while the flat side stays untouched to maintain proper cutting action.
How often should I sharpen my scissors?
Most folks think scissors need constant attention, but you’ll typically sharpen yours twice yearly with regular use.
Light users can stretch it to once annually.
Heavy crafters might need monthly touch-ups to maintain peak performance.
What are the best techniques for sharpening scissors?
You’ll get best results using sharpening stones, aluminum foil, or fine sandpaper.
Disassemble your scissors first, then sharpen the beveled edge at its natural angle.
Professional services cost around fifteen dollars for excellent results.
How can I test if my scissors are sharp enough after sharpening them?
Test your scissors by cutting through paper cleanly without tearing or bending it.
Try cutting fabric or thread smoothly.
If they grab, pull, or leave ragged edges, they need more sharpening work.
Is it safe to sharpen children’s scissors and classroom scissors?
Updating classroom tools isn’t risky when you’re careful.
You can sharpen children’s scissors using gentle methods like aluminum foil or fine sandpaper.
Just supervise kids closely and avoid disassembling scissors completely for safety and use gentle methods.
Can left-handed scissors be sharpened differently?
Left-handed scissors can be sharpened using the same techniques as right-handed ones.
You’ll sharpen the beveled edge, but the blade orientation is reversed.
The process remains identical—just identify which side has the beveled edge first.
Do fabric scissors need special sharpening techniques?
Fabric scissors don’t require special sharpening techniques, but you’ll want to use finer grits and gentler pressure.
Their precision blades need careful handling to maintain the smooth, clean cuts essential for quality sewing projects, which involves using finer grits.
Conclusion
Remember to sharpen only the beveled edge, remember to preserve the flat side, and remember that proper technique makes all the difference.
Understanding which side of scissors sharpen transforms your cutting experience from frustrating to flawless.
You’ve learned the anatomy, angles, and methods that professional craftspeople use daily.
Your scissors will slice through materials like butter when you respect their blade geometry. With consistent maintenance and the right sharpening approach, you’ll never struggle with dull blades again.
- https://knife.wickededgeusa.com/forums/topic/at-which-angles-do-you-sharpen-your-scissors/
- https://sharponsight.com/cutting-remarks-the-sharp-on-sight-blog-of-superior-edges/the-science-behind-sharpness-understanding-blade-angles-and-edges
- https://www.bladeforums.com/threads/how-do-you-determine-blade-angle.946455/
- https://wolffindustries.com/blogs/technical-blog/how-we-define-sharpening-angles
- https://www.weekand.com/home-garden/article/bevel-edge-angle-scissors-18035290.php

