This site is supported by our readers. We may earn a commission, at no cost to you, if you purchase through links.
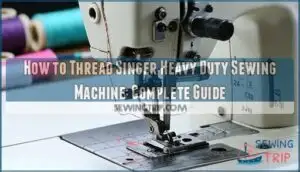 Threading your Singer Heavy Duty sewing machine starts with placing thread on the spool pin and following the numbered threading path.
Guide the thread through the tension discs, around the take-up lever, down through the threading guides, and finally through the needle from front to back.
You’ll need to wind and insert your bobbin properly before bringing both threads together, maintaining steady tension throughout the process and following your machine’s specific threading diagram.
Don’t rush through the tension discs – they’re essential for smooth stitching. Master these basics, and you’ll discover threading tricks that prevent common problems.
Table Of Contents
- Key Takeaways
- How to Thread a Singer Heavy Duty Sewing Machine
- Inserting The Bobbin on a Singer Heavy Duty Machine
- Raising The Bobbin Thread to Start Sewing
- How to Wind a Bobbin on a Singer Sewing Machine
- Installing a Bobbin on a Singer Sewing Machine
- Choosing The Right Thread for a Singer Sewing Machine
- Best Bobbin Thread for a Singer Sewing Machine
- Thread Spool Sizes for a Singer Sewing Machine
- Where to Buy Threads for a Singer Sewing Machine
- Frequently Asked Questions (FAQs)
- Conclusion
Key Takeaways
- You’ll need to follow the correct threading sequence by placing thread on the spool pin, guiding it through tension discs, around the take-up lever, and through the needle from front to back while keeping the presser foot raised and needle at its highest point.
- You must wind your bobbin properly and insert it counterclockwise into the top-drop bobbin system, then pull the thread through the tension spring slot following the marked pathway for smooth operation.
- You should bring the bobbin thread up by holding the upper thread firmly and turning the handwheel one complete rotation, then gently pull up the bobbin thread loop that appears to create the essential connection for stitching.
- You can’t rush through the tension discs since they’re critical for smooth stitching – proper tension adjustment prevents common threading problems and ensures professional-quality results every time you sew.
How to Thread a Singer Heavy Duty Sewing Machine
Threading your Singer Heavy Duty requires following the correct threading order for smooth operation.
Master your Singer Heavy Duty threading—precision in every step creates flawless stitches every time.
Start by raising the presser foot and positioning the needle at its highest point using the handwheel.
Place your thread spool on the pin, then guide it through the upper thread guides, tension discs, and take-up lever.
Thread the needle from front to back, leaving several inches hanging.
Proper tension adjustment prevents common threading problems.
Regular maintenance tips include checking needle types match your fabric weight for ideal sewing machine threading performance, ensuring smooth operation and the right threading order.
Inserting The Bobbin on a Singer Heavy Duty Machine
Precision makes all the difference when inserting your bobbin into the Singer Heavy Duty machine. Start by removing the bobbin case cover using the small tab on the right side.
Your Singer 4423 uses a top-drop bobbin system, making insertion straightforward once you know the steps. Place your wound bobbin into the case with the thread running counterclockwise – this thread direction is vital for proper stitching.
Pull the thread through the slit in the metal bobbin case, following the marked path to the tension spring. The correct bobbin size guarantees smooth operation and prevents bobbin tension issues.
Before securing the bobbin case, perform regular bobbin case cleaning to remove lint buildup. Dirt accumulation can disrupt the sewing machine’s operation. Snap the cover back into place, ensuring it clicks securely.
Poor bobbin threading leads to uneven stitches, so double-check your thread path before closing the case.
Raising The Bobbin Thread to Start Sewing
Now that your bobbin is properly inserted, you’ll need to bring the bobbin thread up to create that essential connection for stitching.
Hold your upper thread firmly and turn the handwheel toward you one complete rotation. This action drops the needle down to catch the bobbin thread and brings it back up through the needle plate. You’ll see a small loop of bobbin thread appear – gently pull it up with tweezers or your fingertip. Proper bobbin thread tension is key, and can be adjusted using the bobbin case tension screw.
Key steps for successful bobbin threading include:
- Initial Stitch Formation requires both threads positioned correctly above the needle plate
- Securing Initial Stitches happens when you hold both thread tails while taking your first few stitches
- Consistent Thread Pickup depends on proper Bobbin Thread Tension and correct bobbin insertion
This threading tutorial step prevents thread snapping and guarantees your Singer Heavy Duty threading process creates smooth, even stitches from the very first stitch.
How to Wind a Bobbin on a Singer Sewing Machine
Once you’ve raised your bobbin thread, you’ll need fresh bobbins for continuous sewing.
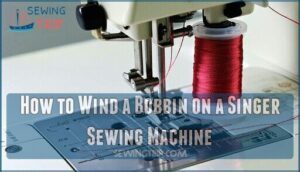
Start by placing your thread spool on the spool pin. Thread through the bobbin winding tension disc, then insert the end through the bobbin’s small hole. Place the bobbin on the spindle and engage it by sliding right.
Control your bobbin winding speed with gentle pedal pressure for consistent thread winding.
- Tension disc usage: Thread must pass between the discs for proper winding
- Spindle engagement issues: Push bobbin firmly right until it clicks into position
- Full bobbin removal: Stop when bobbin reaches capacity to prevent jamming
- Bobbin case compatibility: Use Class 15 bobbins for Singer Heavy Duty models
Installing a Bobbin on a Singer Sewing Machine
Two key steps guarantee your Singer Heavy Duty runs smoothly after bobbin winding.
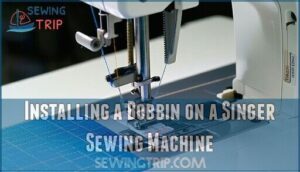
First, remove the bobbin case cover and insert your wound bobbin with thread running counterclockwise.
Pull the bobbin thread through the tension spring slot, following the marked pathway.
Check that your top-drop bobbin sits snugly in the case without wobbling.
| Bobbin Case Types | Threading Direction |
|---|---|
| Drop-in/Top-loading | Thread pulls counterclockwise |
| Front-loading | Thread feeds horizontally |
| Correct Bobbin Size | Must match machine specifications |
| Bobbin Tension Issues | Adjust screw clockwise to tighten |
Choosing The Right Thread for a Singer Sewing Machine
You’ll get better sewing results when you match your thread type to your fabric and project needs.
The right thread choice prevents tension problems, skipped stitches, and thread breaks that can frustrate your sewing experience, by ensuring a smoother and more efficient sewing process with better sewing results.
100% Cotton Thread
Cotton threads bring natural strength and breathability to your Singer Heavy Duty projects.
Long staple cotton creates smoother stitches than short-fiber alternatives, while mercerized cotton thread resists shrinkage and maintains vibrant colors.
Egyptian cotton thread offers premium quality with superior durability.
When threading your Singer machine, cotton thread weight affects stitch formation—lighter weights work best for delicate fabrics, heavier weights for sturdy materials.
Cotton thread strength makes it ideal for quilting and garment construction.
Follow proper machine threading steps to prevent tangles and guarantee your Singer threading process runs smoothly with cotton’s natural texture.
Some machines, like the Singer Futura XL, offer computerized features.
General All-Purpose Sewing Thread
General all-purpose thread serves as your go-to choice for most Singer Heavy Duty projects.
This polyester-cotton blend handles various fabric weights while maintaining consistent tension through your Singer sewing machine.
When threading a machine, these medium-weight threads work seamlessly with standard needles.
Popular thread brands like Coats offer reliable performance across different materials, making thread color matching simple for everyday sewing tasks.
For best results, consider using recommended thread brands such as Gutermann or Sulky with your Singer machine to achieve consistent tension and ensure reliable performance.
Fun Specialty Threads
Beyond all-purpose options, specialty threads open creative doors for your Singer Heavy Duty machine.
Metallic threads create stunning decorative stitches and ribbon accents, while variegated options produce beautiful color shifts.
Glow-in-the-dark and invisible threads offer unique possibilities for thread painting and corded embroidery.
For decorative projects, consider the use of various metallic options.
When threading a machine with specialty sewing machine thread, adjust your upper thread tension for superior results to achieve the best outcome with specialty sewing machine thread.
Machine Embroidery Thread
Machine embroidery thread transforms your Singer Heavy Duty into an artistic powerhouse. Choose 40-weight polyester for most projects, ensuring smooth machine threading guide performance.
Proper needle types and thread weight selection prevent breaks during design digitizing. Consider stabilizer usage for complex patterns and experiment with color blending techniques.
Your upper thread tension affects how beautifully those intricate sewing machine thread designs emerge.
Metallic Sewing Thread
In the case of metallic thread types, you’ll need to adjust your Singer Heavy Duty’s approach.
Lower your thread tension and use a 75/11 or 90/14 needle size to prevent breakage.
Control your stitching speed – slow and steady wins the race with these delicate threads.
How to thread your upper thread requires extra care, as sewing machine thread made from metallic materials demands gentle handling.
Variegated Thread
Variegated thread transforms your Singer Heavy Duty projects with automatic color blending as you sew.
This specialty thread creates stunning pattern creation without changing spools, making it perfect for decorative stitching and embroidery.
Consider these key factors:
- Thread Weight – Choose 40 wt. for versatile applications
- Stitch Visibility – Test upper thread tension for desired results
For denim projects, consider using sturdy jeans thread.
- Project Ideas – Ideal for quilting borders and topstitching
Invisible Thread
When working with invisible thread on your Singer Heavy Duty, you’ll achieve nearly undetectable stitches that blend seamlessly into fabric.
This specialized thread requires careful tension adjustments and proper needle selection for ideal results.
| Aspect | Recommendation |
|---|---|
| Needle Size | 60/8 to 75/11 for best results |
| Tension Setting | Lower than standard thread |
| Best Fabrics | Lightweight to medium-weight materials |
Invisible thread uses include quilting, appliqué, and decorative work where stitch visibility must remain minimal.
Your Singer sewing machine handles this thread well when you reduce upper thread tension substantially.
Test fabric compatibility first, as some materials show transparent thread more than others.
Quilting Thread
Quilting thread transforms your Singer Heavy Duty into a powerhouse for multi-layer projects.
Choose 30-40 thread weight for durability and visible stitching lines.
Cotton thread works perfectly with cotton fabrics, while polyester blends offer superior strength.
Match your needle size to thread weight—heavier threads need larger needles.
Adjust quilting tension settings lower than regular sewing to accommodate thick batting layers.
Color matching depends on your design goals: neutral tones blend seamlessly, while contrasting colors highlight quilting patterns.
Wind bobbins slowly for even distribution.
Test thread material combinations on sample fabric sandwiches before starting your masterpiece quilt project.
Best Bobbin Thread for a Singer Sewing Machine
Looking through your Singer Heavy Duty’s threading requirements, you’ll discover that bobbins thread choice makes or breaks your stitching quality.
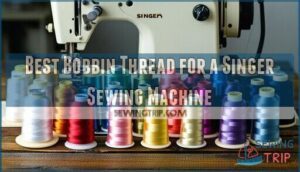
Most sewers stick with all-purpose polyester thread for their Singer sewing machine, but specialty projects demand different approaches.
Cotton thread works beautifully for quilting and natural fabrics, while polyester handles everyday tasks with durability.
Thread weight matters too – lighter weights like 60wt create delicate seams, while heavier 40wt threads provide strength for thick materials.
Quality thread brands like Gutermann, Coats & Clark, and Madeira guarantee consistent performance in your sewing machine bobbin thread system.
These manufacturers understand Singer heavy duty machines need reliable thread material that won’t break mid-project.
Store your bobbin thread properly in thread storage containers to prevent dust and tangling.
Match your thread color to your project’s needs, remembering that bobbins thread rarely shows on finished pieces.
Thread Spool Sizes for a Singer Sewing Machine
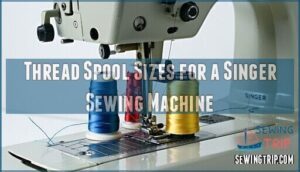
Understanding thread spool sizes makes your Singer Heavy Duty machine perform like a champion. Your spool holder accommodates various thread spool dimensions, but size matters more than you’d think.
Standard spools work perfectly for most projects, while larger spools provide extended thread capacity for quilting or heavy-duty work. Here’s what you need to know about spool compatibility:
- Small spools fit snugly with minimal spool holder adjustment
- Medium spools require proper positioning to maintain smooth thread guide flow
- Large spools need secure placement to prevent wobbling during operation
Thread tension changes with different spool sizes. Larger spools deliver thread differently than smaller ones, affecting your stitch quality. Your Singer sewing machine’s thread guide system handles most variations, but you’ll want to test tension settings when switching sizes. Smart storage solutions keep various spool sizes organized and ready for your next project.
Where to Buy Threads for a Singer Sewing Machine
Once you’ve figured out thread spool sizes, you’ll need to know where to find quality threads for your singer heavy duty 4423. Smart shopping starts with understanding your options.
Local Fabric Stores offer hands-on experience. You can feel thread texture and get expert advice on how to thread your singer sewing machine properly. Staff often recommend specific brands that work well with Singer models.
Online Retailers provide convenience and variety. Sites like Amazon and Joann’s offer bulk purchasing and customer reviews. You’ll find detailed specifications for each thread singer machine compatibility.
Discount Options include warehouse stores and seasonal sales. Check craft store weekly ads for thread deals.
| Store Type | Pros | Cons |
|---|---|---|
| Local Fabric Shops | Expert advice, touch/feel products | Limited selection, higher prices |
| Online Retailers | Huge selection, competitive pricing | Can’t examine before buying |
| Craft Chains | Regular sales, consistent stock | Variable quality, crowded stores |
| Specialty Sewing | Premium quality, technical support | Expensive, limited locations |
| Discount Stores | Low prices, bulk options | Inconsistent thread quality |
Brand Availability varies by location. Gutermann, Coats & Clark, and Mettler offer reliable Thread Quality that won’t jam your machine or break mid-project. Consider thread weight categories to match the fabric for ideal sewing.
Frequently Asked Questions (FAQs)
How do you use a singer heavy duty sewing machine?
To use a Singer Heavy Duty sewing machine, thread the bobbin and needle correctly, adjust tension settings, and select your stitch type.
Raise the presser foot, position the fabric, and start sewing with steady pedal pressure to ensure a smooth and even stitch, which is a complete concept in sewing.
Can a Singer sewing machine be threaded?
Threading your Singer sewing machine isn’t rocket science, but it’s the foundation of every successful project.
You’ll wind the bobbin, thread the upper mechanism, and use the automatic needle threader for effortless setup.
Should I thread my singer heavy-duty machine?
Yes, you should thread your Singer Heavy Duty machine before sewing.
Proper threading guarantees smooth stitching and prevents thread breaks.
Both upper threading and bobbin preparation are essential for quality results and machine performance.
How do you thread a singer heavy duty needle?
Raise the presser foot and position the needle at its highest point. Thread the needle from front to back, leaving 4-5 inches extending beyond the eye for proper stitching.
How do you tension a Singer sewing machine?
Picture your thread dancing perfectly through fabric like a skilled partner.
Turn the tension dial clockwise to tighten loose stitches or counterclockwise to loosen tight ones.
Test on scrap fabric first—you’ll find that sweet spot where everything clicks, and this is where the tension is just right.
How to thread the heavy-duty singer?
Thread your Singer Heavy Duty by first winding the bobbins, then inserting it counterclockwise into the drop-in case.
Next, guide upper thread through tension discs, take-up lever, and needle eye from front to back.
How to load thread on Singer sewing machine?
Ready to master your Singer?
First, place your thread spool on the pin.
Wind thread through guides, tension discs, and needle from front to back.
Don’t forget—bobbin goes counterclockwise in the case below.
Why does my Singer Heavy Duty skip stitches?
Your Singer Heavy Duty skips stitches when the needle’s dull, thread tension’s wrong, or you’re using the incorrect needle size.
Check your tension settings, replace the needle, and verify it matches your fabric weight, focusing on complete concepts to resolve the issue.
How to fix loose bobbin thread tension?
Like a guitar string that’s too slack, loose bobbin thread creates messy stitches.
Turn your bobbin case tension screw clockwise with a small screwdriver to tighten.
Test on scrap fabric until stitches balance perfectly.
What needle size for thick denim fabric?
Use a size 16/100 or 18/110 needle for thick denim fabric.
Heavy-duty needles penetrate multiple layers easily without breaking.
You’ll get cleaner stitches and avoid skipped threads when tackling those tough jean hems.
Conclusion
Threading your Singer Heavy Duty is like following a roadmap – each step builds on the last.
You’ve mastered the essential steps of how to thread singer heavy duty sewing machine, from placing thread on the spool pin to bringing bobbin and top threads together.
Remember to maintain proper tension throughout the process and don’t rush through the tension discs.
With the right thread selection and these proven techniques, you’ll create smooth, professional stitches every time you sew.
- https://www.singer.com/manuals?__cf_chl_jschl_tk__=cf7102a992e53b3cba4604c7fee39d3b83563068-1623515293-0-AUIKLFCaho1QsHmhzFFAgiFUYRAD3sgODqkaxY4XVPkHIQoFSMtTB9FMJZA8iXjwMigYmHA4EAk8gt7OZod3OUX3mn5w_GAUj80hHck6l7MRcjp80XPl2nVl-6rE9dDolFvYhNEV_zcZr8cXeRW5j-j2msH7zQEO6_eSPjztU06P2bdY1CFXEdcanEDQBpaxwsnfN4PTUt4A3hzLDNi1oX0Wx6_jBOGNgMbxXZIr9H2M32MqRTNHOXF0BsJxUDfirtJpTEqOZQICOuuuzjXuajxl5-Nf4CDjxLTPA9-ANVtP3aT8A9czNK0EMA4p1tu3xYIuMWC1ZAZNKngzkEpFxhrdov8EXZ5nHKwjLkAMhFxye_YO-vDuf-8V4QqgiYH7Omyn8fK3s-yWK6QdQlGih1w
- https://www.manua.ls/singer/heavy-duty-4432/manual
- https://help.brother-usa.com/app/answers/detail/a_id/74407/~/stitches-are-loose-on-the-top-and/or-bottom
- https://www.reddit.com/r/sewing/comments/lhti98/new_singer_heavy_duty_4432_top_thread_keeps/
- https://www.superiorthreads.com/embroidery-threads?srsltid=AfmBOooqQz9jD_UdRhyiOdxMdRVPxRc3JKF0cRo6UQS15Y5eMLN0D3YI

