This site is supported by our readers. We may earn a commission, at no cost to you, if you purchase through links.
 Your sewing machine creates zigzag stitches by moving the needle side-to-side while piercing fabric.
You’ll find zigzag stitches incredibly versatile for finishing seam edges, preventing fraying, and sewing stretchy materials that straight stitches can’t handle.
The stitch works by alternating needle positions left and right, creating that distinctive back-and-forth pattern.
You can adjust width and length settings to customize the zigzag for different fabrics and purposes.
Whether you’re hemming knits, creating decorative borders, or reinforcing buttonholes, zigzag stitches provide flexibility that straight stitches simply can’t match.
Understanding why sewing machine sew zigzags opens doors to advanced techniques that’ll transform your projects.
Table Of Contents
Key Takeaways
- You’ll master versatile seam finishing – Zigzag stitches prevent fabric fraying and create stronger, more flexible connections than straight stitches, making them essential for professional-quality projects.
- You can sew stretch fabrics confidently – The zigzag’s side-to-side needle movement accommodates fabric stretch without breaking threads, perfect for knits and elastic materials that straight stitches can’t handle.
- You’ll control stitch appearance through settings – Adjusting width (how far the needle swings) and length (distance between stitches) lets you customize everything from delicate appliqué work to bold decorative borders.
- You can repair and reinforce with precision – Zigzag stitches excel at mending tears, attaching patches, and reinforcing weak areas while maintaining fabric flexibility and preventing further damage.
Understanding Zigzag Stitch
Understanding how your sewing machine creates zigzag stitch starts with needle movement.
Your sewing machine’s zigzag stitch transforms ordinary seams into flexible, professional-quality connections that straight stitches simply can’t match.
Unlike straight stitching, your needle swings left to right while feed dogs advance the fabric forward.
This creates the distinctive back-and-forth pattern that makes zigzag stitch so versatile.
Your machine’s stitch settings control both stitch width and length.
Width determines how far the needle travels sideways, while length controls the distance between each stitch.
Most basic classes teach zigzag alongside straight stitch because it’s fundamental to sewing techniques.
The stitch formation happens when your needle alternates positions with each penetration.
This creates stronger, more flexible seams than straight stitching alone.
You can adjust stitch width from narrow to wide, opening possibilities for decorative stitches and various stitch patterns.
Mastering these basics gives you control over one of sewing’s most essential techniques.
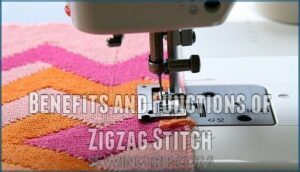
Benefits and Functions of Zigzag Stitch
When your sewing machine creates zigzag patterns, you’re tapping into a powerhouse of functionality that transforms ordinary projects into professional-quality work.
- Edge Durability: Your zigzag stitch prevents fraying on raw edges, keeping seams intact through countless washes and wear
- Seam Reinforcement: These interlocking threads create stronger connections than straight stitches, especially on stress points
- Knit Fabrics: The zigzag’s stretch accommodates fabric movement without breaking or puckering
- Elastic Application: You can attach elastic bands smoothly while maintaining their stretch properties
- Decorative Stitching: Transform basic seams into eye-catching design elements with varied stitch patterns
Practical Applications of Zigzag Stitch
You’ll discover that zigzag stitches serve multiple essential purposes in your sewing projects, from finishing raw edges to securing appliques and mending tears.
Understanding these practical applications helps you choose the right technique for each task and creates professional-looking results every time.
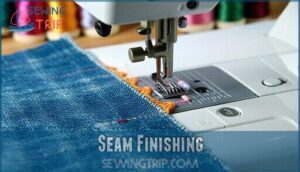
Seam Finishing
Your zigzag stitch transforms raw fabric edges into professional-looking seams that won’t unravel.
This versatile technique works across various fabric types, from delicate silk to sturdy denim.
You’ll find it’s an excellent serger alternative when you don’t have specialized equipment.
The stitch density you choose affects edge durability – tighter stitches provide stronger finishing edges.
For lightweight materials prone to puckering, try stabilizer usage underneath your fabric.
Many sewers find specialized tools available to help with this process.
This method excels at locking seams while preventing fraying, making it perfect for everyday sewing projects.
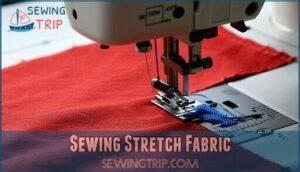
Sewing Stretch Fabric
Stretch fabrics can feel like wrestling with a stubborn cat, but zigzag stitch tames them beautifully.
Zigzag stitch turns stubborn stretch fabrics into obedient sewing companions.
When your sewing machine settings accommodate knit fabrics, you’ll maintain that essential stretch while creating secure seams.
The zigzag stitch moves with the fabric instead of fighting against it. Your needle selection matters substantially – use a ballpoint needle that slides between fibers rather than piercing them.
To find the right one, consider a specialized sewing product. Adjust stitch length to 2.5-3mm and stitch width to 2-3mm for ideal results.
Tension adjustment should be slightly looser than standard settings to prevent thread breakage. Consider fabric stabilizers for lightweight knits that might tunnel or pucker.
Key techniques for stretch fabric success:
- Set your differential feed to prevent fabric stretching during sewing
- Test stitch settings on fabric scraps before starting your project
- Use polyester thread for better stretch recovery than cotton
- Maintain consistent fabric feed speed to avoid uneven stitches
- Press seams with a pressing cloth to protect delicate fibers
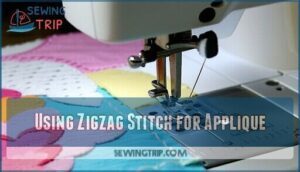
Using Zigzag Stitch for Applique
Applique transforms ordinary sewing projects into artistic masterpieces, and your zigzag stitch becomes the perfect tool for this transformation.
Choose your needle selection based on applique fabrics – universal needles work well for cotton, while ballpoint needles suit knits.
Adjust stitch density by modifying width and length settings on your sewing machine.
Consider exploring options for zigzag applique projects to find inspiration.
Use stabilizer types like tear-away or wash-away beneath delicate fabrics to prevent puckering.
Your decorative stitching creates secure edge finishing while adding beautiful texture to each applique piece.
Zigzag for Mending
Worn-out clothes don’t have to hit the trash bin when your sewing machine becomes a repair hero.
Zigzag stitch transforms into your go-to mending tool, handling fabric emergencies with precision and strength.
Master these essential mending techniques:
- Tear Reinforcement – Stitch across rips to prevent further damage
- Patch Attachment – Secure fabric patches over holes with zigzag edges
- Hole Covering – Create decorative mends while maintaining fabric integrity.
Your zigzag stitch makes mending both functional and beautiful.
Zigzag Hems
Beyond traditional hemming methods, your sewing machine’s zigzag stitch transforms basic edges into professional finishes.
Wide zigzags create stunning decorative effects on curtains and tablecloths.
Blind zigzag techniques produce invisible hems on formal wear.
For delicate fabrics, rolled hems with narrow zigzag settings prevent fraying while maintaining flexibility.
Hem stabilization becomes effortless when you master these essential sewing tips.
These sewing tutorials for beginners reveal creative possibilities that straight stitches simply can’t match.
Best Tension for Zigzag Stitch
Finding the perfect tension for your zigzag stitch transforms frustrating sewing sessions into smooth, professional results.
Start with your machine’s default tension setting of 4.0 to 4.5, then test on fabric scraps.
Thread types and needle size directly impact tension requirements, while fabric stabilizers help manage challenging materials.
Adjust tension gradually—small increments prevent overcorrection.
Some users find it difficult to adjust the bobbin tension settings on drop-in bobbin machines.
- No more puckered seams that make your projects look homemade
- Smooth, even stitches that showcase your growing skills
- Professional-looking finishes that boost your sewing confidence
Remember: tension troubleshooting requires patience and practice for ideal stitch length results.
Exploring Different Zigzag Stitch Settings
Your zigzag stitch transforms dramatically when you adjust machine settings properly.
Stitch Width controls how far your needle swings left and right, while Stitch Length determines the distance between each zigzag point. These two settings work together to create countless variations for different projects.
A specialized presser foot can be installed to help with guidance and puckering.
| Setting | Narrow (0.5-1.5mm) | Wide (4.0-7.0mm) |
|---|---|---|
| Best Use | Delicate fabrics, appliqué | Edge finishing, heavy fabrics |
| Appearance | Subtle, refined look | Bold, prominent coverage |
| Tension Adjustment | Light tension needed | May require adjustment |
| Fabric Type | Silk, cotton voile | Denim, canvas, thick knits |
| Stabilizer Use | Often unnecessary | Recommended for lightweight |
Experimenting with different combinations helps you understand how each adjustment affects your final result. Start with medium settings (2-3mm width and length) then modify based on your specific needs.
Remember that Fabric Type influences which settings work best for your zigzag stitching projects.
Other Stitches to Explore
With your zigzag stitch foundation solid, you’re ready to discover the full potential of your sewing machine’s pattern selection.
Modern machines offer dozens of built-in stitches that’ll transform your projects from basic to brilliant.
Here are five essential stitches worth mastering:
- Stretch stitches – Lightning bolt patterns that move with knit fabrics without breaking, perfect for activewear and stretchy materials
- Buttonhole stitch – Creates precise, reinforced openings with adjustable stitch width and length for different button sizes
- Overlock stitch – Mimics serger finishing by trimming and sealing raw edges in one pass
- Blind hem stitch – Produces nearly invisible hems on pants, skirts, and curtains with professional results
- Decorative stitches – Add personality with scallops, flowers, and geometric patterns for embellishment work
Each stitch serves a specific purpose, expanding your creative toolkit beyond the reliable zigzag stitch you’ve already conquered.
Remember that fabric type considerations are vital for effective stitch selection.
Mastering Zigzag Stitch Techniques
After exploring various stitch options, you’re ready to refine your zigzag stitch mastery. Perfect technique starts with proper needle selection—choose the right size for your fabric weight. Tension tweaks make all the difference between professional results and amateur mistakes.
Stabilizer usage prevents fabric puckering, especially on lightweight materials. Multiple fabric layers often eliminate the need for additional stabilizers. Foot pressure adjustments help your machine handle different fabric thicknesses smoothly.
| Challenge | Quick Fix | Pro Tip |
|---|---|---|
| Puckered seams | Add stabilizer | Test on scraps first |
| Skipped stitches | Change needle | Match needle to fabric |
| Uneven tension | Adjust dial gradually | Write down settings |
Control stitch width and stitch length for varied effects. Wider settings work beautifully for decorative edging, while narrow settings suit delicate hems. Practice needle movement timing when traversing corners—pause with your needle down, lift the presser foot, pivot, and continue. These fundamentals transform ordinary sewing projects into polished masterpieces.
Frequently Asked Questions (FAQs)
Why does my sewing machine zigzag only work on certain fabrics?
Your machine’s zigzag performance varies because different fabrics require specific tension adjustments, needle sizes, and stabilizer support.
Lightweight fabrics pucker without proper backing, while heavy fabrics provide natural stability for consistent stitch formation.
How to zigzag stitch on a sewing machine?
Set your machine’s stitch selector to zigzag, adjust width and length settings, then guide fabric steadily under the presser foot. The needle automatically moves side-to-side, creating the distinctive zigzag pattern.
How do zigzag stitches work?
Your needle moves side-to-side while the feed dogs advance fabric forward, creating interlocking diagonal threads.
This crossover pattern forms when the needle swings left, then right, securing threads together for flexible, durable seams.
What should I do if my sewing machine zig zags?
Nearly 80% of zigzag issues stem from incorrect settings.
First, check if you’ve accidentally selected zigzag mode on your stitch selector dial.
Set stitch width to zero or switch to straight stitch to fix this common problem.
Can you repair your sewing machine’s zigzag stitch?
Yes, you can repair your zigzag stitch by checking tension settings, replacing dull needles, rethreading properly, and cleaning lint buildup. Most issues stem from simple adjustments rather than major repairs.
What is a zigzag stitch?
Like a dancer swaying side to side, a zigzag stitch moves your needle left and right instead of straight.
You’ll create interlocking patterns that secure fabric edges, reinforce seams, and add decorative touches to your projects.
How Can I Adjust the Width and Length on My Zig-zag Stitch?
Most sewing machines have dial controls or digital settings for adjusting zigzag width and length.
Turn the width dial to control side-to-side movement, and adjust the length dial for stitch density.
Test on scrap fabric first.
Why does my machine only zigzag stitch?
Your machine’s stuck in zigzag mode because the stitch selector dial is set wrong, or it’s jammed with lint.
Check your dial setting first, then clean around the selector mechanism thoroughly.
Can zigzag stitching damage delicate fabric types?
Delicate fabrics can get damaged by zigzag stitching if you’re not careful.
Use lighter tension, shorter stitch width, and stabilizer underneath.
Test on scraps first to avoid puckering or tearing your precious silk.
What causes uneven zigzag stitch formation?
Thread tension imbalances, worn needles, incorrect threading, and accumulated lint cause uneven zigzag stitches.
You’ll also see problems from improper stitch width settings, damaged machine parts, or using the wrong needle size for your fabric, which can be considered as complete concepts.
Conclusion
Mastering why sewing machine sew zigzags transforms your sewing journey from basic to brilliant.
You’ve discovered this versatile stitch handles stretch fabrics, prevents fraying, and creates professional finishes that straight stitches can’t achieve.
With proper tension settings and technique practice, you’ll confidently tackle appliqué work, seam finishing, and decorative elements.
Your projects will show improved durability and polished results. Keep experimenting with different width and length combinations to discover zigzag stitch’s full potential in your future sewing endeavors.
- https://crazylittleprojects.com/learn-to-sew-series-lesson-2-zigzag-stitch-2/
- https://www.seamwork.com/articles/the-anatomy-of-a-sewing-machine
- https://www.youtube.com/watch?v=ZMdWkXAZBxE
- https://www.nationalsewingcircle.com/article/the-difference-between-interfacing-and-stabilizer/
- https://www.sunbrella.com/en-us/textiles/upholstery/for-the-home

