This site is supported by our readers. We may earn a commission, at no cost to you, if you purchase through links.

You don’t want your Santa to look like a blob on Christmas morning!
It helps catch pesky misalignments or color disasters before they happen, saving you from financial hiccups and embarrassment.
By testing, you can guarantee that the design behaves well with the chosen fabric and thread, tackling tension and registration gremlins head-on.
Plus, testing teaches you the ropes, like an embroidery whisperer, making every thread-perfect and boosting your confidence.
Curious about avoiding those rogue stitches? Stick around and stitch your way to flawless creations!
Table Of Contents
- Key Takeaways
- Importance of Testing Designs
- Why Testing is Crucial
- Understanding Design Limitations
- Testing Best Practices
- Benefits of Testing Designs
- Common Mistakes to Avoid
- The Role of The Digitizer
- Fabric Selection and Design Considerations
- Machine Setup and Troubleshooting
- Improving Design Quality Through Testing
- Frequently Asked Questions (FAQs)
- Conclusion
Key Takeaways
- You’ll save money and time by catching mistakes early, avoiding costly redos and wasted materials.
- You’ll ensure your designs look perfect by testing different fabrics, threads, and machine settings to find the optimal combination for each project.
- You’ll build confidence in your skills by learning from each test and refining your techniques.
- You’ll improve your reputation by delivering high-quality, consistent results to your clients.
Importance of Testing Designs
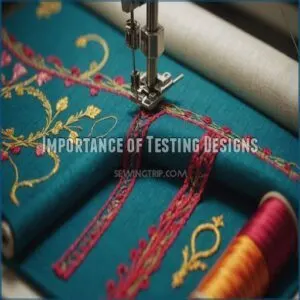
Before you crank up your embroidery machine, it’s smart to test your design because skipping this step could turn your work into a costly mess.
A quick test run saves you from unwanted surprises, like poor stitching or mismatched colors, ensuring your final product is as perfect as you envision.
Preventing Disappointment and Financial Loss
Think testing is a hassle? Imagine this: costly mistakes creeping up like hidden monsters!
Embroidery design testing is your secret weapon.
Spot design flaws before they’re a headache, avoid rework consequences, and earn trust in your creations.
A virtual sew out helps dodge disappointment, ensuring your project hits the mark without ugly surprises.
You’ll save money and stress – that’s a win-win!
Ensuring Design Accuracy and Quality
Preventing those costly embroidery mishaps starts with a thorough design review.
You’ll nail that perfect stitch quality and color matching by testing your design.
Before you sew, check fabric compatibility.
A simple test run reveals any issues before mass production, saving you time and money.
This embroidery design testing is crucial, especially when working with complex designs created using the best embroidery software auto-digitizing tools, it’s like a virtual sew out, letting you tweak stitch types and guarantee excellent embroidery quality.
Trust me, it’s worth the effort!
Identifying Potential Issues and Errors
Spotting errors before they wreak havoc on your embroidery masterpiece is worth its weight in gold.
Density too tight? You risk puckering.
Stitch Length and Underlay off? Say hello to snagged threads.
Testing allows you to tweak compensation and avoid dreaded thread breaks, ensuring your embroidery digitizing shines.
Embrace the adventure of embroidery troubleshooting and delight in mastering design evaluation!
Why Testing is Crucial
You’d be surprised how much difference a little test run can make when you’re dealing with embroidery!
Whether it’s your favorite fabric being a bit stubborn or an uncooperative sewing machine, testing helps you avoid those "oops" moments.
Differences in Fabric, Thread, and Machine
Ever tried stitching on a fabric that feels like wrestling a bear in a phone booth?
That’s why testing is golden!
Each fabric type, thread selection, and machine tension can make or break your project, and choosing the right embroidery vs sewing machines can greatly impact your results.
Don’t let stitch density or needle size run the show. Test, tweak your **embroidery
Environmental Factors Affecting Embroidery
Have you thought about how environmental factors like humidity, temperature, and even little things like dust can mess with your embroidery designs? Yep, it’s important to test!
Here’s why:
You can find specialized tools to help you test and control these factors, such as products for embroidery test airflow.
- Humidity
Tension and Registration Problems
Feeling like your embroidery’s playing tricks? Blame those tension and registration gremlins! Needle tension and bobbin tension can turn perfect designs into a mess, with stitches dancing out of line.
Don’t ignore fabric thickness or hooping issues either—they’re like pranksters waiting to spoil your efforts.
Testing keeps these embroidery quality issues at bay, ensuring machine glory instead of frustration.
Understanding Design Limitations
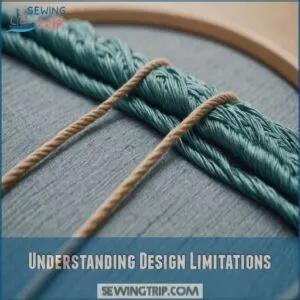
When you’re creating an embroidery masterpiece, remember that no one design fits all fabrics.
Each material has its own quirks like a quirky cat with preferences.
Recognizing these limitations helps you adjust fabric thickness and thread tension, making your design purrfect every time!
No One Design Fits All Fabrics
Three key things to remember: Fabric choice massively impacts your embroidery results. Each fabric type – from delicate silks to sturdy denim – presents unique challenges.
Design limitations exist; a design perfect for cotton might look awful on linen.
Proper stabilizer usage is essential; it helps control fabric behavior and prevents puckering. Experiment to find the best stabilizer for each fabric. Don’t be afraid to tweak your embroidery machine settings, too!
Fabric Thickness and Thread Tension
When you’re amid an embroidery project, fabric thickness and thread tension are like the peanut butter and jelly of the crafting world.
They must complement each other, or it’s a recipe for disaster.
To avoid common issues, it’s important to adjust thick fabric tension for good results, especially when working with densely woven fabrics like heavy twill or canvas.
Be mindful of needle size, bob
Testing Best Practices
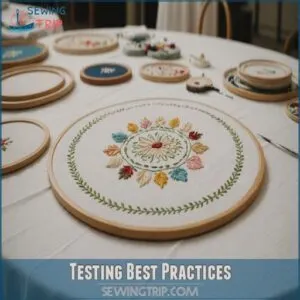
Testing your embroidery designs is like giving your car a once-over before a road trip—you’ll catch issues before they turn into disasters.
Testing your embroidery designs is like giving your car a once-over before a road trip—you’ll catch issues before they turn into disasters.
Use the same fabric, threads, and settings for your test run, and stay vigilant during the process, jotting down any hiccups you might spot to fine-tune the final masterpiece.
Using Same Fabric, Thread, and Settings
Jumping from understanding design limitations, it’s key to remember that using the same fabric, thread, and settings during testing can work wonders, especially when considering the differences between embroidery vs regular thread.
Consistent results become your best friend, ensuring production accuracy.
It’s like turning a potential guessing game into a troubleshooting session—catching issues before they
Observing The Embroidery Process
Observing your embroidery process is like being a detective in a creative crime scene!
Watch closely to make sure stitch quality shines and explore hooping techniques that secure your fabric snugly.
Notice how thread choice impacts your colors.
Here’s a quick checklist: 1. Study needle performance.
- Adjust for fabric behavior.
- Fine-tune stitch length.
Every detail counts!
Documenting Test Results
You’ve tested your embroidery designs, but did you jot down the test results?
Keeping a test log is like having a treasure map for future projects.
Capture data analysis, design notes, and adjustments in a table:
| Category | Details | Comments |
|---|---|---|
| Test Log | Date & Machine Used | Results Observed |
| Design | Initial Notes | Changes Made |
| Project | Time Taken | Issues Found |
| Software | Embroidery Digitization | Any Errors |
| Customization | Thread & Fabric Specs | Test Observations |
Organizing these insights helps track changes and refine your embroidery customization efforts.
Benefits of Testing Designs
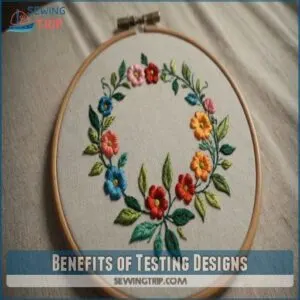
When you test embroidery designs, you’re not just saving tons of time and effort down the road, you’re also dodging those pesky production errors that can turn your project into a nightmare.
Plus, it’s a fantastic way to build confidence in your design skills, making sure each stitch is as perfect as you imagined.
Saving Time and Effort
A little pre-production testing saves you headaches later.
Imagine finding a flaw after you’ve made 50 shirts!
Testing your embroidery designs beforehand means fewer costly mistakes.
You’ll refine your designs efficiently, boosting your Production Efficiency and Time Management skills.
Plus, it’s a huge win for your Design Refinement and Error Prevention efforts.
Think of it as preventative maintenance for your embroidery business!
Reducing Production Errors
Why go through the pain of fixing embroidery disasters later when you can squash production errors right from the start?
By evaluating fit and tension, you can prevent waste and repeats.
Testing helps you nail fabric compatibility and design accuracy, avoiding dreaded embroidery puckering and poor registration.
Proper machine setup and managing thread tension keep everything smooth.
It’s like having a stitch-proof blueprint, paving the way for flawless embroidery production.
Building Confidence in Design and Skills
After reducing those pesky production errors, you’ll see embroidery practice as your trusted compass.
Testing isn’t merely a chore; it’s your confidence booster.
Like fine-tuning a favorite recipe, receiving design feedback sharpens your skills.
Embrace testing benefits and watch your skills soar.
Each design evaluation acts as a stepping stone, turning amateurs into pros, optimizing your embroidery techniques with precision and flair.
Common Mistakes to Avoid
You might think skipping a test run is fine, but it can lead to a fabric fiasco faster than you can say "needle jam."
Always check the fabric and thread compatibility and don’t forget to poke into tension and registration issues—your embroidery sanity will thank you!
Skipping Tests and Assuming Design Quality
Skipping those tests can be like playing embroidery roulette with your reputation and finances.
Assuming your design will work flawlessly without testing is a sure way to invite production delays, wasted materials, and customer complaints.
Instead, embrace embroidery design optimization and design evaluation as your secret weapons.
They’ll save you from financial losses and protect your good name in the industry.
Ignoring Fabric and Thread Compatibility
Isn’t it frustrating when a design turns out wrong because of a fabric-thread mismatch?
Not considering thread weight or fabric types can lead to sewing issues.
Before blaming the design, check these:
- Fabric Properties: Does it fit the design?
- Thread Colors: Are they right?
- Fabric Construction: Is it suitable?
- Design Limitations: Can it adapt?
- Thread Choice Impact: Influences outcome.
Overlooking Tension and Registration Issues
So, you’ve got the fabric and thread sorted, but have you thought about tension problems and registration errors?
Tension issues can turn your masterpiece into a puckered mess.
To make sure you’re on the right track, consider investing in a proper embroidery machine setup to minimize potential issues.
Poor registration leads to misaligned designs—talk about embroidery flaws!
The Role of The Digitizer
So, you want to understand the digitizer’s role?
They’re the design magicians who create and test your embroidery patterns, making sure they’ll look amazing on your chosen fabric – saving you headaches (and maybe even a few tears!) down the line.
Creating Custom Designs for Target Fabrics
Ever thought about why some designs flop? It’s often all about that fabric!
As a digitizer, creating custom embroidery designs for target fabrics means considering fabric compatibility, color matching, and design complexity.
Utilizing tools like best free embroidery software can also help you perfect stitch density and thread colors.
You’ll rely on digitizing
Making Key Decisions on Design Elements
Creating custom designs for your fabric is like tailoring a suit—it’s gotta fit just right!
As a digitizer, you’re the mastermind behind key design decisions: stitch density, underlay type, and color choice.
Keep an eye on push-pull and stitch length to perfect custom embroidery.
Remember, choosing the right elements sets you up for embroidery success.
Testing Designs for Optimal Results
You’ve crafted your design masterpiece, but before firing up the embroidery machine, test designs for best results.
This step’s like trying on new shoes before buying them.
Through testing, you’ll catch design flaws early, ensuring fabric compatibility and perfect thread choices.
Adjust for any quirks, and you’ll nail that custom embroidery, avoiding headaches and boosting your skills in no time!
Fabric Selection and Design Considerations
When you’re choosing the right fabric for your embroidery design, it’s a bit like picking the right stage for your performance—everything just needs to match perfectly.
Understanding fabric types and properties is key, and considering thread color and type makes sure your design doesn’t turn into a wild fashion disaster.
Choosing The Right Fabric for The Design
Picking the right fabric for your embroidery design is like choosing the perfect canvas for a masterpiece. Fabric weight, texture, and thread compatibility make a big difference in design quality.
Think about hoop size and stabilizer use because they impact the outcome.
Don’t skimp on fabric selection and needle choice—they’re essential for avoiding potential mishaps.
Understanding Fabric Types and Properties
Diving into fabric types means understanding how each affects embroidery.
Can your chosen fabric handle the design? Think about it:
- Fiber content affects how your needle moves.
- Fabric weight influences thread depth.
- Weave types determine texture and strength.
- Fabric stretch impacts stability.
Knowing these helps prevent snags, puckering, or unexpected texture surprises!
Considering Thread Color and Type
Before you stitch, think about your thread choices!
Thread color impact is huge; a wrong shade can ruin your masterpiece.
Consider thread weight and sheen too – they affect the final look.
Here’s a handy guide:
| Thread Type | Weight | Sheen |
|---|---|---|
| Rayon | 40 | High |
| Polyester | 40 | Medium |
| Cotton | 40 | Low |
Matching thread and fabric is key for great embroidery!
Experiment to find what works best for you.
Let’s chat about your experiences!
Machine Setup and Troubleshooting
When your embroidery machine acts up, it’s often a tension issue, kind of like when your headphones mysteriously don’t work right before a run.
Properly adjusting needle and bobbin tensions can smooth out these hiccups and prevent those pesky thread breaks and registration slip-ups that make your designs look wobbly.
Adjusting Needle and Bobbin Tensions
Choosing the right fabric is just the start. You’ve got to nail those needle and bobbin tensions for real embroidery magic! Think of it as tuning a musical instrument. Get it right to avoid tension problems and keep your embroidery smooth and professional.
- Fewer thread breaks
- Balanced stitches
- Less fabric puckering
- Consistent stitch quality
- Enhanced design appearance
Identifying Symptoms of Tension Problems
Let’s chat about spotting tension troubles.
Looping, bobbin thread peeking out, and absent stitches can ruin your embroidery vibes.
Imagine sewing a satin column with invisible running stitches!
It may not be fun, but it’s essential to recognize these symptoms.
If you’re unsure about your machine’s tension, consider using a tension test tool to get a clear picture.
Check your machine’s setup if things go awry.
| Symptom | Cause | Solution |
|---|---|---|
| Looping | Loose tension | Tighten tension |
| Bobbin showing | Tight top tension | Loosen tension |
| Needle breaks | Improper tension | Adjust tension |
Resolving Registration and Thread Break Issues
Tackling registration and thread break issues feels like wrestling with gremlins in your machine, doesn’t it?
Here’s how you can wrestle them down:
- Adjust machine tension: Helps with clean stitches.
- Check bobbin issues: Keeps threads from tangling.
- Optimize needle selection: Matches fabric thickness perfectly.
Remember, mastering these will make your embroidery sing!
Improving Design Quality Through Testing
When you test your embroidery designs, you’re not just ensuring they look fabulous; you’re also getting some firsthand experience that’ll make you a pro in no time.
It’s like giving your skills a workout—every test run refines your design elements and upgrades your reputation, leaving room only for high-quality results.
Gaining Valuable Experience and Feedback
While tinkering with machine setup, you also uncover the magic of testing.
Through design critiques and user testing, you gather heaps of valuable experience and community feedback.
Imagine trading stories with fellow embroidery enthusiasts, sharing laughs over hiccups, and serendipitously creating industry-standard pieces.
Peer reviews become your secret sauce in embroidery project planning and pushing those machine embroidery designs to new heights, especially when incorporating unique designs from free embroidery machine fonts like curly script fonts.
Refining Design Elements and Settings
Someone once told me, "Testing is your secret weapon!"
Tweak your stitch density; experiment with different stitch lengths.
Fine-tune color blending for a smoother look.
Play around with underlay tweaks and fill optimization—it’s all about getting that perfect embroidered image.
Remember, even stock embroidery designs benefit from a little personalized attention!
Don’t forget the stabilizer and embroidery hoop—they’re your best friends!
Enhancing Creator Skills and Reputation
Boosting your skills and reputation in embroidery isn’t rocket science, but it does take effort.
Testing your embroidery designs not only sharpens your abilities but also builds brand trust.
Client feedback helps refine your design portfolio, pushing you in the direction of industry recognition.
Each tweak in digitizing and machine embroidery brings you closer to professional development and success.
Keep those embroidery threads spinning!
Frequently Asked Questions (FAQs)
What is the best fabric to test embroidery on?
Choose poplin for testing embroidery designs since it’s like the Goldilocks of fabrics—not too thick or too thin.
Its medium weave and stability offer a solid baseline, helping you spot design tweaks before the big day.
Why do we need to study embroidery?
Stitching stories into fabric, embroidery’s like painting with thread, weaving history, culture, and creativity together.
Embroidery empowers you to express artistry, design skills, and even mindfulness—turning a simple needle into a wand of wonder.
How do you know if embroidery is good?
Evaluating good embroidery? Look for even stitching, vibrant colors, smooth design lines, and perfect tension without puckering.
Make sure your threads don’t unravel and the backing supports the fabric.
A neat finish tells a lot too!
What is the purpose of embroidery design?
Embroidery designs, like tiny masterpieces, add personality and flair to fabrics.
You can create unique apparel, personalize gifts, or even express your creativity through intricate patterns and colors.
They’re a way to bring your imagination to life, stitch by stitch.
How long should embroidery testing typically take?
Testing embroidery designs can take anywhere from 30 minutes to a few hours, depending on complexity.
It’s like a dress rehearsal—ensuring everything stitches right before you go big.
Take your time to get it perfect!
Can I test multiple designs simultaneously?
Sure, you can test multiple designs at once, but be careful.
Each design might need unique tweaks like thread tension or stabilizer adjustments.
Keep notes on what changes work for each to save headaches later.
What tools can enhance the testing process?
You’ve got some nifty tools to make embroidery testing easier.
Use design software for simulations.
An embroidery-specific ruler helps check stitch precision.
Test swatches are essential for color accuracy and fabric compatibility.
Always keep a notebook handy!
Are there budget-friendly testing methods available?
Like a crafty fox, you can cleverly test embroidery designs on scrap materials to save cash.
Use old fabric pieces,
try out basic designs first,
and share tips online to learn and innovate without breaking the bank.
How to interpret test results effectively?
Check out embroidery test results by focusing on stitch consistency and tension balance.
Spot issues fast, like thread loops or fabric pulls.
Adjust settings accordingly.
It’s more art than science, so trust your eye and tweaks!
Conclusion
Imagine saving yourself from an embroidery nightmare—testing designs is like having a safety net.
By sampling first, you dodge fabric disasters and boost your project’s quality.
You’ve learned why testing embroidery designs is vital: it prevents costly mistakes, perfects alignment, and guarantees fabulous finishes.
So, don’t skip those test runs.
They’re key to understanding the quirks of different fabrics and threads, such as choosing the right embroidery stabilizer for your project, understanding stabilizer types. They’re key to understanding the quirks of different fabrics and threads, giving you the confidence to stitch like a pro every time.

