This site is supported by our readers. We may earn a commission, at no cost to you, if you purchase through links.
Imagine stitching your stress away, each thread weaving a tale as unique as your voice.
You don’t need fancy gear to start—just some fabric, a hoop, and a dash of creativity.
Embroidery’s like painting with thread, offering both calm and a touch of playful mischief, especially when you find yourself accidentally stitching your work to your jeans!
Ready to master those stitches and create something beautiful?
There’s so much more you can do with a needle in hand.
Keep reading for tips!
Table Of Contents
- Key Takeaways
- What You’ll Need for Embroidery
- Setting Up Your Embroidery Tools
- Mastering Basic Embroidery Stitches
- Transferring Designs to Fabric
- Starting Your Embroidery Project
- Hand Embroidery Vs Machine Embroidery
- Advanced Embroidery Materials and Techniques
- Finishing and Displaying Your Work
- Tips for Improving Your Embroidery Skills
- Embroidery as a Creative Outlet
- Frequently Asked Questions (FAQs)
- Conclusion
Key Takeaways
- To get the most out of your embroidery hobby, mastering techniques like choosing the right stabilizer is essential for achieving professional-looking results. You’ll find that embroidery is a creative and relaxing hobby, perfect for expressing yourself through artful designs on fabric.
- Embroidery requires only a few essential tools like fabric, an embroidery hoop, needles, embroidery floss, and a water-soluble pen to get started.
- Mastering basic stitches such as the running stitch, back stitch, and French knots will equip you with the skills needed to create intricate patterns.
- Experimenting with different thread types, specialty fabrics, and new techniques will elevate your projects and keep the hobby engaging.
What You’ll Need for Embroidery
So, you’re ready to express your creativity with embroidery?
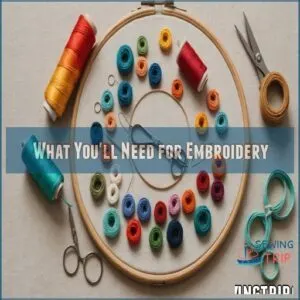
Before you stitch up a storm, let’s gather your essential tools: fabric, embroidery floss, needles, a hoop, and a water-soluble pen – trust me, you’ll thank me later!
Essential Embroidery Supplies
When diving into embroidery, you’ll find yourself frequently reaching for these essentials. Grab a 6-inch embroidery hoop to keep your fabric taut. Choose sharp embroidery needles with large eyes. Stock up on quality embroidery floss, perhaps trying a few floss brands. Finally, use a water-soluble pen for easy transfer methods. Each tool plays a key role in crafting beautiful patterns.
- Embroidery hoop: Keeps fabric tight.
- Embroidery floss: Add color to your work.
- Embroidery needles: Essential for stitching.
- Water-soluble pen: For transferring embroidery patterns.
Choosing The Right Fabric
Choosing the right fabric is your next step!
Think about fabric weight, weave type, and color choice for your project purpose.
Linen and quilting cotton are great, but steer clear of Aida cloth for beginners.
It’s about balancing care with creativity.
Here’s a quick guide:
| Fabric Type | Best For |
|---|---|
| Linen | Detailed designs |
| Quilting Cotton | Versatile projects |
| Aida Cloth | Experienced artisans |
| Muslin | Practice stitching |
Selecting Embroidery Threads
For vibrant embroidery, picking the right threads is essential. Explore the colorful world of DMC floss!
Consider these essentials:
- Thread types: Choose between mercerized cotton floss and pearl cotton thread.
- Thread weight: Opt for the best texture.
- You can find a wide variety of high-quality embroidery threads at embroidery thread stores.
- Color blending: Harmonize shades warmly.
- Thread care: Avoid tangles, keep threads tidy.
Enjoy creating with these embroidery materials!
Understanding Embroidery Needles
Imagine your embroidery adventure begins with the right needle.
When selecting a machine embroidery needle, it’s crucial to consider the types of embroidery needles to ensure smooth stitches. Choosing the right needle type, such as chrome-plated machine embroidery needles, is essential for smooth stitches.
You need to select a needle with the perfect size and eye for your thread.
Think about those delicate embroidery stitches—it’s all about needle types and brands.
A smooth, sharp needle makes magic happen, so care for it because it’s your trusty partner in embroidery for beginners!
Scissors and Transfer Tools
Got your needles sorted? Fantastic! Now, grab sharp scissors for cutting threads and fabric like a pro.
When it comes to transfer tools, you’ll want options: try water-soluble pens or tracing paper to replicate those intricate pattern types.
Remember, using the right tools adds joy to your embroidery journey, making hoop sizes and fabric considerations fun to explore!
Setting Up Your Embroidery Tools
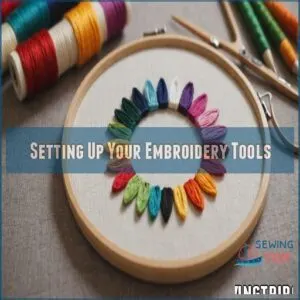
Setting up your embroidery tools is an exciting and important step, like laying out ingredients before baking your favorite cookies.
You’ll organize your supplies, prepare your hoop, and thread your needle with a sense of adventure and creativity in the air.
Preparing The Embroidery Hoop
Now that you’ve gathered your supplies, let’s get those embroidery hoops ready!
You’ll need the right hoop size for your project.
Proper fabric tension is key; don’t pull too tight!
Here’s how to get started:
- Separate the hoop rings.
- Place your fabric over the smaller ring, centering your design.
- Tighten the screw, ensuring even tension across the fabric.
You’re ready to stitch!
Organizing Embroidery Supplies
A tidy embroidery workspace fuels creativity!
Explore storage solutions by using project boxes to keep embroidery kits neat.
Organize thread spools by color in clear containers, making it easy to grab the right hue.
Your hand embroidery tools deserve a dedicated spot—think small baskets or jars.
It’s not just about organization; it’s creating an inspiring sanctuary for your hobby.
Threading Your Needle
Does your needle seem like it’s playing hide and seek with the thread?
Start by choosing the right needle size for your thread thickness; it’s like matching socks on laundry day.
To simplify threading, use a needle threader tool that guides the floss through the eye.
Embrace needle threading tools or a steady hand to guide the floss through the eye.
With knot types mastered, you’re ready for hand embroidery magic, starting and stopping with ease!
Mastering Basic Embroidery Stitches
To start your embroidery journey, you’ve got to master the basic stitches—think of them as the ABCs of stitching magic!
From the gentle flow of the back stitch to the playful loops of the French knot, each technique adds a bit of personality and flair to your project, and who knows, you might even find your new favorite meditative hobby while creating beautiful designs.
Running Stitch
Imagine this: you’re mastering the running stitch, a simple yet versatile technique in hand embroidery.
To do this, you’ll need the right tools, such as an embroidery needle suitable for your fabric type.
Embrace the rhythm, like music for your fingers, and avoid these snags:
- Fabric choices: Lightweight cotton works wonders.
- Stitch length: Keep it even by maintaining an 18-inch thread length and using a consistent style for visible thread and fabric spacing, see how to do a running stitch.
- Thread tension: Not too tight or loose.
- Running stitch variations: Experiment fearlessly.
- Common mistakes: Learn with each poke!
Back Stitch
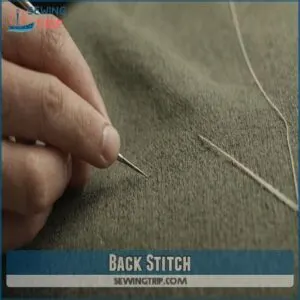
The journey from running stitch into back stitch brings a world of creativity.
You’ll love how back stitch creates smooth lines, enhancing outlines in your embroidery projects.
With simple variations, personalize your designs effortlessly.
Focus on the right tools and practice to avoid common back stitch mistakes.
So, thread that needle!
Your embroidery skills are ready to blossom, unleashing limitless artistic potential.
Split Stitch
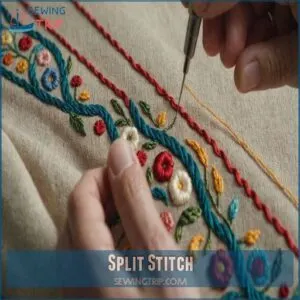
Explore the beauty of textile art by diving into split stitch.
It’s fantastic for outlines and filling, giving your embroidery a braided texture.
Why use it? Because it’s easy, versatile, and adds depth.
Picture stitching a flower, where:
- Petals pop with split stitch variations
- Stems shine with smooth outlines
- Leaves are lively, filling the design.
French Knot
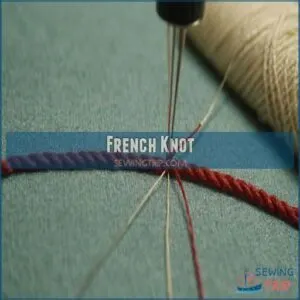
Ready to add some pizzazz? The French knot’s your next embroidery adventure! It’s all about wrapping the thread around the needle, then pulling it through for a tiny, charming knot.
Practice controlling knot size and placement—it’s like sculpting miniature gems onto your fabric!
Experiment with knot density for different textures. Don’t worry about mistakes; the embroidery community’s got your back!
Detached Chain Stitch
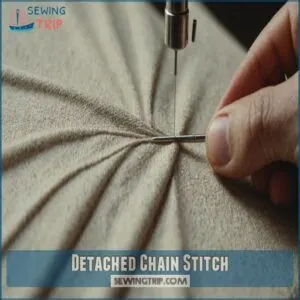
After mastering the delicate raised texture of French knots, which can be used to create realistic flower centers and add dimension to your designs, check out our French knot guide. After mastering French knots, you’ll find the detached chain stitch is like adding a charming chain necklace to your embroidery skills.
These loops, resembling petals or links, can vary with placement and fabric choice, bringing life to your projects.
Keep an eye out for tension slip-ups.
Let creativity blossom in your DIY crafts, turning common mistakes into learning treasures!
Stem Stitch
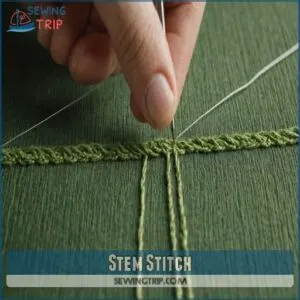
Switching from detached chain stitch to the mesmerizing stem stitch, you’ll discover a world of botanical embroidery magic.
This technique, like a gentle plant stem, allows for flowing, smooth lines.
Perfect for freehand stem stitch patterns or structured designs, mastering it feels like painting with thread. Using a variety of stitches, such as backstitches for outlining, can enhance your embroidery skills.
Explore stem stitch variations and let your embroidery journey blossom with creativity and mindfulness.
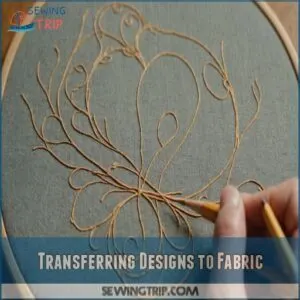
Transferring Designs to Fabric
You’re about to discover the magic of transferring your unique designs onto fabric, turning a blank canvas into your next masterpiece.
Whether you’re tracing with a trusty water-soluble pen or using a lightbox like a pro, these techniques will have you giggling at how easy and fun the process can be!
Tracing Patterns
Stepping into the art of embroidery, tracing patterns is your first step to perfection.
Imagine you’re an artist sketching your ideas.
Here’s how:
- Choose a tracing tool, like a water-soluble pen.
- Ensure pattern accuracy by securing your fabric.
- Try lightbox alternatives, such as a sunny window, for easy visibility.
Let your artistic expression flow!
Using Iron-on Pens or Lightboxes
Imagine you’re ready to transfer that intricate pattern to fabric.
Iron-on pens offer a quick shortcut, ensuring pattern accuracy with ease.
You can find various embroidery patterns online, such as those at embroidery designs store.
Lightboxes, though, can rescue more complex designs, shining light through fabric like a wizard’s spell.
Each method transforms fabric into a ready canvas, making embroidery a mindful crafting hobby where relaxation techniques meet creative challenge.
Best Practices for Pattern Transfer
Pattern transfer might sound tricky, but with a few best practices, it’s a breeze.
Make sure your fabric prep is spot-on by smoothing wrinkles before you start.
Water-soluble pen tips are lifesavers for neat tracing accuracy.
For a lightbox alternative, use a bright window.
These tips make sure your embroidery shines, blending beautifully with favorite art hobbies and hobby ideas.
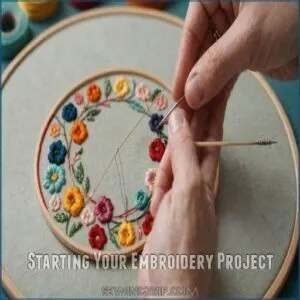
Starting Your Embroidery Project
Ready to bring your design to life? Choose a simple pattern—maybe a cute cat or a cheerful flower—and let’s get stitching!
Developing Design Ideas
You’ve traced your patterns, now let’s stir some creative juices, considering the various types of embroidery.
Think of inspiration sources like nature walks or favorite songs.
Experiment with color palettes that make your designs pop.
Sketching practice helps solidify thoughts into vibrant ideas, while exploring themes adds depth.
Consider hand embroidery vs. device embroidery for different textures.
Let your imagination run wild!
Selecting Beginner Patterns
Starting your embroidery project with beginner patterns is like picking the low-hanging fruit of creativity.
Choose simple designs with easy stitches, like running or back stitches, that won’t overwhelm.
Small projects are perfect for building confidence and skills.
Explore pattern resources online for inspiration, and focus on fabric choices that allow for easy handling and vibrant floss colors.
Tips for Choosing The Right Project
Consider your skill level and time commitment.
Choose projects that match your interests and complexity level, like simple flowers or geometric patterns.
Think about material preference; perhaps explore linen or muslin.
To get started, invest in the right tools, such as high-quality embroidery needles online.
Embroidery can be hand-stitched or digitized, so weigh your options.
Remember, you’re the master of your stitches—start with what excites you most!
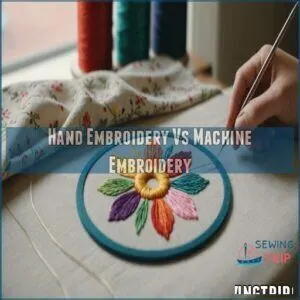
Hand Embroidery Vs Machine Embroidery
When deciding between hand embroidery and machine embroidery, think of it like choosing between crafting a handwritten letter or typing a quick email.
You’ll find that hand embroidery offers a personal touch and creative freedom, while machine embroidery speeds things up when you’re excited to see projects come to life.
Exploring Hand Embroidery
Embrace the simplicity and creativity of hand embroidery! It’s perfect for personalizing your embroidery projects with a personal touch.
Looking for a new hobby? Hand embroidery’s where you can enjoy:
- Stitch variations: Endless creativity.
- Thread choices: Mix and match colors.
- Finding patterns: Explore unique designs.
- Beginner tips: Perfect for starting out.
Are you in person? Consider hand embroidery!
Understanding Machine Embroidery Basics
Machine embroidery opens up endless creativity!
Imagine crafting art with precise machine types and embroidery software.
With digitizing designs and hooping techniques, you’ll master stitches effortlessly.
Troubleshooting issues? Easy as pie!
In this journey, consider hand embroidery if you’re a personal touch fan.
Here’s a table for quick tips:
| Aspect | Machine Embroidery Tools |
|---|---|
| Machine Types | Digitizing Designs |
| Hooping Techniques | Embroidery Software |
| Troubleshooting | Why Not Try a New Hobby? |
Choosing The Right Approach for Your Needs
With hand embroidery, you’re in control, stitch by stitch! It’s perfect for beginners wanting to learn the basics and develop their personal style.
However, machine embroidery offers speed and precision, ideal for larger projects or if you’re short on time.
Budget and project goals are key factors. Are you in person? Consider hand embroidery for its meditative quality.
Ending up being a master of stitches—that’s the goal! Machine/digitized embroidery offers advantages for speed and intricate designs. Choose the method that best suits your needs and enjoy the process!
Advanced Embroidery Materials and Techniques
Ready to add some pizzazz to your embroidery projects?
By experimenting with vibrant thread types like variegated or metallic floss and exploring specialty fabrics such as silk and denim, you’ll master techniques that will make your creations stand out in any crowd—your grandma might just call you for tips!
Experimenting With Different Thread Types
You know, picking the right thread can feel like choosing ice cream flavors—so many delightful options, each promising a unique twist on your project.
Compare thread weights for texture, blend colors for depth, or add shimmer with metallics.
Variegated floss creates lovely patterns.
Explore these and step closer to becoming a master of stitches!
Exploring Specialty Fabrics
Starting a new fabric adventure can transform your embroidery.
Explore specialty fabrics like denim, silk, and muslin to add unique flair.
Each fabric brings its own 1. texture complexity, 2. color impact potential, and 3. distinct stitching techniques.
Follow care instructions carefully to maintain your masterpiece.
Why not try a new hobby? Maybe hand embroidery, a perfect match for these materials!
Mastering Advanced Stitches and Techniques
Picture yourself mastering advanced embroidery stitches like a pro, exploring satin stitch variations and couching techniques with ease.
Get into surface embroidery and freehand your way into unique creations.
Before you know it, you’ll be ending up a master of stitches.
Invest in quality embroidery floss types and explore the advantages of machine embroidery.
Congrats, you’re soon to be an embroidery entrepreneur!
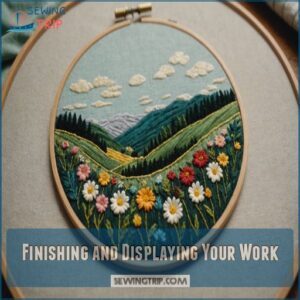
Finishing and Displaying Your Work
You’ve spent hours perfecting each stitch, so now it’s time to secure your masterpiece and give it the spotlight it deserves, whether that’s in a cozy frame or boldly displayed as a trendy patch on your backpack.
Remember, the way you choose to showcase your art can be as creative as stitching a mini Mona Lisa, especially if you’ve ever wrestled with a French knot that felt like it required an engineering degree to tame!
Securing and Protecting Stitches
Ever tried setting a solid foundation for your embroidery creations?
Securing and protecting stitches is key to making them last and shine.
Here’s how:
- Stitch Knots: Secure those ends with tight knots.
- Thread Stabilization: Prevent tangles by using quality floss.
- Fabric Backing: Add a protective layer.
- Embroidery Care: Treat your masterpiece gently.
Your stitches deserve love!
Mounting and Framing
Showcasing your handiwork is half the fun! First, carefully mount your embroidery onto sturdy backing. Then, choose a frame.
| Frame Styles | Matting Options | Mounting Techniques |
|---|---|---|
| Simple, ornate | Acid-free, colored | Glue, stretching |
| Modern, rustic | Varying thicknesses | Using archival materials |
| Custom-made | Beveled, layered | Professional framing |
Creative Ways to Display Your Embroidery
Got your embroidery beautifully framed? Time to think outside the hoop! Turn those stitches into home magic. Hang embroidered wall art in your creative nook, make embroidery jewelry for a personal touch, or sprout DIY projects that double as gifts. Don’t stop there—why not try a new hobby to share with friends? Trust me, they’ll love it!
- Create embroidered wall art
- Design embroidery jewelry
- Spruce up with DIY projects
- Craft unique gifts
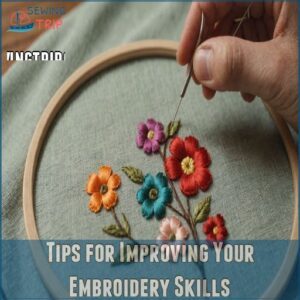
Tips for Improving Your Embroidery Skills
To take your embroidery skills to the next level, keep your needle moving regularly, and don’t be afraid to try new stitches or experiment with vibrant threads.
Join an embroidery community where you can swap tips, share those tangled knot stories, and find endless inspiration from fellow stitch enthusiasts.
Practicing Regularly
When you’re tackling embroidery challenges, stitch consistency is key.
Make time management a priority by fitting a few minutes daily to practice.
Finding inspiration can be as simple as a walk in nature.
Self-critique gently and ask yourself, "Why not try a new hobby?"
Hand embroidery can be your creative escape, honing skills and boosting artistry with every stitch.
Experimenting With New Techniques
Exploring new techniques in embroidery feels like discovering hidden treasures.
To master embroidery stitches, it’s essential to understand the characteristics of different best embroidery machine thread types, such as rayon’s vibrant sheen and polyester’s durability. Explore various needle sizes and embroidery thread types to find your style.
Mix stitch variations with different fabric combinations—it’s like a colorful adventure!
Switch between hand and machine embroidery for a fresh perspective.
Finally, sprinkle in some mixed media for that extra flair!
- Embrace creativity!
- Find your unique style.
- Stitch your story into fabric.
- Dare to be different!
- Create with passion!
Joining an Embroidery Community
Try mixing in some online groups or local classes to boost your skills after trying new techniques.
You’ll find stitch-alongs spark creativity, and sharing projects provides inspiration.
Are you in person?
Consider hand embroidery for a personal touch.
Machine embroidery offers speed.
Both ways, you’ll gain confidence and maybe become an embroidery entrepreneur!
Why not check it out?
| You Might | Discover | Enjoy |
|---|---|---|
| New Friends | Workshops | Friendly Chats |
| Tips & Tricks | Patterns | Skill Growth |
| Inspiration | Community | Fun Projects |
| Confidence | New Hobby | Entrepreneur Ideas |
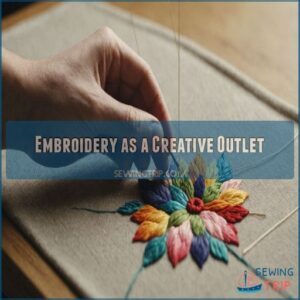
Embroidery as a Creative Outlet
When you pick up a needle and thread, you open a world of creativity where you can turn a plain fabric into something extraordinary—like a pillowcase masterpiece or a quirky family heirloom.
Whether you’re personalizing gifts or exploring the wild side of freehand embroidery, you’ll find endless fun and satisfaction in every stitch.
Personalizing Gifts and Home Decor
Express your creativity! Stitch personalized pillow covers, adding a unique touch to your home.
Embroidered wall art makes a stunning statement; create custom tote bags for friends.
DIY embroidery kits offer easy starts.
Hand-stitched blankets become cherished gifts.
It’s the magic of personalized gifts! Why not try a new hobby? You’ll be amazed at what you can create.
Creating Family Heirlooms
Impress your family by creating beautiful heirloom pieces with embroidery!
Whether you’re stitching vintage patterns on heirloom quilts or crafting personalized baby blankets, you can add a personal touch by using techniques such as embroider letters on shirt to create unique designs.
Embroidered family crests bring history to life, while hand-stitched birth announcements celebrate new beginnings.
These treasures, crafted with your own hands, will be cherished for generations.
Why not try a new hobby?
Exploring Freehand Embroidery and Mixed Media
Ever toyed with the idea of freehand embroidery?
It’s like doodling with threads!
By embracing mixed media, you add layers of texture and surprise to your work.
You can start by mastering basic hand embroidery stitches, which include the running stitch and backstitch for basic lines, and then start with these ideas:
- Combine fabric scraps to inspire design ideas.
- Experiment with thread textures for a dynamic look.
- Why not try a new hobby and explore hand embroidery’s unique charm?
Frequently Asked Questions (FAQs)
Can embroidery be a hobby?
A stitch in time saves nine: embroidery can weave into your life as a fulfilling hobby.
Jump into creating art on fabric, feel the rhythm of needle and thread, and share your masterpieces with fellow embroidery enthusiasts.
Is embroidery worth learning?
Absolutely, embroidery is worth learning!
Picture creating beautiful art with thread and fabric, adding a personal touch to clothes or decor.
It’s relaxing, creative, and meditative—not to mention a fantastic way to express yourself!
Is embroidery a good side hustle?
You could sell your creations online or at craft fairs.
It’s a fun way to earn extra cash, but don’t expect to get rich quick.
Think of it as a creative side gig, not a get-rich-quick scheme.
Is embroidery hard for beginners?
Don’t worry, embroidery isn’t hard for beginners!
Just start small with basic stitches like the straight stitch, and be patient.
It’s like painting with thread—let your creativity flow, and enjoy each colorful moment.
How can I care for finished embroidery pieces?
Imagine your embroidery like a newborn kitten, needing gentle handling.
Dust it regularly.
Avoid direct sunlight.
Hand wash with mild soap.
Lay flat to dry.
Store it in a cool, dry place.
What are common mistakes beginners make?
Beginners often forget to use taut fabric, leading to puckering.
They may also pull stitches too tight, skip practicing basic stitches, or neglect pattern tracing.
Embrace patience, practice, and celebrate small wins to improve your skills!
How do I choose embroidery designs?
Start by picking designs that align with your interests—whether it’s cute animals, elegant flowers, or funky abstracts.
Consider your skill level: simple patterns build confidence!
Let your creative juices flow and embrace each stitch with joy.
Can embroidery help reduce stress?
Embroidery? It’s like a slow dance for your fingers, easing that mind.
You focus on each stitch, letting worries fade.
It’s creative, meditative, and rewarding—like painting, but with thread.
You’ll find peace stitching those dreams.
Is it possible to embroider on dark fabrics?
Sure, embroidering on dark fabrics is totally doable!
Try using a white pencil or chalk to transfer patterns, and choose bright or metallic threads for contrast.
A light box under the fabric helps see markings easily.
Conclusion
So, there you have it! Embroidery as a hobby is like opening a secret garden of creativity.
You’ve learned the basics, now it’s time to let your imagination run wild. Don’t be afraid to experiment; those wonky stitches add character!
Remember, practice makes perfect, and the joy of embroidery lies in the process, not just the perfect picture.
Find your community, share your creations, and keep stitching those happy little moments. Embrace the journey of embroidery as a hobby; it’s more rewarding than you think!

