This site is supported by our readers. We may earn a commission, at no cost to you, if you purchase through links.
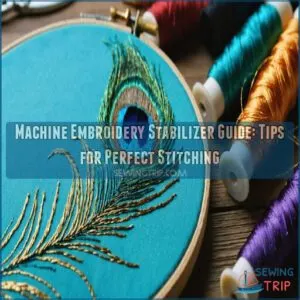
Stabilizers keep your fabric steady, preventing puckering and distortion. Tear-away stabilizers are great for temporary support, while cut-away ones offer long-lasting stability, especially for stretchy knits.
For delicate fabrics like lace, water-soluble stabilizers work wonders, dissolving completely after stitching. Heat-activated stabilizers vanish with a little heat, perfect for non-washable projects.
Match the stabilizer’s weight to your fabric—light for sheer materials, heavy for thick fabrics. Always test on scrap fabric first to avoid surprises.
Ready to stitch like a pro? Let’s explore hooping and troubleshooting next!
Table Of Contents
Key Takeaways
- You’ll choose a stabilizer based on your fabric type, design density, and desired outcome, considering tearaway, cutaway, washaway, or heataway options for best embroidery results.
- To prevent puckering and distortion, you’ll match the stabilizer’s weight to your fabric – light for sheer materials, heavy for thick fabrics, and always test on scrap fabric first.
- Different fabrics need different stabilizers, so you’ll use cut-away stabilizers for stretchy knits, tear-away for woven fabrics, and wash-away for delicate or sheer fabrics like lace.
- You’ll remove the stabilizer depending on its type – tear it away, cut it away, or wash it away – and always follow the removal instructions carefully to achieve a clean finish and prevent fabric damage.
What is Embroidery Stabilizer?
Embroidery stabilizers are the foundation of flawless machine embroidery.
They’re like a safety net, keeping your fabric steady and your stitches precise.
Without them, designs can warp, pucker, or lose their crisp details—nobody wants that!
Stabilizers provide essential fabric stabilization, ensuring your material doesn’t stretch or shift during stitching.
Whether you’re working on delicate organza or sturdy denim, the right stabilizer for machine embroidery makes all the difference.
Think of them as the unsung heroes of embroidery support, holding everything together so your designs shine.
From lightweight Tear-Away to durable Cut-Away, there are various embroidery stabilizer types to suit every project.
Mastering this embroidery stabilizer guide is your first step to achieving professional-level stitch quality every time!
Types of Embroidery Stabilizers
When discussing embroidery stabilizers, understanding the types can make all the difference in your stitching.
Each one serves a particular purpose, so selecting the right kind guarantees your designs look crisp and stay secure.
This approach ensures that your embroidery projects turn out as intended, with the stabilizer playing a crucial role in achieving the desired outcome, and the right choice being essential for a secure finish.
Cut-Away Stabilizers
When working with knits or stretchy fabrics, a cutaway stabilizer is your go-to for lasting support.
These stabilizers don’t budge, even after washing, making them perfect for dense designs.
You can find a variety of cutaway stabilizer products to choose the right stabilizer weight—light for delicate fabrics, heavy for thicker ones.
Hoop it snugly, ensuring proper stabilizer adhesion, and watch your embroidery tension stay flawless.
Tear-Away Stabilizers
Tear-away stabilizers are perfect for stable, woven fabrics like cotton or linen.
They’re temporary, leaving minimal residue and no permanent backing. A variety of tear-away stabilizer products are commercially available.
Here’s when to use tear away stabilizer:
- Simple designs with low stitch density.
- Lightweight fabrics that don’t stretch.
- Adjustable stabilizer weight for versatility.
- Easy stabilizer removal without damage.
- Helps maintain proper embroidery tension.
Quick, clean, and effective!
Water-Soluble Stabilizers
Water-soluble stabilizers are like the disappearing act of embroidery—they support your fabric during stitching, then vanish completely with water.
Whether you’re creating lace embroidery, freestanding designs, or working on sheer fabrics, these soluble films are your go-to.
You can purchase water soluble stabilizer products online.
Lightweight options suit delicate materials, while heavier ones handle intricate patterns.
For textured surfaces, a water soluble topping works wonders.
Stabilizer removal is simple: rinse in warm water for sheer fabrics or hot water for dense designs, to achieve flawless results.
Always test a wash away stabilizer first.
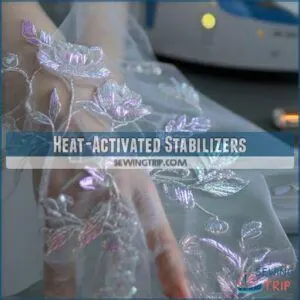
Heat-Activated Stabilizers
Heat-activated stabilizers, or heataway stabilizers, bring a unique twist to embroidery.
These stabilizers disappear with heat, offering clean finishes for fabrics that can’t be washed.
Perfect for tricky projects, they fuse seamlessly with materials, ensuring smooth stitching.
Here’s how to make the most of their thermal properties:
- Use an iron at precise settings for heat removal.
- Enhance stabilizer adhesion during fabric preparation.
- Support delicate designs with invisible backing.
- Simplify appliqué with controlled heat.
- Adjust embroidery settings for flawless results.
Choosing the right stabilizer boosts your creative control.
Choosing The Right Stabilizer
Picking the right stabilizer can make or break your embroidery project, so it’s worth a little extra thought.
Consider your fabric’s texture, the design’s stitch count, and how the finished piece will be used to guarantee everything stays smooth and secure.
Fabric Weight Considerations
Matching stabilizer weight to fabric is key for smooth stitching.
Lightweight fabrics, like chiffon, need a delicate stabilizer to prevent puckering. Medium fabrics, such as cotton, pair well with medium stabilizers for firm support.
Heavy fabrics, like denim, thrive with thicker stabilizers for stability. Always consider fabric density, stabilizer thickness, and material selection to balance thread tension and achieve flawless results!
To ensure the best outcome, it is crucial to understand that complete concepts must be considered when choosing the right stabilizer for your fabric.
Embroidery Design Density
Choosing the right embroidery stabilizer hinges on your design’s stitch density and complexity.
Dense embroidery designs with high stitch counts need strong stabilizers to handle the pressure, while lighter patterns can use less support.
Think of stabilizers as your fabric’s safety net—essential for preventing puckering or distortion.
For intricate designs, heavier stabilizers or multiple layers provide stability.
Always match density settings to your project to achieve flawless stitching and balanced thread tension.
Stitch Types and Their Requirements
Different stitch types call for specific stabilizer support to keep your embroidery flawless.
Here’s how to match them up:
- Running stitches need light tear-away stabilizers for delicate outlines and fine details.
- Satin stitches, with their dense, shiny finish, work best with heavyweight cut-away stabilizers to prevent puckering.
- Fill stitches in larger areas benefit from medium-weight stabilizers for even tension and support.
For more detailed guidance, explore this helpful machine embroidery stabilizer guide.
Always consider stitch density, fabric stretch, and thread tension. Testing stabilizer selection on your embroidery machine guarantees smooth stitching and professional results.
How to Use Embroidery Stabilizers
Using embroidery stabilizers isn’t tricky if you know the basics. From hooping your fabric to removing the stabilizer cleanly, each step guarantees your design looks crisp and professional.
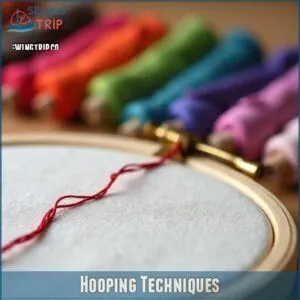
Hooping Techniques
Getting the hooping right is where your embroidery magic begins.
After choosing an embroidery stabilizer, it’s time to focus on placement and tension. Proper hooping prevents embroidery stabilizer problems like puckering or misaligned designs. Think of it as setting the stage for a flawless performance.
- Frame Selection Matters: Use a hoop size that matches your design. A snug fit reduces fabric movement.
- Tension Control Is Key: Stretch your fabric and stabilizer for embroidery designs evenly, but don’t pull too tight. Wrinkles or sagging can ruin the outcome.
Smooth fabric stretch and precise hooping transform your work from “okay” to “wow.”
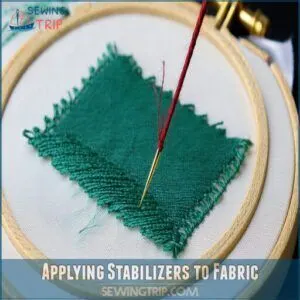
Applying Stabilizers to Fabric
Applying stabilizers is key to embroidery prep.
Start by layering the stabilizer in your hoop, then center your fabric on top.
For sticky stabilizers, peel, press, and smooth wrinkles.
Fusible stabilizers? A quick iron press works wonders.
Proper stabilizer selection techniques involve considering fabric type and design density.
Match stabilizer weight to fabric type for better Fabric Tension.
Use this guide:
| Stabilizer Type | Ideal Use |
|---|---|
| Tear-Away | Woven fabrics |
| Cut-Away | Stretchy knits |
| Wash-Away | Sheer, delicate fabrics |
| Fusible | Stretchy or tricky fabrics |
| Sticky | Hard-to-hoop items |
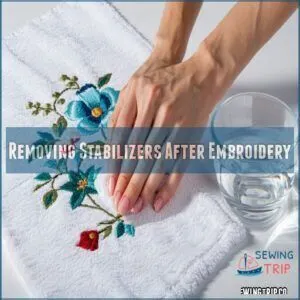
Removing Stabilizers After Embroidery
After stitching, stabilizer removal is your final step to perfection.
Here’s how to handle it:
- Cut-Away Stabilizers: Trim neatly, leaving a small edge around the design.
- Wash-Away Stabilizers: Soak in warm water, gently wiping fabric residue with a damp cloth.
- Heat Removal Stabilizers: Use heat for delicate fabrics that can’t be washed.
Pro tip: Add a backing layer to protect stitches and elevate your embroidery’s finish!
Troubleshooting Common Stabilizer Issues
Sometimes stabilizers don’t behave the way you expect, causing puckering, tearing, or even thread breakage.
Don’t worry—figuring out what went wrong and making a few adjustments can save your project and improve your results.
Puckering and Distortion
Puckering can ruin even the most beautiful embroidery, but it’s often avoidable with the right approach. Choosing an embroidery stabilizer that prevents puckering starts with understanding your fabric. Lightweight fabrics, like chiffon, need stabilizers that balance fabric stretch and stabilizer weight. Heavy fabrics, on the other hand, demand sturdier support.
Pay attention to thread tension and hoop pressure. Too tight, and you risk pulling the fabric off its natural grain, causing distortion. A snug, drum-like fit in the hoop works best.
Here’s how to keep puckering at bay:
- Match stabilizer weight to fabric type and design density.
- Always test on scrap fabric first.
- Use cut-away stabilizers for stretchy fabrics.
- Don’t over-tighten your hoop.
Think of your stabilizer as the foundation—it keeps everything smooth and stable.
Thread Breakage
Thread breakage can feel like your embroidery machine’s way of saying, “Not today!” But don’t worry—it’s fixable.
Start by checking thread tension; too tight or too loose causes stitch problems. Inspect for needle damage or bobbin issues that might snag threads.
Proper machine maintenance techniques are essential for preventing thread breakage.
- Use the right embroidery stabilizer to prevent puckering and keep stitches smooth.
- Choose quality threads—cheap ones fray easily, leading to more breakage and frustration.
Stabilizer Tearing
Stabilizer tearing can feel like your embroidery machine’s way of rebelling, but it’s usually about mismatched materials. If your embroidery machine keeps tearing stabilizer, start by checking your stabilizer type.
Tearaway stabilizers work well for stable, woven fabrics, but dense designs or stretchy materials may demand a cutaway stabilizer for better support. Layering stabilizers or using heavier options can also help prevent fabric distortion.
Make sure proper embroidery tension and hooping techniques—too tight, and the stabilizer might weaken. For smoother stabilizer removal, always test on scrap fabric first.
These embroidery stabilizer tips can save your project from frustration!
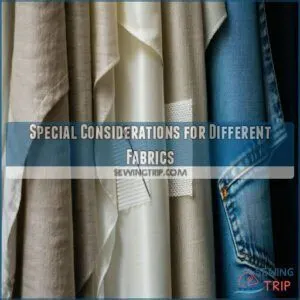
Special Considerations for Different Fabrics
Different fabrics need different stabilizers to keep your embroidery looking its best.
Whether you’re working with stretchy knits, delicate sheers, or heavy textures, matching the right stabilizer to your fabric is key for smooth, professional results.
This approach ensures that your embroidery maintains its quality and appearance, and professional results are achieved by considering the specific needs of each fabric type.
Stabilizers for Knits and Stretchy Fabrics
For stretchy knits like t-shirts or polyester performance shirts, cut-away stabilizers are essential.
They anchor your design, preventing fabric distortion and ensuring embroidery tension stays even.
Lightweight mesh works well for thin knit fabrics, while medium-weight options suit thicker materials.
For added stabilizer adhesion, try fusible varieties.
Always test on a sample to keep those stitches crisp and professional!
Stabilizers for Delicate or Sheer Fabrics
Delicate fabrics like chiffon, organza, and tulle need a gentle hand to avoid fabric distortion and guarantee flawless embroidery.
A lightweight stabilizer, like a water-soluble topping, is perfect for these sheer fabrics, disappearing completely after stitching. For added support, you can layer stabilizers or try a heat-away stabilizer for intricate designs.
Always test on scraps first to fine-tune embroidery tension and stabilizer removal.
- Use water-soluble stabilizers for clean finishes.
- Layer stabilizers for complex designs.
- Test embroidery tension on fabric scraps.
- Try heat-away stabilizers for washable alternatives.
Stabilizers for Heavy or Textured Fabrics
Thicker fabrics like denim and leather bring their own challenges, but the right stabilizer makes all the difference.
Fabric density and texture management are key when choosing embroidery stabilizer options. For heavy fabric like denim, a heavy cut-away stabilizer offers strong support.
Choosing between stabilizer and interfacing depends on the project’s needs. Terry cloth benefits from tear-away stabilizers paired with a topper to prevent threads from sinking.
Leather, with its smooth surface, works well with no-show mesh for lightweight backing. Always match stabilizer weight to design complexity—heavier stabilizers handle dense stitching better, ensuring your embroidery machine designs stay crisp and professional.
Frequently Asked Questions (FAQs)
How do I choose a stabilizer for machine embroidery?
Did you know dense designs need stabilizers up to 3 oz?
Choose Cut Away for stretchy knits, Tear Away for woven fabrics, and Wash Away for lace.
Always test on scraps before starting!
What is embroidery stabilizer?
Embroidery stabilizer is a supportive material you use to keep fabric stable during stitching.
It prevents puckering, distortion, or misalignment, ensuring your designs look crisp and professional.
Different types suit various fabrics and projects.
Can you use embroidery stabilizer if fabric is not machine washable?
Yes, you can!
Heat-away stabilizers are perfect for non-washable fabrics.
They vanish with heat, not water, making them ideal for delicate or specialty materials that can’t handle a rinse.
Just follow removal instructions carefully, and ensure you understand how they vanish with heat to achieve the best results.
Why do we use stabilizer when embroidering on fabric?
Skipping stabilizer is like building a house without a foundation—it won’t hold up.
Stabilizers prevent fabric puckering, keep stitches aligned, and support complex designs, ensuring your embroidery looks polished, durable, and professional every time, with stabilizers being crucial for this outcome.
What are the different types of embroidery stabilizers?
You’ll find tearaway, cut-away, wash-away, heat-away, and water-soluble stabilizers, each suited for specific fabrics and projects, to help you achieve perfect embroidery results.
How to remove embroidery stabilizer?
When in doubt, tear it out" – remove stabilizer by tearing, cutting, or washing, depending on type, to prevent fabric damage, you’ll master it.
How to know what stabilizer to use for machine embroidery?
You’ll choose a stabilizer based on fabric type, design density, and desired outcome, considering tearaway, cutaway, washaway, or heataway options for best embroidery results.
What to use as a stabilizer for embroidery?
You’ll need a tearaway, cut-away, or wash-away stabilizer, depending on your fabric type and embroidery design, to prevent puckering and support your stitches, ensuring a smooth embroidery process always.
How many layers of stabilizer do I need for embroidery?
You’ll typically use one layer of stabilizer, but it depends on your fabric and design, so don’t be afraid to experiment and add more if necessary.
Should I use cut away or tear away stabilizer?
You’ll want cut away stabilizer for stretchy fabrics and tear away for stable, woven ones, considering fabric type and design density to make the right choice.
Conclusion
You’ve learned the basics of machine embroidery stabilizer guide, now it’s time to stitch like a pro.
With 80% of embroiderers citing stabilizers as key to success, you’ll master the art with this machine embroidery stabilizer guide.
Choosing the right one for perfect stitching, every time, using your new machine embroidery stabilizer guide skills, is crucial for achieving professional results with machine embroidery.
- https://www.bycurated.com/machine-embroidery-stitch-types/
- https://www.digitizingmadeeasy.com/machine-embroidery-stitch-types/
- https://kazzthespazz.com/machine-embroidery-stitches/
- https://zdigitizing.com/machine-embroidery-stitch-types/
- https://forum.embroideres.com/blogs/entry/180-machine-embroidery-stitch-types-and-limitations/

