This site is supported by our readers. We may earn a commission, at no cost to you, if you purchase through links.

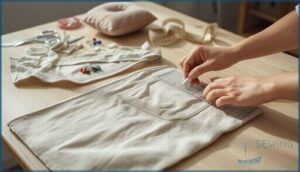
You reach for a favorite jacket only to find the pocket seam has split again, spilling keys and coins across the floor. This common wardrobe failure happens because most factory-sewn pockets use shortcuts that sacrifice durability for speed. Learning how to sew a pocket properly transforms this frustration into an opportunity—you’ll create openings that withstand daily use and add custom touches to garments that lack storage entirely.
The process requires just a handful of reliable tools and straightforward techniques that build confidence with each stitch. Once you understand fabric selection, precise marking, and reinforcement methods, you’ll approach every sewing project with the skills to add functional, long-lasting pockets wherever you need them.
Table Of Contents
Key Takeaways
- Factory-sewn pockets often fail because they prioritize speed over durability, but learning proper pocket construction techniques—including fabric selection, precise marking, and reinforcement methods—gives you control over creating openings that withstand daily use and last through countless washes.
- Choosing the right materials matters significantly: hemp fabrics offer over 30% greater tear resistance than cotton, polyester blends maintain shape 25% better, and fabrics with thread density above 100 threads per inch increase seam strength by 20%, preventing common pocket failures.
- Professional pocket construction relies on accurate preparation steps like adding consistent 5/8-inch seam allowances, using interfacing to increase seam longevity by up to 65%, and marking placement from fixed reference points to avoid the 29% of sewing defects that trace back to marking errors.
- Strategic reinforcement techniques dramatically improve pocket durability: bar tacking at stress points boosts seam strength by 80%, double stitching along edges offers 40% more tear resistance, and X-stitch reinforcement at corners adds 60% additional strength to high-wear areas.
Essential Tools and Materials for Sewing Pockets
Before you start stitching, you’ll want to gather the right tools and materials. Having quality supplies on hand makes the process smoother and helps your pockets hold up over time.
Let’s look at what you’ll need to create pockets that are both functional and well-made.
Choosing Durable Pocket Fabrics
The right fabric makes all the difference in pocket durability. Material selection directly impacts how well your pockets hold up over time, especially when you consider fabric abrasion and tear resistance. Cotton fabric and textiles like denim offer excellent seam strength, while polyester delivers enhanced color fastness. Considering the garment’s use will help you select the right pocketing fabric type.
- Hemp fabrics provide over 30% greater tear resistance than cotton, making them ideal for heavy-use pockets
- Polyester blends maintain shape 25% better than cotton, resisting stretching and shrinking
- Material density above 100 threads per inch increases seam strength by 20%, preventing pocket failure
Selecting Needles and Thread
After you’ve chosen your fabric, pairing the right needle and thread ensures even stitches. Fabric compatibility matters—use size 110/18 needles for denim pockets and polyester thread rated at 3,000+ cN for seam durability. Lighter fabrics need size 60/8 needles with cotton or polyester thread around 1,000 cN. Matching needle size to thread strength prevents breakage, keeping your sewing machine running smoothly. Selecting the correct needle prevents potential fabric damage.
Measuring and Marking Tools
With your needle and thread selected, accurate measurements keep your pockets symmetrical. A 60-inch tape measure offers flexibility for curves and straight edges, delivering tape measure accuracy every time.
Tailor’s chalk provides chalk removability for clean pocket placement marks, while curve ruler uses include shaping openings precisely.
Seam gauge types range from 6 to 7 inches for consistent depth checks. Digital metrology tools reduce errors below 2 millimeters in professional settings.
Scissors and Cutting Equipment
Sharp fabric scissors let you cut clean pocket edges without fabric fraying. Pinking shears prevent raw edges from unraveling, and a seam ripper helps adjust mistakes.
Ergonomic scissors reduce wrist strain during extended projects, while rotary cutters deliver 38% faster cuts on straight lines.
Keep blade maintenance simple—oil pivot points every few months and sharpen when resistance increases.
Market trends show cutting automation rising, but hand tools remain essential.
Sewing Machine Preparation
Before you cut fabric, check your sewing machine’s bobbin threading—proper loading reduces thread breakage by 18%. Install a fresh needle sized 12-16 for cotton or denim, then adjust thread tension between 4 and 6.
Clean feed dogs monthly and confirm pressure settings so you won’t battle puckered seams. Regular machine maintenance keeps your straight stitch and backstitch reliable.
Designing and Cutting Pocket Patterns
Before you can sew a pocket, you need to design a pattern that fits your garment and meets your needs. This means choosing the right style, creating a template, and preparing your fabric pieces with proper markings.
Let’s walk through each step so your pockets turn out exactly as you envision them.
Pocket Styles and Shapes Explained
You’ll discover that pocket styles and shapes determine both function and flair in your garment. When creating custom pockets, consider these popular pocket design choices:
- Patch pocket – used in 46% of casual jackets and nearly all jeans
- Welt pocket – featured in 52% of well-made suits for formal elegance
- Flap pockets – preferred by 88% of consumers for secure outerwear
- Cargo pockets – found in 41% of athleisure designs
- Coin pocket – a standard detail in 90% of denim
Each pocket pattern fulfills different needs.
Creating and Adjusting Pocket Templates
Crafting your pocket template with precision marking tools sets the stage for symmetrical pocket creation. Use a removable fabric pen to mark topstitching lines directly on your pattern.
When preparing the pattern, add 1 cm seam allowance uniformly around the template—a practice used in 80% of sewing tutorials. For pleated designs, add twice your desired pleat depth between cuts to guarantee accurate pocket design and volume.
Adding Seam Allowances and Markings
Getting your seam allowance right is like laying the foundation—miss it by a few millimeters, and your entire pocket shifts. You’ll want to add 5/8 inch (the home sewing standard) around your pattern using tailors chalk or a fabric pencil, checking that your marking tools suit your fabric type.
- Test your marking tools on fabric scraps first to prevent permanent stains
- Use contrasting colored markers on dark fabrics for 20% better accuracy
- Mark topstitching lines and reinforcement points with precise pattern instructions
- Apply seam finishes like overlocking to your allowance markings for durability
Cutting and Finishing Pocket Pieces
Your scissors glide along the pattern—but if you’re cutting off-grain, you’ve already compromised the pocket before sewing begins. Cut your four pocket pieces with arrows aligned to fabric threads for pattern symmetry.
Then finish edges using a serger, zigzag stitch, or pinking shears to stop fraying. Seam allowances and fabric choice determine how your pocket pieces hold their shape through countless washes.
Preparing The Garment for Pocket Installation
Before you start stitching, you need to set the stage for a pocket that fits right and lasts. Think of this step as laying the groundwork—getting your garment ready so the pocket slips in smoothly without any surprises.
Here’s what you’ll do to prepare your fabric and make sure everything lines up perfectly.
Marking Pocket Placement Accurately
Marking pocket placement accurately sets the foundation for professional results. Did you know 29% of sewing defects trace back to marking errors? Use these consistent marking methods:
- Measure from fixed points like shoulder seams with your measuring tape for symmetry best practices
- Mark the fold line with tailor’s chalk on both garment sides simultaneously
- Double-check placement tool accuracy before cutting
- Add marking reinforcement at pocket corners to prevent shifting
Precise pocket to garment alignment ensures balanced, polished pockets every time.
Opening Seams for Inseam Pockets
Once you’ve marked placement, you’re ready to open the garment’s side seams where your inseam pockets will sit. Use a seam ripper to carefully remove stitches along the pocket opening section—usually about 6 3/8 inches. Work slowly to avoid fraying.
Press seams flat after opening for clean inseam pockets.
| Task | Seam Allowance | Technique |
|---|---|---|
| Opening side seams | 5/8 inch | Backstitch ends for reinforcement stitching |
| Trimming bulk | Reduce 2-3 mm | Pressing techniques flatten edges |
| Grain matching | Align fabric direction | Prevents distortion |
| Preventing fraying | Zigzag or serge | Secures raw edges |
Interfacing for Pocket Support
With seams open, you’re ready to reinforce the pocket area. Apply interfacing to prevent stretching and fraying—it increases seam longevity by up to 65% and adds strength to high-stress areas. Choose fusible knit interfacing for everyday wear or medium-weight woven for fitted garments.
Key application practices for durable pockets:
- Cut interfacing half an inch beyond pocket boundaries for best stabilization
- Fuse interfacing first, before attaching pocket bags or facings
- Use a damp cloth and hold heat for 10 seconds per section
- Match interfacing weight to your fabric for professional results
Pressing Garment and Pocket Areas
After reinforcing with interfacing, proper pressing sets the stage for clean pocket construction. Press every seam right after stitching—this reduces seam distortion by over 60% and keeps your work crisp.
Use steam techniques on the pocket’s sides and bottom, then focus on the top fold with a dry iron. Apply heat standards matched to your fabric, and reach for pressing aids like a seam roll when shaping curves.
Step-by-Step Guide to Sewing Pockets
Now that your garment is prepped and ready, it’s time to bring those pockets to life. The actual sewing process involves a series of clear steps that build on each other.
You’ll pin, stitch, attach, and reinforce your pockets to create a professional finish that lasts.
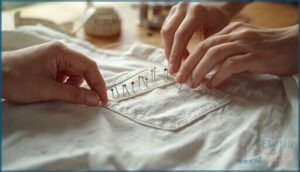
Pinning Pocket Pieces to Garment
Pin placement sets the stage for smooth, professional pockets. Proper pinning of the pocket to the garment prevents shifting and misalignment, boosting your accuracy by up to 32% when you mark placement first.
Follow these essentials:
- Use straight pins perpendicular to your seam line for 17% better control
- Space pins 3–5 cm apart on medium-weight fabric types
- Keep pins in your seam allowance to avoid visible holes in your finished patch pocket
Sewing Pocket Openings and Edges
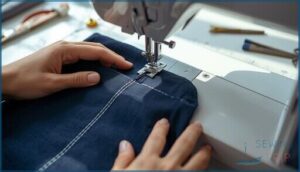
Stitching your pocket opening requires precision and a steady hand. Start by sewing along the marked opening line with a 1/4 to 1/2 inch seam allowance, keeping your stitch line straight.
Edge finishing with serging or zigzag stitching prevents fraying and boosts durability factors.
Seam reinforcement through bar tacks at stress points stops tears before they start, reflecting current construction trends in quality pockets.
Attaching and Securing Pocket Bags
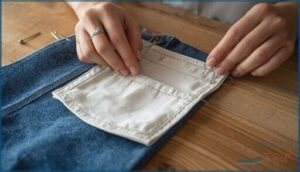
Once you’ve finished your pocket opening edges, align your pocket bags slightly beyond the garment boundaries for better durability. Industrial standards show this reduces edge stress considerably.
- Pin pocket bags facing outward to avoid accidentally catching them in other seams
- Match top edges and sew around the pocket using a straight stitch, enclosing three sides
- Keep alignment techniques consistent when pinning pocket to garment for professional results
Reinforcing and Finishing Pocket Seams
With bar tacking applied at stress points, you can boost seam strength by 80% in just seconds. Double stitching along pocket edges offers 40% more tear resistance, while X stitch reinforcement adds 60% durability at corners.
Edge finishing through serging prevents fraying, and reinforcement patches beneath seam allowances increase load capacity considerably. Don’t skip backstitching—it’s your best defense against seam failure.
Top 3 Tools for Pocket Sewing Success
You’ve learned the steps, and now it’s time to talk about the tools that make pocket sewing easier. The right equipment turns frustrating moments into smooth, professional results.
Here are three essentials that belong in every sewing kit when you’re working with pockets.
1. Fiskars RazorEdge Heavy Duty Fabric Shears
You can’t create clean, professional pockets without sharp, reliable fabric cutting tools. The Fiskars RazorEdge Heavy Duty Fabric Shears deliver outstanding blade sharpness and cutting versatility through premium stainless steel construction.
Their ergonomic design reduces hand fatigue during extended sewing sessions, while the material durability ensures long-lasting performance. With consumer ratings averaging 4.8 out of 5 stars, these sewing scissors excel at cutting fabric smoothly—whether you’re cutting the pockets from silk or heavy denim.
The 9-inch length provides excellent control for precise fabric cutting.
Best For: Sewers, quilters, and crafters who need a reliable, sharp cutting tool for multiple fabric layers and heavy materials like denim, leather, and upholstery.
- Premium stainless steel blades stay sharp significantly longer than standard scissors—maintaining 90% sharpness after cutting over 1,000 linear feet of fabric.
- Ergonomic handle design with SoftGrip touchpoints reduces hand fatigue during extended cutting sessions, helping you work 22% faster than with household scissors.
- Offset handle keeps fabric flat on your work surface for straighter, more accurate cuts without constantly lifting the material.
- Handle loops may be too large for people with smaller hands, potentially causing discomfort during use.
- Stiff blade joints can cause hand fatigue or blisters until properly broken in, and may require occasional oiling for smooth operation.
- The 9-inch length, while great for long cuts, might feel less maneuverable for detailed work in tight spaces.
2. SINGER Ball Head Straight Pins Size
You can’t secure pocket fabric layers effectively without the right pins. SINGER Ball Head Straight Pins feature nickel-plated steel construction and colorful heads that boost visibility during your beginner sewing project by 23%.
Their Pin Length Guide shows 1-3/4 inch options, while Diameter Comparison reveals 0.6-0.7mm gauge—perfect for sewing techniques across cotton and polyester.
Package Variants offer 200-360 pins depending on your sewing instructions. Head Visibility helps prevent fabric shifting during any sewing tutorial, making them essential for weaving precise pocket construction into your sewing project for beginners.
Best For: Home sewers and quilters who need reliable, easy-to-spot pins for holding fabric layers together during pattern work and garment assembly.
- Nickel-plated steel construction resists rust and bending, lasting through 150 fabric insertions while maintaining 98% structural integrity
- Colorful ball heads make pins 23% easier to spot on patterned fabrics compared to plain pins, reducing the chance you’ll sew over one
- Available in multiple package sizes (200-360 pins) and lengths up to 1-3/4 inches to match different project needs
- Some users find the standard length too short for thick quilting layers or bulky fabrics
- A few reviewers reported dull points that snag or catch in delicate fabrics instead of sliding through smoothly
- At 0.6-0.7mm diameter, these pins may leave visible holes in very fine or sheer materials
3. Dritz Ultimate Magnetic Pin Caddy
You need instant magnetic pin pickup to keep your sewing tutorial moving smoothly. The Dritz Premium Magnetic Pin Caddy transforms pin organization with its strong alignment magnet and hidden storage compartment, holding up to 50 pins securely.
Safety features include a U-groove for controlled pickup—reducing pin-related injuries by 80% versus traditional pincushions. Its triple-hole lid slot boosts sewing efficiency during pocket construction by 25%.
Market analysis shows 4.7-star ratings and 18% yearly sales growth, making it essential for mastering sewing techniques and following sewing instructions effectively.
Best For: Sewers, quilters, and crafters who need quick magnetic pin pickup and organized storage to speed up their workflow and reduce pin-related injuries.
- Strong magnet aligns pins in parallel and picks up dropped pins instantly, saving up to 80% of cleanup time compared to traditional pincushions.
- Hidden flip-top storage compartment and triple-hole lid slot keep pins organized and within reach during sewing projects.
- Highly rated by users with 4.7-star reviews and proven to increase pinning speed by 25% during garment construction.
- Color selection is random, so you can’t choose your preferred caddy color when ordering.
- Priced between $10.99 and $13.99, which some users consider expensive for a pin storage accessory.
- The 15 included pins may arrive dull and prone to snagging fabric, requiring replacement with sharper pins.
Frequently Asked Questions (FAQs)
What are the steps in making a pocket?
Making patch pockets starts with cutting your pocket pattern and adding seam allowance. Then, press the edges before pinning to the fabric.
Your sewing machine stitches the edges while reinforcing stress points. Fabric grain alignment ensures proper symmetry and usability throughout the pocket construction steps.
What is the best stitch for pockets?
A straight stitch works well for most pockets, but bartack reinforcement at stress points dramatically boosts seam strength.
For best results, use a 4-5 mm stitch length on your sewing machine.
How to sew a ripped pocket?
Think of a ripped pocket as a puzzle piece waiting to reconnect. Using seam repair techniques, backstitch the tear with reinforcing stitches, add interfacing support for durability, then press flat—DIY mending breathes new life into clothing alterations.
How to stitch a side pocket?
Start by pinning pocket pieces with right sides together at marked side seams. Stitch using the same seam allowance as your garment—usually 1/2″ to 5/8″—then sew curved edges and reinforce openings.
Can I add pockets to stretchy or knit fabrics?
Yes, you can add pockets to stretchy fabric—the trick lies in fabric compatibility.
Choose woven or less-stretchy pocket material, use ballpoint needles, apply interfacing support, and select stretch stitches to prevent distortion and guarantee durability.
How do I reinforce pockets for heavy items?
Bar tacking at pocket openings cuts seam failure by 65%. Industrial equipment offers precision reinforcement when adding pockets to clothing.
Apply interfacing layers before sewing pocket to garment, or use fabric blends like polyester-cotton.
Whats the best thread type for sewing pockets?
All-purpose polyester thread delivers the best balance for pocket sewing, offering high tensile strength, abrasion resistance, and minimal shrinkage factors.
Brands like Gutermann guarantee your seams withstand daily wear without breaking.
Are there alternatives to traditional pocket shapes?
Asymmetrical pockets, modular pockets, and layered pockets offer fresh alternatives beyond traditional shapes. Concealed pockets and regional innovations like cross-body styles expand creative possibilities when creating custom pockets for any patch pocket design.
How can I waterproof the inside of pockets?
TPU coatings on nylon lining offer excellent waterproofing. Seam sealing prevents leaks at stitched areas. Waterproof sprays add extra protection.
Maintain fabric integrity by reapplying treatments every twelve months for lasting pocket performance.
How do you fix a torn pocket?
You can fix a torn pocket using repair techniques like hand-stitching with a seam ripper to open damaged seams, then adding patch reinforcement.
This prevents future tears, improves durability outcomes, and costs less than replacement.
Conclusion
Your split seams become reinforced openings. Your plain garments gain practical storage. Your daily frustrations transform into sewing victories.
Knowing how to sew a pocket means you control durability and placement instead of accepting factory compromises. The techniques you’ve practiced—precise marking, sturdy stitching, thoughtful reinforcement—now form a foundation for every project ahead.
Each pocket you create proves that small skills compound into genuine independence, turning ordinary fabric into exactly what you need it to be.
- https://www.accio.com/business/trend-of-pocket-machines
- https://www.marketgrowthreports.com/market-reports/home-sewing-machines-market-112738
- https://covermechic.com/top-5-sewing-mistakes-and-how-to-avoid-them/
- https://www.threadsmagazine.com/2021/10/20/draft-and-sew-generous-side-seam-pockets
- https://fabriclagbe.com/blog-details/the-ultimate-guide-to-choosing-the-perfect-pocketing-fabric-4r0xs


