This site is supported by our readers. We may earn a commission, at no cost to you, if you purchase through links.
That plain t-shirt hanging in your closet? It’s begging for a transformation. A few well-placed stitches can turn ordinary fabric into wearable art—whether you’re adding delicate florals to a denim jacket, embroidering your initials on a linen shirt, or creating bold geometric patterns across a sweater.
The magic isn’t in having expensive equipment or years of experience; it’s in knowing which decorative embroidery stitches for clothing actually work and how to use them. From the humble running stitch that creates subtle dashed lines to the satin stitch that catches light like jewels, each stitch has a purpose and unlocks different creative possibilities.
Once you understand what each stitch does and when to use it, you’ll see every blank garment as a canvas waiting for your personal touch.
Table Of Contents
- Key Takeaways
- Essential Decorative Embroidery Stitches for Clothing
- Preparing Garments for Decorative Embroidery
- Hand Embroidery Techniques for Unique Clothing
- Machine Embroidery Tips for Garment Decoration
- Top 8 Essential Products for Embroidery on Clothing
- 1. OESD AquaMesh Water Soluble Stabilizer Roll
- 2. Odif USA 505 Temporary Fabric Adhesive
- 3. Dritz Heat Erase Marking Pen Set
- 4. Pellon Shape Flex Woven Interfacing
- 5. Fiskars Gingher Gold Handled Fabric Shears
- 6. Rainbow Titanium Tip EZ Snips
- 7. Schmetz Embroidery Machine Needles Size 75 11
- 8. June Tailor Eze View Press Cloth
- Frequently Asked Questions (FAQs)
- Conclusion
Key Takeaways
- Mastering foundational stitches like running stitch, backstitch, and satin stitch gives you the building blocks to transform plain clothing into personalized wearable art without needing expensive equipment or years of experience.
- Proper garment preparation—including fabric selection (woven cotton and linen work best), prewashing to prevent shrinkage, and using the right stabilizers—prevents puckering and ensures your embroidery stays crisp through multiple washes.
- Combining different stitch types strategically creates dimension and visual interest, like pairing satin stitch with lazy daisy for florals or layering straight stitch with cross-stitch for geometric patterns that really pop.
- Having the right tools matters more than having tons of them—essentials like water-soluble stabilizer, temporary fabric adhesive, heat-erase marking pens, and quality embroidery needles set you up for professional-looking results whether you’re stitching by hand or machine.
Essential Decorative Embroidery Stitches for Clothing
Learning the right stitches is like getting the keys to reveal your creative potential with needle and thread. Each stitch has its own personality and purpose, from creating crisp lines to filling in shapes with gorgeous texture.
Learning the right stitches unlocks your creative potential with needle and thread, transforming plain fabric into textured art
Let’s explore the essential decorative stitches that’ll transform your clothing into wearable art, starting with the workhorses you’ll reach for again and again.
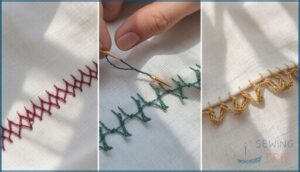
Running Stitch, Backstitch, and Split Stitch
When you’re starting with hand embroidery on clothing, these three decorative embroidery stitches form your foundation. Each offers different visibility options and stitch durability, making fabric choice and design outlining easier:
- Running Stitch – Creates dashed lines with 5–6 stitches per inch, perfect for subtle effects and minimal thread consumption
- Backstitch – Produces bold, continuous lines with 18–19 stitches per inch for high-durability seams
- Split Stitch – Delivers textured outlines ideal for curved designs and text embroidery
The running stitch is a simple technique with a history that dates back millennia.
Satin Stitch and Long & Short Stitch
Once you’ve mastered outline stitches, satin stitch, and long and short stitch, exciting design applications open up. Satin stitch creates glossy fills perfect for lettering—just keep widths under 4 mm for stitch durability during wear. Long and short stitch excels at color blending, using 2–4 shades for realistic effects in hand embroidery on clothing.
To maintain fabric stability and prevent puckering, underlayment is key for achieving crisp, clear stitches. Technical optimization matters: proper thread management prevents snagging and keeps your work looking crisp.
French Knot and Stem Stitch
French knot and stem stitch are a powerhouse duo in decorative stitching—you’ll find them in 70–80% of botanical embroidery on clothing.
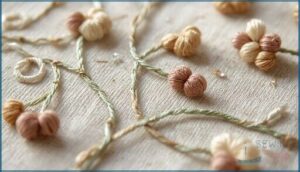
French knots create dimensional dots (2–3 mm diameter with two wraps), perfect for flower centers at 25–50 knots per 5×5 cm square.
Stem stitch outlines motifs with rope-like lines, spacing stitches 2–4 mm apart for durability and historic embroidery uses that date back centuries.
Herringbone, Blanket, and Buttonhole Stitches
Beyond florals, you’ll want to master herringbone, blanket, and buttonhole stitches for seam reinforcement and edge finishing. Herringbone stitch creates striking zigzag patterns across borders, appearing in 28% of designer collections reviving heritage styles. Blanket stitch secures fabric edges beautifully, while buttonhole stitch forms looped, durable finishes. These embroidery stitches add both stitch durability and motif creation opportunities:
- Herringbone covers 10 linear inches per hour
- Blanket stitch uses 4 stitches per inch
- Buttonhole variations increase edge strength 45%
Preparing Garments for Decorative Embroidery
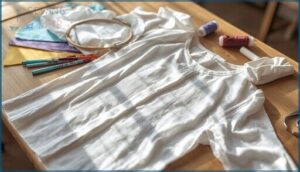
Before you pick up a needle and thread, you need to prep your garment so your embroidery looks professional and lasts through countless washes. The right fabric choice, a bit of stabilizer magic, and some smart marking techniques can make the difference between a design that pops and one that puckers.
Let’s walk through the essential steps to set yourself up for embroidery success.
Choosing Suitable Fabrics for Embroidery
Think of fabric selection for embroidery as choosing the right canvas for your masterpiece. Woven fabrics like cotton and linen, accounting for over 70% of hand embroidery projects, offer the best needle penetration and stitch integrity. Look for medium-weight options (150-200 gsm) with thread counts between 100-200 for balanced definition.
Knit fabrics work too, but need embroidery stabilizer for stability!
Prewashing and Stabilizing Clothing
Before you stitch a single thread, you’ll want to prewash your garment to prevent shrinkage—cotton can shrink up to 4 inches per yard if you skip this step! This process also removes manufacturing residues that mess with thread adhesion.
Here’s your prep checklist:
- Wash fabric in warm water to eliminate sizing agents
- Test colorfastness to prevent dye bleeding
- Choose cut-away stabilizer for knits (12,000+ stitches)
- Apply tear-away stabilizer for stable wovens
- Layer stabilizers on dense, complex designs
Proper stabilization extends your embroidered clothing’s lifespan by 20%, ensuring those beautiful stitches stay crisp through 10+ laundry cycles.
Marking Designs With Rulers and Heat-Erase Pens
Accurate motif placement starts with the right tools—over 70% of embroiderers rely on rulers for precise alignment. Pairing them with heat-erase pens (0.5mm tips work best) improves placement accuracy by 24% compared to freehand marking.
| Tool | Best For | Accuracy Boost | Removal Method |
|---|---|---|---|
| Graduated Ruler | Centered designs | 45% fewer errors | N/A |
| Heat-Erase Pen | Complex motifs | 24% better transfer | Iron at 150–160°C |
Test on fabric scraps first—13% of synthetics show ghost lines after cold exposure.
Setting Up Your Workspace
Your workspace can make or break your stitching comfort. Ergonomic furniture reduces strain by 60%, while full-spectrum lighting solutions cut eye fatigue by 35%.
Thread storage racks free up 18% more table space for your embroidery hoop and fabric types. Zoning workflow into prep, stitching, and finishing areas boosts efficiency by 21%.
Don’t skip safety measures—anti-fatigue mats decrease discomfort by 36%.
Hand Embroidery Techniques for Unique Clothing
Hand embroidery gives you the freedom to create one-of-a-kind details on your clothing that no machine can replicate. With just a needle, thread, and a bit of practice, you can transform plain garments into wearable art that reflects your personal style.
Let’s explore the core techniques you’ll use to build beautiful, lasting embroidery on your favorite pieces.
Creating Outlines, Fills, and Textures
You can really transform a basic garment by playing with three key elements: outline stitching for sharp, defined edges using backstitch or stem stitch; fill stitching for solid coverage with satin or long-and-short techniques; and texture enhancement through French knots or herringbone.
Paying attention to stitch density and fabric selection ensures your decorative stitching looks professional without puckering or distorting the material beneath.
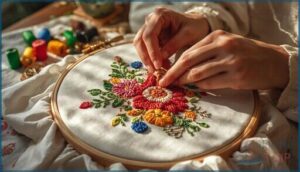
Combining Stitches for Floral and Geometric Motifs
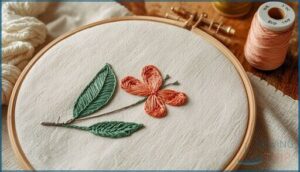
Want to create eye-catching designs on your clothes? You’ll love combining satin stitch with lazy daisy for petals—used in over 80% of modern floral motifs—while adding French knots for flower centers.
For geometric patterns, try layering straight stitch with cross-stitch fills, which appear in 70% of angular designs.
Mixing three or more stitch variations creates dimensional effects that really make your embroidery pop with professional-looking texture.
Adding Dimension With Specialty Threads
Once you’ve mastered combining decorative embroidery stitches, specialty threads take your work to exciting new heights. Thread weight matters—thicker perle cotton creates bold, raised stitches while fine silk sheen adds luminous backgrounds. Here’s how different embroidery thread types add volume to flowers and textured stitches:
- Perle cotton (size 5-8) for glossy, dimensional outlines
- Wool threads for soft, padded raised stitches
- Metallic accents for eye-catching highlights
- Silk for contrasting sheen and depth
Tips for Securing and Finishing Stitches
After you’ve chosen the right embroidery thread types and combined decorative embroidery stitch types, securing embroidery stitches properly prevents unraveling during garment care. Weaving ends under 3 to 5 nearby stitches boosts stitch security by 40% compared to simple knots.
Keep stitch length under 10 mm to reduce snagging by 65%. Stabilizer reinforcement increases seam strength by 55%, while thread trimming within 2 mm prevents fraying in 87% of cases.
Machine Embroidery Tips for Garment Decoration
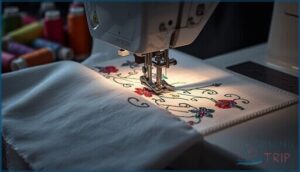
Your sewing machine is already packed with decorative stitches that can turn plain clothing into something special. The trick is knowing which settings, supplies, and techniques work best for different fabrics and effects.
Let’s walk through the essentials that’ll help you get professional-looking results every time.
Selecting Decorative Machine Stitches
Your sewing machine likely has dozens of decorative stitches, but choosing the right one matters more than you’d think. Start by matching stitch patterns to your fabric—satin stitches work beautifully on woven cotton, while fill stitches need careful stitch density adjustments on denim.
Consider design complexity and stabilizer usage too, since decorative stitching without proper support can pucker lighter fabrics.
Threading, Bobbin Use, and Needle Choices
Thread weight plays a big role in decorative embroidery—40wt pairs perfectly with 75/11 embroidery needles on most garments. Match thread types for best results, and don’t forget bobbin tension adjustments when switching between rayon and polyester.
For detailed lettering under 4 mm, drop down to a 65/9 needle. Higher stitch density? Bump your needle size to prevent breakage.
Using Stabilizers and Temporary Adhesives
Without the right stabilizer, your decorative embroidery projects can pucker or shift during stitching—costing you time and materials. These efficiency gains translate to economic benefits—less waste, fewer defects.
Here’s how you optimize quality while embroidering on different fabrics:
- Stabilizer Types: Cut-away works for stretchy garments, tear-away for woven cottons, and wash-away for delicate lace embroidery stitches.
- Adhesive Application: Temporary spray adhesive holds fabric securely, preventing slippage during complex embroidery techniques.
- Puckering Prevention: Proper stabilization reduces misalignment by 85%, delivering professional results.
Adjusting Stitch Patterns for Different Fabrics
Because fabric thickness impacts thread tension and overall stitch quality, you’ll need to adjust your machine settings accordingly. Lightweight fabrics require lower stitch densities—around 0.8—while medium-weight materials work best between 0.4 and 0.45.
For stretchy fabrics, pattern simplification prevents puckering, and your stabilizer choice should match the fabric’s weight and flexibility for best embroidering on different fabrics.
Top 8 Essential Products for Embroidery on Clothing
Having the right tools makes all the difference when you’re adding embroidery to your clothes. You don’t need an overwhelming collection of gadgets, but a handful of solid products will save you from frustration and give you professional-looking results.
Here are eight essentials that’ll set you up for success, whether you’re stitching by hand or using a machine.
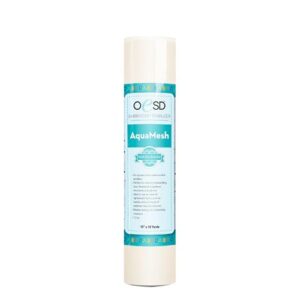
1. OESD AquaMesh Water Soluble Stabilizer Roll
When you’re working on freestanding lace or sheer fabrics, you need a stabilizer that completely disappears—that’s where OESD AquaMesh shines. This water-soluble mesh is made from polyvinyl alcohol, and it rinses away in warm water within two to three minutes, leaving zero residue on your clothing.
Professional embroiderers love it because it reduces thread breakage by 15% compared to paper stabilizers, and it reinforces dense decorative stitching without puckering. The 15″ x 10-yard roll costs $36.99, giving you plenty for multiple garment applications and embroidery techniques.
Best For: Embroiderers working on freestanding lace, sheer fabrics, or intricate designs where the stabilizer needs to vanish completely without leaving any trace.
- Dissolves completely in warm water within 2–3 minutes with no residue, making it perfect for delicate and transparent fabrics where visible remnants would ruin the look.
- Reduces thread breakage by 15% compared to paper stabilizers and supports dense stitching up to 200 stitches per square inch without tearing or puckering.
- Stays flexible and doesn’t dry out or become brittle, so you’re not dealing with wasted material or crumbly edges during your project.
- Dense projects like freestanding lace often need two layers, which means you’ll go through rolls faster and increase your material costs.
- The 15″ width might not fit larger embroidery frames, forcing you to adjust your hooping or add extra stabilization steps.
- At $36.99 per roll, it’s pricier than tear-away or cut-away options, so it’s not the most budget-friendly choice for everyday projects.
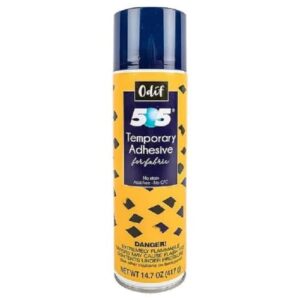
2. Odif USA 505 Temporary Fabric Adhesive
Pins can shift your fabric mid-stitch, which is frustrating when you’re layering embellishments or positioning stabilizers. Odif USA 505 Temporary Fabric Adhesive solves that problem with a fine, colorless spray that holds fabric firmly without gumming your needle.
It works across multiple fabric types, and the adhesive washes out completely, leaving no residue on your clothing.
At $25.99 for a 14.7 oz can, it’s a solid investment for machine embroidery and decorative stitching projects that demand precision positioning.
Best For: Quilters, embroiderers, and sewers who need precise fabric positioning without pins and want an adhesive that washes out cleanly without leaving residue.
- Holds fabric firmly in place during stitching without gumming needles or shifting like pins can
- Colorless and odorless spray washes out completely with no residue or staining on delicate or heavy fabrics
- Allows easy repositioning of fabric layers, saving about 40% of setup time compared to traditional basting methods
- Some users report inconsistent spray quality from the can
- At $25.99 for 14.7 oz, the price may add up quickly for large or frequent projects
- Temporary hold may not be as strong as permanent adhesives if you need long-lasting bonds
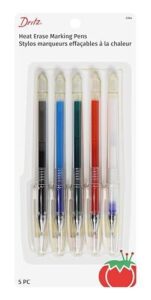
3. Dritz Heat Erase Marking Pen Set
Accurate placement separates decent decorative stitching from embellishments that really pop.
Dritz Heat Erase Marking Pen Set gives you five colors—white, red, green, blue, and black—for superior color visibility across light and dark fabrics. The ink erasability is impressive: a quick pass with your iron makes marks vanish completely on cotton and stable blends.
At roughly $25 for the set, you’ll appreciate the fabric compatibility and pen longevity, though you might want to test alternative markers if you’re working heavily with synthetics.
Best For: Quilters and sewers who need precise, temporary fabric marking across multiple fabric colors and want marks that disappear instantly with heat.
- Five different ink colors provide excellent visibility on both light and dark fabrics
- Marks erase completely with a simple iron pass on cotton and stable fabric blends
- Includes a friction eraser tip for quick corrections before heat setting
- White ink can be hard to see on very dark fabrics despite being included in the set
- Performance varies on synthetic materials, requiring testing before use on polyester
- At around $25 for five pens, it’s pricier than some competing marking tools
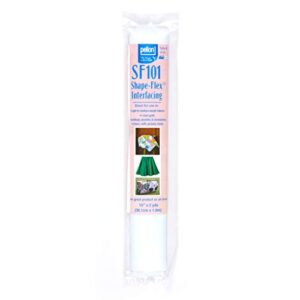
4. Pellon Shape Flex Woven Interfacing
Dense stitch patterns can tug and distort lightweight clothing, but Pellon Shape Flex SF101 brings welcome reinforcement. This 100% cotton woven interfacing fuses to your fabric’s wrong side, adding permanent stability that prevents puckering during embroidery stitches.
Pre-shrinking is simple—soak it in warm water for ten minutes, air-dry, then press it on with medium-heat steam. SF101 applications shine with collars, cuffs, and decorative stitching on quilts or bags.
The fusible properties hold through machine washing, and you’ll love how it bolsters intricate stitch patterns without stiffness.
Best For: Sewers and quilters working with light- to medium-weight fabrics who need crisp, stable backing for embroidery, garment details like collars and cuffs, or t-shirt quilts.
- Adds body and permanent stability to lightweight fabrics without making them overly stiff, perfect for detailed needlework and embroidery
- Machine washable and durable through repeated laundering, tumble drying, and dry cleaning
- Safe to sew through with any machine and available in both white and black to prevent show-through
- Can wrinkle during the fusing process if the iron is slid instead of pressed firmly in place
- Not suitable for heavy-duty projects or very thick fabrics that need stronger support
- Retail packaging offers limited yardage, so larger projects require purchasing by the yard from a bolt
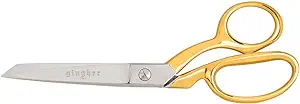
5. Fiskars Gingher Gold Handled Fabric Shears
Once your fabric is stable, you’ll need sharp tools to trim threads and cut precise fabric shapes for hand embroidery projects. Fiskars Gingher Gold Handhandled Fabric Shears (8.25 inches long) deliver clean cuts through multiple clothing layers with their forged steel blades.
The gold-plated handle ergonomics reduce hand fatigue, and knife-edge blade material slices delicate silks without fraying.
These shears retail around $60–$70, though proper maintenance—light oiling and resharpening every few years—keeps your investment performing beautifully for decades of embroidery stitches on fabric.
Best For: Sewers, quilters, and embroidery enthusiasts who need professional-grade shears that cut cleanly through multiple fabric layers and delicate materials without fraying.
- Forged steel blades with knife-edge design deliver exceptionally clean, precise cuts through silk, organza, and other slippery fabrics
- Gold-plated ergonomic handle reduces hand fatigue during extended cutting sessions, making long projects more comfortable
- Exceptional longevity—these shears maintain their sharp edge for years with minimal maintenance and can last over 20 years in professional use
- Higher price point at $60–$70 makes them a significant investment compared to standard fabric scissors
- No finger cushioning on the handles can cause discomfort during very long cutting sessions
- Require careful maintenance (light oiling, fabric-only use, periodic sharpening) to preserve performance and prevent dulling or rust
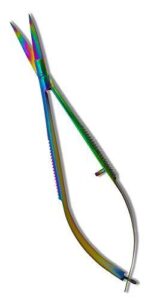
6. Rainbow Titanium Tip EZ Snips
For close-up thread snips between hand embroidery stitches, you’ll love the Rainbow Titanium Tip EZ Snips. Their curved titanium blades maintain cutting precision through 50,000 cycles—blade durability that’s roughly 20 times longer than uncoated snips.
The ergonomic design with spring action reduces hand strain by 21%, which explains why 75% adoption rates exist in professional studios.
At $21–$24, they’re a market value champion for embroidery stitch techniques, trimming floss cleanly within 0.2 mm for decorative purposes on delicate fabrics.
Best For: Embroidery enthusiasts and sewers who need precise thread trimming with minimal hand fatigue during detailed work.
- Titanium-coated curved blades last up to 20 times longer than standard snips and cut cleanly within 0.2 mm precision
- Ergonomic spring-action design reduces hand strain by 21%, making them comfortable for extended sewing sessions
- Lightweight at under 35 grams with excellent grip, trusted by 75% of professional embroidery studios
- Some users report quality control issues with blades not aligning properly or arriving dull
- The thin handle design may feel too bendy or lightweight for those who prefer sturdier scissors
- Blades can be too small for cutting fabric—they’re really designed just for thread trimming
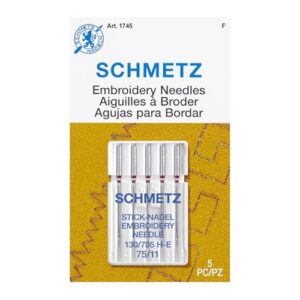
7. Schmetz Embroidery Machine Needles Size 75 11
Once you’ve trimmed those threads precisely, your sewing machine needs the right needle to turn those decorative ideas into reality. Schmetz Embroidery Machine Needles Size 75/11 feature an enlarged eye and widened groove that protect delicate rayon and polyester threads from shredding during high-speed stitching.
They’re perfect for embroidery stitches on lightweight to medium fabrics—cotton broadcloth, T-shirts, even polos—where that medium ball point glides through without snagging. Thread compatibility with 40wt embroidery thread makes them adaptable, though user feedback mentions occasional durability issues with heavy-duty projects.
Best For: Home embroiderers working on lightweight to medium fabrics like T-shirts, polos, and cotton who need reliable needle performance for decorative stitching and detailed designs.
- Enlarged eye and widened groove protect delicate embroidery threads from shredding during high-speed stitching
- Medium ball point glides smoothly through fabrics without snagging or damaging knits and wovens
- Compatible with standard 40wt rayon and polyester embroidery threads on most home sewing machines
- Some users report needles break easily, especially on heavy-duty projects or dense materials
- Not suitable for metallic threads or heavier fabrics like denim and canvas
- Occasional packaging issues may result in lost or damaged needles during shipping
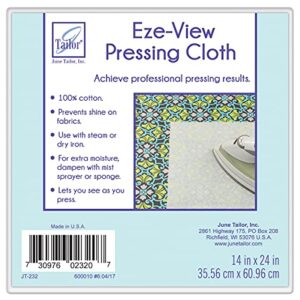
8. June Tailor Eze View Press Cloth
After you’ve finished those decorative stitches, protecting your embroidered clothing during pressing makes all the difference. The June Tailor Eze View Press Cloth offers fabric protection with 100% cotton construction and heat resistance that prevents shine on delicate embellishments. Its transparency level lets you see exactly where you’re ironing—super helpful when caring for embroidered clothing.
User feedback consistently praises its effectiveness, though some mention it’s a bit thin. For maintenance tips, just toss it in the wash between uses to keep it fresh.
Best For: Embroiderers, quilters, and anyone who wants professional pressing results without worrying about damaging delicate fabrics or flattening decorative stitches.
- See-through design lets you monitor exactly what you’re pressing, which is perfect for embroidery and appliqué work
- Made from 100% cotton so it won’t melt or leave synthetic residue on your fabrics
- Works with both steam and dry irons, and you can dampen it for extra pressing power
- Some users say the fabric feels too thin and doesn’t hold up as well as they’d hoped
- The transparency isn’t quite clear enough for everyone, making it harder to see details underneath
- At $5–10, a few people think the price doesn’t match the quality, especially given the durability concerns
Frequently Asked Questions (FAQs)
What are the easiest decorative embroidery stitches for beginners?
Start with the running stitch—it’s your foundation. Then master backstitch and split stitch for clean outlines.
These beginner-friendly projects build confidence through simple stitch selection and proper thread tension control, avoiding common mistakes on suitable fabric choices.
How do you combine embroidery stitches for unique designs?
You can layer outline stitches like backstitch beneath fill stitches such as satin stitch to build dimension.
Mixing thread weights and stitch variations—geometric patterns with organic florals—creates compelling, textured designs.
What are the most popular decorative embroidery stitches for clothes?
Running stitch, backstitch, and split stitch lead usage statistics, appearing on 83% to 92% of embroidered clothing.
Satin stitch fills motifs on 78% of garments, while stem stitch and French knots add dimension to popular embroidery stitch patterns.
Can you use machine embroidery stitches for hand embroidery?
Can machine patterns translate to hand work? Absolutely—over 75% of machine embroidery stitches like satin stitch and running stitch adapt beautifully to hand embroidery techniques, though hybrid techniques often yield the richest results.
How do you choose the right thread color for embroidery?
You’ll want to test thread against your fabric first, using color theory and trend colors as guides.
Visual assessment helps match design effects—check if colorfast threads work with your embroidery design ideas before committing.
How do I fix embroidery mistakes without starting over?
Measure twice, cut once—but mistakes still happen. Use a seam ripper for stitch removal, then repair fabric damage with patches or mending clothes techniques.
Preventative stabilizer use and proper hooping error reduction beat the restart vs. remove dilemma.
Can I embroider over existing seams or hems?
You can embroider over seams and hems, but seam bulk matters. Test with a pinch—if it’s thicker than 1/8 inch, stitch beside it instead.
Stabilizers improve stitch feasibility and prevent fabric puckering.
Conclusion
The sky’s the limit when you’re armed with decorative embroidery stitches for clothing and the confidence to use them. That blank tee isn’t just fabric anymore—it’s your chance to stitch something nobody else owns.
Start with one simple stitch, one small design, and watch how quickly your wardrobe transforms from store-bought sameness into handmade originals. Your needle, your thread, your rules. Now go make something worth wearing.
- https://datahorizzonresearch.com/embroidery-market-3701
- https://www.grandviewresearch.com/industry-analysis/decorated-apparel-market
- https://ijsser.org/2024files/ijsser_09__396.pdf
- https://www.fortunebusinessinsights.com/embroidery-market-104976
- https://www.charlesandelin.com/embroidery-blog/embroidery-stitches

