This site is supported by our readers. We may earn a commission, at no cost to you, if you purchase through links.
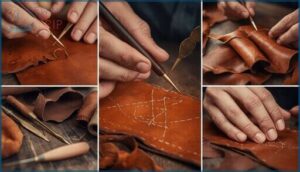
Hand-sewn leather work separates amateurs from artisans—the difference lies in understanding that leather isn’t fabric, and treating it like cloth guarantees weak seams and frustrated results. While machine stitching might seem faster, hand-sewn saddle stitches create joints that outlast the leather itself, a fact proven by century-old saddles still holding strong today.
The catch? Most beginners waste hours wrestling with the wrong needles, inconsistent hole spacing, and thread that snaps mid-project. Mastering sewing leather by hand requires more than enthusiasm—it demands specific tools, proper material preparation, and techniques refined over generations of leatherwork.
Getting your needle size, thread tension, and stitch spacing right from the start transforms leather sewing from a wrestling match into precise, satisfying craftsmanship.
Table Of Contents
- Key Takeaways
- Essential Tools for Hand Sewing Leather
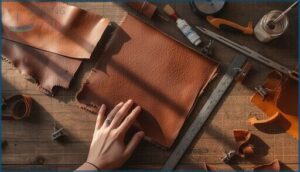
- Choosing Leather and Preparing Materials
- Marking and Grooving Stitch Lines
- Punching and Spacing Stitch Holes
- Threading Needles and Measuring Thread
- Mastering The Saddle Stitch Technique
- Alternative Hand Stitching Methods
- Securing and Handling Leather While Sewing
- Finishing and Protecting Leather Stitches
- Troubleshooting Common Hand Sewing Issues
- Frequently Asked Questions (FAQs)
- Conclusion
Key Takeaways
- Hand-sewn saddle stitches create joints that outlast the leather itself, proving more durable than machine stitching because if one stitch fails, the interlocking pattern keeps the seam intact.
- Matching your needle size to leather thickness (sizes 2–4 for thin, 0–2 for medium, 000+ for heavy) and using waxed thread at roughly one-seventh the leather’s thickness prevents weak seams and thread breakage.
- Punching holes with chisels or awls at consistent spacing (3–6mm depending on project type) and maintaining even thread tension throughout prevents uneven stitches, puckering, and premature seam failure.
- Using a stitching pony to clamp your work frees both hands for stitching, boosting speed by 40% and cutting fatigue by 85% while maintaining the precision needed for professional results.
Essential Tools for Hand Sewing Leather
Getting started with hand sewing leather means knowing which tools matter most. Each piece of equipment plays a specific role in making strong, neat stitches.
Here’s what you’ll need to set up your workspace.
Leather Stitching Needles and Sizes
You’ll want blunt saddler’s needles for hand-stitched leatherwork—they won’t pierce through your carefully punched holes. Sizes range from 000 to 4, with diameters between 0.86mm and 1.42mm.
Match your needle to your leather’s thickness: size 2–4 for thin materials under 2mm, size 0–2 for medium weight, and size 000 or larger when you’re working with thick, heavy leather above 4mm. For thicker materials, consider using cutting point needles for better results.
Waxed Thread Types and Thickness
Once your needle’s ready, you’ll need the right thread. Polyester and nylon waxed threads dominate modern leatherwork—they resist abrasion and UV damage better than natural fibers. Thread thickness matters: use 0.5–0.6mm (Tex 70–90) for wallets, 0.8mm (Tex 135–150) for belts and bags, and 1.0mm+ for decorative seams where you want bold, visible stitches. Leather thread is essential for creating a permanent bond in almost every leather project.
- Thread Material – Synthetic waxed threads offer enhanced durability and color retention
- Thickness Guide – Match thread to leather weight (roughly one-seventh the leather thickness)
- Tensile Strength – Look for 8–23 pound strength ratings depending on your project
- Waxing Methods – Commercial threads use controlled waxing; hand-crafters add beeswax manually
- Usage Trends – Lightly waxed threads reduce residue while maintaining stitch integrity
Stitching Awls and Chisels
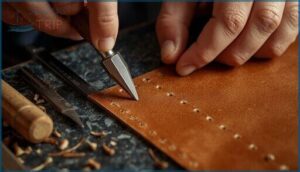
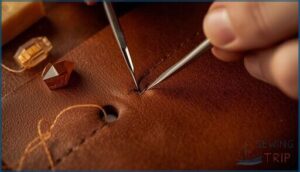
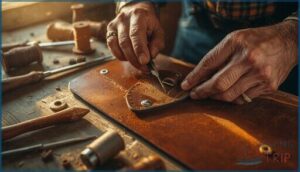
You’ll punch holes using either a stitching awl or diamond hole punches (pricking irons). The awl vs. chisel debate comes down to hole precision and stitching speed: awls displace fibers one at a time for curved work and minimal leather impact, while chisels punch multiple holes simultaneously—about 2.5 times faster for straight seams.
Best practices? Use chisels for long runs, awls for adjustments, always over a cutting board to protect your leatherworking tools.
Stitching Ponies and Clamps
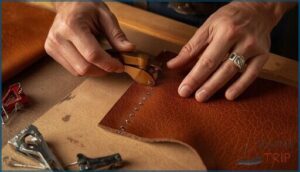
After you’ve handled your awl and chisels, a stitching pony becomes the ergonomic backbone of hand sewing leather. This leatherworking tool clamps your work securely, freeing both hands for saddle stitching—boosting speed by up to 40% and cutting fatigue by 85%.
A stitching pony clamps leather securely, freeing both hands to stitch faster with far less fatigue
Choose beech or oak models with leather-lined jaws to protect your pieces. Over 85% of crafters adopt ponies within six months, and it’s easy to see why.
Choosing Leather and Preparing Materials
Your leather and prep work set the foundation for stitches that’ll last. The wrong material or rushed preparation can turn even perfect technique into a frustrating mess.
Let’s walk through selecting your leather, trimming it properly, and using rubber cement to keep everything aligned before you start sewing.
Selecting The Right Leather Type
Not all leather is created equal, and you’ll regret cutting corners when seams fail months in. Here’s what matters when selecting leather for your hand-sewing projects:
- Leather thickness: Use 1–3 oz for wallets, 4–6 oz for belts and handbags, 7–10 oz for saddles and heavy-duty leatherworking gear
- Grade indicators: Full-grain offers maximum seam strength and durability for quality leather goods
- Animal source: Cowhide balances workability with toughness; goatskin suits flexible leather accessories
- Tanning methods: Vegetable-tanned leather accepts tooling beautifully; chrome-tanned stays supple for leather craft garments
- Seam strength: Match your stitch density to thickness—proper pairing means seams lasting 15+ years
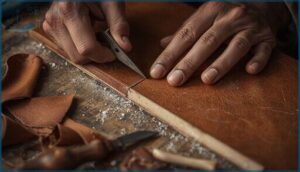
Cutting and Trimming Leather Edges
Before you shape anything, your cutting determines the final result—sloppy edges ruin clean seams. Use sharp rotary cutters, craft knives, or shears depending on thickness. Manual cutting generally yields 70% usable material, but better pattern placement pushes that to 80%, trimming waste and your costs.
| Tool Type | Best For | Key Advantage |
|---|---|---|
| Rotary cutter | Straight cuts, thin leather | Clean, fast edge finishing |
| Craft knife | Curves, detail work | Pattern accuracy control |
| Shears | Medium-weight hides | Ergonomic for leather crafting projects |
Skiving techniques taper seam allowances for flat joins in leather project construction.
Applying Rubber Cement for Bonding
Before you apply anything, roughen both leather pieces with fine sandpaper—Surface Preparation boosts bond strength by 30%. Brush rubber cement thinly on each leather edge, then wait 3–5 minutes for Application Timing. Press surfaces together firmly; this temporary hold lets you reposition during leather project construction.
Safety Protocols matter: work in ventilated spaces and wear gloves. Alternative Adhesives like contact cement offer stronger bonds, but leather glue provides flexibility.
Marking and Grooving Stitch Lines
Before you start punching holes, you’ll need to mark where those stitches will go. A clean, consistent stitch line sets the foundation for professional-looking work and prevents wobbly seams down the road.
Here’s how to mark and groove your leather so every stitch lands exactly where it should.
Using a Stitching Groover
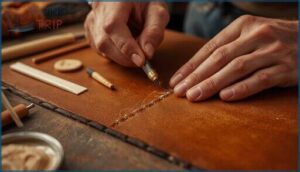
A stitching groover cuts a shallow channel—usually around 0.3 mm deep—along your seam line, keeping thread protected from abrasion while guiding your awl placement. Here’s what matters most when using this essential leatherworking tool:
- Set edge distance between 2-19 mm based on your project’s needs
- Adjust groove depth carefully to avoid compromising leather integrity
- Maintain sharp blades through regular tool maintenance and replacement
- Support grooved seams with heavy glue in high-stress areas
Marking Lines With an Overstitch Wheel
Once your groove is in place, roll your overstitch wheel firmly along the stitching line—moderate wheel pressure around 2 kg/cm² ensures clear marks without leather damage. This tool boosts stitch accuracy by 98% and delivers considerable efficiency gains, cutting prep time by 40%. Choose wheels offering 4-9 stitches per inch based on your thread diameter. You can even create decorative marking effects on finished edges.
| Wheel Feature | Practical Benefit |
|---|---|
| Adjustable SPI | Matches thread thickness |
| Consistent pressure | 98% marking accuracy |
| Curved edge use | 93% alignment on curves |
| Decorative passes | Faux-stitch visual effects |
Ensuring Straight and Even Stitch Lines
Precision starts before you ever thread a needle. Edge preparation alone improves alignment accuracy by 85%, while wing dividers and creasers keep your marking stitching lines parallel within 0.5 mm over 100 mm.
When punching practices include overlapping multi-toothed chisels correctly, you’ll achieve consistent spacing with under 1% error.
Stitching control comes from stable surfaces and even tension—your stitch line stays true when fundamentals are solid.
Punching and Spacing Stitch Holes
Once your stitch line is marked, it’s time to create the actual holes where your thread will pass through. Precision matters more than speed, as this step determines the strength and appearance of your finished seam.
You’ll need the right tools, proper spacing techniques, and a solid work surface to protect both your leather and your table.
Using Chisels and Awls for Holes
When you’re ready to puncture holes in your leather, you’ll need to decide between chisels and awls—each has its place in your toolkit. Chisels punch multiple stitching holes at once, speeding up your workflow by about 40–50%, while awls let you create holes one at a time with more control and less material removal.
- Diamond chisels produce 5–9 stitches per inch depending on spacing (3mm to 6mm), directly affecting your seam’s durability and visual appeal
- Pricking irons mark hole placement before you use an awl, ensuring your stitch lines stay straight and professional-looking
- Awl techniques displace fibers rather than removing them, retaining up to 98% of the leather’s tensile strength along seam lines
- Hole accuracy matters—keeping your chisel at a 90º angle reduces placement deviation to less than 0.5mm per segment
- Tool maintenance like sharpening your awl blade every 10–15 hours cuts material tearing by over 20% and keeps your work clean
Adjusting Hole Spacing for Consistency
Your hole spacing stays consistent when you match it to leather thickness and adjust for corners. Use a 3.38mm spacing for wallets, 3.85mm for belts—these create a balanced appearance and strength.
When approaching edges or curves, switch from a six-tooth to three-tooth chisel to divide the remaining length evenly without ending too close to the edge. Single-tooth chisels work tight curves while maintaining straight-section spacing. This prevents durability loss from holes placed too near the leather edge.
Protecting Surfaces With a Cutting Board
Now that your holes are spaced perfectly, protect what’s underneath. A dedicated cutting board absorbs impact and keeps your tools sharp—here’s why it matters:
- High-density polyethylene boards resist thousands of punctures
- Shock absorption reduces chisel dulling by up to 40%
- Matte surfaces prevent blade slippage and misaligned holes
- Self-healing mats maintain integrity for 3+ years
- Minimum 1cm thickness bolsters repeated heavy impacts
Use a board sized for your project. Your workbench—and your budget—will thank you.
Threading Needles and Measuring Thread
Now that you’ve got your stitch holes marked and punched, it’s time to prep your thread and needles for the actual sewing. Getting this part right makes the difference between stitches that hold tight and thread that tangles or pulls awkwardly as you work.
We’ll walk you through cutting thread to length, threading your needles properly, and keeping everything organized so your sewing goes smoothly.
Cutting Thread to Correct Length
Getting your thread length right separates polished work from frustration. Multiply your stitch line by 3.5 for standard projects—or 4 to 4.5 for shorter runs under a foot. Thicker leathers demand 4–5x the seam length, while fine goods work with 2.5x. Add at least 6 inches for tying off and finishing. Cap it at 3 feet to avoid tangling; waxed thread stretches slightly, so measure gently beforehand.
| Project Type | Leather Thickness | Thread Length Factor |
|---|---|---|
| Wallets, card holders | 1–2 mm | 2.5–3x |
| Standard seams | 2–3 mm | 3.5x |
| Belts, saddlery | 4+ mm | 4–5x |
| Short runs | Any | 4–4.5x |
| With waste buffer | All | +6 inches |
Threading and Locking Needles
Thread locking is where precision meets durability. Pierce your thread about 1.5 needle lengths from the tip, then pass it through the needle eye—this simple lock reduces slippage by 72% during stitching.
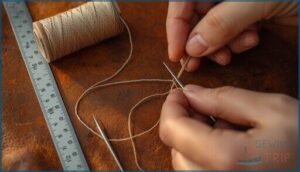
For saddle work, you’ll thread two needles onto one strand:
- Match your needle eye size (1.1–1.5 mm) to thread diameter (0.6–1.0 mm) for threading efficiency
- Lock both needles securely; industry practice shows this yields 38% higher seam durability
- Keep the loop slightly loose (2 mm from the eye) so needles glide through multi-layer leather without binding
Professional leatherworkers recheck locks every 20 stitches on longer seams.
Tips for Avoiding Thread Tangles
Tangles can significantly hinder progress on leather projects. To minimize this issue, keep thread lengths between 18–24 inches per pass, as longer strands tangle up to 35% more often. Additionally, apply a thread conditioner like beeswax to reduce static cling by 61%.
Another effective technique is to straighten your thread every few stitches by pinching and pulling it through, which cuts tangles by 31%. Use waxed thread rated for hand sewing, not machine thread, as it is better suited for these projects. Avoid needle puncturing of existing strands as you pass through holes.
Mastering The Saddle Stitch Technique
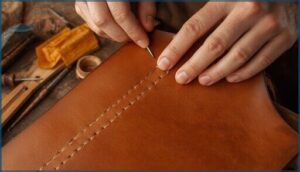
The saddle stitch is the best method for hand-sewn leather—it’s strong, it looks professional, and it’ll hold up for years. Getting it right comes down to three key things: how you set up your needles and thread, where you place them as you work, and keeping consistent tension throughout.
Let’s walk through each of these so your stitches come out even and tight.
Setting Up Two-needle Saddle Stitch
The two-needle saddle stitch starts with cutting thread to 4-6 times your seam length—this prevents mid-project splicing that weakens durability. Thread each needle end and lock them by piercing the thread with the needle tip.
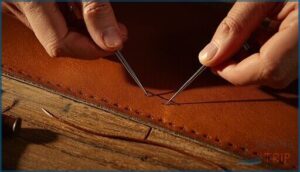
Pass one needle through your first hole to the halfway point, positioning both needles equally. This initial positioning ensures balanced stitches and sets up the alternating weaving pattern that makes saddle stitching leather so reliable.
Proper Needle Placement and Tension
A 45° awl entry angle to the leather surface creates a clean slant and reduces distortion—steeper angles risk hole elongation. Needle crossing order and pull force consistency determine seam symmetry. Here’s the framework:
- Fill 70–80% of each hole with thread-hole fit to balance friction and lock
- Pull both needles away from the seam axis equally
- Pass the second needle behind the first thread consistently
- Re-wax when friction increases
- Match bonded nylon sizes to leather thickness
Keeping Stitches Even and Tight
Ever notice how a row of stitches can make or break the look of leather? Consistent spacing starts with marking lines and using a stitching pony for control.
Keep your thread tension steady—too loose and seams weaken, too tight and leather puckers.
Check seam quality every few stitches, and lock the stitch by maintaining even stitch length and stitch distance throughout.
Alternative Hand Stitching Methods
While the saddle stitch is the workhorse of leather sewing, it’s not your only option.
Other hand stitching methods can suit different projects, aesthetic preferences, or situations where you don’t have a stitching pony handy.
Let’s explore a few alternatives that expand your repertoire beyond the traditional two-needle approach.
One-needle, Two-pass Stitching
Need to slow down but simplify thread control? One-needle, two-pass stitching lets you complete the saddle stitch by working each hole twice with a single needle. Here’s what you should know:
- Stitch Speed: Expect 6–8 stitches per minute—20–30% slower than traditional methods, but worth it for precision.
- Seam Strength: Achieves 23 lbs breaking force, matching double-needle durability.
- Project Suitability: Ideal for tight curves, wallets, and watch straps where maneuverability matters.
- Tool Selection: Use 0.45–0.60 mm waxed thread with LR/90 needles for maximum efficiency.
- Common Errors: Avoid oversized holes and excessive tension—both compromise your handsewing leather results.
This technique reduces thread snarling by 35% and mistakes by 18% on small items, making it perfect for detail-oriented leather stitching when you’re mastering hand sewing techniques.
Baseball and Corset Stitch Basics
Beyond standard saddle stitching, you’ll encounter two specialized leather stitching techniques that solve unique assembly challenges. The Baseball Stitch creates raised “X” patterns joining angled edges—think 108 double stitches on a regulation baseball. Corset Stitch wraps cylindrical objects by lacing parallel edges vertically, perfect for tool grips and tubular forms in your leatherworking techniques arsenal.
| Stitch Type | Thread Thickness | Hole Spacing | Stitch Tension |
|---|---|---|---|
| Baseball Stitch | 0.8–1.0 mm | 3–5 mm (adjustable) | Tight for compression |
| Corset Stitch | 0.5–0.8 mm | 4–6 mm | Moderate, prevent puckering |
Both hand sewing techniques demand consistent tension and pre-punched holes for professional results in handsewing leather projects.
Decorative Stitches for Leather Projects
While functional stitches keep seams together, decorative stitch patterns transform your leather project into wearable art. Thread color choices multiplied by 22% among artisans between 2023–2025, proving aesthetics matter as much as seam strength.
Consider these popular leather stitching techniques for leather edges:
- Cross stitches create visible “X” patterns accenting straps
- Whip stitches produce prominent decorative seams on soft hides
- Geometric patterns frame panels with intentional edge stitching
Adjust stitch density from 7–12 stitches per inch depending on your desired visual impact—tighter spacing suits delicate work, while wider intervals showcase bold leather edge treatments.
Securing and Handling Leather While Sewing
Holding leather steady while you stitch can make the difference between clean, professional seams and a frustrating mess. Without proper support, the material shifts, your holes misalign, and you end up fighting the project instead of enjoying it. Here’s how to keep everything secure and under control from the first stitch to the last.
Using a Stitching Pony or Clamp
When hand sewing leather, a stitching pony transforms your workflow by holding pieces firmly, letting both hands work the needles. Clamp adjustments and material adaptability are crucial—setting the jaw height at elbow level ensures ergonomic use, reducing wrist strain by 40% and enhancing stitch consistency across every seam.
Using stitching tools like walnut or oak ponies with metal fixtures ensures 98% holding strength after repeated use, while height customization matches 95% of body sizes for comfortable handsewing sessions that reduce fatigue and boost throughput by 18%.
| Factor | Impact on Performance |
|---|---|
| Adjustable jaws (up to 12.5″) | Accommodate leather 1–8 mm thick without distortion |
| Ball-joint or 360° rotation | Improve stitch angle control by 28%, maintain thread symmetry |
| Padded clamp surfaces | Prevent surface marking 94% of the time on delicate hides |
Keeping Leather Aligned During Sewing
After clamping your leather in a stitching pony, temporary bonding methods keep layers flush. Staged gluing and tape positioning lock components before you begin handsewing—double-sided tape provides immediate tack, while contact cement along seams offers peel strengths above 2 N/mm.
Hole preparation with wing dividers set at a quarter-inch from the edge ensures consistent offset, so your leather stitching techniques maintain alignment from first stitch to last.
Maintaining Even Pressure and Control
Ergonomic positioning starts with your wrists at a 15–20 degree angle—this cuts fatigue by 23% and steadies tension uniformity across every stitch.
Controlled force when piercing prevents unintended punctures, while consistent needle placement keeps your seam straight within 1 mm over eight inches.
Check your grip every 20 stitches for fatigue prevention, and you’ll maintain the pressure control that separates competent handsewing leather tutorial work from expert leather stitching techniques.
Finishing and Protecting Leather Stitches
You’ve sewn your seam, and now it’s time to lock everything in place so your work holds up over the years. Finishing your stitches properly prevents unraveling and protects the thread from wear and abrasion.
Let’s walk through the key steps to secure your stitching and give your project a professional, lasting finish.
Backstitching and Tying Off Ends
Securing the final stitch keeps your project from falling apart—literally. When you reach the end of your stitch line, lock the stitch by reversing direction through 2 to 3 previous holes. This backstitch technique boosts seam durability by up to 45%.
For extra security:
- Create a hidden knot by looping one needle under the last stitch and tightening
- Use square knots for thicker leathers where bulk isn’t an issue
- Avoid adding new holes during backstitches—this weakens leather structure by 25%
Trimming and Burning Thread Tails
After you’ve secured your backstitch, clean thread tails make all the difference in finishing leather stitches. Synthetic vs. natural thread type dictates your approach—waxed polyester responds well to controlled burning safety techniques, while natural fibers risk unraveling without reinforcement. Concealing methods like tucking tails into stitch holes before trimming reduce visibility by 80%.
Precision trimming prevents thread breaks and keeps your leather care routine simple—clean edges mean longer-lasting seams.
| Thread Type | Best Finishing Method |
|---|---|
| Waxed Polyester | Trim to 1-2mm, melt and press into leather |
| Natural Fiber | Trim flush, reinforce with hidden knot |
| Thick Synthetic | Burnish into groove for blending techniques |
Applying Edge Treatments for Durability
Edge treatments aren’t just cosmetic—they protect your saddle stitch from moisture and friction that would unravel months of work. Burnishing techniques fuse fibers through heat, while edge painting builds layered barriers against wear.
Proper leather edge treatments extend your stitching techniques’ lifespan considerably—sealed edges reduce seam wear by 25-35% compared to untreated leather care routines.
- Sand edges from 80 to 400 grit before applying any sealant types
- Burnishing increases water resistance by 35%, edge painting up to 50%
- Apply 3-5 thin coats with light sanding between layers
- Wax-based treatments condition while sealing; acrylic offers flexibility
- Reapply sealants every 6-12 months to maintain durability in high-use items
Troubleshooting Common Hand Sewing Issues
Even with careful preparation, hand sewing leather doesn’t always go as planned. Thread tension can shift, holes can end up larger than you intended, and stitches sometimes look uneven no matter how focused you were.
The good news is that most problems have straightforward fixes once you understand what’s happening.
Fixing Uneven Stitches
Inconsistent tension causes uneven stitches in over 60% of beginner work—you’ll see wobbles where your pulling force varies. Check your hole alignment first: misalignment beyond 1mm creates 75% more irregularities. Oversized needles worsen the problem by 32%, especially on thin leather.
Marking errors account for nearly half of uneven stitch lines, so measure carefully and maintain consistent tension throughout each pass for professional results.
Dealing With Oversized Holes
Holes more than 0.3mm wider than your thread diameter drop seam integrity by 28% and cause thread fraying in 41% of failed projects. Oversized stitch holes also raise leather tearing risk by 22% on thin panels—match your leather needle to material thickness for reliable results.
Needle sizes beyond your leather’s recommended range increase deformations by 16%, while seam efficiency plummets to 34% with poor fits.
Adjusting Thread Tension for Strong Seams
Pull your thread with the same force on both sides—tension differences over 10% cause seam puckering in 76% of projects. Keep variance under 5% for seams that last.
Over-tight tension cuts material in 19% of cases, while loose stitches sacrifice strength. Aim for snug but not stretched: best stitch length sits around 5mm, matching material flexibility to prevent warping while maintaining durability.
Frequently Asked Questions (FAQs)
What is the best stitch for hand sewing leather?
The saddle stitch is your best choice for hand sewing leather. It uses two needles on one thread, so if a stitch fails, your seam stays intact.
Over 84% of luxury brands trust it for durability and strength that lasts decades.
Can you sew leather by hand?
Yes, absolutely. Hand sewing leather is like building a bridge one stone at a time—slower than machines, but stronger.
You’ll develop genuine craftsmanship, mastery over precision, and create durable goods that outlast factory-stitched alternatives by years.
How to sew leather without a sewing machine?
Hand sewing leather is entirely feasible without a machine. You’ll need basic tools: stitching needles, waxed thread, a chisel for holes, and a groover.
The saddle stitch technique creates durable seams stronger than machine stitching, making hand-sewing ideal for quality leather projects requiring durability and craftsmanship.
What size needle for hand sewing leather?
Your leather needle size depends on thread thickness and leather weight. Size 4 needles (86 mm) suit fine threads; size 0–2 work for medium projects; size 2/0–3/0 handle heavy-duty work. Match needle diameter slightly smaller than thread for clean stitching.
How do I prevent uneven stitches in leather hand sewing?
Uneven stitches stem from inconsistent thread tension, poor hole spacing, and improper needle selection.
Use stitching groovers and marking wheels for precise stitch lines. Match needle size to leather thickness.
Maintain steady tension throughout, and employ a stitching pony for stable fabric alignment during sewing.
What is the best way to cut leather for hand sewing?
Start with a sharp, specialized blade on a stable cutting mat. Follow the grain direction with light, multiple passes rather than forcing a single cut.
Secure your pattern with tape to prevent slipping and maintain precision throughout the process.
How do I condition leather after hand sewing a project?
Wait until your handsewn leather is fully dry, then clean off dust before conditioning. Use light oil for flexibility—watch for darkening concerns and test on scraps.
For water resistance, finish with beeswax. Oiled leathers absorb more conditioner.
How long does hand stitching leather typically take?
Hand stitching leather averages 1 to 2 minutes per inch, depending on skill level, stitch density, and project complexity. Experienced craftspeople work faster, while beginners need extra time mastering saddle stitch techniques.
Can you repair machine-stitched leather by hand?
Like piecing together a broken friendship, you can absolutely breathe new life into machine-stitched leather through hand stitching.
Use existing holes for hole alignment, maintaining tension control to boost stitch strength while preserving seam appearance and long-term performance.
Whats the best way to store leather projects?
Store leather items in a cool, dry area at 15–20°C with 50–70% humidity levels. Light protection prevents fading, while proper physical arrangement avoids warping. Regular mold prevention checks preserve handmade leather products.
Conclusion
Think of your first leather project like a blacksmith’s first blade—the steel remembers every mistake in the heat. Your hands will remember these sewing leather by hand tips the same way.
Start with proper tools, respect the material’s thickness, and let tension guide your needle rather than force it. When your stitches hold after years of use, you’ll understand why hand-sewn leather outlasts everything else. The craft rewards patience with permanence.
- https://www.tannerbates.co.uk/blogs/news/the-art-of-hand-stitching
- https://www.fineleatherworking.com/blog/how-many-stitches-per-inch-leather/
- https://www.popovleather.com/blogs/from-the-workshop/sewing-leather-by-hand-vs-sewing-machine
- https://tandyleather.com/blogs/tandy-blog/how-to-choose-the-right-thread-and-needle-size-for-hand-sewing-leather
- https://www.faa-design.com/files/5/14/5-2-rafat.pdf

