This site is supported by our readers. We may earn a commission, at no cost to you, if you purchase through links.
A dull or bent needle doesn’t announce itself with fanfare—it just starts skipping stitches, snagging fabric, or making that telltale thunking sound that signals something’s off. Most sewing problems trace back to this tiny metal shaft, yet many sewers put off changing it until a project goes completely sideways.
The good news? Swapping out a needle takes about two minutes once you know the steps, and it’s one of the easiest ways to keep your machine running smoothly. Whether you’re dealing with broken thread, puckered seams, or fabric that won’t feed properly, a fresh needle often solves the mystery.
Master this simple maintenance task, and you’ll save yourself hours of frustration troubleshooting issues that never needed to happen in the first place.
Table Of Contents
- Key Takeaways
- Gather Tools and Prepare The Workspace
- Raise The Needle and Presser Foot
- Loosen and Remove The Old Needle
- Select The Correct Replacement Needle
- Insert and Secure The New Needle
- Rethread and Prepare for Sewing
- Test and Troubleshoot Needle Installation
- Frequently Asked Questions (FAQs)
- Conclusion
Key Takeaways
- Most sewing problems trace back to dull or damaged needles, which should be replaced every 6-8 hours of use to prevent skipped stitches, thread breakage, and fabric damage.
- Changing a needle takes about two minutes and requires turning off the machine, raising the needle to its highest position, loosening the clamp screw counterclockwise, and inserting the new needle with the flat side facing the correct direction.
- Matching the right needle type and size to your fabric is essential—lightweight fabrics need smaller needles (60/8 to 70/10), while heavy materials like denim require larger ones (100/16 or bigger).
- Always test your needle installation on scrap fabric before starting your project to catch threading issues, tension problems, or improper needle seating that could ruin your work.
Gather Tools and Prepare The Workspace
Before you start changing your needle, you’ll want to set yourself up for success. A little preparation goes a long way in making this task quick and easy.
Turning Off and Unplugging The Machine
Before touching your sewing machine needle, flip the power switch to “O” (off), then unplug the cord by gripping the plug body—not the cable. This simple sewing machine maintenance step prevents accidental activation and eliminates electrical safety risks during machine operation.
Think of it as creating a safety buffer: unplugging protects you from sudden starts, shock hazards, and fire prevention concerns while you work on your machine maintenance. Experts suggest that you consider regular needle replacement to prevent damage.
Assembling Necessary Tools (e.g., Screwdriver, New Needle)
With the machine safely powered down, grab your screwdriver—most household models use a small flat-head or Phillips—and select the right sewing machine needle for your fabric. Check your manual if you’re unsure which screwdriver or needle type you need.
Remember to replace your needle after every 8-10 hours of use. Keep everything within arm’s reach: gathering tools and materials now makes needle replacement smooth and frustration-free.
Ensuring Proper Lighting and Clean Area
With your tools ready, set up ideal illumination over your sewing machine—detailed work near the needle demands 10 times more light than a standard office. Position a bright task lamp directly above the needle plate to eliminate shadows and support visual health during sewing machine needle replacement.
Clean lint and dust around the needle area using a soft brush:
- Remove the needle plate and lift out large lint deposits with tweezers
- Brush residual fibers from feed dogs and bobbin compartment
- Clear debris that could interfere with needle movement or stitch formation
- Wipe surrounding surfaces to maintain workspace organization
- Store cleaning tools nearby to encourage regular sewing machine maintenance
Raise The Needle and Presser Foot
Before you can swap out that old needle, you need to get everything in the right position. This step sets the stage for safe and easy access to the needle area.
Let’s walk through how to raise the needle and presser foot so you’re ready to work.
Using The Handwheel to Lift The Needle
Before changing sewing machine needles, you’ll need precise positioning of the needle bar. Grip the handwheel—that’s the round disc on the machine’s right side—and turn it toward you (counterclockwise). Rotate slowly until the needle reaches its highest point, where it stops rising. This rotation direction prevents thread tangling and gives you safe maintenance access without using the motor alternative.
| Action | Direction | Why It Matters |
|---|---|---|
| Locate handwheel | Right side of machine | Controls needle position |
| Turn handwheel | Toward you (counterclockwise) | Prevents mechanism damage |
| Rotate until stopped | Needle at top | Creates safe workspace |
| Keep machine off | No power during turning | Avoids accidental activation |
Lifting The Presser Foot for Access
After raising the needle, find the presser foot lever mechanism behind your machine’s needle area. Push it up gently—this releases fabric tension and creates a safe workspace for needle access.
Raising the foot prevents common errors like thread snags during needle replacement guide steps. If the lever feels stiff, that’s a lift malfunction requiring light oil on the hinge before continuing with your sewing machine needle change.
Positioning for Easy Needle Removal
Before you reach for the screwdriver, check your positioning to avoid fumbling or accidents. Good setup makes needle removal smooth and safe.
- Verify power status—confirm the machine is off and unplugged so nothing shifts unexpectedly.
- Position your hands to the side of the needle clamp, keeping fingers away from the point.
- Adjust lighting so you can clearly see the needle set screw and needle holder without shadows blocking visibility.
Loosen and Remove The Old Needle
Now that your needle and presser foot are raised, it’s time to actually get that old needle out. This step is pretty straightforward, but there are a few key things you’ll want to know to do it safely and without any hassle.
Let’s walk through finding the right screw, using your screwdriver correctly, and checking that old needle before you toss it.
Identifying The Needle Clamp Screw
Before you can remove the old sewing machine needle, you’ll need to locate the needle clamp screw—that small, often textured fastener on the right side of the needle bar. It’s usually twice the needle bar’s diameter and holds your needle firmly in place. Screw misidentification happens to about 8–15% of beginners, so don’t worry if it takes a moment to spot.
| Feature | What to Look For |
|---|---|
| Location | Right side of needle bar, perpendicular to it |
| Appearance | Textured knob, commonly 12–14 mm diameter |
| Material | Steel with lightweight synthetic resin knob |
| Safety Note | Access only when machine is powered off |
Modern machines often mark the needle clamp screw for easy identification, reducing novice user errors greatly. Once you’ve found it, you’re ready to loosen it with your screwdriver and swap that needle out safely.
Using The Correct Screwdriver Technique
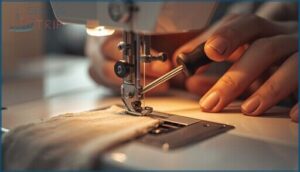
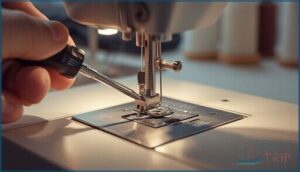
Most household machines use slotted needle clamp screws, so you’ll want a flat-blade screwdriver that fits snugly—not too wide or narrow. Hold the screwdriver perpendicular to the screw and turn counterclockwise with gentle, steady pressure.
Think “snug, not superhero-tight” when loosening or tightening. Over-torquing can bend your needle bar or strip threads, turning a simple swap into an expensive repair.
Safely Removing and Inspecting The Needle
Once the screw is loose, grip the needle firmly at the shank to avoid puncture risk reduction. Pull straight down—not sideways—to prevent needle clamp control issues or dropping it into the machine.
Hold it up to the light for a quick visual damage check: bent needles, burrs at the tip, or any roughness mean it’s done.
If you’ve logged six to eight sewing hours or see wear, replacement hour criteria say swap it out.
Select The Correct Replacement Needle
Picking the right needle isn’t just about grabbing any one from your stash—it’s about matching the needle to your fabric and project. The wrong choice can lead to skipped stitches, puckered seams, or even damage to your material.
Here’s what you need to know to select a replacement needle that’ll work perfectly for what you’re sewing.
Choosing Needle Size for Fabric Type
Your fabric weight determines which needle size you’ll need—think of it like pairing shoes to the terrain. Lightweight fabrics such as silk call for sizes 60/8 to 70/10, while medium cottons work best with 80/12 or 90/14. Heavy denim needs 100/16 or larger.
Needle charts help you match fabric types to proper sizes, preventing damage and ensuring great stitch quality through correct thread matching.
Understanding Needle Types (Universal, Ballpoint, Etc.)
Once you’ve pinpointed your needle size, you need the right type to match how your fabric is built. Universal needles work for most woven fabrics like cotton and linen—their slightly rounded point manages general sewing tasks.
Ballpoint needles slip between knit yarns without snagging jersey or fleece.
Microtex needles offer sharp, precise piercing for silk and microfiber, while jeans needles power through heavy denim with their reinforced blade.
Inspecting The New Needle for Quality
Even high-quality needles can hide defects from the factory. Before installing your new sewing machine needle, run through this quick needle inspection:
- Roll the needle shank on a flat surface—any wobble signals bending that can wreck your stitches
- Check for burrs by gently dragging the point across your fingertip; roughness means trouble
- Examine the eye under good light for sharp edges that fray thread
- Verify straightness by laying the flat side on a hard surface
Think of this as your insurance policy against skipped stitches and fabric damage before you even start sewing.
Insert and Secure The New Needle
Now that you’ve got the right needle in hand, it’s time to put it in place. Getting the orientation and positioning correct makes all the difference between smooth sewing and frustrating malfunctions.
Let’s walk through the three key steps to get your new needle properly installed and locked down tight.
Orienting The Needle Flat Side Correctly
Before you slide the needle in, take a close look at its shaft—one side is flat, and that’s your guide. On most home machines, the flat side faces away from you toward the back.
This flat side orientation ensures proper hook interaction and prevents needle damage. If you get it backward, you’ll see skipped stitches or thread breaks right away.
Inserting Needle Fully Into The Needle Bar
Once you’ve got the flat side aligned, push the needle shank upward into the needle bar until it hits the mechanical stop—that’s full insertion depth, and it matters more than you might think.
Here’s why proper needle insertion prevents common headaches:
- Correct stitch formation depends on precise needle alignment with the hook
- Component damage risk drops when clearances stay where manufacturers designed them
- Calibration considerations assume you’ve seated the needle completely every time
Tightening The Needle Clamp Screw Securely
With the needle fully inserted, grip your screwdriver and turn the needle clamp screw clockwise—firm but not forced. Secure tightening techniques prevent needle displacement that causes stitch skipping, while overtightening consequences include stripped threads.
Give a gentle tug on the needle afterward; if it wiggles, tighten another quarter-turn. Loose clamp issues lead to dropped needles mid-project, something you definitely don’t want.
Rethread and Prepare for Sewing
Once your new needle is locked in place, you’re not quite ready to start sewing yet. You’ll need to rethread your machine since the thread path was likely disrupted during the needle change.
Let’s walk through the final setup steps to get you back to creating beautiful stitches.
Rethreading The Sewing Machine
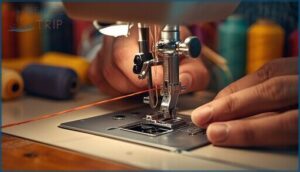
After securing the new needle, you’ll need to rethread your machine to get back to sewing. Start by raising the take-up lever with the handwheel, then lift the presser foot so the tension discs open.
Guide the upper thread through each step in the thread path—skipping even one guide near the needle can cause skipped stitches or poor stitch quality.
Lowering The Presser Foot
Once threading is complete, lower the presser foot before you stitch—this single move stabilizes your fabric and ensures proper stitch formation. Replacing a sewing machine needle is pointless if your presser foot stays up during sewing.
Here’s what lowering the presser foot does:
- Fabric stabilization keeps layers flat against the feed dogs for even feeding
- Safety precaution prevents sudden fabric shifts that could draw fingers toward the needle
- Stitch formation activates tension discs so each stitch locks correctly
- Pressure adjustment engages foot design features that match your fabric weight
Adjusting Thread Tension if Needed
After threading your new needle, the tension dial might need a nudge—most machines preset for balanced stitches around 4.0 to 5.0, but fabric weight effects demand adjustments.
Your stitch appearance reveals the truth: loops underneath mean your upper thread needs tightening; puckering signals it’s too tight.
Check that thread passes cleanly through the tension disks, matching thread type to your fabric for perfect lockstitch formation.
Test and Troubleshoot Needle Installation
You’ve installed your new needle, but the real test happens when you actually start sewing. A quick test stitch on scrap fabric will tell you everything you need to know about whether the needle is seated correctly and working as it should.
Here’s how to test your needle installation and fix any issues that pop up.
Performing a Test Stitch on Scrap Fabric
Before you start your actual project, run a test stitch on scrap fabric to catch problems early—over 90% of sewing instructors say this step prevents costly mistakes. Pick fabric similar to your project, then sew a 4-inch sample to check:
- Stitch density falls within the 8–16 stitches per inch range
- Tension adjustment doesn’t create puckering or loose loops
- Issue detection reveals skipped stitches or thread breaks
- Fabric selection matches your needle type properly
Checking for Proper Stitch Quality
After your test stitch, look closely at both sides—does the thread loop evenly, or do you see bumps and tight spots? That’s your tension balance talking.
Check for skipped stitches, uneven stitches, or fabric damage around the needle holes. A well-formed seam appearance means consistent lockstitch and no puckering.
This objective evaluation catches sewing problems and solutions before they ruin your project.
Troubleshooting Common Needle Issues
Even when everything looks right, needle breakage, skipped stitches, or thread breakage can still pop up. Here’s your sewing machine troubleshooting checklist:
- Needle Breakage Causes: You’re using a needle too fine for thick fabric in 70% of cases
- Bent Needle Problems: Check if you hit the throat plate during insertion
- Skipped Stitches Issues: Improper threading disrupts loop formation 50% of the time
- Dull Needle Effects: Replace every 10-15 hours to prevent fabric snags
- Thread Breakage: A small needle eye causes 55% of breaks from friction
Frequently Asked Questions (FAQs)
How do you remove a needle from a sewing machine?
Turn off your machine and unplug it for safety. Use the handwheel to raise the needle fully, then loosen the needle clamp screw counterclockwise. Pull the old needle straight down and out.
How do you change a sewing machine needle?
Replacing a sewing machine needle involves turning off the machine, raising the needle to its highest position, loosening the needle clamp screw, removing the old needle, inserting the new needle with proper orientation, and tightening securely.
When should I change my sewing machine needle?
Your sewing machine needle deserves a fresh start every 6–8 hours of active sewing, or sooner if you notice skipped stitches, thread breakage, or fabric snagging—signs that dull or bent needles are compromising stitch quality.
What happens if you don’t change your sewing machine needle?
A dull needle causes skipped stitches, thread breakage, and fabric damage. Bent needles snag delicate materials and strain your machine’s timing. You’ll waste time troubleshooting issues that a fresh needle would prevent entirely.
How do I change the needle on my sewing machine?
Replacing a sewing machine needle requires turning off your machine and raising the needle to its highest position. Loosen the needle set screw counterclockwise, then remove the old needle. Insert the new needle with its flat side facing back and tighten securely.
Why is my sewing machine not stitching after I changed the needle?
Sometimes you hit a snag—improper needle orientation causes most stitching failures. Check that the flat side faces correctly, the needle’s fully inserted, and you’ve rethreaded completely.
Always run a test stitch on scrap fabric first.
How to fix a broken needle on a sewing machine?
First, turn off your machine and unplug it to prevent injury.
Remove any fragments with a magnet, inspect the throat plate for damage, then install a new sewing machine needle and test stitch carefully.
What are signs a needle needs replacement?
When fabric puckers like tired skin or thread snaps mid-seam, your sewing machine needle is signaling distress. Skipped stitches, audible popping sounds, fabric damage, and thread breakage all indicate immediate replacement needed for better stitch quality.
How do I clean the machine before changing needles?
Before you start, turn off and unplug your machine for safety.
Remove lint accumulation from the bobbin area and feed dogs using a soft brush. This debris removal prevents stitch problems and keeps machine parts running smoothly.
Can I use any brand of sewing needle?
You can use different sewing machine needle brands, but needle compatibility depends on system standards like 130/705 H.
Brand differences affect sewing performance and needle quality, so always match your machine’s specifications.
Conclusion
Imagine this: you’re halfway through hemming a bridesmaid dress when your stitches go wonky. You swap the needle, and suddenly everything flows perfectly again. That’s the power of this simple skill.
Changing a sewing machine needle becomes second nature once you’ve done it a few times, and it prevents most common stitching headaches before they start. Keep a stash of fresh needles nearby, change them regularly, and your projects will thank you.
- https://konsew.com/blog/how-often-do-we-have-to-change-needles-in-an-industrial-sewing-machine
- https://thesewinggallery.net/blogs/the-sewing-gallery/how-often-should-you-change-your-sewing-machine-needle
- https://sewingmastery.com/15-reasons-why-a-sewing-machine-needle-breaks/
- https://www.onlineclothingstudy.com/2019/07/common-sewing-machine-problems-its.html
- https://pmc.ncbi.nlm.nih.gov/articles/PMC8706176/

