This site is supported by our readers. We may earn a commission, at no cost to you, if you purchase through links.
 Basic block pattern making creates foundation templates that fit your measurements perfectly.
You’ll start by taking accurate bust, waist, hip, and length measurements to draft your first bodice or skirt block.
These master patterns become your starting point for creating countless garment designs.
Think of blocks as your pattern-making skeleton – they provide the structure while you add the creative flesh.
You’ll trace around your block, then modify it by adding design elements like pleats, gathers, or style lines.
Once you’ve mastered creating blocks, you’ll discover how these simple templates reveal advanced techniques that transform basic shapes into professional-quality patterns.
Table Of Contents
- Key Takeaways
- What is a Block in Pattern Making
- Benefits of Using Blocks in Pattern Making
- Creating a Basic Bodice Block
- Working With The Basic Skirt Block
- The Dartless Bodice Block and Its Applications
- Creating a Basic Pants Block
- Essential Tools for Drafting a Bodice Pattern
- Drafting a Bodice Pattern in 5 Steps
- Customizing and Adjusting a Bodice Pattern
- Applying Blocks to Create Various Garment Patterns
- Frequently Asked Questions (FAQs)
- Conclusion
Key Takeaways
- You’ll save significant time by using blocks as reusable foundation templates instead of drafting each pattern from scratch, eliminating repetitive measuring and calculation work.
- Your garments will fit consistently well because blocks are based on your exact body measurements, serving as personalized templates that ensure proper fit across all your designs.
- You can create countless garment variations from just four basic blocks – bodice, skirt, sleeve, and pants – by modifying these foundations through dart manipulation and design additions.
- You’ll achieve professional results by starting with tested, fitted blocks rather than guessing at measurements, reducing errors and fabric waste while building confidence in complex projects.
What is a Block in Pattern Making
When you start pattern making, you’ll use a block as your master template for creating garment patterns.
It’s a simple, close-fitting foundation that contains only the essential shaping and measurements needed for a perfect fit.
Definition of a Block
A block in pattern making acts as your master template—the foundation from which all your garments spring to life.
Your block is the secret weapon that turns measurements into endless, perfectly fitting designs.
This sloper pattern contains only essential fitting elements without design details, serving as your reliable starting point. Block evolution has transformed how designers approach pattern creation, making the process faster and more consistent.
- A foundation template that fits your body like a second skin
- A basic block pattern making tool that eliminates guesswork from fitting
- A sloper vs. block terminology that means the same reliable base pattern
Types of Blocks Used in Pattern Making
Four essential Basic Blocks form your pattern-making foundation: bodice block, skirt block, sleeve block, and pants block.
These sloper patterns serve as blueprints for countless designs.
Derivative Blocks like sleeveless variations and Specialized Blocks including Overgarment Blocks and Jeans Blocks expand your toolkit further.
A key element involves accurately determining the armscye depth for a well-fitted garment.
Whether you’re pattern drafting from standard measurements or creating custom fits, these foundational templates streamline your entire design process efficiently.
Benefits of Using Blocks in Pattern Making
When you use blocks in pattern making, you’ll save hours of drafting time since each block serves as a reusable foundation for multiple garment styles.
Blocks also increase your efficiency by providing consistent fit and eliminating the guesswork that comes with starting each pattern from scratch, which helps to make the process more efficient with reusable foundations.
Saving Time and Effort
Pattern making transforms dramatically when you build extensive block libraries for your design work.
These foundational templates eliminate repetitive drafting tasks while ensuring pattern consistency across your entire collection.
Your basic block serves as a reliable starting point, reducing hours of measurement calculations to simple modifications.
Block libraries deliver measurable advantages that revolutionize your creative process:
- Error minimization through tested, fitted foundations rather than guesswork
- Workflow predictability with established templates for faster design development
- Sustainable production methods that reduce fabric waste through accurate fitting ease and ease allowance planning
Professional pattern makers rely on this systematic approach because pattern alteration becomes straightforward adjustments rather than complete redrafts.
Increasing Efficiency in Pattern Creation
You’ll transform your workflow from time-consuming drafts to lightning-fast modifications.
Block Libraries and Digitalization Benefits create Modular Design systems where Automated Grading handles size variations instantly.
Streamlining Adjustments becomes effortless when you’re working with proven foundations rather than starting fresh each time.
A key aspect is understanding grainlines and notches for proper fabric drape.
Automated grading
Modular design flexibility
Creating a Basic Bodice Block
Creating a bodice block starts with taking accurate body measurements and transferring them to pattern paper using basic drafting tools.
You’ll need bust, waist, back width, and shoulder measurements to draft this foundation pattern that becomes your template for countless garment designs.
Understanding Bodice Block Measurements
Perfect bodice blocks start with measurement accuracy—your sewing ruler can make or break the final fit.
Your measurements are your pattern’s DNA—get them wrong, and every garment disappoints.
When you’re ready to create your basic block, you’ll need five key measurements that determine how well your finished garment hugs your body.
Here’s what you’ll capture with your bodice measuring tape:
- Bust Point to bust point for precise dart placement
- Shoulder Slope from neck base to shoulder tip
- Back Width across your shoulder blades
- Armhole Depth from shoulder down to underarm
- Waist Definition circumference plus comfort ease.
These bodice measurements create the foundation for every bodice block you’ll draft.
It’s important to establish accurate side seams for proper bodice block drafting.
Take each measurement twice—consistency beats speed when you’re building patterns that actually fit your unique shape.
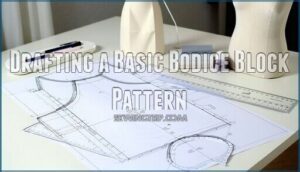
Drafting a Basic Bodice Block Pattern
With your bodice measurements in hand, you’ll draft your basic block by plotting key points on pattern paper.
Mark the bust point, shoulder slope, back width, and armhole depth using your grid ruler. Connect these points with smooth lines to create your bodice block outline.
Your drafting techniques should include adding essential ease and establishing the center front line.
Once complete, create a muslin fitting to test accuracy before moving to dart manipulation adjustments.
Adjusting Dart Placement and Size
Once you’ve drafted your basic bodice pattern, fine-tuning dart placement becomes your secret weapon for achieving professional results. Your darts control how fabric shapes around curves, making pattern alteration critical for proper fit.
Master your darts, master your fit—precision in placement creates couture-level results from basic blocks.
Dart manipulation transforms average blocks into custom-fitted foundations. Bust adjustment accommodates individual curves, while dartless options work beautifully for relaxed styles. Multiple darts can be combined or relocated for better shaping.
Here are five key dart adjustment techniques:
- Rotate darts toward your bust apex for natural shaping
- Combine multiple darts into strategic single placements
- Adjust dart width based on your body’s curves
- Test angles through muslin fittings before cutting fashion fabric
- Consider dartless designs for comfortable, loose-fitting garments.
Redesigning darts through careful bodice block adjustments guarantees your patterns fit like they were made just for you.
Working With The Basic Skirt Block
Once you’ve mastered your basic skirt block, you’ll transform it into three popular styles that every seamstress should know.
These modifications—gathered skirts with yokes, sleek pencil skirts with drapes, and flared variations—will expand your pattern-making toolkit substantially.
Creating a Gathered Skirt With Yoke
With your basic skirt block ready, creating a yoked skirt combines structure and movement beautifully.
This design eliminates waist darts while adding graceful volume below the yoke line for flattering silhouettes.
- Draft the yoke by drawing a horizontal line 3-4 inches below the waist on your skirt block
- Close all darts in the yoke section for smooth yoke shaping and seamless construction
- Calculate gathering ratio – typically 1.5 to 2 times the yoke circumference for proper volume distribution
- Choose lightweight fabrics like cotton voile or silk for best gathering techniques and drape
- Add seam allowances and notches for accurate assembly and professional finishing details
Consider how the yoke impacts garment shaping for the best results.
Making a Pencil Skirt With Drapes
Start with your straight skirt block and transform it into an elegant pencil skirt through strategic pattern modification.
Use dart manipulation to create sophisticated drape placement along the hip and thigh areas.
Choose fabrics with excellent draping qualities like crepe or jersey for superior cascade effects, and apply asymmetrical draping techniques for visual interest while maintaining the fitted silhouette shaping.
Perfect your pattern alteration skills through careful shaping adjustments to achieve a sophisticated look.
Modifying The Basic Skirt Block for Flared Skirts
Moving from pencil skirts to flared designs opens up endless creative possibilities through strategic pattern modification. Your skirt block transforms into stunning Aline skirt patterns using proven slash-and-spread techniques.
Here’s your roadmap for perfect Volume Distribution:
- Flare Calculation – Determine desired fullness at hem for balanced silhouette
- Panel Variations – Create multiple sections for controlled volume placement
- Hemline Shaping – Maintain smooth curves through careful measurement
- Fabric Choice – Select materials that enhance natural drape and movement
Master these pattern alteration fundamentals and you’ll create everything from subtle A-lines to dramatic circle skirts. The same principles apply when adapting blocks for flared pants – it’s all about controlling where volume falls.
The Dartless Bodice Block and Its Applications
When you want to create loose, comfortable garments without the structure of darts, the dartless bodice block becomes your go-to foundation pattern.
This simplified block removes traditional bust darts and adds ease throughout the torso, making it perfect for relaxed blouses, casual dresses, and flowing tops that prioritize comfort over fitted silhouettes, using the dartless concept to achieve a more relaxed fit.
Creating a Sleeveless Blouse
Your dartless bodice block transforms perfectly into a comfortable sleeveless blouse with simple modifications.
Armhole adjustments prevent gaping by deepening the curve slightly and smoothing rough edges.
Explore neckline variations like scoop necks or square cuts for visual interest.
Fabric selection matters—choose breathable cottons or flowing rayons for drape.
Consider closure options like back zippers or side seams for easy wear.
This sleeveless block becomes your foundation for countless summer tops through strategic pattern alteration.
Making a Loose-Fitting Dress
Using your dartless bodice block, you can whip up a loose-fitting dress that’s both stylish and comfy.
Pick a breathable fabric—cotton or linen works wonders. Widen the pattern for design and garment ease, then play with Dress Silhouettes: A-line or straight.
Try out different Neckline Options and Hem Finishes to suit your taste. With relaxed styles, your block pattern becomes truly versatile.
Consider utilizing pattern making software for digital dress patterns.
Adjusting Ease for a Comfortable Fit
Perfect fit starts with understanding wearing ease versus design ease. Wearing ease allows comfortable movement, while design ease creates your intended silhouette.
Different fabric considerations require specific ease allowance adjustments based on your body types and fit preferences.
- Test garment ease amounts with muslin mockups before cutting final fabric
- Consider fabric stretch and recovery when determining clothing fit requirements
- Analyze movement patterns for active wear or fitted garment needs
- Match ease adjustments to your personal style and comfort goals
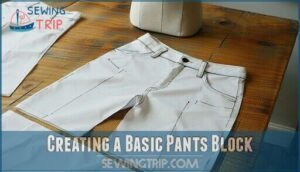
Creating a Basic Pants Block
Creating a pants block requires precise measurements for the inseam, rise, hip curve, and leg width to guarantee proper fit and comfort.
You’ll use these measurements to draft your foundation pattern, which you can then modify into various styles like elastic waist or flared pants through dart manipulation techniques.
Understanding Pants Block Measurements
Accurate body measurements form the backbone of any successful pants block. You can’t skip this step and expect professional results.
Here are the three measurement categories that’ll make or break your basic block:
- Waist and Hip Dimensions: Take waist circumference at natural waist, hip at widest point (typically 94cm for UK10), plus waist-to-hip length (20-27cm range)
- Rise Measurement and Crotch Depth: Measure seated waist-to-seat distance (29.9-34.4cm depending on size) for proper comfort and mobility
- Inseam Accuracy and Leg Width: Record inside leg from crotch to ankle, plus knee and ankle circumference for desired silhouette
These body measurements guarantee your pant block reflects real proportions, not guesswork.
Drafting Elastic Waist Pants
Converting your basic pant block into elastic waist pants requires adjusting the waistline measurement to match your hip circumference.
This allows easy wear while maintaining proper fit through the hips and thighs.
Your pattern drafting skills will guide these modifications for comfortable results.
| Component | Specification |
|---|---|
| Waistband Types | Fold-over or separate casing |
| Elastic Width | ¾ to 1¼ inch standard |
| Casing Construction | 1.5 inches wide minimum |
| Fabric Choice | Knit or stretch woven preferred |
| Fit Adjustments | Add 2 inches to rise length |
Creating Flared Pants With Dart Manipulation
Flared pants transform your basic block through strategic dart manipulation that redirects fabric volume from waist to hem.
You’ll close waist darts completely, then pivot pattern pieces to transfer their value toward the leg opening. This pattern alteration creates natural volume adjustment without compromising fit.
Different dart placement positions affect your flare styles – experiment with hip-level versus thigh-level starting points.
Add gradual curves to inseam alterations for smooth shifts, and extend outseams proportionally. Your hemline finishes require careful blending to maintain symmetrical panels.
Consider fabric weight when planning pattern making adjustments – lighter materials create graceful movement while structured fabrics hold dramatic bell-bottom shapes effectively.
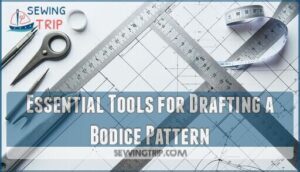
Essential Tools for Drafting a Bodice Pattern
You’ll need the right tools to draft an accurate bodice pattern that fits perfectly every time.
Having quality pattern paper, a grid ruler, French curve, and measuring tape makes the difference between a professional-looking block and a frustrating fitting disaster.
Pattern Paper and Grid Ruler
After creating your basic pants block, you’ll need the right tools to draft precise bodice patterns. Pattern paper and grid ruler combinations provide the backbone for accurate measurements and clean lines.
Choose from various paper types like manila tag or lightweight cardboard for durability. Grid sizes of 5mm or 1cm offer precise measurement guides, while clear ruler markings guarantee consistent pattern lines. Digital alternatives exist through CAD software, though traditional tools remain reliable.
Smart storage solutions include hanging hooks through punched holes for easy organization. To find the perfect material, consider exploring different pattern paper options.
Your grid ruler should feature non-slip backing and clear markings for cutting accuracy. Many patternmaking professionals prefer combining both tools for superior results in basic block creation.
- Select grid paper with 5mm-1cm measurements for detailed pattern work
- Use rulers with clear markings and non-slip backing for precision
- Organize tools with designated storage systems for efficient workflow
French Curve and Measuring Tape
Your French curve shapes smooth armholes and necklines with precision—different curve uses handle various pattern areas perfectly.
A quality measuring tape guarantees tape accuracy throughout countless projects, whether you prefer metric vs. imperial measurements.
Some pattern makers now use flexible curves or digital measuring tools alongside traditional methods.
You can even find specialty French curves for specific pattern alterations.
These pattern tools work together seamlessly: measure dimensions first, then refine those lines with your French curve for professional pattern making results.
Calculating Bodice Measurements
Accurate bodice measurements form the foundation for professional pattern making. Your back width calculation uses half your measurement plus 1.5cm ease, while front width needs half chest measurement plus 2cm dart allowance and 1.5cm ease.
Armhole depth requires adding one-sixth of your bust measurement to the base measurement. Mark your bust point precisely to guarantee proper waist definition and shoulder slope alignment throughout the drafting techniques process.
A precise fit often requires a specialized measuring tool.
- Calculate back width: half back measurement + 1.5cm ease
- Determine front width: half chest + 2cm dart allowance + 1.5cm ease
- Find armhole depth: base measurement + one-sixth bust circumference
- Mark bust point location for accurate dart placement
- Double-check all calculations before transferring to your basic block
Drafting a Bodice Pattern in 5 Steps
Creating a perfect bodice pattern starts with following five essential steps that transform your measurements into a professional pattern block.
You’ll draft the foundation pieces, shape critical areas like necklines and armholes, and establish the framework for countless future garments, which involves a process that requires precision and attention to detail to create a perfect bodice.
Taking Body Measurements for a Bodice Pattern
Perfect body measurements create the foundation for your basic block pattern making success. Your measuring tape becomes your best friend during this essential step. Stand naturally while someone helps you capture these key dimensions.
Follow this systematic approach:
- Bust Measurement – Measure at fullest point with tape parallel to floor
- Waist Definition – Use elastic band to mark natural waist, then measure circumference
- Shoulder Slope and Back Width – Record from neck base to shoulder edge
Record Armhole Depth and other bodice measurements precisely for your basic block.
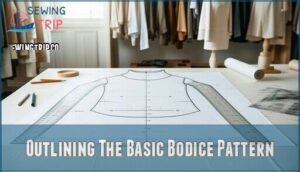
Outlining The Basic Bodice Pattern
Your bodice block anatomy starts with sketching key reference points on pattern paper.
Mark shoulder slopes, bust apex, and waistline positions carefully—these become your foundation for dart manipulation and proper fit.
This basic block outline guides accurate pattern development.
| Reference Point | Location Guide | Measurement Tip |
|---|---|---|
| Shoulder slope | Natural shoulder angle | Use shoulder measurement + ease |
| Bust apex | Center chest point | Bust separation ÷ 2 from center |
| Waistline | Natural waist position | Mark at narrowest torso point |
| Armhole depth | Underarm curve | Back width + 2 inches minimum |
The key to a well-fitting bodice is accurately marking these reference points, ensuring a proper fit and allowing for effective pattern development.
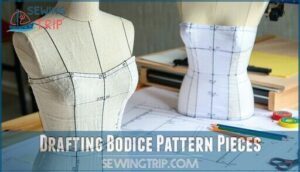
Drafting Bodice Pattern Pieces
With your basic bodice outline complete, you’re ready to create the actual pattern pieces that’ll become your foundation for countless garments. Separating your bodice block into front and back sections marks the real beginning of pattern drafting magic.
Start by tracing your front bodice block onto fresh pattern paper, paying close attention to Bust Point placement and Shoulder Slope accuracy. Your Back Width measurement becomes critical here – it determines how the pattern pieces will align during construction. Mark your Armhole Depth carefully, as this affects sleeve attachment later.
Next, add your dart manipulation points. The basic block pattern making process requires precise Dart Manipulation to achieve proper fit. Your bodice block should include waist darts and bust darts positioned according to your measurements.
- Mark clear grainlines on both front and back pattern pieces
- Add 5/8-inch seam allowances around all edges consistently
- Label each piece with size information and cutting instructions
- Create notches at key matching points for accurate assembly
- Test your drafted pieces with muslin before cutting expensive fabric
Remember, this basic block becomes your master template for future pattern drafting adventures.
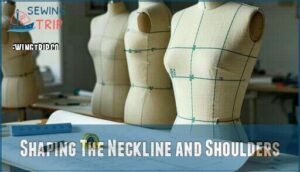
Shaping The Neckline and Shoulders
With your pattern pieces outlined, neckline variations and shoulder slopes require precise measurement.
Calculate one-fifth of your neck circumference for back neckline shaping, adding quarter-inch depth at front.
Shoulder slope assessment determines proper shoulder seam length – typically two-fifths shoulder width.
Use your French curve for smooth neckline adjustments.
Collar attachments and strapless solutions depend on accurate shoulder slope alignment.
Armhole shaping begins where shoulder ends.
Drafting Armholes and Side Seams
Now you’ll shape the essential curves that make your basic block truly functional. Start by measuring your armhole depth – typically one-third of your total armpit measurement plus ease for movement.
Use your French curve to create smooth armhole adjustments that won’t restrict arm mobility:
- Mark armhole depth points precisely on both front and back bodice pieces
- Draft side seam curves connecting waist darts smoothly to armhole opening
- Add blouse ease (1-2 inches) for comfortable fit and dress silhouette flexibility
- Test armhole shaping with muslin to verify proper pattern drafting before cutting fabric
This step transforms your flat pattern into a three-dimensional foundation for countless garment variations.
Customizing and Adjusting a Bodice Pattern
Once you’ve drafted your basic bodice pattern, you’ll need to check the fit and make adjustments to guarantee it works perfectly for your body measurements.
The shoulder seam length and overall fit require fine-tuning to create a professional-looking garment that fits like it was made just for you, with a good fit.
Checking Shoulder Seam Length
Your shoulder seams determine whether your basic block fits properly or looks homemade. After completing your bodice block pattern making, measure both front and back shoulder seams for Accurate Measurement. They must match exactly – even small differences create pulling or bunching.
| Problem | Solution | Common Alterations |
|---|---|---|
| Uneven lengths | Remeasure Shoulder Slope | Adjust shorter piece |
| Forward shoulders | Check Armhole Depth | Reshape back piece |
| Tight fit | Add ease gradually | Muslin Fitting test |
Achieving Balance requires patience, but perfect shoulder seam length transforms your basic block from amateur to professional-grade pattern making.
Making Final Adjustments for a Perfect Fit
The final test for your block pattern comes through careful assessment and strategic adjustments.
Here’s your roadmap to pattern perfection:
- Conduct a thorough muslin test – Pin-fit your test garment to identify fitting issues around bust, waist, and armholes
- Make targeted ease adjustments – Add or reduce wearing ease based on your comfort preferences and fabric choice
- Apply precise dart manipulation – Relocate or resize darts to eliminate pulling or gaping for better silhouette refinement
- Complete balance assessment – True your pattern lines and verify all measurements align with your block pattern standards
Applying Blocks to Create Various Garment Patterns
Once you’ve mastered your basic blocks, you can transform them into countless garment designs with simple modifications and combinations.
This chapter shows you how to apply your foundation blocks to create everything from simple tops to complex jumpsuits, expanding your pattern-making toolkit exponentially.
Using Blocks to Create Tops and Dresses
With your bodice block perfected, you’re ready to transform it into stunning tops and dresses. Block customization becomes your creative toolkit for endless silhouette variations.
Your basic block serves as the foundation for fitted top patterns, flowing A-line dresses, and everything between. Block-based design lets you modify necklines, relocate darts, and create princess seaming while maintaining proper fit. Design ease gets added during this transformation stage, not in your original bodice block.
Fabric selection plays a vital role here. Knits work beautifully for fitted tops, while wovens excel in structured dresses. Style adaptations happen through dart manipulation and seam adjustments.
Garment Type Key Modifications Design Features
Fitted Tops
A-Line Dress
Princess Dress
Your dress silhouette variations emerge from these fundamental block modifications.
Combining Blocks for Jumpsuits and Other Garments
Complex garments like jumpsuits demonstrate the power of block integration when you combine your bodice block with a pants block. Start by aligning the waistlines of both patterns, ensuring proper proportions through careful measurements. Pattern manipulation techniques let you adjust the torso length and create smooth passages between upper and lower sections.
Jumpsuit construction requires attention to these key elements:
- Match grainlines between bodice and pants sections for consistent fabric drape
- Adjust torso length by adding or subtracting length at the waist junction
- Create crotch depth modifications to accommodate sitting and movement
- Test fit thoroughly with muslin before cutting your final fabric
Design expansion possibilities include rompers, coveralls, and formal jumpsuits. Block integration principles apply to other complex garments too – think shirt-dresses, coat-dresses, or even overalls. The basic block foundation gives you confidence to tackle these challenging projects systematically.
Expanding Your Pattern Making Skills With Blocks
Once you’ve mastered combining blocks for jumpsuits, your pattern making potential becomes limitless through advanced dart manipulation and block pattern techniques.
Building block libraries and creating custom blocks guarantees pattern consistency while helping you minimize errors and reduce fabric waste.
Through pattern drafting with your basic block foundation, you’ll develop signature designs that showcase your unique vision and technical expertise.
Frequently Asked Questions (FAQs)
What are block patterns?
Think of block patterns as your blueprint foundation—they’re the basic, close-fitting templates you’ll use to create any garment design.
You’ll draft these master patterns without seam allowances or styling details, then modify them for countless creative possibilities.
What is a block in sewing?
A block in sewing is your foundation pattern template—a close-fitting, basic shape without seam allowances or design details.
You’ll use it as your starting point to create different garment patterns.
What are the main pattern blocks to learn in pattern drafting?
You’ll need four essential blocks: bodice (front and back), skirt, sleeve, and pants. These foundation patterns serve as starting points for creating countless garment designs.
What are basic blocks?
Unlike complex garment patterns with intricate details, basic blocks are simple, fitted foundation templates without seam allowances or styling elements.
You’ll use these master patterns as blueprints for creating all your custom designs, utilizing them as a foundation for your work with basic blocks.
How do I create my own patterns?
Start with your body measurements – bust, waist, hip, and lengths.
Draft basic blocks on pattern paper using rulers and curves.
Test with muslin, adjust for fit, then modify blocks to create unique designs.
Reorganizing the structure improves the overall flow and readability of the instructions.
What blocks can you use to make sewing patterns?
Like a master carpenter’s toolkit, your pattern-making arsenal includes four essential blocks: bodice, skirt, sleeve, and trouser blocks. You’ll use these foundation templates to create countless garment variations and designs.
What is a basic block in pattern drafting?
A basic block is your master pattern template that fits perfectly to specific body measurements.
You’ll use this foundation piece to create all other garment patterns, saving time and ensuring consistent fit across different designs.
What is the basic block foundation pattern?
Think of it as your garment’s DNA—you’ll create this close-fitting, dartless foundation template using precise body measurements. It’s your master pattern that transforms into every design you’ll ever make.
What are the 5 steps in pattern making?
You’ll follow five essential steps: take accurate body measurements, draft the basic block on pattern paper, create a muslin test garment, fit and adjust the pattern, then finalize your master block for future use.
What is the block method pattern?
The block method uses foundation patterns called blocks or slopers as templates for creating new designs.
You’ll draft these close-fitting, basic patterns without seam allowances, then modify them into various garment styles, using the block method as a foundation.
Conclusion
Consider Sarah, who spent months adjusting commercial patterns that never fit properly until she learned basic block pattern making.
Now you’ve mastered the foundation of professional pattern creation.
These blocks become your personal fitting templates, ensuring every garment starts with accurate measurements.
You’ll save countless hours by tracing and modifying proven blocks rather than starting from scratch each time.
With consistent practice, basic block pattern making transforms challenging projects into manageable steps, giving you the confidence to create any design you envision.
- https://dresspatternmaking.com/patternmaking-basics/blocks
- https://audaces.com/en/blog/basic-block
- https://thefoldline.com/blogs/pattern-series-get-ready-to-sew/the-sewing-pattern-tutorials-13-sewing-pattern-blocks
- https://www.youtube.com/watch?v=0WVOhnq1cro
- https://www.canvasetc.com/fabrics-for-pattern-making/

