This site is supported by our readers. We may earn a commission, at no cost to you, if you purchase through links.
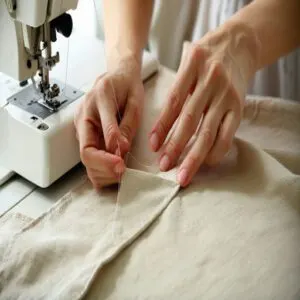
 Invisible stitching methods, like the ladder or slip stitch, are your secret weapon for a polished, “wow-is-that-machine-made?” finish.
The ladder stitch “zips” fabric together by weaving through edges, while the slip stitch hides seams with small, snug hand stitches.
Start by folding the hem neatly and anchoring your thread inside the fabric to keep the knot hidden, use a matching thread for seamless blending (test it first!) and keep your needlework tight but smooth—no puckering allowed.
With practice and patience, you’ll master these techniques and leave people wondering how you pulled it off, ready to level up those sewing skills?
Table Of Contents
Key Takeaways
- Match your thread color and fabric carefully for truly seamless stitches that stay hidden.
- Use the ladder or slip stitch for closing seams and creating a polished, professional finish.
- Keep your stitch tension balanced to avoid puckering or loose gaps in your seams.
- Practice on fabric scraps to perfect your invisible stitching techniques, like the ladder stitch, before tackling projects.
Invisible Stitch Basics
Invisible stitching is a clever technique that keeps your seams hidden, giving projects a smooth, professional finish.
It’s a must-have skill for repairing tears, closing gaps, or creating seamless designs with a polished look.
Definition of Invisible Stitching
Invisible stitching is all about stitch concealment, making seams and threads disappear like magic.
By blending fabric and hiding threads, it creates smooth, professional-looking finishes known as invisible seams.
Techniques like the ladder stitch transform frayed gaps into flawless seams.
It’s your secret weapon for projects that look polished, giving a seamless touch to garments, pillows, and more.
Mastering the invisible hand stitching technique is essential for achieving professional-looking results.
Importance of Invisible Stitching
You know that awe of a flawless finish? That’s what invisible stitching brings.
It gives projects a polished appearance while boosting seam security and fabric durability.
With these invisible stitching methods, you’ll nail that craftsmanship quality pros envy.
Who needs visible seams when seamless stitching makes your work look high-end and effortless?
It’s all about mastering the blind hem stitch!
Common Uses of Invisible Stitching
You’ve probably faced a torn favorite shirt—or maybe a stuffed toy with a gaping hole screaming for rescue.
That’s where invisible stitching saves the day.
It’s perfect for fabric repair, seamless garment making, or adding invisible seams on crafty projects like pillows or bags.
Invisible stitching methods—like the ladder stitch—make your creations look polished and professional every time, which is why it’s a key technique for achieving seamless garment making.
Choosing Right Thread
Matching the thread to your fabric is like finding the perfect dance partner—color, weight, and type all need to work in harmony.
Don’t skimp on these details, or your "invisible" stitches might get more attention than you’d planned!
Thread Color Selection
When aiming for seamless stitches, matching thread color to fabric tones is key.
Test thread shades on swatches—you’d hate to pick the wrong hue!
Light fabrics? Clear thread works.
Dark ones? Go for smoke-colored options.
Think of it like choosing dye for hair—it’s all about blending, not clashing.
Perfect thread selection means stitches that vanish effortlessly.
Understanding the right thread types for sewing is essential for achieving professional-looking results in various projects.
Thread Type and Weight
Picking the right thread type and weight can make your stitching magic.
Lightweight cotton threads work wonders on delicate fabrics, while synthetic fibers like nylon hold up for heavy-duty jobs.
Yarn weights matter too—thin for finesse, thick for durability.
Test fiber options on scraps, match your thread color carefully, and skip visible thread knots for a seamless finish.
Understanding the correct thread size selection is essential for achieving professional-looking results in various sewing projects.
Thread Tension and Control
Thread tension control is like Goldilocks—too loose, and seams gape; too tight, and fabric puckers.
Guide the thread gently, balancing tension with the fabric’s stretch.
Keep stitches smooth by mastering needle movement and consistent tension control.
Match thread color perfectly, and knot carefully to stay invisible.
Practice makes that “invisible hand stitch” truly seamless, leaving no trace behind.
Invisible Stitch Techniques
You’ve got three simple methods to master invisible stitching: the ladder stitch, slip stitch, and hand stitching.
Each technique helps you create strong, seamless seams that look like magic once you’re done.
Ladder Stitch Method
When you’re ready to master invisible stitching, the ladder stitch is your go-to.
This hand sewing technique involves needlework that zips fabric seams closed like magic.
With steady stitch tension and careful thread management, you’ll create invisible seams perfect for fabric selection from plush toys to pillows.
Remember: needle choice matters—sharp, fine needles work best for clean seam closure.
Slip Stitch Method
If you nailed the ladder stitch, the slip stitch offers another smooth way to ace invisible seams.
It’s all about keeping hand sewing stitches small and snug, with a steady sewing speed.
Match your thread selection to your fabric choice for flawless results.
Slip stitch tips? Focus on stitch length and tension—tight enough to hold, but invisible!
Hand Stitching for Invisible Stitch
Hand stitching for invisible stitching requires sharp needle control, solid stitch tension, and a bit of patience.
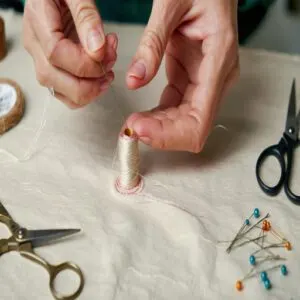
Choose matching thread, start inside the fabric to hide the knot, and use tiny hand sewing stitches, alternating sides for a neat ladder stitch effect.
Keep thread concealment in mind and finish seams carefully for flawless, professional results.
To achieve the best results, selecting the right sewing needles is essential for hand stitching, which involves sharp needle control and solid stitch tension, and remember that practice makes perfect!
Working With Curves
Sewing curves can feel tricky, but it’s all about control and technique.
With a bit of patience and the right prep, you’ll tackle those rounded seams like a pro.
Basting Stitch for Curves
Curves can feel tricky, but a basting stitch is your secret weapon for smooth curved edging.
Lightly stitch along your marked seam to guide fabric manipulation—it’s sewing tricks 101.
This temporary stitch holds everything steady so you can nail those invisible stitching methods.
Adjust stitch tension and gently navigate the seam for flawless curves in DIY sewing projects.
Pressing for Smooth Curves
When aiming for seamless finishes, pressing is your secret weapon for curve smoothing.
- Use a pressing ham to shape curved seams.
- Press edges open before turning fabric right side out.
- Always press with a cloth for delicate fabrics.
- Work in small sections to avoid stretching.
- Blend stitches like ladder or blind hem seamlessly with careful pressing.
The instructions provided focus on the importance of pressing in achieving smooth curves and seamless finishes in fabric work.
Tips for Stitching on Curved Seams
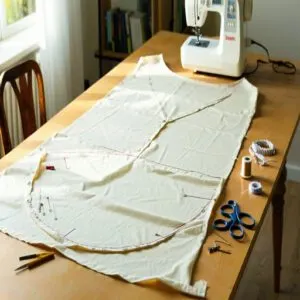
Tackling curved seams requires patience and preparation, using basting to guide your line and manage stitch tension.
Smaller stitches work better on curves—think of it like steering a tight corner, and adjusting your seam allowance to avoid puckering, keeping fabric flexible with light pressing.
Tools like pins, ladder stitch techniques, or even a blind hem stitch can help with managing these seams.
For a detailed guide, explore this helpful hand sewing curved seams tutorial.
Mastering Invisible Stitch
Mastering the invisible stitch takes practice, patience, and a good eye for detail, but it’s easier than you think once you get the hang of it.
With a few simple tools and the right techniques, you’ll create seamless, professional finishes that’ll impress everyone—even yourself!
Practice and Patience
Perfecting invisible stitching takes time, so don’t rush—practice and patience are your secret weapons for stitch mastery.
Focus on consistent practice to build muscle memory and confidence.
Try this:
- Start with scraps to fine-tune your ladder stitch or blind hem stitch.
- Set small, achievable goals to track progress.
- Celebrate every stitch that looks nearly invisible—you’re growing!
This approach will help you achieve stitch mastery over time, as you dedicate yourself to the process.
Troubleshooting Common Mistakes
Got the basics down but something looks off?
Common mistakes like uneven stitches or fabric puckering come from rushing or pulling threads too tight.
Slow down, practice tension control, and always secure with a tidy knot.
If your ladder stitch or invisible hand stitch isn’t blending, check your thread color—it’s sneaky, but mismatching throws everything off, particularly with invisible hand stitch.
Tools and Materials for Invisible Stitching
If you’re patching up seams or nailing that ladder stitch, having the right gear matters.
Keep these handy:
- Sewing needles for precision.
- Fabric scissors for clean cuts.
- Matching thread to keep stitches invisible.
- Thimble uses to protect fingers.
- Stitch markers, ideal for tracking tricky sections.
A seam ripper? Your bestie for mistakes!
Choosing the right sewing needles is essential for a professional finish.
Finishing Techniques for Invisible Stitch
Once you’ve stitched your seam, gently press the edges with an iron to smooth things out.
Hide the thread tail by burying it within the fabric fold—it’s sneaky but effective, and for a seamless finish, make certain stitch tension stays even throughout.
Try ladder stitch techniques for straight seams or master the blind hem stitch for tricky edge binding.
Mastering the slip stitch hem technique is vital for creating professional-looking hems with invisible seams.
Maintaining Consistent Stitch Quality
Keeping your stitch quality spot-on means mastering stitch length control and tension management.
Use smooth, consistent movements—think of it as steady handwriting for fabric.
Match your thread consistency to the fabric selection for a seamless look.
Needle angle matters too; it keeps your invisible stitching hidden.
Practice ladder stitch techniques and blind hem stitches on scraps until they feel second nature.
Frequently Asked Questions (FAQs)
What is an invisible hand stitch?
Let’s cut to the chase—an invisible hand stitch is a sneaky sewing trick where you join fabric seamlessly.
It’s done by stitching inside folds, making repairs or closures vanish like magic.
Perfect for polished projects!
What is invisible stitch & why is it important?
It’s a stitching trick that hides the thread, making seams look seamless.
You’ll love it for fixing tears, finishing projects, and adding a polished, professional touch.
Think magic for your sewing projects!
What are some other names for an invisible stitch?
Ever wondered if an invisible stitch has a secret identity?
It’s also called a ladder stitch, slip stitch, or blind stitch.
Each name highlights its sneaky ability to make seams disappear like magic!
How to do invisible stitching?
Start by threading your needle and knotting the thread.
Stitch across alternating folds like stepping up a ladder.
Keep stitches small and snug.
Gently pull the thread, tighten, and secure with a hidden knot.
How do you use invisible hand stitch needles?
Slide the needle under the fabric fold, keeping it parallel to the seam edges.
Alternate stitches between folds, forming a “ladder” pattern.
Pull gently to close the seam, and voilà—your stitches disappear!
How do you make an invisible lock stitch?
To make an invisible lock stitch, thread your needle, knot it securely, and sew tiny, alternating stitches into fabric folds.
Pull tightly to “lock” the seam, then tie off discreetly, tucking the knot inside.
What are the different types of invisible stitches?
Think stitching’s all needles and knots?
Nope!
There’s the ladder stitch for seamless seams, mattress stitching for joining edges, and slip stitching for hems.
Each feels like magic—you’ll be a sewing ninja in no time!
How do you do invisible stitching?
Grab a needle, thread it, and start with a hidden knot.
Stitch from one fabric fold to the other, like climbing a tiny ladder.
Pull tight, finish with a discreet knot—voilà, seamless magic!
How do you knot an invisible stitch?
To knot an invisible stitch, slip the needle under nearby threads, create a small loop, and pull the needle through it.
Tug gently to secure, and hide the knot in the fabric fold.
Simple, right?
Can you get invisible stitches?
Yes, you can totally master invisible stitches.
It’s all about using the ladder stitch technique and matching thread.
With a little practice, your seams will look so flawless, nobody will ever spot them.
Conclusion
Just like tying the perfect bow on a gift, mastering invisible stitching methods takes a little patience and finesse, but the results are worth it.
Whether you’re using the ladder stitch or slip stitch, these techniques create clean, professional seams that elevate your projects.
Keep your tools handy, your thread matching, and your stitches smooth, with practice, you’ll sew like a pro, fooling even the keenest eye.
Ready to let your handiwork shine, grab that needle and utilize the ladder stitch to achieve professional results.
- https://sewguide.com/invisible-stitches/
- https://www.applegreencottage.com/invisible-stitch-ladder-stitch/
- https://www.onlinefabricstore.com/makersmill/how-to-sew-an-invisible-stitch/
- https://blog.treasurie.com/invisible-stitch-ladder/
- https://sew4home.com/how-to-close-up-a-seam-with-invisible-hand-stitching/

