This site is supported by our readers. We may earn a commission, at no cost to you, if you purchase through links.
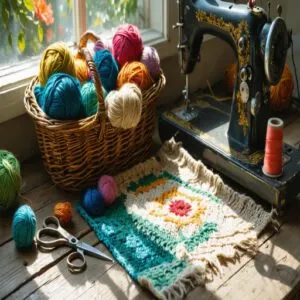
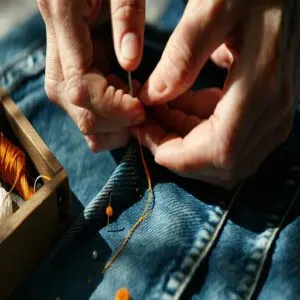
For hand stitching, keep your thread taut, use consistent stitch lengths, and make smooth, steady motions—reverse appliqué is a fun technique to try.
On a machine, lower the needle into the fabric, sew a few stitches, then hold the reverse lever to reinforce seams.
Adjust tension and speed to avoid puckering.
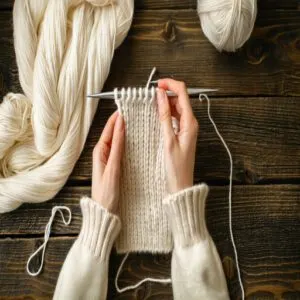
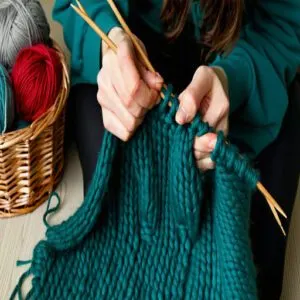
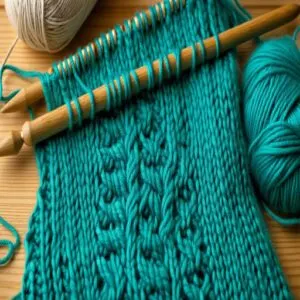
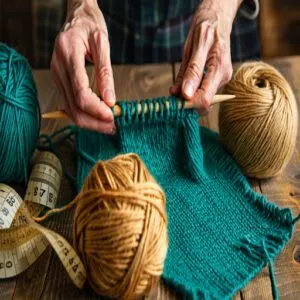
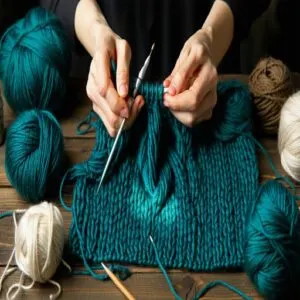
Knitters, you can reverse knit by inserting the left needle into the back of the stitch—great for textured patterns or neat edges.
Ready for advanced tricks? There’s so much more to uncover!
Table Of Contents
Key Takeaways
- Reinforce your seams by practicing reverse stitching on both hand-sewn and machine projects to stop unraveling and ensure durability.
- Flip stitches in knitting to create decorative patterns like reverse garter stitch or textured designs that look polished on both sides.
- Master reverse appliqué by cutting top fabric layers to reveal designs beneath, adding unique flair to sewing projects.
- Practice tension control and consistent stitch lengths to perfect reverse knitting and secure sewing techniques without puckering or breaking.
Reverse Knitting Basics
Reverse knitting might sound tricky, but it’s really just working your stitches backward to save time and effort.
You’ll learn how to knit from left to right or right to left, using simple steps that keep your edges neat and your hands moving smoothly.
English Reverse Knitting Method
English reverse knitting takes familiar motions and flips them.
Instead of the usual forward knit stitch, you work backward, perfect for reverse stockinette stitch patterns.
You can find resources for English reverse knit products.
Keep your yarn flowing loosely to avoid tension headaches, and focus on needle control for even fabric texture.
It’s a handy technique in knitting tutorials, great for mastering fabric reversibility with style.
Continental Reverse Knitting Method
Switching gears, Continental knitting flips the flow.
With your yarn in the left hand, reverse knitting becomes quicker and smoother.
To master it, the following tips are helpful:
- Use smaller needle sizes for precision.
- Try smooth yarn choices for easy control.
- Practice the reverse stockinette stitch for textured stitch patterns.
- Focus on consistent tension with motion.
- Stick to lightweight fabric types for beginners.
The key to mastering reverse knitting is consistent practice and attention to detail.
Left-to-Right Reverse Knitting Approach
Knitting from left to right feels tricky at first but gets smoother with practice.
Insert your left needle into the stitch on your right needle’s back, wrap the yarn counter-clockwise, and drop the stitch.
This Stitch Pattern Reversal works with knits and purls, making it great for Reverse Yarn Management or creating a clean reverse stockinette stitch edge.
Understanding reverse stitching techniques is also essential for securing seams in various sewing projects, particularly for achieving a clean finish.
Right-to-Left Reverse Knitting Approach
Ever tried knitting without flipping your work? That’s reverse knitting from right to left.
You use your left needle as the working one, and it’s surprisingly simple.
This technique is especially helpful for creating entrelac, bobbles, and short rows.
Treat it like a mirror: knit stitch reversal, reverse yarn management, same stitch orientation—just backward.
Perfect for reverse garter stitch, textured designs, or anytime purling feels tedious.
For a detailed tutorial, explore this guide on continental reverse knitting.
Mastering left hand techniques makes projects flow!
Tunisian Reverse Stitch
Ready to try something new with your Tunisian crochet?
The Tunisian reverse purl stitch is a game-changer.
It’s like adding texture and personality to your projects in one smooth move.
Think of it as the counterpart to the Tunisian knit stitch, but with a playful twist.
You can find helpful resources for Tunisian crochet supplies and patterns.
Start by inserting your hook from right to left behind the front vertical bar, instead of in front.
Hold the yarn in front of the hook and scoop it through—simple, right?
This stitch makes a soft, almost bumpy texture that’s perfect for scarves or cozy blankets.
For clean edges, keep your tension steady and avoid tugging too hard.
Don’t forget, mastering the Reverse Purl Method just takes practice, patience, and some clever hook management.
Reverse Stitching Fundamentals
Reverse stitching is all about reinforcing seams and keeping your work secure, whether you’re sewing by hand or using a machine.
You’ll adjust your stitches, hit the reverse setting, and create strong seams that won’t unravel.
Hand Reverse Stitching Technique
Reverse stitching by hand is simple but takes practice.
Start with these steps:
- Fabric Selection: Use medium-weight fabric first—it’s easier to manage.
- Thread Control: Keep thread taut but not too tight.
- Stitch Length: Aim for consistent lengths to avoid puckering.
- Hand Movement: Use smooth, steady motions to sew backward neatly.
Understanding reverse applique techniques can also enhance your stitching skills.
Confidence builds with repetition!
Machine Reverse Stitching Technique
To nail a reverse stitch by machine, check your sewing machine settings first—stitch length and thread tension matter.
Choose sturdy fabric, set the stitch length slightly shorter, and practice adjusting sewing speed for control.
Understanding sewing machine settings is essential for achieving professional results.
Use the reverse lever to secure seams, it’s like tying a knot with thread—a quick back-and-forth prevents stitching disasters down the road, which is crucial for a secure seam.
Troubleshooting Reverse Stitching Issues
Now that you’ve got your machine set up, let’s tackle the hiccups you might hit with reverse stitching.
If you’re noticing thread tension problems, first check if your machine’s clean – lint buildup loves causing trouble.
Watch for bent needles and sticky latches, they’re often behind those pesky fabric distortions.
For hand stitching, keep your thread tension steady and stitch length consistent to avoid any yarn breakage issues.
Knitting Reverse Stitches
You’ll discover how reverse stitches can transform your knitting projects by creating beautiful textures and decorative edges that look great on both sides of your work.
Whether you’re working on a scarf or sweater, you’ll learn to flip traditional knit stitches into their reverse versions, giving your pieces that professional, polished look you’ve always wanted.
Creating Textured Patterns
Take your fabric manipulation skills to the next level with texture creation that’ll make your projects stand out.
By blending different stitch variations and smart yarn selection, you’ll transform plain surfaces into stunning patterns.
The magic happens when you mix knit and purl combinations to create eye-catching designs.
- Start with double moss stitch for a gorgeous raised texture
- Create diagonal patterns using herringbone combinations
- Try alternating knit-purl sequences for bubble effects
- Work basic reversible patterns with garter stitch
- Add pleating techniques for dimensional texture
Making Decorative Edges
Beautiful edge embellishments start with a simple technique: slip the first stitch and knit the last stitch of every row.
For fancy borders, try the reverse stitch method by purling edge stitches on both sides, and your decorative trims can be one to five stitches wide.
These stitch patterns create professional knit finishes that prevent curling.
Reverse Garter Stitch Definition
While decorative edges add flair to your work, let’s explore a fundamental stitch that’ll transform your knitting game.
This stitch is the reverse garter stitch, where you’ll purl every single row instead of knitting them.
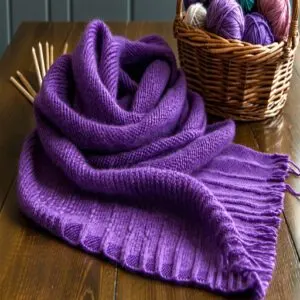
This creates a fully reversible fabric that won’t curl at the edges – perfect for scarves!
You’ll notice it’s just like regular garter stitch, but with right and wrong sides flipped, making it a unique and useful technique for your knitting projects, involving a fully reversible fabric.
Reverse Stitching Techniques
You’ll discover how reverse stitching transforms your knitting and sewing projects with three essential methods: reverse appliqué, reverse single crochet, and backstitching.
Whether you’re working with a needle and thread or a crochet hook, you’ll learn how these techniques can add strength to your seams and create beautiful decorative patterns that’ll make your projects stand out.
Reverse Appliqué Method
Let’s get started with a handy technique that’ll give your old clothes new life.
In reverse appliqué, you’ll work with two fabric layers – creating a design by cutting the top layer to reveal the bottom one.
You can find a variety of reverse applique tools online.
You’ll need basic appliqué tools: fabric marker, scissors, fusible web, and needle.
After alignment and cutting, secure layers with hand sewing or decorative stitches for a custom look.
Reverse Single Crochet Technique
The crab stitch, also known as reverse single crochet stitch, creates a unique twisted edge that’ll make your projects pop.
Instead of working left to right like usual, you’ll move your crochet hook to the right, keeping the same single crochet motions.
While it feels a bit awkward at first, this technique produces a gorgeous rounded, coiled design that’s perfect for edging your favorite pieces, utilizing the crab stitch.
Backstitching Method
Mastering the backstitch creates the strongest hand-sewn seams you’ll ever make.
To maintain perfect stitch tension, work from right to left, keeping your stitch length consistent for a clean look.
Practice thread control by overlapping each stitch, which creates that solid, durable seam you want.
For fabric selection, start with scrap material to perfect your technique before tackling your main project.
Mastering Reverse Stitches
You’ll find that reverse stitching isn’t as tricky as it seems once you understand the basic movements and practice with different materials.
Whether you’re working with a sewing machine or knitting needles, you’ll soon master these essential techniques that’ll make your projects look polished on both sides.
Step-by-Step Reverse Stitch Guide
Now that you’ve got your supplies ready, let’s discover the mysteries of reverse stitching. Here’s your foolproof roadmap to mastering both hand and machine techniques.
- Insert the left needle carefully into the right needle for basic reverse stitch by hand
- Draw the loop backward smoothly into the stitch position
- Practice reverse knitting in both English and Continental styles
- Keep your tension consistent while working backward rows
- Use straight stitches as your foundation before attempting reverse patterns
Tips for Mastering Reverse Stitches
After learning the basics, your path to perfect reverse stitches starts with smart tension control.
Practice makes perfect when balancing your stitch tension – I’ve found it’s all about rhythm and feel.
| Skill Focus | Key Tool | Daily Practice |
|---|---|---|
| Stitch Tension Control | Test Swatch | 10 minutes |
| Knit Stitch Reversal | Stitch Markers | 15 minutes |
| Fabric Type Selection | Practice Fabric | 5 minutes |
Remember to test your techniques on scrap fabric first, which is crucial for mastering stitch tension control.
Common Reverse Stitch Mistakes
Slipping up is common, but it’s fixable.
Struggling with tension issues? Try loosening your grip and smoothing out your rhythm.
Yarn breaks or stitch drops? Go slower—precision beats speed.
Needle slips and fabric puckering in sewing? Adjust tension settings and double-check your stitches.
Reverse stitching isn’t tricky if you keep these mistakes in check!
Advanced Reverse Stitching
You’ve mastered the basics, so now it’s time to tackle advanced reverse stitching techniques that add durability and creativity to your projects.
Let’s explore variations, sewing tips, and how reverse stitches can transform your knitting into something truly unique.
Reverse Stitch Variations
Stitch reversal adds flair to both knitting and sewing projects.
Purling every stitch creates a reverse garter stitch with a flexible fabric texture.
For detailed guidance, explore this reverse stitch guide.
In sewing, a backstitch secures seams while variations like the whipped backstitch bring color and style.
Experiment with reverse weaving or yarn manipulation to tweak knit patterns, blending function and creativity effortlessly!
Importance of Reverse Stitch in Sewing
Think of reverse stitching as your sewing safety net.
It boosts seam security, reinforces fabric stability, and keeps everything intact.
Got thread tension struggles? This sewing tutorial covers how to reverse stitch correctly.
By doubling back on your stitches, you increase stitch strength, making projects last longer.
It’s a simple sewing basics trick that saves headaches later!
Common Uses of Reverse Stitch in Knitting
Your knitting skills get a boost when you master the reverse stitch.
Here’s how you can use it:
- Reversible Scarf Designs: Reverse stockinette adds texture that looks fantastic on both sides.
- Knitting Edge Finishes: Try a reverse garter stitch for edges that resist curling.
- Fabric Texture Enhancement: Combining reverse stitches with cables highlights patterns beautifully.
These knitting techniques make projects shine!
Frequently Asked Questions (FAQs)
How to make a reverse stitch?
Think of reverse stitching like hitting rewind on a sewing project.
It strengthens seams and prevents unraveling effortlessly when you push your machine’s reverse button, stitch backward over your seam for 3-5 stitches, then release.
What is reverse stitching & how does it work?
Reverse stitching secures fabric by sewing backward for reinforcement.
You hold the stitch’s end, run your machine or needle in reverse, and lock seams to stop unraveling.
It’s simple and essential, and prevents future seam mishaps.
How do you reverse a stitch in knitting?
To reverse a stitch in knitting, work backward across the row by flipping the movement of your needles.
For knit stitches, purl instead; for purl stitches, knit instead.
It’s easier than it sounds!
How do you make a reverse Ridge stitch?
To create a reverse ridge stitch, alternate knitting and purling every other row in reverse.
Work backwards across the stitches, moving from the last stitch to the first, ensuring consistent tension for a neat finish.
How do you reverse stitch a sewing machine?
Did you know reverse stitching can extend your sewing project’s life?
Just hold your machine’s reverse lever or button, guide the fabric back gently, and reinforce seams to stop unraveling—it’s like adding a safety lock!
How do you knit a reverse garter stitch?
Flip your work after every row of knit stitches, and voilà—reverse garter stitch.
It’s like regular garter but with a twist.
Smooth edges can be achieved by loosening stitches slightly on the edges for a polished, consistent look.
How do you do a reverse stitch?
Think of reverse stitching like hitting rewind on sewing.
You simply stitch backward to secure seams.
On a machine, hold the reverse button; by hand, loop back through stitches to lock everything in place.
What is a reverse stitch in sewing?
It’s when you sew backward to lock stitches in place.
This action adds strength, and it prevents unraveling, which is a significant benefit.
On a machine, hold the reverse lever and stitch; for hand sewing, stitch backward into the last hole.
Is back stitch the same as reverse stitch?
Did you know reverse stitching can boost seam strength by 30%?
But no, backstitch and reverse stitch aren’t identical.
Reverse stitching reinforces seams by sewing backward; backstitch is a hand-sewing technique for tight, overlapping stitches.
How to reverse stitch on stretchy fabrics?
Stretchy fabrics need extra care—use a stretch stitch or zigzag setting on your machine.
Hold the fabric taut but don’t stretch it.
Practice on scraps first, and avoid pulling too much mid-stitch!
Conclusion
In the context of reverse stitching, practice makes perfect—don’t bite off more than you can chew, though.
Whether you’re reverse knitting for decorative patterns or using a sewing machine to secure seams, start small and take it one step at a time.
With techniques like reverse appliqué or reverse garter stitch, you’ll master the art of creating clean, creative designs.
Keep experimenting, follow this reverse stitching tutorial, and soon, you’ll feel like a stitching pro!
- https://www.embroidery.rocksea.org/stitch/chain-stitch/reverse-chain-stitch/
- https://support.brother.com/g/b/faqend.aspx?c=us&lang=en&prod=hf_se600eus&faqid=faqh00101022_000
- https://sewingiscool.com/reverse-stitch/
- https://www.ehow.com/how_7670087_reverse-stitch-sewing-machine.html
- https://www.americanquilter.com/blog/trace-baste-snip-stitch-reverse-applique-tutorial/

