This site is supported by our readers. We may earn a commission, at no cost to you, if you purchase through links.
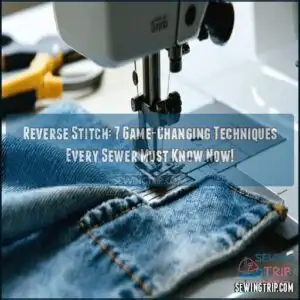 A reverse stitch is your sewing machine’s secret weapon for strong, finished seams.
It simply involves stitching backward to lock threads in place, making your work sturdy and unravel-proof.
To do it, press the reverse lever or button on your machine while stitching.
Use it at the start and end of a seam to secure your work, whether you’re hemming jeans or piecing together a quilt, this step prevents your seams from coming undone.
Think of it as tying a knot but with a machine’s precision, and consider its role in embroidery or advanced techniques, there’s more to explore!
Table Of Contents
Key Takeaways
- Reverse stitching locks your threads in place by sewing backward, preventing seams from unraveling at start and end points.
- Use the reverse stitch button on your sewing machine or manual backstitching to add strength and durability to stress areas like pockets and waistbands.
- Tension control is key to achieving clean, professional seams—too tight causes thread breaks, and too loose results in puckering.
- Reverse stitching isn’t just functional—it can be decorative, like adding texture with crab stitches or enhancing designs with reverse appliqué.
What is Reverse Stitch
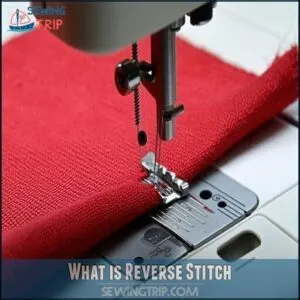
You’ll find that reverse stitching is your secret weapon against unraveling seams, as it locks your thread in place by sewing backward over previous stitches.
Reverse stitching is the key to strong, durable seams that stay intact under stress, ensuring your sewing projects last.
This essential technique strengthens the beginning and end of your seams, ensuring your projects stay together even in high-stress areas, which is crucial for the longevity of your work.
Definition of Reverse Stitch
A simple reverse stitch forms the foundation of all secure sewing projects, allowing you to stitch backward over forward stitches to secure them firmly in place.
Think of it as double-knotting your shoelaces—this essential directional stitching technique prevents unraveling and guarantees seam durability in your projects. It’s also commonly called backstitching in sewing basics.
Here’s why reverse stitching matters:
- Stitch Reinforcement: Creates strong anchor points at both ends of your seams
- Preventing Unraveling: Locks stitches in place when fabric experiences stress
- Professional Finish: Gives your work that clean, polished look
- Increased Longevity: Adds years of wear to garments and projects
You’ll typically use this technique at the beginning and end of seams, taking just seconds to perform but providing lasting security. It’s your first line of defense against frustrating thread pulls!
Types of Reverse Stitches
Building on our definition, let’s explore the variety of reverse stitches at your disposal.
| Stitch Type | What It Does | When To Use | How It Looks |
|---|---|---|---|
| Manual Backstitch | Secures by hand | Delicate fabrics | Tiny, even loops |
| Machine Reverse | Locks seams quickly | Everyday projects | Strong, uniform |
| Decorative Reverse | Adds visual interest | Visible seams | Patterned, artistic |
| Blind Stitch | Hides reinforcement | Hems and facings | Nearly invisible |
Each reverse stitch technique serves as your secret weapon against unraveling seams, utilizing delicate fabrics to create a strong and durable finish.
Importance of Reverse Stitch in Sewing
While regular stitches form the backbone of sewing, reverse stitches provide the staying power. This stitch reinforcement technique isn’t optional—it’s what keeps your hard work intact.
Reverse stitches are the hidden heroes of sewing, locking your hard work in place and ensuring every seam stands the test of time.
Reverse stitching (also called backstitching) serves four critical purposes:
- Creates stitch locking that prevents frustrating unraveling when garments are worn
- Reinforces stress points where seams experience the most pulling
- Guarantees seam durability in high-friction areas like armholes and crotch seams
- Extends your project’s lifespan without adding visible bulk
It’s basically invisible insurance for your sewing projects, providing a way to ensure that your work lasts without compromising its appearance or functionality.
Common Uses of Reverse Stitch
When you master reverse stitches, your sewing projects gain professional durability.
You’ll rely on this technique daily to lock threads at seam starts and ends, preventing frustrating unraveling.
| Use | Benefit |
|---|---|
| Seam reinforcement | Prevents fabric tearing |
| Stress points (pockets, waistbands) | Adds strength where needed |
| Repairing weak spots | Secures mending work |
| Edge finishing | Stops fraying on raw edges |
| Decorative elements | Creates visible texture patterns |
Backstitching is your secret weapon for fabric locking at critical points, providing professional durability and helping to prevent frustrating unraveling with seam reinforcement.
How to Do a Reverse Stitch
You’ll save yourself hours of frustration by mastering the reverse stitch, a simple technique that prevents your seams from unraveling when you least expect it.
Whether you’re using a machine with a handy reverse button or working by hand, this essential skill will make your projects more durable and professional-looking.
Step-by-Step Guide to Reverse Stitch
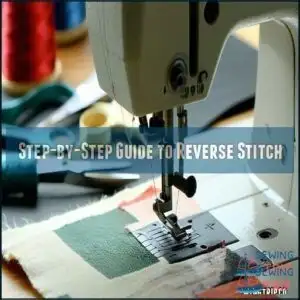
Now that you know what reverse stitching is, let’s master how to do it on your machine.
Look for the reverse button—typically marked with a U-shaped arrow—then follow these simple steps:
- Position your fabric and lower the presser foot
- Sew forward 4-5 stitches at medium speed
- Press and hold the reverse button or lever
- Stitch backward over the same path for 4-5 stitches
- Release the button and continue with your forward stitching
For perfect stitch direction control, keep your stitch length at 2-2.5mm when backstitching. This technique is your secret weapon for sewing start/end points that won’t unravel.
Watch your tension control—too tight and threads might break, too loose and stitches could pucker. If your machine jams during reverse sewing, check for thread buildup around the feed dogs.
Good fabric handling makes all the difference between professional-looking seams and amateur results.
Tips for Mastering The Reverse Stitch
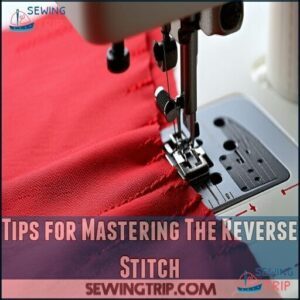
To master the reverse stitch down to its finest details, focus on tension control first.
Keep your hands steady for consistent length while practicing on scrap fabric.
When handling delicate materials, reduce pressure on the reverse lever.
Regular machine maintenance prevents jamming during the sewing process.
Many sewers also need to replace broken parts eventually.
Start with simple practice projects like napkins before tackling garments.
You’ll nail these sewing techniques with patience and repetition.
Common Mistakes to Avoid in Reverse Stitch
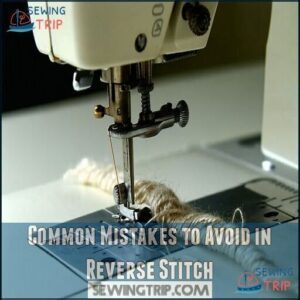
Even experienced sewers stumble in the area of reverse stitching. To avoid common pitfalls, watch for these frequent errors:
- Tension problems causing loose, wavy seams or thread bunching underneath
- Fabric puckering when using incorrect pressure on delicate materials
- Skipped stitches from improper needle position during direction change
Don’t rush your back stitching—uneven length creates weak spots in your reinforcement stitch. Moving too quickly often leads to needle breaks, especially in thicker fabrics.
Take your time; those few extra seconds prevent sewing errors that could ruin your entire project.
Reverse Stitch Variations
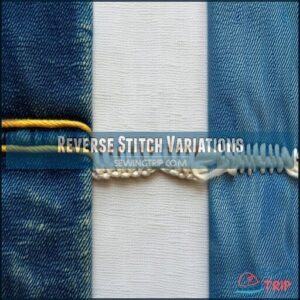
After moving past those common mistakes, it’s time to explore the exciting world of reverse stitch variations! These techniques don’t just reinforce your work—they transform it.
Beyond basic back stitching, you’ll find options that combine strength with style:
- Standard Backstitch – Perfect for medium-weight fabrics using 2.5mm stitch length, creating secure seams with 3-5 stitches at each end.
- Whipped Backstitch – Wrap a second thread around your stitches without piercing the fabric for a raised, decorative effect.
- Back Tack Stitch – Go over the same spot multiple times to create a knot-like reinforcement stitch that’s virtually unbreakable.
Each variation requires different tension adjustment and stitch length settings. Your fabric compatibility matters too—lightweight materials need gentler approaches while heavyweight fabrics demand stronger reinforcement. Creative applications are endless!
Reverse Stitch in Knitting
You’ll add a professional touch to your knitting projects when you master reverse stitches, which create beautiful texture and neat edge finishes.
Working stitches backwards might feel strange at first, but with practice, you’ll soon transform scarves, blankets, and garments into reversible masterpieces that look polished from every angle.
Definition of Reverse Stitch in Knitting
After mastering reverse stitches in sewing, you’ll find that knitting offers its own version of this technique.
In knitting, a reverse stitch simply works the opposite side of your regular stitches. You’re basically creating mirror images or purls from knits.
| Technique | Result | Use Case |
|---|---|---|
| Knitting Backwards | Stockinette texture | Reversible scarves |
| Reverse Garter | Bumpy texture | Neat edge finishes |
| Continental Reverse | Smooth fabric | Yarn management |
| Reverse Rib | Elastic pattern | Decorative borders |
This technique creates depth and texture you can’t get with standard knitting, offering a unique reverse stitch approach that enhances the overall fabric.
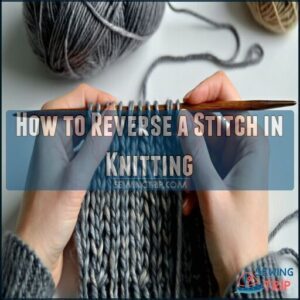
How to Reverse a Stitch in Knitting
You’ve learned what reverse stitching is – now let’s tackle the hands-on part. Reversing stitches in knitting isn’t just about fixing mistakes; it’s about gaining control over your craft.
To reverse a stitch in knitting, you’ll need:
- A crochet hook for picking up dropped stitches
- Steady hands to maintain consistent tension
- Knowledge of both English reverse knitting and Continental reverse knitting
- Patience for creating those beautiful neat edge finishes
When you spot a dropped stitch (that pesky ladder in your work), insert your left needle under it and pull the strand through. This technique is perfect for reversible scarf designs and can transform a mistake into a happy accident! Work up each "rung" until you’re back on track, utilizing your understanding of reverse stitching to achieve a flawless finish, and ultimately, gaining control over your knitting project.
Types of Reverse Stitches in Knitting
There are five essential reverse stitches every knitter should know:
- English Reverse – Creates textured patterns by working stitches backward
- Continental Reverse – Faster technique using left hand for yarn management
- Left-Right Reverse – Perfect for reverse stockinette and decorative edging
The Tunisian Purl adds rich texture to projects, while Right-Left Reverse simplifies complex patterns.
Unlike sewing machine reinforcement stitches that use a reverse button, knitting reverse techniques create deliberate design elements rather than just preventing unraveling.
Importance of Reverse Stitch in Knitting Patterns
Reverse stitches aren’t just fancy extras in your knitting patterns—they’re workhorses that transform your projects.
These stitches provide remarkable pattern durability in high-wear areas like cuffs and edges. When you incorporate reverse techniques, you’ll notice immediate improvements in edge finishing and stitch definition.
Your fabric gains strength without unnecessary bulk, while the alternating texture creation adds depth that basic stitches can’t match.
What’s more, reverse stitches offer incredible design versatility. They work like automatic reverse functions in sewing—providing reinforcement exactly where needed. Consistent tension matters for clean edges.
Back stitching techniques in knitting similarly secure your work, making pieces last longer while looking professionally crafted.
Backstitching Techniques
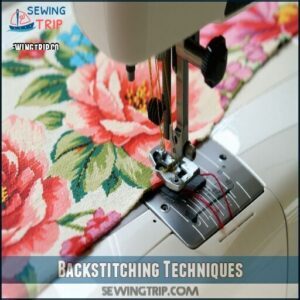
You’ll secure your seams and prevent unraveling by mastering the art of backstitching, a technique that locks your thread in place at the beginning and end of your sewing journey.
With a simple press of your machine’s reverse button or a careful hand stitch in the opposite direction, you’ll transform fragile stitches into strong, durable seams that withstand daily wear and tear, making your sewing projects more durable.
What is Backstitching
While knitting creates texture, backstitching provides structure. This simple technique secures your sewing projects by creating locked stitches that won’t unravel.
Backstitching happens when you sew backward over existing stitches, creating a reinforced seam. That U-shaped arrow button on your machine isn’t just decoration—it’s your ticket to sturdier sewing!
- Your heart will skip when seams stay intact after dozens of washes
- You’ll smile with pride showing off projects that don’t fall apart
- You’ll feel confident tackling challenging fabrics
- You’ll sigh with relief when stress points hold strong
- You’ll nod with satisfaction at those perfectly locked stitches
Think of backstitching as insurance for your hard work!
When to Use Backstitching
After mastering the basics of backstitching, you need to know exactly when this technique will save your sewing projects from disaster.
Backstitching isn’t just a technique—it’s essential for creating durable, professional-looking items.
Use it strategically in these key situations:
- When seams need extra strength at start/end points to prevent unraveling
- At high-stress areas like pocket corners, waistbands, and bag handles
- During repairs to stabilize fabric and prevent tears from spreading
- For decorative finishes where clean, defined lines enhance your design
Think of reverse stitching as insurance for your hard work. Without it, even the most beautiful project can quickly come apart at the seams.
Most modern machines include an automatic reverse function precisely because stitch reinforcement is so vital for fabric stability. Remember: those few extra seconds of seam reinforcement can add years to your creation’s lifespan.
How to Backstitch
Now that you know when to use backstitching, let’s talk about how to do it properly. Backstitching isn’t rocket science—it’s a simple technique that’ll save your seams.
For machine backstitching, sew 4-5 forward stitches, then press your reverse button while keeping light pressure on the foot pedal. Once you’ve stitched backwards to your starting point, release and continue forward.
For manual backstitching, use small, overlapping stitches that reinforce the fabric. One key is to maintain consistent length for a professional look.
- Secure seams at stress points using shorter stitch lengths (1.5-2mm)
- Maintain even thread tension to prevent puckering
- Use automatic reverse features on modern machines for consistent results
- Apply double backstitching on high-wear areas like pockets and waistbands
Your reinforcement stitches should be invisible yet strong—like a good foundation.
Backstitching Tips and Tricks
Anyone can master backstitching with these game-changing tips. First, maintain consistent thread tension—too tight causes puckers, too loose creates weak seams.
When using your sewing machine, practice on scrap fabric before tackling your actual project. Choose the right needle for your fabric type—thicker fabrics need stronger needles.
Control your fabric by guiding it gently without pulling, which guarantees even reinforcement stitches every time. "I’ve found that slowing down at stress points makes all the difference," says one experienced sewer.
Press the reverse stitch button after 3-5 forward stitches at seam beginnings and ends. Don’t overlap too many stitches in one spot to avoid bulk, especially on lightweight materials.
For curved seams, take your time and adjust your fabric position gradually—your sewing techniques will look professional even around tricky corners. This approach ensures professional results and helps in mastering backstitching with consistent thread tension.
Reverse Ridge Stitch Texture
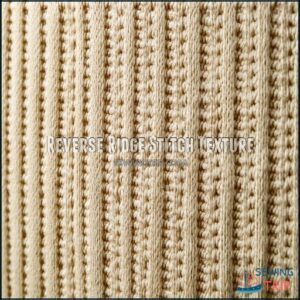
You’ll transform your projects with the distinctive raised texture of the Reverse Ridge Stitch, adding depth and visual interest that ordinary stitches simply can’t match.
This versatile technique creates beautiful textured patterns that work wonderfully for scarves, blankets, and decorative elements where you want that extra touch of craftsmanship.
Definition of Reverse Ridge Stitch
While backstitching secures your seams, the reverse ridge stitch opens up a whole new world of texture in your knitting projects.
This distinctive stitch pattern creates beautiful, tactile ridges that transform flat fabric into something with remarkable dimension.
What makes the reverse ridge stitch special:
- It creates pronounced horizontal ridges that add depth and visual interest
- The stitch pattern produces identical textures on both sides of your work
- It forms a stretchier, more elastic fabric than standard stitches
- The ridge stitch origin traces back to traditional fishermen’s sweaters
- It works wonderfully with both lightweight and medium-weight yarns
You’ll love how this stitch strengthening technique adds character to scarves, blankets, and more!
How to Create Reverse Ridge Stitch
The reverse ridge stitch texture creates a dimensional fabric that’s both visually striking and tactilely pleasing. You’ll love how this simple technique transforms your knitting projects.
Here’s how to create this gorgeous texture:
- Select the right Yarn Type Effects – medium weight yarns with good stitch definition work best
- Use appropriate Knitting Needle Size – typically one size larger than recommended for your yarn
- Begin with a row of knit stitches maintaining even Stitch Tension Control
- Follow with a row of purl stitches to create the ridge
- Continue alternating knit and purl rows throughout your project
You’ll see beautiful horizontal ridges forming as you work, perfect for scarves, blankets, and decorative panels. This technique is great for creating a visually striking and tactilely pleasing effect, making it ideal for various knitting projects.
Uses of Reverse Ridge Stitch in Knitting
The ridge-textured powerhouse of reverse stitch transforms ordinary knitting projects into standout creations.
You’ll find this stitch pattern perfect for scarves, where it adds warmth and visual interest, and throws that showcase its distinctive waves.
When incorporated into sweater designs, the stitch definition creates eye-catching focal points across yokes or cuffs.
Hat brims gain structure and character while maintaining stretch.
This reinforcement stitch works beautifully with various yarn weights – from delicate fingering to chunky options.
Its versatility in knitting pattern design makes it suitable for both beginner projects and complex sewing techniques.
Variations of Reverse Ridge Stitch
Now that you’ve explored how reverse ridge stitch enhances your knitting projects, let’s look at its exciting variations that can transform your work.
The beauty of reverse ridge stitch lies in its versatility. You can create stunning textile effects by adjusting these key elements:
- Ridge Stitch Height: Chunky yarns create more pronounced ridges while finer yarns offer subtle texture.
- Ridge Stitch Depth: Tight stitching provides crisp definition; looser tension creates softer patterns.
- Two-Color Ridges: Alternating colors between ridge rows adds visual interest to your reinforcement stitches.
These simple modifications to your stitch pattern will keep your sewing techniques fresh and inspiring!
Printable Knitting Instructions
You’ll never lose your place again with printable knitting instructions that clearly map out your reverse stitch techniques.
These handy reference guides transform complex patterns into easy-to-follow steps that you can mark up, highlight, and take anywhere, making it easier to follow complex patterns.
Importance of Printable Instructions
While mastering the textured reverse ridge stitch is rewarding, you’ll need reliable instructions to reference.
Printable knitting instructions offer game-changing benefits that digital guides simply can’t match.
To get children started, chunky yarn is easier for them to manage.
Keep your sewing machine manual alongside printed instructions for the perfect combination of technical guidance and creative freedom!
How to Create Printable Knitting Patterns
After mastering knitting basics, creating your own printable patterns becomes the next exciting frontier.
Transform your ideas into shareable designs with these simple steps:
- Download user-friendly pattern software that handles chart creation automatically
- Standardize your symbols for consistent, easy-to-follow instructions
- Create a clean layout design with ample white space around reverse stitch sections
- Test print on different paper sizes to verify readability
Your sewing machine can wait—pattern making just became your new favorite skill!
Where to Find Printable Knitting Instructions
Now that you’ve created your patterns, you’ll need resources for printable knitting instructions.
Bookmark these gold mines: Ravelry’s free pattern database, Etsy’s unique designs, and designer blogs packed with sewing tips.
Pattern websites like Yarnspirations offer downloadable PDFs with reverse stitch techniques.
Many resources offer products for knitters to make the process easier.
Don’t forget library resources and local craft stores – they often have sewing guides you won’t find online.
Happy stitching!
Advanced Reverse Stitch Techniques
You’ll transform your sewing projects with these advanced reverse stitch methods that go far beyond basic backstitching.
From creating intricate embroidery details to reinforcing quilts and mastering your machine’s reverse functions, these techniques will take your creations from homemade to handcrafted.
Reverse Stitch in Embroidery
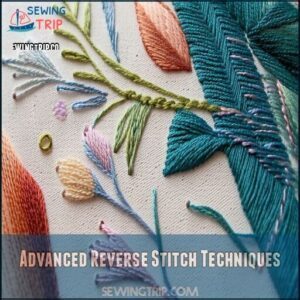
Thinking about adding flair to embroidery designs? The reverse stitch is your secret weapon for stronger, polished creations. It’s versatile for embroidery outlines, filling techniques, and decorative accents, bringing precision to every detail.
Here’s how to get it right:
- Use a Stabilizer: Stop puckering with the correct stabilizer for your fabric.
- Choose Threads Wisely: Pick durable, vibrant threads suiting your stitch types.
- Perfect Hooping: Confirm tight, even tension with proper hooping techniques.
- Plan Lettering Effects: Carefully chalk design placements for perfect alignment.
To enhance design depth, consider layering stitches effectively. Quality materials and steady practice transform ordinary stitches into bold, professional artistry!
Reverse Stitch in Quilting
Reverse stitching is the backbone of strong quilts. It secures seams, reinforces edges, and prevents unraveling in high-stress areas. Always use a reverse stitch at the start and end of quilting seams for durability.
Here’s a quick guide:
| Technique | Purpose | Tip |
|---|---|---|
| Patchwork Reinforcement | Strengthens quilt blocks | Use 3-5 reverse stitches |
| Quilting Seam Security | Secures stress points | Balance thread tension |
| Decorative Quilting | Enhances designs visually | Combine reverse with appliqué |
For smooth results, adjust your machine’s tension and stitch length. Add fabric stability by practicing on scrap pieces first. Reverse stitching keeps your sewing projects polished and sturdy!
Reverse Stitch in Sewing Machines
Your sewing machine’s reverse stitch feature is like the lock on a well-packed suitcase—it keeps everything secure. By using the reverse lever or button (often shaped like a U arrow near the needle), you can quickly backtrack stitches to create reinforcement at the start and end of seams.
This prevents seams from unraveling, even under stress.
- Know your machine: Check how the Lever/Button Types function, especially with Walking Foot Use.
- Fine-tune settings: Adjust Stitch Length Control and thread tension to avoid puckering.
- Practice upkeep: Regular Machine Maintenance prevents issues with automatic reverse or a stuck lever.
Consider replacing worn parts like the reverse mechanism components for peak performance.
Using reverse stitching regularly guarantees your seams stay strong and fabrics intact.
Advanced Reverse Stitch Variations
Discover your project’s full potential with advanced reverse stitch variations. These techniques don’t just secure seams—they elevate creativity and craftsmanship.
- Reverse Appliqué: Cut the fabric’s top layer to reveal stunning patterns underneath.
- Crab Stitch: Add a twisted, finished edge, ideal for decorative borders.
- Hand Backstitching with Whipped Backstitch: Reinforce seams while adding a sleek, raised look.
- Reverse Weaving: Use threads creatively to build durable, artistic textures.
Mastering these builds confidence for sewing start-end precision or creating eye-catching designs. Pair them with an automatic reverse stitch for fine control. With these, reverse stitching turns every detail into a masterpiece of durability and style.
Frequently Asked Questions (FAQs)
How to do a reverse stitch?
To reverse stitch, press and hold your machine’s reverse button or lever while sewing.
This makes the needle move backward over previous stitches, locking them in place.
Practice on scrap fabric to perfect it!
How to do a reverse stitch in knitting?
Knitting backward feels like dancing in reverse—it’s a quirky move to master.
Insert your left needle into the back of the stitch on the right needle, then work it like normal.
Simple practice fosters fluidity.
What is a reverse stitch in sewing?
You secure seams with a reverse stitch by sewing backward over your initial stitches.
It locks everything in place, preventing unraveling.
Most machines have a button or lever to make it super easy, with the reverse stitch being a key feature.
How to do a reverse stitch in crochet?
Practice makes perfect.
To reverse stitch in crochet, work single crochets from left to right instead of right to left.
Insert your hook backward, yarn over, and pull through to create a textured, decorative edge.
What is reverse stitch in knitting?
You work reverse stitches in knitting by working stitches backward to create patterns like reverse stockinette.
It’s handy for reversible garments, edges, or texture.
Just keep tension steady, and practice for neat, consistent results.
How do you reverse a stitch in knitting?
To reverse a stitch in knitting, insert your needle into the stitch from the opposite direction, and loop the yarn backward.
Keep your tension steady, and practice slowly for clean, even results over time, to achieve clean, even results.
How do you do a reverse crochet stitch?
Craft a clean crab stitch by crocheting backward.
Simply insert your hook into the previous stitch, pull up a loop, yarn over, and pull through both loops.
It creates a twisted, textured edge—super stylish!
Why do we reverse stitches?
You reverse stitches to lock your seams in place, so they don’t come undone.
It’s like tying a knot—it adds strength and durability, especially at stress points, keeping your projects neat and long-lasting.
What is the reverse stitch called?
Think of it like tying a knot in the thread—it’s called a backstitch.
You reverse and reinforce stitches so seams don’t unravel, giving them more durability, especially at the beginning and end.
How to troubleshoot reverse stitch issues?
Start by checking the thread tension and stitch settings.
Make sure the presser foot is compatible with your fabric.
Clean your machine, test on scrap fabric, and adjust the needle if stitches still skip.
Conclusion
Did you know 90% of seamstresses use reverse stitch to secure their work? It’s that essential!
Whether you’re finishing jeans, quilting, or tackling embroidery, reverse stitch makes your seams stronger and your projects more durable.
Try using it at the start and end of each seam to prevent unraveling. With techniques like backstitching and reverse ridge stitch, your sewing skills will level up.
Mastering reverse stitch isn’t hard—it’s the secret to a polished and professional finish!
- https://americas.elizabethbradley.com/pages/reverse-stitch-instructions?srsltid=AfmBOor7JIUQAUxTkngz7lwL05UU0HkmGfexpR_F4Pn1HgFnSyIjdbVf
- https://www.heirloomcreations.net/backstitching-basics/
- https://www.youtube.com/watch?v=uCCa-wFl7n0
- https://support.brother.com/g/b/faqend.aspx?c=us&lang=en&prod=hf_se600eus&faqid=faqh00101022_000
- https://www.quora.com/What-is-the-purpose-of-the-reverse-stitch-on-a-sewing-machine-Do-you-need-to-use-it-all-the-time-or-can-you-just-switch-it-on-and-off-if-needed

