This site is supported by our readers. We may earn a commission, at no cost to you, if you purchase through links.
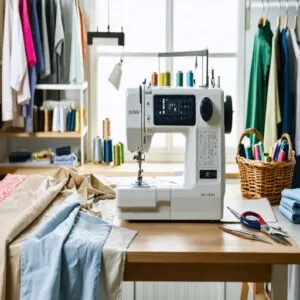 Mastering advanced sewing machine stitches isn’t rocket science—it’s about tinkering until your machine sings in harmony with your fabric.
Start by owning your thread tension and stitch length; they’re the secret sauce for durable, flawless seams.
Experiment with decorative stitches like the blanket stitch or create showstoppers with free-motion quilting.
Got puckering? A walking foot works wonders on tricky fabrics.
And don’t forget to try French seams for crisp, professional edges.
Adjust speed for precision and use high-quality threads to avoid those infuriating tangles.
Ready for more tips to elevate your skills? Let’s sharpen your sewing superpowers together!
Table Of Contents
Key Takeaways
- Adjust your thread tension and stitch length carefully for flawless, durable seams on any fabric.
- Experiment with advanced techniques like free-motion quilting or decorative stitching to create unique, eye-catching designs.
- Use the right tools and settings, like a walking foot for tricky fabrics or a specific needle and thread combination for precision.
- Master finishing techniques like French seams, binding, and facing to give your projects a polished, professional look.
Mastering Sewing Techniques
You’ll find that mastering sewing techniques isn’t just about pushing fabric through your machine – it’s about understanding the perfect blend of tension, speed, and stitch selection for professional results.
Whether you’re tackling French seams or creating intricate quilting patterns, these pro tips will help you transform those tangled threads into beautiful, precise stitches that’ll make your projects shine.
French Seams and Ladder Stitches
For flawless seam finishing, you’ll want to master French seams and ladder stitches.
These advanced sewing stitches aren’t just about looking fancy – they’re game-changers for your projects.
Here’s what makes them worth the effort:
- French seams hide raw edges completely, perfect for sheer fabrics
- Your stitch length affects seam durability – aim for 2.0-2.5mm
- Thread tension makes or breaks your French seams‘ appearance
- Ladder stitches create invisible closings, essential for high-end pieces
Tailoring Tricks and Methods
Like a sculptor shaping clay, you’ll master princess seams by drawing them within 1½ inches of the bust point.
Start with basic fit adjustments, then plunge into corset making by pressing seams open and carefully positioning the busk.
Your tailoring tools become magic wands as you transform heavy fabrics into smooth, bulk-free princess seams.
These advanced sewing stitches create that coveted royal silhouette.
To achieve a professional finish, understanding princess seams is vital for creating a flawless garment.
Hand Sewing and Threading
You’ve nailed tailoring methods, but don’t underestimate hand sewing.
Threading a needle feels like threading a camel through a keyhole, but it’s worth it.
Master these:
- Needle Threaders – Your secret weapon.
- Sewing Knots – Secure stitches start here.
- Hand Stitches – Ladder stitch creates invisible magic.
- Threading Tips – Use wax for smoother threading.
- Stitch Mastery – Practice makes perfect.
Troubleshooting Common Issues
Struggling with thread tangles or machine errors?
First, check if you’ve threaded it properly—backward threading’s a sneaky culprit!
For stitch skipping or tension issues, test on scrap fabric and adjust stitch tension.
Fabric frays? Use seam finishes or a stabilizer. Thread breakage might mean replacing needles or using high-quality threads.
Sewing machine troubleshooting saves projects—and your sanity!
Advanced Sewing Machine Stitches
You’ve mastered the basics, but now it’s time to explore advanced stitches that take your sewing to the next level.
From intricate free-motion quilting to experimenting with creative stitch patterns, you’ll transform plain projects into stunning works of art, using techniques that help you achieve stunning works of art.
Free-Motion Quilting Techniques
Ready to release your creativity with free-motion quilting? This advanced sewing technique turns your stitches into art.
Lower the feed dogs, grab a free-motion foot, and let the fabric flow! Here’s the plan:
- Practice stitch density on scrap fabric for even designs.
- Adjust quilting speed control to match your rhythm.
- Use quilting gloves for better fabric manipulation and grip.
To master free motion quilting, understanding free motion techniques is essential for achieving professional results.
Controlling Speed and Stitch Variations
Finding control with sewing machine speed and stitch variations takes practice.
Use Speed Control Tips like adjusting tension and stitch length for smooth results.
Keep your foot light on the pedal—think steady, not speedy.
Test stitch settings on scrap fabric to tweak stitch tension.
Thread Management also matters; avoid tangles by properly threading your machine before starting.
Experimenting With Creative Ideas
Discover your artistic side with creative stitching! Experimenting with innovative techniques opens up new worlds in textile design.
Play with decorative stitching and fabric manipulation to craft unique designs.
- Try layering stitch variations for added depth.
- Mix advanced sewing techniques like applique or free-motion embroidery.
- Combine different sewing machine stitches for bold effects.
- Incorporate unexpected textures for creative expression.
Mastering advanced sewing pattern making skills can elevate your projects to the next level.
Working With Challenging Fabrics
Tackling tricky fabrics like silk or denim doesn’t have to feel like wrestling a stubborn octopus.
With the right tools and tips, you’ll stitch through anything smoothly and confidently.
Managing Delicate and Thick Fabrics
Handling delicate fabrics and thick fabrics requires patience and the right tools.
Use a walking foot for delicate sewing and adjust settings for fabric density.
For specialized equipment, consider a walking foot sewing machine to enhance control.
Reinforce seams on thick fabrics with double stitching.
Here’s a cheat sheet:
| Fabric | Needle Type | Thread Type | Pro Tip |
|---|---|---|---|
| Chiffon | Fine-point | Lightweight | Avoid backstitching for smooth seams. |
| Taffeta | Microtex | Smooth polyester | Pre-wash for tighter grain. |
| Denim | Denim needle | Heavy-duty | Use clips, not pins, for layering. |
| Leather | Leather needle | Durable thread | Lengthen stitches for neat results. |
Preparing Fabrics for Sewing
Got your fabric picked out? Great! Start with fabric prewashing—it prevents surprises like shrinking later.
Check for proper grain alignment; crooked grains can ruin the drape.
Need extra stability? Try stabilizing methods like fusible interfacing.
Adjust your seam allowances based on fabric density; lighter fabrics need smaller seams.
Smart fabric preparation makes sewing smoother—like laying a solid foundation for success.
Choosing Right Needles and Threads
Before loading your machine, think about thread selection and needle types as tools, not afterthoughts.
For silky fabrics, pair a slim Microtex needle with fine threads to avoid snags.
Denim? Grab a thicker needle for smooth stitching.
For a thorough guide, explore choosing the right sewing needle and thread.
Match fabric compatibility with sewing machine needles, ensuring good stitch quality.
Proper combinations keep tension control steady and prevent headaches like skipped stitches!
Understanding Fabric Properties
To get the most from your stitches, understanding fabric properties is key.
Fabrics react differently based on their makeup.
Here’s what you’ll want to check:
- Fiber Analysis: Know what fibers you’re dealing with.
- Thread Count: Higher counts mean smoother finishes.
- Weave Types: Tight or loose affects stretch.
- Fabric Density: Impacts drape and stitching behavior.
Creating Professional Finishes
You don’t need a magic wand to make your projects look polished—just the right techniques and a little patience.
From crisp binding to perfectly placed zippers, these tricks will make your finishes look store-bought (in a good way).
Binding and Facing Techniques
Don’t underestimate binding and facing—they’re your secret weapon for sharp, clean edges that scream professional.
Binding wraps raw edges, while facing reinforces them.
Use bias tape for flexible curves or folded hems for a polished finish.
Experiment with stitch variations for decorative stitching.
You’ll love how these techniques elevate your sewing game.
| Method | Best Used For | Tools Needed | Advantages | Pro Tip |
|---|---|---|---|---|
| Bias Binding | Curved edges | Bias tape, sewing machine | Flexible, neat finish | Pre-press tape for smooth stitching |
| Facing | Reinforcing edges | Interfacing, fabric scissors | Adds structure | Match fabric weight for best results |
| Seam Binding | Enclosing raw seams | Seam tape, machine | Prevents fraying | Choose lightweight tape for delicate fabric |
| Folded Hems | Polished garment edges | Iron, ruler, pins | Clean edges | Fold twice for extra strength |
| Decorative Stitching | Adding style | Specialized presser foot | Unique design elements | Use stitch tests on scrap fabric |
Interfacing and Stabilizing Methods
Interfacing and stabilizers are your secret weapons for sewing reinforcement and fabric support.
Here’s how to master them:
- Pick interfacing types matching fabric weight—fusible webs for easy bonding or sew-in for delicate materials.
- Test interfacing on scraps before committing.
- Use stabilizer materials for tricky fabrics like stretch or silk.
- Control tension for smooth sewing machine stitches.
- Stay patient—precision matters!
Understanding various sewing interfacing types is essential for professional finishes.
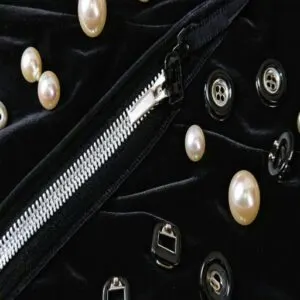
Adding Closures and Fasteners
Closures can make or break your look, so let’s master them.
Start with zipper installation; an invisible zipper foot saves headaches.
Buttonholes? Your sewing machine’s stitch selection is key—test on scrap fabric first.
Snap fasteners and hook-eye sets need precision but pack a punch for functionality.
For flair, magnetic closures bring sleek, modern vibes to bags and garments.
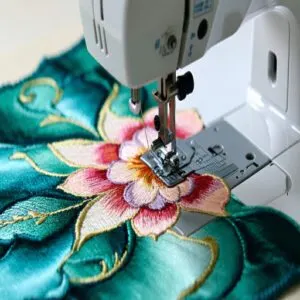
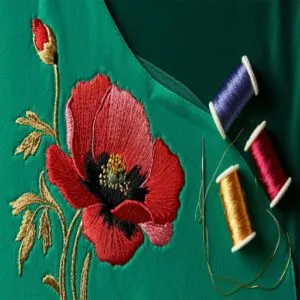
Mastering Embroidery and Appliqué
Embroidery and appliqué bring bold personality to your sewing.
Start with quality embroidery threads and learn a few embroidery stitches like backstitch.
Needle choices matter—use sharp ones for precision.
For appliqué techniques, try raw edge or needle-turn styles.
Precise die cutting speeds appliqué, using an AccuQuilt embroidery appliqué tutorial.
Pair these with decorative stitching or even fabric painting for custom embroidery pieces that pop.
Mistakes? They’re just accidental flair!
Frequently Asked Questions (FAQs)
What is the strongest stitch on a sewing machine?
The strongest sewing machine stitch is the straight stitch.
It’s perfect for seams that take a beating, like jeans or bags.
Use a shorter length (like 2mm) for extra durability, as this makes the stitch strong, simple, and reliable!
What makes a sewing pattern advanced?
Think of an advanced sewing pattern like a puzzle with extra tricky pieces—complex techniques, detailed instructions, and precision-required steps like pleating or tailoring.
You’ll need skills, patience, and a knack for solving challenges.
Why is my sewing machine making weird stitches?
Weird stitches often mean something’s off—check your thread tension, rethread everything, and use the right needle for your fabric.
Dust bunnies in your machine? Clean them out! Sometimes, it’s just a picky machine.
Why is my sewing machine gathering stitches?
Oh great, your sewing machine thinks it’s a scrunchie maker?
It’s likely your thread tension’s too tight or you’re mismatching fabric with stitch settings.
Loosen tension, check your presser foot, and smooth things out!
How do I sew decorative topstitching perfectly?
Keep your decorative topstitching straight by using an edge guide or marking the line with chalk.
Match thread tension, slow down your stitching speed, and practice on scrap fabric first—it’s like nailing perfect handwriting!
What stitches work best for stretch fabrics?
Stretch fabrics love a zigzag stitch or a triple stretch stitch.
They’re flexible enough to move with the fabric without snapping.
Pair it with a ballpoint needle, and boom, no skipped stitches or tears!
How do I create seamless curved hems?
Picture hemming a curve like taming a wild wave—go slow and steady.
Use a rolled hem foot, snip notches sparingly, and press as you go.
Patience and steam are your secret weapons for perfection!
What’s the technique for double-needle stitching?
Double-needle stitching adds a pro finish with parallel rows.
It’s perfect for stretch fabrics or hemming—just don’t pull too tight, or puckers happen.
Simply thread two needles, adjust tension, and use a zigzag bobbin stitch.
How can I combine stitches for creative designs?
Ever tried blending decorative stitches?
Pair scallops with zigzags for waves or use a straight stitch to outline intricate embroidery.
Experiment on scraps first—it’s like freestyle drawing, but your sewing machine is the pencil.
Conclusion
Think of sewing like dancing with your machine—when you find the rhythm, magic happens.
By mastering advanced sewing machine stitches, from free-motion quilting to decorative details, you’ll discover endless creative possibilities.
Don’t let tricky fabrics or uneven seams throw you; tackle them with the right tools, patience, and practice.
Experiment, make mistakes, and refine your technique—you’ll soon turn even challenges into art.
Now, go stitch your way to projects that wow and last!
- https://www.katia.com/blog/en/10-basic-sewing-machine-stitches-sewing-tips/
- https://crazylittleprojects.com/understanding-sewing-machine-stitches/
- https://sewingtrip.com/how-to-use-a-sewing-machine/
- https://www.thesewingdirectory.co.uk/machine-stitches/
- https://www.dutchlabelshop.com/en_us/blog/mastering-advanced-sewing-techniques/

