This site is supported by our readers. We may earn a commission, at no cost to you, if you purchase through links.
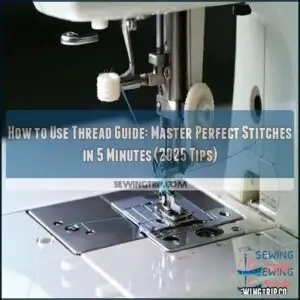 To use a thread guide, start by raising your presser foot and turning the handwheel to lift the take-up lever.
Run your thread through each numbered guide on your machine, following the path marked on your machine’s body. Make sure you’re hitting every guide – they’re like traffic directors keeping your thread in perfect formation.
Pull the thread through the take-up lever with a slight upward motion, then continue down to the needle area guides.
Proper threading through guides prevents tangling and guarantees even tension. The right thread path makes the difference between frustrating snags and those satisfying, perfect stitches you’re aiming for.
Table Of Contents
Key Takeaways
- You’ll need to raise the presser foot and turn the handwheel counterclockwise to lift the take-up lever to its highest position before threading your machine.
- Thread must pass through each numbered guide on your machine in sequence, following the exact path marked on your machine’s body to prevent tangling and maintain even tension.
- You should feed thread from right to left through the take-up lever with a slight upward motion before continuing to the needle area guides for smooth operation.
- Regular maintenance of your thread guides, including cleaning weekly and checking for nicks or scratches, will prevent common issues like skipped stitches and thread breakage.
Threading Basics Explained
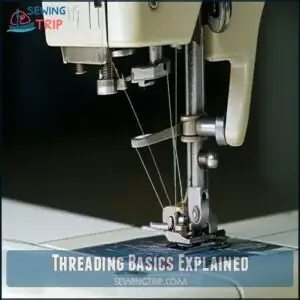
You’ll need to raise the presser foot and turn the handwheel counterclockwise before guiding your thread through the machine’s path.
The thread guide guarantees proper tension as you feed the thread from right to left through the take-up lever for smooth, perfect stitches.
Raising Presser Foot
Every successful sewing project begins with raising the presser foot correctly.
Lift the foot using the presser foot lever located at the back of your machine to create the necessary space for threading.
- Foot Lever Types vary by machine model, but typically push backward or upward
- Fabric Thickness Impact lessens when foot is fully raised
- Tension Release occurs automatically when foot is up
- Needle Protection improves when threading with raised foot
Turning Handwheel Counterclockwise
Before threading your machine, turn the handwheel counterclockwise to raise the needle to its highest position. This vital step guarantees proper thread alignment when you begin threading.
Don’t rush this step—proper needle positioning prevents threading frustrations.
| Handwheel Action | Purpose | Safety Tip |
|---|---|---|
| Full rotation | Raises needle completely | Power off first |
| Half rotation | Partial needle lift | Watch finger placement |
| Quick turn | Emergency positioning | Avoid forcing |
| Slow, steady turn | Precise control | Always go counterclockwise |
Regular maintenance can prevent common handwheel issues, such as those discussed at common handwheel issues, and following the slow, steady turn method can help achieve precise control.
Passing Thread Through Guides
Most sewing machines have multiple thread guides that create the proper thread path. You’ll need to pass your thread through each guide in sequence.
Start at the spool pin and follow the numbered markers on your machine. Proper guide usage guarantees tension balance and prevents tangling.
Different guide materials work with specific thread compatibility, so check your manual for ideal placement during your threading tutorial to ensure tension balance.
Feeding Thread Into Take-Up Lever
Now that your thread is through the guides, locate the thread take-up lever.
This moving part must be fully raised before threading.
Insert your thread from right to left through the lever’s hole. Many beginners miss this step, causing tension problems later.
The take-up lever controls thread timing and tension as you sew, making correct placement essential for smooth stitching.
Follow your machine’s threading diagram for exact path guidance.
Using Thread Guide Effectively
The proper thread guide usage makes all the difference between perfect stitches and frustrating tangles.
When positioning your thread guide, align it with your machine’s threading path – incorrect guide placement causes tension problems and skipped stitches.
Different thread materials interact uniquely with guides.
Silky threads need gentler tension than cotton, so adjust accordingly.
Your thread should glide smoothly through each guide without resistance or sagging.
Check your machine compatibility before adjusting guides.
Some models have fixed guides while others are adjustable.
The manual for your sewing machine threading process shows correct positions for your specific model.
Maintain tension balance by ensuring thread follows the exact path indicated by arrows on your machine.
Watch how the thread flows – it shouldn’t be too tight or too loose.
Good stitch quality comes from proper thread guide positioning.
If your stitches look uneven, first check if your thread is correctly seated in all guides.
Needle Threader Techniques
You’ll save your eyesight and frustration by mastering these simple needle threader techniques.
Master needle threader techniques to save time, reduce frustration, and achieve flawless threading with ease and precision every time.
Hold the wire loop against the needle eye and pull your thread through in one smooth motion to thread your needle in seconds.
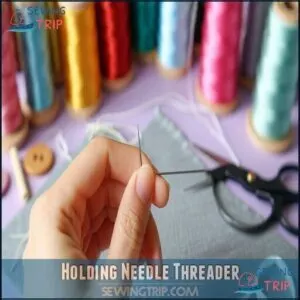
Holding Needle Threader
Now that you’ve mastered the thread guide, let’s tackle the needle threader. First, establish proper grip by holding the needle threader between your thumb and index finger.
Your hand stability matters – keep your wrist relaxed but firm. Try different ergonomic holds until you find what works for you.
The threader angle should be straight, not tilted. Improving dexterity training through regular practice makes needle threading easier over time.
Many sewers also find that enhancing needle visibility is essential for success.
Inserting Wire Loop
Once you’ve positioned your needle threader correctly, it’s time to insert the wire loop through the needle eye.
Hold steady and push the diamond-shaped wire loop completely through. A wire loop threader can greatly simplify this.
- Align the needle at a 90-degree angle for easiest insertion
- Choose a needle threader with durable loop material for longevity
- Match loop size to your needle eye for perfect threading
- Adjust your insertion angle if resistance occurs
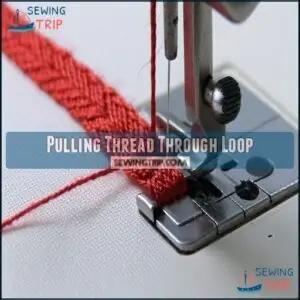
Pulling Thread Through Loop
Now that you have the wire loop in position, insert your thread through it. The Loop Size should be wide enough for easy threading.
Hold the thread firmly to prevent Slipping Prevention issues. Pull about 8 inches of thread through, especially if using slippery Thread Material.
A helpful tool is the needle threader tool for this step. Maintain gentle Tension Control as you work.
This critical threading step guarantees proper thread guide alignment in your sewing machine threading guide.
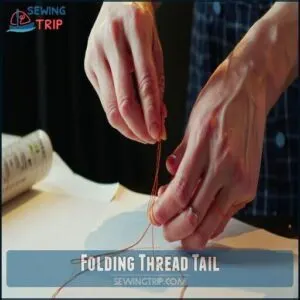
Folding Thread Tail
After placing thread through the wire loop, the thread tail folding process begins.
Your thread guide coordination will improve with this step:
- Hold both the needle threader and needle firmly in your non-dominant hand
- Grasp the thread tail with your dominant hand
- Fold the thread back on itself, creating a doubled threading effect
- Maintain even tension on both sides
- Align the thread tail perfectly before proceeding
Achieving ideal results often involves specialized folding tools.
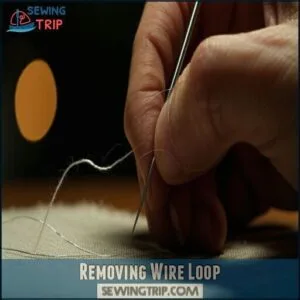
Removing Wire Loop
Careful hands make the difference when removing the wire loop.
Pull the needle threader’s wire loop straight out of the needle eye while keeping the thread in place. The thread should remain securely through the needle eye during this process.
Once removed, release the thread tail and gently pull the needle threader away. Thread guide position guarantees thread security after completing this step, ensuring the needle eye remains secure.
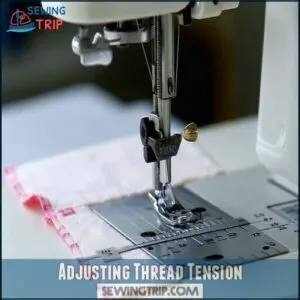
Adjusting Thread Tension
You’ll need to adjust your thread tension correctly to avoid frustrating stitching problems like puckering or loose threads.
A properly balanced tension creates smooth, even stitches on both sides of your fabric and prevents thread breakage during sewing, which is crucial for achieving professional-looking results with minimal thread issues.
Regulating Around-The-Hook Tension
Have you noticed your stitches looking uneven? Proper around-the-hook tension is essential for perfect stitching consistency.
Your thread guide functions as a tension regulator, working with the take-up lever to maintain ideal thread control. When adjusting, observe how the thread wraps around the hook—it should move smoothly without snapping (too tight) or sagging (too loose).
Modern machines feature independent tension regulators that eliminate timing discrepancies for improved sewing performance. Achieving the correct crochet project tension is essential for following patterns accurately, and it requires careful attention to thread control.
Avoiding Excessive Tension
Now that you understand how your around-the-hook tension regulator works, let’s prevent thread snapping issues.
When thread tension is too tight, your thread can break as it wraps around the hook, forcing your machine to pull extra thread from the spool.
You’ll notice jerky movement and uneven stitches.
Adjust your tension regulators gradually until your thread moves smoothly without resistance.
A key aspect involves understanding tension settings for various stitches.
This balance guarantees consistent sewing without thread slack problems, ensuring a smooth and even finish.
Ensuring Optimal Tension
Optimal tension is the sweet spot where your thread flows smoothly without breaking or looping.
To achieve balanced stitches that enhance stitch quality:
- Look for identical patterns on both sides of your fabric
- Test tension on scrap fabric matching your project’s material
- Adjust gradually, testing after each change
Thread type and fabric impact your tension settings substantially, making tension optimization essential for professional results.
Adjusting Thread Guides
Why do thread guides need adjustment? When your thread guide isn’t properly positioned, it affects your entire sewing project.
To adjust it, insert a marked thread through your machine, sew a sample, then mark the thread again. Compare the marked lengths to see the guide’s impact on tension balance.
Moving guides up, down, or even mounting them upside down optimizes your thread path for consistent stitching, which ultimately leads to a better sewing experience with proper positioning.
Mastering Thread Management
You’ll prevent frustrating tangles and achieve perfect stitches when you properly adjust your thread guides and maintain consistent tension.
Thread management is the key to smooth sewing operations, allowing you to complete projects faster with professional-looking results.
Preventing Thread Tangling
Now that you’ve adjusted your thread tension properly, keeping your thread from tangling is your next challenge.
Poor thread quality often causes knots and snags. Always use fresh, quality thread and match your needle size to your fabric.
Keep your machine clean, as lint buildup affects thread movement. Proper threading through all guides prevents loops and tangles.
Regular machine maintenance guarantees smooth thread management and reduces sewing machine troubleshooting needs. You can also use thread rack organizers to prevent tangles, ensuring proper threading and reducing troubleshooting.
Maintaining Smooth Sewing Operation
Now that you’ve prevented tangling, let’s keep your sewing machine running smoothly. Your thread guide plays a key role in maintaining consistent operation when properly used.
- Clean lint from thread guides weekly
- Check guides for nicks or scratches
- Align thread path correctly to prevent skipped stitches
- Apply one drop of oil to moving parts monthly
- Monitor thread tension during fabric feed changes
Regular cleaning, proper lubrication, and correct thread path alignment guarantee your machine operates flawlessly for years to come.
Troubleshooting Common Issues
Now that your machine is running smoothly, let’s tackle those pesky problems that pop up when you least expect them.
| Issue | Quick Fix |
|---|---|
| Skipped Stitches | Replace needle and rethread |
| Thread Breaks | Check thread path and guides |
| Tension Problems | Inspect bobbin case condition |
| Fabric Puckering | Adjust upper thread tension |
When your sewing machine thread tension seems off, first check if your thread is properly seated in all thread guides.
Bent thread guides can catch thread, causing unexpected breaks.
Regular maintenance can prevent mechanical malfunctions mechanical malfunctions.
For persistent issues, try replacing plastic bobbins with metal ones.
Enhancing Stitching Precision
Three key factors enhance your stitching precision: properly aligned thread guides, consistent tension, and compatible thread-needle pairings.
Check your sewing machine thread guide positions regularly.
Adjust thread tension control slightly when switching fabrics.
Your seam appearance improves when the fabric feeds evenly.
Fine-tune thread tension adjustment techniques by testing on scrap fabric first.
Master these elements, and you’ll achieve perfect stitch quality every time, with evenly fed fabric being crucial.
Frequently Asked Questions (FAQs)
How to use thread guide on sewing machine?
Just like following Ariadne’s thread, you’ll need to place your thread spool on the pin.
Loop it counterclockwise through the metal guide hooks, pull it through tension discs.
And continue following your machine’s numbered path.
What does a thread guide help to do?
A thread guide helps direct your thread along the correct path through your sewing machine.
It controls tension, prevents tangling, and guarantees smooth feeding from the spool to the needle during sewing.
How to use a sewing machine guide?
Like guiding stars on a quiet night, sewing machine guides direct your fabric.
Raise the presser foot, align your fabric with the guide markings, and use them as reference points while sewing for straight, even stitches.
Why are thread guides important?
Thread guides guarantee your thread flows smoothly through your machine, preventing tangles and breaks.
They maintain proper tension and alignment, helping you create even stitches and avoid frustrating sewing problems.
You’ll notice the difference immediately.
Can thread guides be replaced or repaired?
Yes, you can replace or repair damaged thread guides. Most guides can be unscrewed or snapped off, then replaced with compatible parts from sewing supply stores or manufacturer websites.
How often should thread guides be cleaned?
Just like a car needs regular oil changes, your thread guides should be cleaned every 8-10 hours of sewing.
You’ll want to wipe them with a lint-free cloth and check for thread debris weekly.
Which thread materials work best with guides?
Smooth, high-quality cotton and polyester threads work best with guides.
You’ll find silk and nylon also perform well when properly tensioned.
Avoid fuzzy or novelty threads as they can catch in the mechanisms.
Do computerized machines need different threading?
Computerized machines generally follow similar threading principles but may include automatic needle threaders or electronic guides. Your machine’s display will walk you through the process with specific on-screen instructions.
Can thread guides cause fabric puckering?
Thread guides that aren’t properly adjusted can definitely cause fabric puckering.
You’ll need to check that your guides are clean, positioned correctly, and allowing thread to flow evenly without creating inconsistent tension while sewing, to ensure that the issue is resolved by adjusting the thread guides.
Conclusion
Mastering how to use thread guide properly transforms your sewing experience from frustrating to flawless.
You’ll save time, prevent thread breakage, and achieve those professional-looking stitches you’ve always wanted.
Remember, every machine’s threading path matters – follow it faithfully.
With practice, you’ll develop muscle memory that makes threading second nature.
Your dedication to proper technique now will reward you with countless hours of smooth, enjoyable sewing later.
Happy stitching!

