This site is supported by our readers. We may earn a commission, at no cost to you, if you purchase through links.
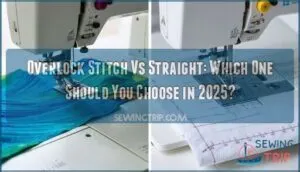
A straight stitch is your go-to for clean, simple seams or topstitching—it’s like the bread and butter of sewing.
Meanwhile, an overlock stitch excels at finishing raw edges, preventing fraying, and creating stretchy seams, making it perfect for knits or high-stress areas.
Think of the straight stitch as the sturdy foundation and the overlock stitch as the polished finish.
Both have their strengths, but combining them often gives the best results.
Want professional-looking seams? Master both, and you’ll sew like a pro in no time!
Table Of Contents
Key Takeaways
- You’ll use an overlock stitch to finish raw edges, prevent fraying, and handle stretchy fabrics, while a straight stitch is best for strong, clean seams.
- Overlock stitches combine cutting, sewing, and edge finishing in one step, making them ideal for professional-looking garments.
- Straight stitches are versatile for topstitching, hemming, and basic construction but need extra steps for edge finishing.
- Pairing overlock and straight stitches ensures durability, flexibility, and polished seams for any project.
Overlock Stitch Basics
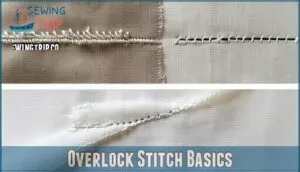
You’ll recognize overlock stitches from the professional-looking seams in store-bought clothing, where they combine cutting, sewing, and edge finishing in one smooth operation.
Overlock stitches deliver seamless perfection, combining cutting, sewing, and edge finishing for that polished, store-bought garment look.
This versatile technique prevents fraying while maintaining fabric stretch, making it essential for both knit and woven materials in garment construction, which is a key aspect of using overlock stitches.
Definition and Purpose
Understanding the fundamentals of overlock stitch transforms your approach to fabric finishing and seam construction.
This specialized technique creates professional-grade results by combining multiple functions in one pass, making it essential for serious sewers.
Here’s what overlock stitch accomplishes:
- Edge trimming – Cuts excess fabric while stitching
- Seam finishing – Prevents fraying and unraveling
- Stretch accommodation – Maintains fabric elasticity
- Professional appearance – Mimics store-bought garment quality
Types of Overlock Stitches
You’ll encounter several overlock types when choosing the right stitch for your project.
The 3-thread overlock creates secure seams while finishing edges, perfect for knits and woven fabrics.
A 2-thread overlock offers lightweight edge finishing for delicate materials like silk.
Four-thread versions add extra strength with backup stitching, while five-thread combinations provide industrial-grade durability for demanding applications.
Benefits of Overlock Stitch
Why choose overlock over straight stitch? The overlock advantages are clear: superior stitch security prevents seams from unraveling, while fabric durability increases dramatically.
You’ll achieve professional finish quality that rivals store-bought garments. Seam strength surpasses basic straight stitching, and edge finishing happens simultaneously.
Your serger creates that coveted commercial look that screams "I know what I’m doing.
Straight Stitch Overview
The straight stitch serves as the backbone of most sewing projects, creating a simple line of thread that joins fabric pieces together with reliable strength.
You’ll find this fundamental stitch works best on light to medium-weight fabrics, though it lacks the edge-finishing power that makes overlock stitches shine in professional garment construction.
Definition and Use
The straight stitch forms the backbone of most sewing projects, creating a simple line of thread that connects fabric pieces.
You’ll find this fundamental technique on nearly every sewing machine, making it your go-to choice for basic construction and repairs.
- Seam construction – Joins fabric pieces together with a clean, straight line
- Topstitching – Adds decorative detail while reinforcing seams and edges
- Quilting – Creates precise lines for patchwork and quilted designs
- Hemming – Secures fabric edges with a professional, invisible finish
- Reinforcement – Strengthens stress points like pocket corners and buttonholes
Understanding the straight stitch basics is essential for mastering various sewing techniques.
Comparison to Overlock Stitch
When comparing straight stitch to overlock stitch, you’ll notice distinct differences that affect your sewing projects.
Straight stitch creates clean, invisible seams but requires separate edge finishing, while overlock stitch handles both seaming and finishing simultaneously.
This comparison helps you understand which stitch types work best for different scenarios.
| Feature | Straight Stitch | Overlock Stitch |
|---|---|---|
| Stitch Speed | Moderate pace | High-speed operation |
| Seam Strength | Strong construction | Robust, flexible hold |
| Thread Usage | Single thread line | Multiple thread system |
| Edge Finishing | Requires separate step | Built-in edge sealing |
| Fabric Choice | Light-medium weights | Handles demanding materials |
Suitable Fabrics for Straight Stitch
Cotton fabrics and woven materials work like a dream with straight stitch, giving you clean, precise seams every time.
You’ll find silk blends and lightweight knits respond beautifully too, though delicate textiles need gentler handling.
While stretch materials can work, they’re trickier since straight stitch lacks the flexibility that knit fabrics often need for comfortable wear.
Overlock Vs Straight Stitch
When you’re staring at your sewing machine wondering which stitch will save your seams from looking like a toddler’s craft project, understanding the core differences between overlock and straight stitches becomes your secret weapon.
You’ll discover that each stitch serves distinct purposes, with overlock excelling at finishing edges and preventing fraying while straight stitches provide the backbone strength for most seam construction.
Key Differences
When deciding between these two fundamental stitches, you’ll notice distinct differences that affect your project’s outcome.
The overlock stitch creates a finished edge while sewing, whereas straight stitch requires separate edge finishing steps.
| Feature | Overlock Stitch | Straight Stitch |
|---|---|---|
| Stitch Speed | Fast, continuous operation | Moderate, precise control |
| Fabric Handling | Trims while stitching | Requires pre-trimming |
| Seam Strength | Flexible, stretch-friendly | Strong, stable construction |
| Thread Usage | Multiple threads (2-5) | Single thread line |
| Edge Finishing | Built-in edge sealing | Needs additional finishing |
Understanding these overlock vs straight differences helps with proper stitch selection for your specific fabric and project needs.
Choosing The Right Stitch
Finding the perfect stitch depends on your project’s needs and fabric type.
Your stitch selection should match the garment’s purpose and stress points. Consider seam strength requirements, thread types available, and your machine’s tension control capabilities when choosing between overlock and straight stitches.
| Project Type | Recommended Stitch |
|---|---|
| Knit garments | Overlock stitch |
| Woven seams | Straight stitch |
| Edge finishing | Overlock stitch |
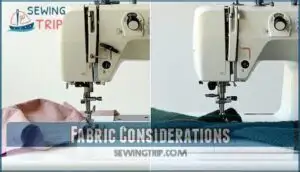
Fabric Considerations
Your fabric choice drives your stitch selection like a compass guides navigation.
The right fabric steers your stitch choice, ensuring every seam aligns perfectly with your project’s purpose and durability needs.
Lightweight materials sing with overlock’s gentle embrace, while heavy fabrics demand straight stitch strength.
Consider how stretchy fabrics need room to breathe—overlock accommodates movement beautifully.
| Fabric Types | Best Stitch Choice |
|---|---|
| Knits & Stretchy Fabrics | Overlock stitch |
| Woven & Heavy Materials | Straight stitch |
| Delicate Fabric Edges | Overlock for finishing |
Overlock Stitch Techniques
You’ll master overlock stitching faster when you understand the proper machine setup, thread tensions, and fabric handling techniques that prevent common mistakes like puckering and tunneling.
These fundamental skills, combined with steady pacing and strategic seam preparation, transform your overlocking from frustrating guesswork into confident, professional-quality results, yielding professional-quality outcomes through practice.
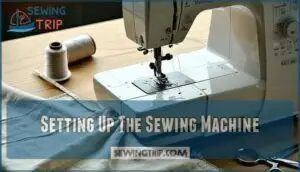
Setting Up The Sewing Machine
Setting up your sewing machine for overlock stitch requires precision and attention to detail.
First, trim seam allowances to 1/4 inch before beginning. Adjust your thread tension settings carefully, as improper calibration can cause loops underneath the fabric.
Select the appropriate needle for your fabric weight, then set your stitch length between 2-3mm for ideal results.
To achieve professional finishes, understanding overlock stitch basics is essential for garment construction.
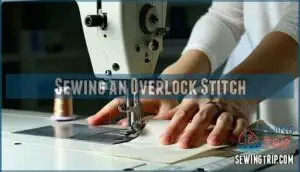
Sewing an Overlock Stitch
Once your sewing machine is properly threaded and configured, you’re ready to create professional overlock stitches. Position your fabric under the overlock presser foot, aligning the raw edge with your serger’s cutting blade. This edge finishing technique transforms amateur projects into polished garments.
To achieve superior results, understanding sewing machine mechanisms is vital for sewing machine maintenance.
- Start sewing slowly to maintain control over fabric feeding
- Keep fabric edges aligned with the serger’s blade guide markings
- Maintain consistent stitch length by feeding fabric at steady pace
- Choose appropriate thread choices that match your fabric weight
- Complete fabric prep by trimming excess seam allowances beforehand to ensure a smooth sewing process and achieve the desired overlock stitches with ease.
Tips for Smooth Stitching
Master your overlock stitch with these proven techniques. Tension Control starts everything – adjust upper and lower loopers until stitches lay flat without puckering. Thread Selection matters more than you’d think; matching thread weight to fabric prevents skipped stitches.
Fabric Preparation with proper pressing eliminates wrinkles that cause uneven Sewing Speed. Edge finishing becomes second nature when you prep fabric properly and control your machine’s rhythm.
Your sewing machine stitches improve dramatically with consistent sewing guide placement. The key to achieving professional results lies in understanding the relationship between fabric preparation, thread selection, and machine control.
| Problem | Cause | Solution |
|---|---|---|
| Puckered seams | Incorrect tension settings | Test on scraps, adjust loopers gradually |
| Skipped stitches | Wrong needle or thread weight | Match needle size to fabric thickness |
| Uneven edges | Inconsistent sewing speed | Maintain steady, moderate pace throughout |
| Frayed cuts | Dull blade on serger | Replace cutting blade, check alignment |
| Loose loops | Poor Stitch Length setting | Shorten stitch length for better coverage |
By mastering these techniques and troubleshooting common issues, you can significantly improve the quality of your sewing projects. Remember, attention to detail and proper machine setup are crucial for achieving professional-looking results.
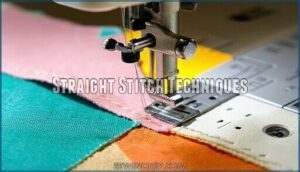
Straight Stitch Techniques
You’ll find that mastering straight stitch techniques gives you the foundation for most sewing projects, from simple hems to complex garment construction.
These versatile methods work across different fabric weights and types, making them essential skills whether you’re hemming jeans or crafting delicate silk blouses.
Basic Straight Stitch
Once you’ve mastered overlock techniques, straight stitches become your bread and butter for precise construction.
You’ll set your sewing machine to the basic straight stitch setting, adjusting stitch length between 2.0-2.5mm for most fabrics.
Control fabric tension by guiding material smoothly through the feed dogs, maintaining consistent sewing speed.
Unlike overlock stitch, straight stitches don’t provide edge finishing but create strong, clean seams.
Variations of Straight Stitch
Straight stitch isn’t just one trick – it’s got plenty of variations up its sleeve.
You can adjust stitch length for different effects, use stretch stitches for knits, or try zigzag variations for decorative edges.
Your sewing machine offers blind hems and reinforcement options that regular overlock stitch can’t match, giving you versatile sewing techniques for any project.
Mastering sewing basic straight stitches is essential to achieving professional-looking results in various sewing applications.
Common Uses of Straight Stitch
Ever wonder why the straight stitch is a sewing staple? It’s all about versatility and precision.
Common uses include:
- Garment construction: Perfect for strong seams and neat hems.
- Fabric repairs: Ideal for patching tears or reinforcing weak spots.
- Topstitching: Adds decorative flair while boosting seam strength.
Adjust your sewing machine settings, like stitch length and tension control, for flawless results.
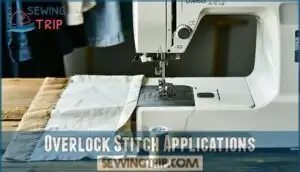
Overlock Stitch Applications
You’ll find overlock stitches invaluable for projects that demand clean, durable edges or stretchy seams.
From crafting garments to tackling home decor, this versatile stitch guarantees your work looks polished and lasts longer, making it a crucial element for achieving durable results.
Garment Construction
In garment construction, an overlock stitch is your go-to for Seam Finishing and durability.
Whether you’re using a serger or a sewing machine with an overlock foot, it handles raw edges beautifully.
Pairing the right Stitch Length with proper Thread Choice guarantees strong seams and a polished look, especially for stretchy fabrics.
It’s a game-changer for perfect Garment Fitting.
For professional results, understanding the sewing machine components is essential to achieve high-quality finishes.
Home Decor and Crafts
For home decor and crafts, the overlock stitch is a game-changer.
Whether you’re sewing DIY decor like wall hangings or crafting textile art, it keeps fabric edges clean and fray-free.
Use a serger or a sewing machine with an overlock foot for precision.
From fabric painting projects to craft storage solutions, this stitch guarantees durability and a polished, professional look.
Industrial Uses of Overlock Stitch
In industrial sewing, the overlock stitch is a powerhouse for mass production and high-volume stitching.
Factories rely on sergers to trim, sew, and finish edges in one go, ensuring seam strength and professional finishes.
Whether it’s textile manufacturing or factory sewing, this stitch speeds up production while preventing fraying, making it essential for durable garments and efficient assembly lines.
Considerations for Fabric Type
When choosing between overlock stitch and straight stitch, fabric type matters. Overlock stitch excels with stretchy fabrics or medium-heavyweight materials, ensuring seam strength and preventing fabric puckering.
For the best results:
- Match thread selection to fabric weight.
- Adjust sewing speed for control.
- Use overlock for edge finishing on fray-prone materials.
- Test stitches on scraps to avoid surprises.
Understanding the proper use of an overlock sewing machine is essential for achieving professional results.
Considering The Project’s Purpose
Your project goals dictate whether an overlock stitch or straight stitch fits best.
For quick seam strength and clean edge finishing, an overlock stitch on a serger or sewing machine shines.
If precision matters, like tailoring seam allowances or delicate fabric edges, straight stitches deliver.
Match stitch speed and fabric choice to the task, ensuring professional results.
Combining Overlock and Straight Stitches
Pairing an overlock stitch with a straight stitch is like combining strength and finesse.
Use the overlock stitch for edge finishing and the straight stitch for seam reinforcement.
This blend guarantees durability and a polished look.
With proper thread management, tension control, and the right overlock foot attachment, your sewing machine or serger can handle diverse fabric selections effortlessly.
Mastering overlock stitch techniques is essential for achieving professional-looking seams and preventing fraying.
Frequently Asked Questions (FAQs)
Can you do an overlock stitch on a regular sewing machine?
About 80% of store-bought clothes use overlock stitches, and yes, you can mimic this on a regular sewing machine.
Just use an overlock foot attachment and the right stitch settings for clean, fray-free edges.
When to use overlock stitch?
Use an overlock stitch when you want clean, professional edges that won’t fray, especially on stretchy or delicate fabrics.
It’s perfect for durable seams, finishing raw edges, or adding a polished touch to handmade garments.
What is the benefit of overlock stitch?
An overlock stitch strengthens seams, prevents fraying, and gives your fabric edges a clean, professional finish.
It’s perfect for stretchy materials, durable garments, and projects needing a polished look, combining function and style in one step.
What if my sewing machine doesn’t have an overlock stitch?
If your machine lacks an overlock stitch, try using a zigzag stitch or a mock overlock technique.
Attach a specialized presser foot if available, and trim edges neatly for a clean, professional finish.
How does overlock stitch handle heavy fabrics?
Heavy fabrics can feel like wrestling a bear, but an overlock stitch handles them like a pro.
Its multiple threads and trimming action create strong, clean seams, preventing fraying while maintaining durability and a polished finish.
Can straight stitches be decorative like overlock?
Straight stitches can absolutely be decorative!
With creative thread choices, stitch lengths, or patterns like topstitching or quilting, you can add flair to your projects.
Think clean lines, bold contrasts, or subtle accents—endless possibilities!
What tools enhance overlock stitch efficiency?
A specialty overlock foot, sharp fabric scissors, and high-quality thread can boost your efficiency.
Pair these with a serger for faster, professional results, or use a standard machine’s overlock settings for versatile finishes, which can lead to professional outcomes.
Are overlock stitches suitable for leather sewing?
Overlock stitches can work on leather, but they’re tricky.
Use a heavy-duty machine, leather needles, and strong thread.
Test on scraps first, as leather’s thickness and stiffness may require tension adjustments for clean, durable seams.
How to troubleshoot skipped overlock stitches?
Skipped overlock stitches? Check your needle—it might be dull or bent.
Use the right type for your fabric.
Adjust thread tension, clean lint buildup, and slow down your sewing speed for smoother results.
Conclusion
Did you know over 60% of sewing projects benefit from combining stitches?
When deciding between an overlock stitch vs straight, think about your fabric and project needs.
Use a straight stitch for structure and precision, while an overlock stitch handles stretch and prevents fraying.
Together, they create durable, professional seams.
Whether you’re sewing knits, home decor, or garments, mastering both stitches guarantees versatility.
So, pair them wisely, and your projects will look polished every time!
- https://threadsmonthly.ck.page/
- https://www.craftsy.com/post/types-of-serger-stitches/
- https://threadsmonthly.com/serger-stitch-types/
- https://www.mygoldenthimble.com/serger-stitches/
- https://madamsew.com/blogs/sewing-blog/finishing-your-edges?srsltid=AfmBOooRKuGF6OusflJJpsegRL9qmiaWBJeHYYTViiQXcnDsZi-xjC5h

