This site is supported by our readers. We may earn a commission, at no cost to you, if you purchase through links.

You’ll want to choose based on your fabric type and sewing skills. For beginners, zigzag stitching works like a charm on most materials.
If you’re working with delicate fabrics, French seams create that couture-level finish that’ll make you feel like a pro.
Pinking shears offer a quick fix for non-raveling fabrics, while serged edges handle heavy-duty projects beautifully.
The key is matching your finish to your fabric’s personality—some materials are drama queens that need extra attention, while others play nice with simple treatments. Each method has its sweet spot.
Table Of Contents
Key Takeaways
- Match your seam finish to your fabric type – You’ll get the best results when you choose zigzag stitches for cotton, French seams for delicate silks, and overlock finishes for stretchy knits, rather than using a one-size-fits-all approach.
- Start with beginner-friendly techniques – You can master pinking shears and zigzag stitching first, since they don’t require special equipment, then progress to more advanced methods, like French seams and flat-felled seams, as your skills develop.
- Consider your garment’s purpose and durability needs – You’ll want flat-felled seams for heavy-duty items, like jeans and work shirts, while delicate garments benefit from enclosed finishes that create a professional, couture-level appearance.
- Test your settings before committing – You should always check thread tension and stitch width on fabric scraps first, as this prevents frustration and ensures your seam finish will look polished and prevent fraying effectively.
Seam Finishing Basics
You’ll need to understand the fundamental methods for finishing seam edges before you can choose the right technique for your project.
These basic approaches include overlocking with a serger or overlock foot, creating zigzag stitches along raw edges, and using pinking shears to cut decorative edges that resist fraying, which involves using pinking shears.
Overlocking Techniques
Overlocking transforms fabric edges from fraying disasters into professional masterpieces.
Your serger trims and stitches simultaneously, creating durable serged seams that won’t unravel.
Master serger threading and differential feed settings for different fabrics.
Whether you’re creating rolled hemming or flatlock stitch finishes, proper overlock maintenance guarantees consistent results.
An overlock sewing machine can help with this.
This overlocking technique delivers bulletproof seam finishes every time.
Zigzag Stitch Method
The zigzag stitch method transforms your regular sewing machine into a seam-finishing powerhouse.
This versatile technique prevents fraying by creating a protective barrier along raw edges, making it perfect for various fabric types.
Here’s what makes this seam finishing technique so effective:
- Stitch width adjustability lets you customize coverage for different materials
- Tension settings guarantee smooth, even stitches without puckering
- Seam securing through backstitching creates lasting durability
- Polished finish rivals professional serger results at home
For those interested, you can find a zigzag sewing machine online.
Zig Zag Edge Seam Finish
Most sewers reach for this reliable seam finish when they need quick results without special equipment. You’ll find the zigzag seam finish works across various fabric types, from cotton to jersey knits.
Simply adjust your stitch settings based on fabric weight—wider zigzag stitch for heavier materials, narrower for delicates.
| Fabric Type | Stitch Width | Stitch Length | Tension Adjustment | Seam Appearance |
|---|---|---|---|---|
| Lightweight Cotton | 2-3mm | 2-2.5mm | Standard | Clean, flat edge |
| Medium Weight Denim | 4-5mm | 3mm | Slightly loose | Secure, visible finish |
| Jersey Knits | 3-4mm | 2.5mm | Loose | Flexible, stretchy |
| Silk/Chiffon | 1-2mm | 1.5mm | Tight | Delicate, minimal bulk |
| Heavy Canvas | 5-6mm | 3.5mm | Standard-tight | Robust, durable edge |
This zigzag seam finishing technique prevents fabric fraying effectively while maintaining seam flexibility. This is one of the easy seam finishes that beginners can quickly master. The durability assessment shows excellent results for garments receiving regular wear and washing.
Pinking Shears Usage
Pinking shears offer a quick seam finish solution when you’re short on time.
These specialized scissors create zigzag edges that naturally resist fabric fraying through their unique cutting technique.
For best results, keep your shears sharp and choose stable fabrics like cotton or linen.
These tools are available at various online retailers.
While not suitable for delicate materials, pinking shears provide excellent fray prevention for everyday sewing projects with minimal effort required, making them a great option for projects that require a quick seam finish and minimal effort.
Good Seam Finish Options
Now that you’ve explored the basics, let’s look at seam finishing techniques that balance Fabric Compatibility, Durability Needs, and Aesthetic Preferences.
A clean finish seam doesn’t have to be complicated. Pinking shears, for instance, are a budget-friendly way to reduce fraying on stable fabrics—perfect for quick projects.
Zigzag stitches offer flexibility, adjusting to various seam allowances and fabric types, while providing a polished edge. For more durability, try a double-stitched seam; it’s great for knits and adds strength without extra tools.
And if you’re aiming for simplicity, a turned-and-stitched seam keeps things neat and tidy. Each method fits different Cost Considerations and Project Complexity, so pick what aligns with your needs and keeps your seams looking sharp!
Enclosed Seam Finishes
When you want your seams to look professional from both sides of your garment, enclosed seam finishes completely wrap and hide those pesky raw edges that love to fray.
These techniques, like French seams and bias-bound finishes, take a bit more time than basic methods, but they’ll give your handmade clothes that expensive, store-bought appearance that makes people ask where you shopped.
French Seams
French seams deliver the ultimate professional look by completely encasing raw edges within the seam itself.
This seam finishing technique works best with lightweight, sheer fabrics like chiffon and silk, though it’s not suitable for curved seams due to bulk reduction challenges.
Here’s why french seams shine:
- Creates a couture-level finish that screams quality
- Perfect fabric suitability for delicate materials
- Zero fraying worries forever
- Makes your garments look expensive
French Seam Finish
When working with delicate materials, you’ll find this seam finish shines brightest on lightweight fabrics like silk and chiffon.
The French seam technique completely encases raw edges, creating a professional look that’s perfect for sheer garments.
However, fabric suitability matters—avoid using it on curved seams since you can’t clip curves, and it adds bulk reduction challenges.
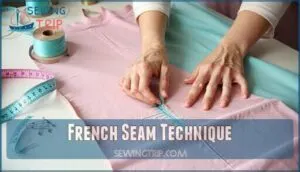
French Seam Technique
Creating a proper French seam requires careful attention to seam allowance and fabric choice.
Start by sewing wrong sides together with a ¼-inch seam allowance, then trim to ⅛-inch. Flip the fabric so right sides face together, press flat, and sew again with a ⅜-inch seam allowance.
This seam finish works best with lightweight fabrics for maximum bulk reduction. For a quicker alternative, consider the mock french seam.
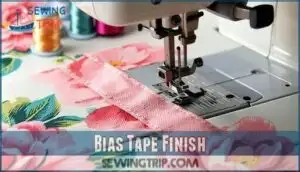
Bias Tape Finish
When you need a bias tape seam finish that’s both functional and beautiful, this edge finishing technique transforms raw edges into polished perfection.
This binding seam method works especially well for curved edges and decorative binding projects.
Here’s your tape application process:
- Choose fabric matching bias tape or contrasting colors for visual interest
- Pin bias tape along raw edges, overlapping starting points
- Stitch consistently using straight seams and even seam allowances
- Create mitered corners by folding tape at 45-degree angles
- Press finished edges for crisp, professional sewing techniques results
Bias Bound Seams
Bias bound seams wrap your fabric edges in bias tape like a protective hug.
This binding seam method works well for straight seams but struggles with curved seams.
Choose your bias width carefully—too wide adds bulk, too narrow won’t cover properly.
Color contrast creates visual interest while matching tape keeps things subtle.
It’s perfect edge finishing for lightweight fabrics needing extra protection, and using bias tape can make a significant difference in the overall appearance.
Durable Seam Finishes
When you’re making garments that need to withstand heavy use and frequent washing, you’ll want seam finishes that can handle the stress without falling apart.
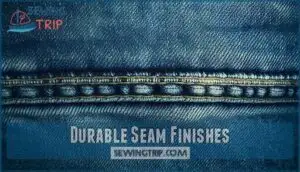
Durable seam finishes like flat felled seams create strong, long-lasting bonds that protect your fabric edges while adding structural integrity to items like jeans, work shirts, and children’s clothing, which require durable seam finishes.
Flat Felled Seam Finish
This flat felled seam finish stands as the heavyweight champion of seam finishes, delivering unmatched durability factors through visible stitching that doubles as reinforcement techniques.
You’ll find this seam finish dominating industrial applications and denim tailoring, where strength matters most.
Flat seam construction minimizes bulk and maximizes comfort, making it ideal for activewear.
The flat felled seams completely encase your seam allowance, creating water-resistant barriers that’ll outlast ordinary finishes by years.
Flat Felled Seam Technique
Here’s the step-by-step flat felled seam technique that’ll give your garments serious staying power.
Start by sewing wrong sides together, then press seam allowances open.
Trim one side by half and fold raw edges toward the shorter side.
Fold the longer seam allowance over the shorter one, encasing everything, and then topstitch for that professional finish that screams quality craftsmanship.
Mock Flat Felled Seam Technique
When traditional flat felled seams feel too complex, you’ll love this streamlined approach.
This mock flat felled seam technique delivers similar durability with half the effort.
Simply sew your seam, serge the edges together, then press to one side and topstitch.
It’s perfect for heavy fabrics where serger alternatives and topstitch options create professional-looking, long-lasting seam finishes.
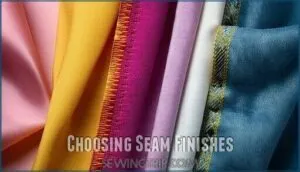
Choosing Seam Finishes
You’ll discover that selecting the right seam finish depends on your fabric type, project purpose, and washing frequency.
The best choice balances durability with appearance, ensuring your garment looks professional while preventing fraying effectively, which is a key aspect of a garment’s overall appearance.
When to Use a Serger
Your serger becomes indispensable when you’re working with knits, stretch fabrics, or projects requiring professional-grade finishes.
This powerhouse machine trims and finishes raw edges simultaneously, making it perfect for:
- Serger Fabric Types: Jerseys, fleece, and activewear that need flexible seams
- Serger Project Ideas: Swimwear, lingerie, and athletic clothing requiring durability
- High-volume sewing: When you need consistent overlocking results quickly
When to Use an Overcast Seam Finish
Choose an overcast seam finish when you’re working with knit fabrics or stretchy materials that need flexibility.
This overlocking technique works perfectly for activewear, t-shirts, and casual garments where comfort matters most.
Your serger settings should match the fabric weight, while thread choice affects stitch density.
It’s ideal for everyday sewing projects requiring durability without bulk.
How to Choose The Best Seam Finish
Your fabric type drives everything when selecting seam finishes.
Cotton handles zigzag stitches well, while delicate silks need French seams.
Consider your garment use too—workout clothes require stretchy overlock finishes, but formal wear deserves enclosed seams.
Match your skill level with time constraints. Beginners can master pinking shears quickly, while experienced sewers tackle bias-bound edges for stunning results.
Factors Affecting Seam Finish Selection
Several key factors determine your seam finish choice, and understanding them saves time and frustration.
Your fabric type drives everything—lightweight silks need different treatment than heavy denim.
Consider these essential elements:
- Fabric Type – Weight and weave structure affect which finishes work best
- Garment Use – Daily wear items need more seam durability than special occasion pieces
- Aesthetic Goals – Visible finishes should complement your design vision
- Skill Level – Complex techniques require more sewing experience
- Time Investment – Simple finishes work when you’re pressed for deadlines
Seam Finish Tips and Tricks
Master your seam finishes with these game-changing sewing tips and tricks.
Test thread tension on fabric scraps first—it’ll save you headaches later. When handling curves, clip notches before applying your chosen seam finish.
Reduce bulk by grading seam allowances differently. Press each step as you go for professional results.
Remember: fraying prevention starts with choosing the right technique for your fabric type. Beginners should consider basic seam finishes for clean, durable seams, which is a key part of achieving clean seams.
Frequently Asked Questions (FAQs)
What is a seam finish?
Ever wondered what keeps your homemade clothes from falling apart after a few washes?
A seam finish is your secret weapon—it’s the technique you’ll use to treat raw fabric edges, preventing fraying and creating professional-looking garments.
What are the best seam finishes for beginners?
You’ll want to start with pinking shears or zigzag stitches—they’re forgiving and don’t require special equipment.
Once you’re comfortable, try French seams for lightweight fabrics or serged edges for stretchy materials.
What are the different types of seam finishes?
You’ve got several seam finish options: zigzag stitching prevents fraying, French seams enclose raw edges beautifully.
French seams and bias tape add polish to the garment, creating a finished look.
Pinking shears create quick zigzag cuts, and flat felled seams offer durability for heavy-use garments.
Why should you choose the right seam finish?
Think of seam finishes as your garment’s insurance policy.
You’ll prevent fraying, extend durability, and achieve professional results.
The right finish matches your fabric type, washing frequency, and desired appearance—it’s the difference between homemade and handcrafted.
What are the best seam finishes for all garments?
French seams work best for lightweight fabrics, while zigzag stitches handle most materials effectively.
Flat felled seams suit heavy-duty garments, and overlock finishes prevent fraying on stretchy fabrics.
Choose based on your fabric weight and project needs.
How do I choose a seam finish?
Carefully consider your fabric’s weight, fray tendency, and garment purpose.
Choose overlocking for stretchy materials, French seams for delicates, flat-felled for durability, or simple zigzag for everyday projects.
Match the finish to your fabric’s needs.
What is the most common seam finish?
The zigzag stitch is the most common seam finish you’ll encounter.
It’s quick, works on most fabrics, and prevents fraying using any standard sewing machine—making it every sewist’s go-to choice, with the zigzag stitch being the preferred method.
What are the three types of seam finishes?
Picture raw fabric edges like frayed rope ends needing protection.
You’ll encounter three main seam finish categories: enclosed finishes that wrap edges completely, bound finishes using bias tape, and edge treatments like zigzag stitching.
What is the best stitch to finish seams?
The zigzag stitch reigns supreme for finishing seams because it’s versatile, accessible, and effective. You’ll find it prevents fraying on most fabrics while being adjustable for different weights and textures.
What is a simple seam finish?
Just when you’re wondering about basic techniques, pinked seams offer the simplest solution.
You’ll trim fabric edges with pinking shears, creating zigzag cuts that prevent fraying without any stitching required—perfect for beginners.
Conclusion
Picture your finished garment hanging proudly in your closet, seams intact and edges pristine after countless wears.
That’s the power of choosing what’s a good seam finish for your project. Whether you’re reaching for zigzag stitches on cotton or perfecting French seams on silk, the right technique transforms amateur work into professional results.
Remember, your fabric dictates the method, not the other way around. Master these seven finishes, and you’ll never worry about fraying edges again, achieving professional results.

