This site is supported by our readers. We may earn a commission, at no cost to you, if you purchase through links.
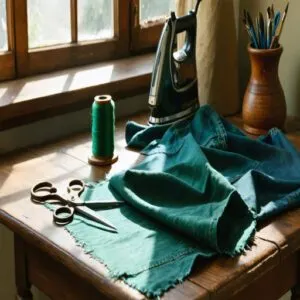 Mastering the best sewing practices starts with the right tools and techniques.
Keep your scissors sharp for crisp cuts, and use a needle suited to your fabric—ballpoints for knits, denim needles for thicker materials.
Always pre-wash fabric to avoid post-project surprises like shrinkage.
Staystitch curves for stability and press seams open for a polished, professional finish (your iron is your secret weapon!).
And don’t forget your machine—change needles often and adjust tension for smooth stitching.
Sewing’s a bit like cooking—measure twice, cut once, and never skimp on quality ingredients like good thread.
Ready to take those seams to the next level?
Table Of Contents
- Key Takeaways
- Sewing Preparation Tips
- Essential Sewing Techniques
- Fabric Handling Methods
- Sewing Machine Maintenance
- Advanced Sewing Skills
- Finishing Touches Techniques
- Sewing Tool Essentials
- Common Sewing Mistakes
- Sewing Efficiency Tips
- Mastering Sewing Fundamentals
- Frequently Asked Questions (FAQs)
- Conclusion
Key Takeaways
- Always pre-wash and press your fabric to prevent shrinkage and ensure accuracy in your projects.
- Use needles and threads matched to your fabric type for smooth stitching and professional results.
- Keep your sewing tools sharp, clean, and well-maintained, including regular needle changes and tension adjustments.
- Practice essential techniques like staystitching curves and pressing seams open for polished, durable finishes.
Sewing Preparation Tips
Start your sewing journey off right by prepping like a pro—think sharp tools, clean fabric, and the right needle for the job.
Skipping these steps might save time now, but trust me, fixing avoidable mistakes later isn’t quite as fun, and it’s crucial to have the right needle for the job to ensure a successful sewing experience.
Investing in Quality Tools
Great sewing starts with great tools.
Invest in essentials that make a difference:
- Sharp scissors—keep these fabric-only for clean cuts.
- Quality sewing needles—match them to your fabric.
- Precision cutters—perfect for straight-line accuracy.
- Reliable irons—press seams like a pro.
Proper sewing techniques improve quality, impacting the final product.
Skipping on quality? You’ll regret it when your sewing tools can’t keep up.
Pre-Washing Fabric
Before sewing, don’t skip pre-washing your fabric.
It prevents fabric shrinkage disasters, reduces color bleeding, and softens stiff materials.
Different fabric types need unique fabric care—check those labels!
It also settles thread count and weave stability for better results.
Fabric preparation is key to respecting the grainline during cutting.
Trust this step; your finished project will thank you!
Choosing Right Needle Type
For smooth stitching, mastering needle selection is essential.
Match sewing needles to fabric density, thread types, and sewing techniques.
Here’s how:
- Use ballpoint needles for knits—they glide without tearing.
- Denim needles handle thick fabrics effortlessly, thanks to extra needle sharpness.
- Lightweight fabrics need smaller needles (80/12) for delicate precision.
Proper needle material enhances thread compatibility and sewing speed!
Essential Sewing Techniques
Mastering essential sewing techniques is the key to creating durable, polished projects that stand out.
From staystitching curves to using a walking foot, these skills will save you frustration and take your sewing to the next level.
Staystitching Curves
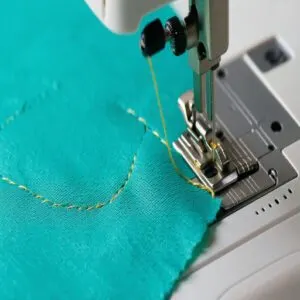
When tackling sewing curves, staystitching is your best defense against unwanted stretching.
It’s simple: sew a single line within the seam allowance before joining pieces.
This adds seam stability while keeping your garment’s shape intact.
Think of it as a safety net for fabric manipulation.
Control stitch tension, and watch your edge finishing achieve pro-level perfection in garment construction.
Backstitching Seams
If you’ve ever felt your stitches unraveling like a bad sweater, backstitching is your secret weapon.
It adds secure stitching and boosts fabric stability.
For a detailed guide, explore various backstitch techniques step by step.
Here’s how:
- Start with 2-3 reverse stitches before sewing forward.
- End the seam with the same trick.
- Use a seam guide for accuracy.
- Keep stitch length consistent for neat seam reinforcement.
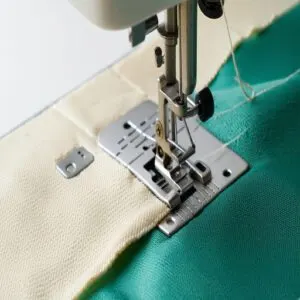
Using Walking Foot
Backstitching locks stitches, but when fabrics misbehave—think slippery silk or chunky layers—a walking foot saves the day.
This magical attachment keeps fabric feeding evenly under foot pressure, preventing annoying puckers, and enables precision sewing to happen effortlessly, with straight seams and matched patterns.
For even more helpful advice, learn about walking foot benefits.
Add this gem to your sewing tips arsenal for even stitching and smoother sewing practices on any sewing machine.
Fabric Handling Methods
Handling fabric correctly can make or break your project, so you’ll want to master a few key techniques.
From pressing seams to grading allowances, these simple habits will keep your work looking polished and professional.
Pressing Seams Open
Pressing seams open transforms your project from messy to crisp.
It flattens bulk and boosts fabric smoothing for that professional look.
Always use pressing tools like a steam iron and a pressing cloth to protect fabric.
- Gradually press, don’t iron aggressively, to avoid distorting seam allowance.
- Press as you sew for cleaner finishing.
- Grading seams reduces thickness on layered areas.
Serging Raw Edges
A serger simplifies edge finishing by trimming and stitching raw edges in one go, reducing fray risk.
Use serging techniques with a 4-thread safety stitch for durable seam reinforcement.
Prefer fabric stabilization for lightweight materials before serging.
While sewing practices boost productivity, remember they’re not exclusive—zigzag stitches or pinking shears can finish seams effectively, too.
Grading Seam Allowances
Thick seams can leave your projects looking bulky, and no one wants that.
Seam grading, or trimming each fabric layer to a different width, balances Fabric Layering for smoother edges.
This Seam Reduction trick is perfect for collars and cuffs, where bulk removal is key.
Pair it with solid sewing practices like Edge Finishing for flawless results.
Sewing Machine Maintenance
Keeping your sewing machine in top shape isn’t just about longevity—it’s also the secret to clean, hassle-free stitching.
Regularly adjusting tension, replacing needles, and using high-quality thread can save you from frustrating thread jams and uneven seams, which is the key to hassle-free stitching.
Adjusting Tension
After mastering fabric handling, you’ll want to tackle thread balance – it’s like finding the sweet spot on your favorite guitar.
When adjusting tension on your sewing machine, watch for these telltale signs:
- Loops forming underneath mean your top tension’s too loose
- Puckered fabric suggests you need to loosen up
- Thread breaking? Double-check your threading path
- Perfect stitches should look identical on both sides
Let’s fix that tension control right away.
Changing Machine Needle
Anyone who’s wrestled with skipped stitches knows the importance of needle sharpness.
Replace your machine needle every 6-8 hours of sewing machine usage to prevent fabric damage and maintain peak performance.
Watch for warning signs like popping sounds or uneven stitches – they’re telling you it’s time for sewing machine maintenance.
For a detailed guide, review these needle changing steps.
For specialized materials like leather or stretch fabrics, change needles even more frequently.
Using Good Quality Thread
When choosing sewing threads, quality isn’t something to skimp on.
High-quality thread prevents breakage and guarantees even thread tension throughout your project.
Consider the thread weight and fiber types – polyester for everyday sewing, cotton for delicate fabrics, and silk for luxury items.
For a wide selection, explore various best sewing thread options available online.
Color matching is vital too, so test your thread selection in both natural and artificial light for perfect yarn texture coordination.
Advanced Sewing Skills
You’ll transform your sewing projects from homemade to professional-looking with essential techniques like French seams, precise buttonhole marking, and clean understitching.
These advanced skills might seem tricky at first, but they’ll soon become second nature as you practice them in your daily sewing routine, mastering essential techniques.
French Seams
While traditional seam finishes can leave your edges raw, French seams elevate your garment construction with a clean, professional enclosure.
This advanced sewing technique creates a polished finish by:
- Sewing wrong sides together with a 1/4" allowance
- Trimming to 1/8" and pressing the seam flat
- Folding right sides together and stitching a 3/8" seam
For best results, practice this elegant edge finishing method on lightweight fabrics and straight seams first.
Understitching Facings
While French seams excel at hiding raw edges, understitching is your secret weapon for professional-looking necklines and facings.
You’ll want to stitch the seam allowance to the facing about 1/8 inch from the seam line, keeping everything neat and flat.
| Fabric Type | Stitch Length | Pressure Setting |
|---|---|---|
| Lightweight | 1.8-2.0 mm |
This edge control technique prevents facings from rolling outward and keeps your garment looking crisp.
Marking Buttonholes
Professional buttonhole placement starts with accurate marking – it’s the foundation of polished results.
Your sewing patterns guide the way, but precision with fabric markers can transform basic projects into designer-worthy pieces.
For flawless buttonholes, explore these sewing perfect buttonholes tips.
Each perfectly marked buttonhole brings you closer to boutique-quality garments.
- Misaligned buttonholes can turn a masterpiece into a disappointment
- Your careful marking shows in every finished detail
Consider using a buttonhole foot for consistent spacing and professional results.
Finishing Touches Techniques
You’ll master the art of professional finishing with techniques that transform homemade projects into boutique-worthy pieces.
From creating invisible hems to attaching sturdy closures, these final steps will give your handmade items that polished, store-bought look you’ve always wanted.
Blind Hem Stitch
Like a magician’s sleight of hand, the blind hem stitch creates invisible stitches that disappear into your fabric.
You’ll need at least 1.5 inches of seam allowance and nylon blind stitch thread for best results.
Perfect for straight hems on skirts and pants, this hemming technique uses your machine’s built-in settings or careful hand stitching to create professional-looking finishes that blend seamlessly into your garment.
Double Fold Hem
While the blind hem gives your work an invisible finish, the double fold hem offers a clean, durable edge perfect for everyday garments.
You’ll love how this hemming technique creates a polished look that withstands frequent washing.
- Press your hem allowance up once, then fold again to encase raw edges
- Pin folds every 2-3 inches to maintain even spacing
- Use fabric markers to mark fold lines accurately
- Steam press between pins for crisp edges
- Sew close to the inner fold using matching thread to achieve a clean finish
Note: The reorganized text now has improved readability with logically grouped concepts separated by double new lines for visual clarity.
Attaching Closures
Double fold hems may finish your edges, but closures bring everything together.
Precision matters with buttons, hooks, and snap fasteners—mark button placement carefully.
For zipper installation, a zipper foot is your best friend.
Struggling? Sewing tutorials can sharpen your sewing skills.
Explore closure types in sewing notions aisles—you’ll discover tools that make every closure perfectly functional and fabulous.
Sewing Tool Essentials
The right tools can make or break your sewing experience, turning frustration into smooth creativity.
From a trusty steam iron to a simple sewing gauge, investing in quality essentials saves time and guarantees professional results.
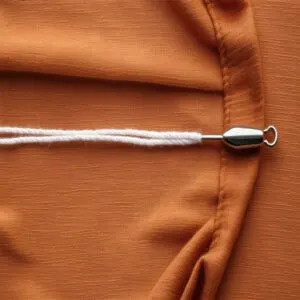
Using Bodkin
Struggling with threading elastic through narrow casings? A bodkin’s your secret weapon. It slides through effortlessly, unlike those rebellious safety pins.
You can find a variety of bodkin threading tool products online.
- Secure elastic threads easily with its gripping mechanism.
- Save time traversing curves and tight casings.
- Avoid pin mishaps since bodkins hold strong.
This sewing aid is a game-changer for waistbands, drawstring bags, and boosting your sewing skills!
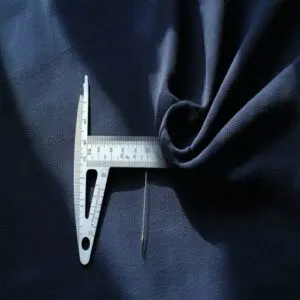
Sewing Gauge
Getting measurements just right? A sewing gauge is your best friend.
This handy little tool lets you easily mark hems, pleats, and buttonholes with precision.
Unlike bulky fabric rulers, it’s compact but packed with versatility.
A sewing gauge product listing offers a convenient way to acquire this essential tool.
Whether you’re fine-tuning sewing supplies or aiming for Sewing Accuracy, this small yet mighty accessory is a must-have in your sewing equipment arsenal, providing you with the precision needed for your projects.
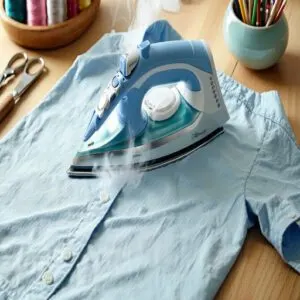
Steam Iron
While the sewing gauge keeps measurements spot-on, your steam iron works magic on fabric.
Perfect your ironing techniques by mastering heat distribution and steam settings to match each material.
Use Iron Temperature Control for fabric protection—no more scorch marks! Steam irons aren’t just sewing equipment; they’re garment care superheroes, blending style with practicality in your sewing supplies arsenal.
Common Sewing Mistakes
It’s easy to make mistakes when sewing, especially if you’re rushing or skipping the basics.
From tangled thread to uneven stitches, understanding common errors helps you fix them quickly and avoid frustration.
Preventing Thread Tangles
Thread tangles can drive anyone crazy mid-project.
Nail tangle-free sewing with these tips:
- Tame fibers by conditioning the thread with beeswax or a dryer sheet.
- Keep thread lengths manageable—no longer than elbow-to-fingertip.
- Thread the needle from the cut end to align with the spiral.
Smooth stitching means smarter thread management—add this to your sewing kit of must-know hacks!
Avoiding Fabric Fraying
Fraying edges can ruin your hard work.
Use pinking shears for a quick fix or zigzag stitches for professional seam finishes.
Stabilizing fabrics with fusible interfacing works wonders, especially for lightweight material.
Binding edges adds pizzazz while preventing falls apart.
Always cut along the fabric grainline for better stability—you’ll thank yourself later for these fray prevention methods.
Sewing Straight Lines
Keeping lines straight can feel like threading a needle in the dark.
Use straight edge tools and rulers on cutting mats to guide your fabric alignment before stitching.
Double-check the fabric grainline, as it can throw everything off.
Rotary cutter tips? Pair it with a ruler for precision.
Specialty presser feet steady wobbly hands, saving projects from invisible seam disaster.
For more helpful advice, explore these beginner sewing tips for straight lines.
Sewing Efficiency Tips
Boost your sewing productivity by streamlining your process with a few simple habits.
From measuring twice to choosing the right thread, these tips save time and help you avoid frustrating mistakes.
Measuring Twice
Skipping the "measure twice, cut once" advice leads straight to sewing mistakes.
Always double-check your fabric measurement with a ruler or gauge before cutting.
It’s about sewing accuracy, not speed.
A little extra time here reduces errors, boosts sewing precision, and saves materials.
Think of it as sewing planning – ensuring smooth sewing execution and avoiding headaches later.
Cutting Once
A little patience goes a long way—measure again, and cut only once.
Lay your fabric flat on a cutting mat for Seam Precision, and use a rotary cutter for clean lines.
Marking fabric with chalk or a sewing gauge guarantees Accurate Measurements.
Careful Fabric Preparation and sharp Cutting Tools reduce Fabric Waste, so choose wisely based on your Fabric Selection.
Using Right Thread
Picking the right sewing thread isn’t just a detail—it’s the backbone of your project.
Match thread selection to your fabric’s fiber types, paying attention to thread weight and color matching for seamless results.
Avoid cheap yarn choices that snap under pressure, and use high-quality sewing thread suited for your sewing machines and needles to guarantee smooth stitches and sturdy outcomes.
Mastering Sewing Fundamentals
Mastering the basics, like understanding fabric grain, seam allowances, and pressing techniques, is the foundation of great sewing.
When you get these right, your projects will come together more smoothly, and you’ll avoid those frustrating "why-doesn’t-this-fit?" moments, which is the key to achieving a successful outcome with seam allowances.
Learning Grain Direction
Fabric orientation isn’t just a technicality—it’s a game-changer.
Grain lines affect fabric stability, drape, and even cutting accuracy.
Use the selvedge as your guide and check that warp and weft meet at right angles.
Sewing fabric off-grain? Expect trouble!
Learning this skill, whether in sewing classes or at home, guarantees sewing with ease and lasting results, making it a key part of mastering sewing with ease.
Practicing Seam Allowances
Getting consistent seam allowances isn’t just a rule—it’s the backbone of sewing precision.
Use a sewing gauge to measure accurately and mark guides with chalk or tape.
Practice on fabric scraps to avoid cutting errors and confirm seam accuracy.
Sloppy allowances lead to fabric shrinkage surprises and misaligned seams, so it’s crucial to stay sharp—literally—by keeping your sewing scissors ready for clean seams, which is key to achieving seam accuracy.
Pressing Techniques
Few things elevate your sewing game like mastering pressing techniques. It’s not just ironing—it’s shaping your fabric for a polished finish.
Here’s how:
- Use a steam iron for fabric smoothing while managing seam pressing.
- Adjust iron settings for precision; test heat control on scraps first.
- Press, don’t drag, to avoid sewing tension issues.
- Invest in essential sewing tools like a tailor’s ham.
Frequently Asked Questions (FAQs)
How do you get better at sewing techniques?
Rome wasn’t stitched in a day!
Practice patience, sew mockups to experiment, and always read patterns thoroughly.
Invest in good tools, tackle new techniques purposefully, and let your mistakes teach lessons for future fabric victories.
What are the best sewing tips for beginners?
Start simple: use quality tools, prewash and iron fabric, and practice stitches on scraps.
Don’t skip reading patterns—it’s like ignoring a map.
Mistakes happen, so embrace them; they’re just your sewing coach in disguise!
What are the different sewing techniques?
You’ll find techniques like staystitching curves, using French seams for delicate edges, or mastering the zig-zag stitch for stretch fabrics.
Even clipping seam allowances reduces bulk—little tricks like these make sewing projects shine!
Is it time to practice sewing for beginners?
Get started with sewing now—it’s like learning a language, easier the earlier you start.
Grab fabric scraps, practice basic stitches, and mess up confidently.
Mistakes teach faster than perfection.
Ready needles, thread, and curiosity!
What skills do you need to learn to sew more professionally?
You’ll need to nail precision cutting, consistent seam allowances, and proper fabric handling.
Practice neat hemming, mastering curved seams, and using pressing techniques.
Invest in quality tools and learn stitches that elevate your garments’ finishes.
Do you know how to sew?
Eighty percent of sewing success lies in preparation—even pros make mockups before touching quality fabric.
If you’ve ever patched jeans or hemmed pants, you’ve started.
Sewing’s about patience, practice, and letting mistakes teach you.
What is the best method of sewing?
The best method depends on your project, but you can’t go wrong starting with tight seams, pressing as you work, and matching tools to fabric.
Treat sewing like cooking—prep properly, and everything flows.
What is the most important rule of sewing?
Never cut corners—literally or figuratively.
Precision is king in sewing, so measure twice, cut once, and follow your pattern like it’s a treasure map.
Small mistakes snowball, turning projects into disasters faster than you’d think, which is why following the pattern carefully and cut once is crucial.
What should I practice sewing on?
Practice on scrap fabric, thrifted sheets, or cheap cotton remnants.
They’re forgiving, plentiful, and low-pressure.
Treat these like your sewing playground—experiment with seams, stitches, and techniques without worrying about mistakes ruining valuable materials.
What is the strongest sewing technique?
If you’re aiming for strength, try a reinforced backstitch by hand or a triple stitch on your machine.
Both hold up beautifully, even under stress—think of them as the superglue of sewing.
Conclusion
Who knew mastering the best sewing practices could feel like juggling scissors and thread?
With the right tools, proper prep, and some patience, you’ll be sewing like a pro in no time.
Keep your fabric pre-washed, your seams pressed, and your iron ready to work overtime.
Oh, and that sewing machine? Treat it like your best friend—with regular needle changes and tension checks.
Stick with these tips, and you’ll elevate every project from “meh” to masterpiece.
- https://www.dutchlabelshop.com/en_us/blog/top-ways-to-improve-your-sewing-skills/
- https://blog.winslets.com/100-sewing-tools-and-equipment-for-beginner-and-advanced-sewists/
- https://thisblogisnotforyou.com/11-most-useful-sewing-tools-why-you-dont-need-to-own-every-tool-out-there-to-improve-your-sewing/
- https://oliverands.com/community/blog/2017/11/15-tips-to-improve-your-sewing.html
- https://mellysews.com/how-to-use-a-walking-foot-for-sewing/

